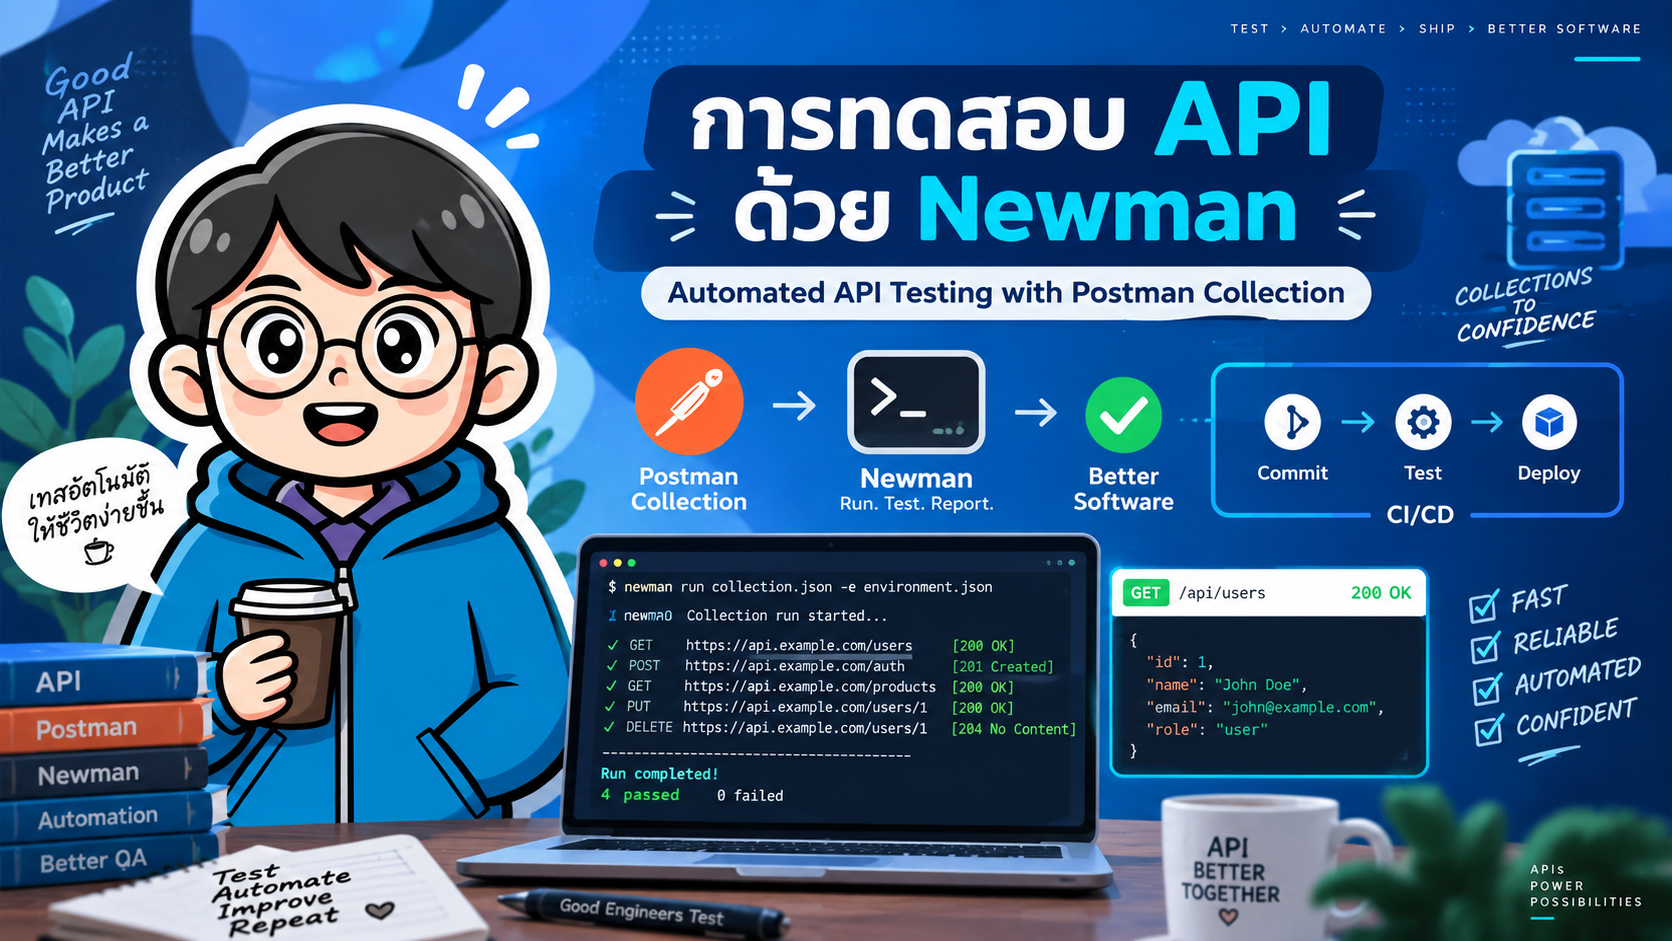
- การทดสอบ API ด้วย Newman
- 2. สิ่งที่ต้องติดตั้ง
- 3. เตรียม Postman Collection
- 4. เขียน API Test ใน Postman
- 5. รัน Collection ด้วย Newman
- 6. ใช้ Environment
- 7. ส่ง Variable จาก Command Line
- 8. การทดสอบ Authentication
- 9. Data-driven Testing
- 10. กำหนดจำนวนรอบ
- 11. รันเฉพาะ Folder
- 12. ตั้งค่า Timeout
- 13. หน่วงเวลาระหว่าง Requests
- 14. หยุดเมื่อ Test ล้มเหลว
- 15. สร้าง JSON Report
- 16. สร้าง JUnit Report
- 17. สร้าง HTML Report ด้วย htmlextra
- 18. รัน Newman ด้วย npm Script
- 19. รันด้วย npx
- 20. ใช้ Newman ใน GitHub Actions
- 21. ใช้ GitHub Secrets
- 22. ตัวอย่าง Test Scenario ที่ควรมี
- 23. Positive และ Negative Testing
- 24. ตรวจสอบ JSON Schema
- 25. ตัวอย่างการจัดชุด Smoke Test
- 26. Exit Code กับ CI/CD
- 27. Newman กับ Docker
- 28. Newman กับ Postman CLI ต่างกันอย่างไร
- 29. Best Practices
- 30. โครงสร้าง Project ที่แนะนำ
- 31. ตัวอย่าง Workflow ตั้งแต่ Development ถึง CI/CD
- 32. คำสั่ง Newman ที่ใช้บ่อย
- 33. สรุป
- References
#การทดสอบ API ด้วย Newman
Newman คือ Command-line Collection Runner สำหรับ Postman Collection ช่วยให้เรานำชุดทดสอบ API ที่สร้างไว้ใน Postman มารันจาก Terminal หรือระบบ CI/CD ได้โดยไม่ต้องเปิด Postman GUI
การทำงานในภาพรวมคือ
Postman
   |
   | Export Collection / Environment
   v
Newman CLI
   |
   +--> Run API Requests
   +--> Execute Tests
   +--> Validate Assertions
   +--> Generate Reports
   |
   v
CI/CD Pipeline
Newman เหมาะกับงานประเภท
- Automated API Testing
- Regression Testing
- Smoke Testing
- Integration Testing
- Data-driven Testing
- การทดสอบ API ใน CI/CD
- การสร้าง Test Report อัตโนมัติ
หมายเหตุสำหรับ Postman รุ่นปัจจุบัน: Newman รองรับ Postman Collection แบบ v2.1 JSON แต่ไม่รองรับ Collection v3 ที่ใช้กับ Native Git workflows ใน Postman v12 ขึ้นไป หาก workflow ของคุณใช้ Collection v3 ควรพิจารณา Postman CLI แทน Newman
#1. Newman ทำงานอย่างไร
แนวคิดพื้นฐานคือเขียน Request และ Test Script ใน Postman ก่อน จากนั้นส่งออก Collection แล้วให้ Newman ทำหน้าที่เป็น Test Runner
Developer / Tester
        |
        v
Postman Collection
        |
        +--> Request
        +--> Variables
        +--> Pre-request Script
        +--> Post-response Test
        |
        v
      Newman
        |
        +--> Send HTTP Request
        +--> Execute JavaScript Tests
        +--> Count Assertions
        +--> Return Exit Code
        +--> Generate Report
จุดเด่นคือ Test Case ชุดเดียวสามารถรันได้ทั้งจาก Postman และ Command Line
#2. สิ่งที่ต้องติดตั้ง
Newman ทำงานบน Node.js โดยเอกสาร Postman ปัจจุบันระบุให้ใช้ Node.js 16 หรือใหม่กว่า
ตรวจสอบ Node.js
node --version
ตรวจสอบ npm
npm --version
ติดตั้ง Newman แบบ Global
npm install -g newman
ตรวจสอบเวอร์ชัน
newman --version
ดูคำสั่งทั้งหมด
newman run -h
#3. เตรียม Postman Collection
สมมติเรามี REST API
GET    /api/users
GET    /api/users/:id
POST   /api/users
PUT    /api/users/:id
DELETE /api/users/:id
ใน Postman สามารถจัด Collection เช่น
User API
├── Authentication
│   └── Login
├── Users
│   ├── Get Users
│   ├── Get User
│   ├── Create User
│   ├── Update User
│   └── Delete User
└── Health Check
หลังจากสร้าง Request และ Test แล้ว Export Collection ในรูปแบบที่ Newman รองรับ เช่น Collection v2.1 JSON
ตัวอย่างโครงสร้างโฟลเดอร์
api-tests/
├── collections/
│   └── user-api.postman_collection.json
├── environments/
│   └── local.postman_environment.json
├── data/
│   └── users.csv
└── reports/
#4. เขียน API Test ใน Postman
ตัวอย่างการตรวจสอบ HTTP Status
pm.test("Status code is 200", function () {
    pm.response.to.have.status(200);
});
ตรวจสอบ Content-Type
pm.test("Response is JSON", function () {
    pm.expect(
        pm.response.headers.get("Content-Type")
    ).to.include("application/json");
});
ตรวจสอบ Response Time
pm.test("Response time is less than 1000 ms", function () {
    pm.expect(pm.response.responseTime).to.be.below(1000);
});
ตรวจสอบข้อมูลใน JSON
pm.test("Response contains user id", function () {
    const jsonData = pm.response.json();

    pm.expect(jsonData).to.have.property("id");
});
ตรวจสอบชนิดข้อมูล
pm.test("Name is a string", function () {
    const jsonData = pm.response.json();

    pm.expect(jsonData.name).to.be.a("string");
});
สามารถมีหลาย Assertions ต่อ Request ได้
pm.test("Validate user response", function () {
    const jsonData = pm.response.json();

    pm.response.to.have.status(200);
    pm.expect(jsonData).to.have.property("id");
    pm.expect(jsonData).to.have.property("name");
    pm.expect(jsonData.name).to.be.a("string");
});
#5. รัน Collection ด้วย Newman
คำสั่งพื้นฐาน
newman run collections/user-api.postman_collection.json
Newman จะรัน Request ตาม Collection และแสดงผลประมาณ
→ Get Users
  GET http://localhost:3000/api/users [200 OK]

  ✓ Status code is 200
  ✓ Response is JSON

→ Get User
  GET http://localhost:3000/api/users/1 [200 OK]

  ✓ Status code is 200
  ✓ Response contains user id

┌─────────────────────────┬──────────┬──────────┐
│                         │ executed │ failed   │
├─────────────────────────┼──────────┼──────────┤
│ iterations              │ 1        │ 0        │
│ requests                │ 2        │ 0        │
│ test-scripts            │ 2        │ 0        │
│ assertions              │ 4        │ 0        │
└─────────────────────────┴──────────┴──────────┘
หาก Assertion ล้มเหลว Newman จะคืน Exit Code ที่ CI/CD สามารถนำไปใช้ตัดสินสถานะ Pipeline ได้
#6. ใช้ Environment
แทนที่จะ hard-code URL
http://localhost:3000/api/users
ควรกำหนดเป็น Variable
{{base_url}}/api/users
ตัวอย่าง Environment
{
  "values": [
    {
      "key": "base_url",
      "value": "http://localhost:3000",
      "enabled": true
    }
  ]
}
รัน Collection พร้อม Environment
newman run collections/user-api.postman_collection.json \
  -e environments/local.postman_environment.json
หรือ
newman run collections/user-api.postman_collection.json \
  --environment environments/local.postman_environment.json
#7. ส่ง Variable จาก Command Line
เราสามารถ override Environment Variable ได้จาก CLI
newman run collections/user-api.postman_collection.json \
  --env-var "base_url=https://api.example.com"
หลายค่า
newman run collections/user-api.postman_collection.json \
  --env-var "base_url=https://api.example.com" \
  --env-var "token=abc123"
อย่างไรก็ตาม ไม่ควรเขียน API Key, Password หรือ Token จริงไว้ใน repository
ใน CI/CD ควรอ่านค่าจาก Secret ของระบบแทน
#8. การทดสอบ Authentication
สมมติ Login API คืนค่า
{
  "token": "eyJhbGciOi..."
}
ใน Post-response Script ของ Login Request
const jsonData = pm.response.json();

pm.environment.set("token", jsonData.token);
Request ถัดไปใช้ Header
Authorization: Bearer {{token}}
Workflow จะเป็น
Login
  |
  v
Receive Token
  |
  v
Save Token to Environment
  |
  v
Call Protected API
Newman ไม่ได้ทำ interactive OAuth 2.0 authentication แบบ Postman UI โดยตรง ดังนั้น workflow ที่ต้องใช้ OAuth token มักต้องเตรียมหรือดึง token ผ่าน request/script ก่อนใช้งาน
#9. Data-driven Testing
Newman รองรับข้อมูลแบบ JSON และ CSV
ตัวอย่าง
data/users.csv
name,email
Alice,alice@example.com
Bob,bob@example.com
Charlie,charlie@example.com
Request Body
{
  "name": "{{name}}",
  "email": "{{email}}"
}
รัน
newman run collections/user-api.postman_collection.json \
  -d data/users.csv
หรือ
newman run collections/user-api.postman_collection.json \
  --iteration-data data/users.csv
Newman จะนำแต่ละแถวมาใช้เป็นข้อมูลสำหรับแต่ละ iteration
#10. กำหนดจำนวนรอบ
newman run collections/user-api.postman_collection.json \
  -n 5
หรือใช้ร่วมกับ Data File
newman run collections/user-api.postman_collection.json \
  -d data/users.csv \
  -n 3
#11. รันเฉพาะ Folder
หาก Collection มีหลาย Test Suite สามารถรันเฉพาะ Folder
newman run collections/user-api.postman_collection.json \
  --folder "Users"
หลาย Folder
newman run collections/user-api.postman_collection.json \
  --folder "Authentication" \
  --folder "Users"
เหมาะสำหรับแยก
Smoke
Regression
Authentication
Users
Orders
Payments
#12. ตั้งค่า Timeout
กำหนด Timeout ของ Request
newman run collections/user-api.postman_collection.json \
  --timeout-request 5000
กำหนด Timeout ของ Script
newman run collections/user-api.postman_collection.json \
  --timeout-script 5000
กำหนด Timeout ทั้ง Collection Run
newman run collections/user-api.postman_collection.json \
  --timeout 60000
#13. หน่วงเวลาระหว่าง Requests
newman run collections/user-api.postman_collection.json \
  --delay-request 500
หมายถึงหน่วง 500 ms ระหว่าง Request
มีประโยชน์เมื่อ API มี Rate Limit หรือ Test Environment มีทรัพยากรจำกัด
#14. หยุดเมื่อ Test ล้มเหลว
ใช้ --bail
newman run collections/user-api.postman_collection.json \
  --bail
หรือ
newman run collections/user-api.postman_collection.json \
  --bail failure
แนวทางนี้เหมาะกับ CI/CD ที่ต้องการหยุด Pipeline ทันทีเมื่อ Critical Test ล้มเหลว
#15. สร้าง JSON Report
Newman มี Built-in Reporters หลายแบบ เช่น CLI, JSON และ JUnit
รันพร้อม JSON Reporter
newman run collections/user-api.postman_collection.json \
  -r cli,json
กำหนดไฟล์
newman run collections/user-api.postman_collection.json \
  -r cli,json \
  --reporter-json-export reports/newman-report.json
ข้อสังเกตคือถ้าระบุ -r json อย่างเดียว CLI output จะไม่ถูกเปิดโดยอัตโนมัติ ดังนั้นหากต้องการทั้งหน้าจอและไฟล์ให้ใช้
-r cli,json
#16. สร้าง JUnit Report
JUnit XML เหมาะกับ Jenkins, GitHub Actions และระบบ CI อื่น ๆ
newman run collections/user-api.postman_collection.json \
  -r cli,junit \
  --reporter-junit-export reports/newman.xml
Pipeline สามารถนำ XML ไปแสดง Test Result ต่อได้
#17. สร้าง HTML Report ด้วย htmlextra
newman-reporter-htmlextra เป็น External Reporter ไม่ใช่ Built-in Reporter ของ Newman แต่ได้รับความนิยมสำหรับสร้าง Dashboard แบบ HTML
ติดตั้ง
npm install -g newman-reporter-htmlextra
รัน
newman run collections/user-api.postman_collection.json \
  -r cli,htmlextra \
  --reporter-htmlextra-export reports/newman-report.html
ถ้า Report อาจมี Authorization headers หรือข้อมูลสำคัญ ควรระวังการเปิดเผย Secret โดยสามารถใช้ option ของ reporter เพื่อตัดข้อมูลอ่อนไหวออก
newman run collections/user-api.postman_collection.json \
  -r htmlextra \
  --reporter-htmlextra-export reports/newman-report.html \
  --reporter-htmlextra-skipSensitiveData
#18. รัน Newman ด้วย npm Script
แทนการติดตั้ง Global สามารถเพิ่ม Newman เป็น Development Dependency
npm install --save-dev newman
package.json
{
  "scripts": {
    "test:api": "newman run collections/user-api.postman_collection.json -e environments/local.postman_environment.json"
  }
}
จากนั้นรัน
npm run test:api
วิธีนี้เหมาะกับ Project Repository เพราะ Version ของ Newman จะถูกควบคุมใน package.json
#19. รันด้วย npx
หลังติดตั้ง Newman แบบ Local
npx newman run collections/user-api.postman_collection.json
ข้อดีคือไม่ต้องพึ่ง Global Installation ของเครื่อง Developer
#20. ใช้ Newman ใน GitHub Actions
ตัวอย่าง
name: API Tests

on:
  push:
  pull_request:

jobs:
  newman:
    runs-on: ubuntu-latest

    steps:
      - name: Checkout repository
        uses: actions/checkout@v4

      - name: Setup Node.js
        uses: actions/setup-node@v4
        with:
          node-version: "20"

      - name: Install Newman
        run: npm install -g newman

      - name: Prepare report directory
        run: mkdir -p reports

      - name: Run API tests
        run: |
          newman run collections/user-api.postman_collection.json \
            -e environments/ci.postman_environment.json \
            -r cli,junit \
            --reporter-junit-export reports/newman.xml

      - name: Upload test report
        if: always()
        uses: actions/upload-artifact@v4
        with:
          name: newman-report
          path: reports/
Workflow
git push
   |
   v
GitHub Actions
   |
   v
Install Node.js + Newman
   |
   v
Start Application / Test Environment
   |
   v
Run Postman Collection
   |
   +---- Pass ----> Build / Deploy
   |
   +---- Fail ----> Stop Pipeline
#21. ใช้ GitHub Secrets
ไม่ควร commit Token ลง Environment JSON
ตั้ง Secret เช่น
API_TOKEN
แล้วส่งเข้าสู่ Newman
- name: Run API tests
  run: |
    newman run collections/user-api.postman_collection.json \
      -e environments/ci.postman_environment.json \
      --env-var "token=${{ secrets.API_TOKEN }}"
ควรหลีกเลี่ยงการพิมพ์ Secret ด้วย console.log() ใน Postman Script
#22. ตัวอย่าง Test Scenario ที่ควรมี
สำหรับ API
POST /api/users
ควรทดสอบอย่างน้อย
| Scenario | Expected |
|---|---|
| Valid data | 201 Created |
| Missing required field | 400 / 422 |
| Invalid email | 400 / 422 |
| Duplicate email | 409 / 422 |
| Missing token | 401 |
| Insufficient permission | 403 |
| Invalid content type | 400 / 415 |
| Response schema | Correct structure |
| Response time | Within threshold |
Newman มีหน้าที่ "รัน" Test เหล่านี้ แต่คุณภาพของ API Test ยังขึ้นอยู่กับ Test Design ที่เขียนไว้ใน Postman
#23. Positive และ Negative Testing
#Positive Test
pm.test("Create user successfully", function () {
    pm.response.to.have.status(201);

    const jsonData = pm.response.json();

    pm.expect(jsonData).to.have.property("id");
    pm.expect(jsonData.name).to.eql("Alice");
});
#Negative Test
pm.test("Reject invalid email", function () {
    pm.expect(pm.response.code).to.be.oneOf([400, 422]);
});
API Test Suite ที่ดีไม่ควรมีเฉพาะ Happy Path
#24. ตรวจสอบ JSON Schema
ตัวอย่าง
const schema = {
    type: "object",
    required: ["id", "name", "email"],
    properties: {
        id: {
            type: "number"
        },
        name: {
            type: "string"
        },
        email: {
            type: "string"
        }
    }
};

pm.test("Validate response schema", function () {
    pm.response.to.have.jsonSchema(schema);
});
การตรวจสอบ Schema ช่วยตรวจจับ Breaking Change เช่น field หาย ชนิดข้อมูลเปลี่ยน หรือโครงสร้าง Response เปลี่ยน
#25. ตัวอย่างการจัดชุด Smoke Test
Collection
API Tests
├── Smoke
│   ├── Health Check
│   ├── Login
│   ├── Get Current User
│   └── Get Main Resource
│
├── Regression
│   ├── Users
│   ├── Products
│   ├── Orders
│   └── Payments
│
└── Negative Tests
    ├── Unauthorized
    ├── Invalid Input
    └── Not Found
รัน Smoke
newman run api.postman_collection.json \
  --folder "Smoke" \
  --bail
รัน Regression
newman run api.postman_collection.json \
  --folder "Regression"
#26. Exit Code กับ CI/CD
สิ่งสำคัญมากสำหรับ Automation คือ Exit Code
แนวคิด
Tests Passed
     |
     v
Exit Code 0
     |
     v
Pipeline Pass
หากเกิด Error/Test Failure ตาม configuration
Tests Failed
     |
     v
Non-zero Exit Code
     |
     v
Pipeline Fail
จึงไม่ควรใช้
--suppress-exit-code
ใน Pipeline ที่ต้องการให้ Test Failure ทำให้ Build ล้มเหลว เพราะ option นี้ใช้ override exit code ให้เป็น 0
#27. Newman กับ Docker
อีกแนวทางคือรัน Newman ใน Container ทำให้ไม่ต้องติดตั้ง Node.js/Newman โดยตรงบนเครื่อง
ตัวอย่างแนวคิด
Host
 |
 +-- collections/
 +-- environments/
 +-- reports/
 |
 v
Newman Container
 |
 v
API Under Test
เหมาะกับ CI/CD และ Environment ที่ต้องการให้ Test Runner reproducible
ควรตรวจสอบ Docker image/tag ที่ต้องการใช้กับ registry ก่อนนำไปกำหนดถาวรใน production pipeline
#28. Newman กับ Postman CLI ต่างกันอย่างไร
| หัวข้อ | Newman | Postman CLI |
|---|---|---|
| รัน Postman Collection | ✓ | ✓ |
| CLI Automation | ✓ | ✓ |
| CI/CD | ✓ | ✓ |
| Collection v2.1 JSON | ✓ | ✓ |
| Postman v12 Collection v3 / Native Git workflow | ไม่รองรับ | รองรับ |
| External Newman Reporter ecosystem | ✓ | ไม่ใช่รูปแบบเดียวกัน |
| เหมาะกับ Newman workflow เดิม | มาก | ใช้สำหรับ workflow ใหม่ได้ดี |
หากองค์กรมี Newman Pipeline เดิมและ Collection ยังเป็น v2.1 ก็ยังสามารถใช้งานต่อได้
แต่หากเริ่มระบบใหม่และใช้งาน Postman v12 Native Git workflows ควรประเมิน Postman CLI ตั้งแต่ต้น
#29. Best Practices
#29.1 แยก Environment
environments/
├── local.postman_environment.json
├── dev.postman_environment.json
├── staging.postman_environment.json
└── ci.postman_environment.json
#29.2 อย่า Commit Secret
ไม่ควรเก็บ
password
API key
Access token
Refresh token
Private key
ไว้ใน Repository
#29.3 ใช้ชื่อ Test ที่อ่านรู้เรื่อง
ไม่ควรเขียน
pm.test("test1", ...)
ควรใช้
pm.test("GET /users returns HTTP 200", ...)
pm.test("Unauthorized request returns HTTP 401", ...)
pm.test("Response contains user id and email", ...)
#29.4 แยก Smoke กับ Regression
Smoke Test ควร
- จำนวนไม่มาก
- รันเร็ว
- ครอบคลุม Critical Path
- ใช้เป็น Deployment Gate ได้
Regression Test สามารถมีจำนวนมากและใช้เวลานานกว่า
#29.5 ทำ Test ให้ Independent เท่าที่ทำได้
ลดการพึ่งข้อมูลจาก Test ก่อนหน้า เพราะ Failure หนึ่งจุดอาจทำให้ Test หลังจากนั้นล้มทั้งหมด
หากจำเป็นต้องมี Workflow เช่น
Login -> Create -> Get -> Update -> Delete
ควรจัดการ Test Data และ Cleanup ให้ชัดเจน
#30. โครงสร้าง Project ที่แนะนำ
api-testing/
├── collections/
│   ├── smoke.postman_collection.json
│   └── regression.postman_collection.json
│
├── environments/
│   ├── local.postman_environment.json
│   └── ci.postman_environment.json
│
├── data/
│   ├── users.csv
│   └── products.json
│
├── reports/
│
├── .github/
│   └── workflows/
│       └── api-test.yml
│
├── package.json
└── README.md
#31. ตัวอย่าง Workflow ตั้งแต่ Development ถึง CI/CD
1. Developer สร้างหรือแก้ API
          |
          v
2. Tester สร้าง Request ใน Postman
          |
          v
3. เพิ่ม Assertions
          |
          v
4. Run Collection ใน Postman
          |
          v
5. Export Collection v2.1
          |
          v
6. Commit Test Suite เข้า Git
          |
          v
7. CI รัน Newman
          |
          +---- Pass ----> Build / Deploy
          |
          +---- Fail ----> Block Pipeline
#32. คำสั่ง Newman ที่ใช้บ่อย
ติดตั้ง
npm install -g newman
ตรวจสอบเวอร์ชัน
newman --version
รัน Collection
newman run collection.json
ใช้ Environment
newman run collection.json -e environment.json
ใช้ Data
newman run collection.json -d data.csv
กำหนด Iteration
newman run collection.json -n 5
รันเฉพาะ Folder
newman run collection.json --folder "Smoke"
หยุดเมื่อ Test Fail
newman run collection.json --bail
สร้าง JSON Report
newman run collection.json \
  -r cli,json \
  --reporter-json-export reports/report.json
สร้าง JUnit Report
newman run collection.json \
  -r cli,junit \
  --reporter-junit-export reports/report.xml
สร้าง HTML Report ด้วย External Reporter
newman run collection.json \
  -r htmlextra \
  --reporter-htmlextra-export reports/report.html
#33. สรุป
Newman ช่วยเปลี่ยน Postman Collection จากการทดสอบแบบ Manual ให้กลายเป็น Automated API Test ที่รันจาก Command Line และ CI/CD ได้ง่าย
แนวคิดสำคัญคือ
Postman Collection
       |
       v
    Newman
       |
       +--> Environment
       +--> Test Data
       +--> Assertions
       +--> Reports
       +--> Exit Code
       |
       v
     CI/CD
สำหรับระบบที่มี Newman และ Collection v2.1 อยู่แล้ว Newman ยังเป็นเครื่องมือที่ใช้งานง่ายและเหมาะกับ Regression/Smoke API Testing
แต่สำหรับ Postman v12 Native Git workflows และ Collection v3 ควรใช้ Postman CLI ซึ่งเป็นแนวทางที่ Postman รองรับสำหรับรูปแบบใหม่
#References
-
Postman Docs — Install and run Newman
https://learning.postman.com/docs/reference/newman-cli/installing-running-newman/ -
Postman Docs — Newman command reference
https://learning.postman.com/docs/reference/newman-cli/newman-options/ -
Postman Docs — Newman built-in reporters
https://learning.postman.com/docs/reference/newman-cli/newman-built-in-reporters/ -
Postman Docs — Newman and CI/CD
https://learning.postman.com/docs/reference/newman-cli/continuous-integration/ -
Postman Docs — Migrate from Newman to Postman CLI
https://learning.postman.com/docs/reference/newman-cli/migrate-to-postman-cli -
npm — newman-reporter-htmlextra
https://www.npmjs.com/package/newman-reporter-htmlextra