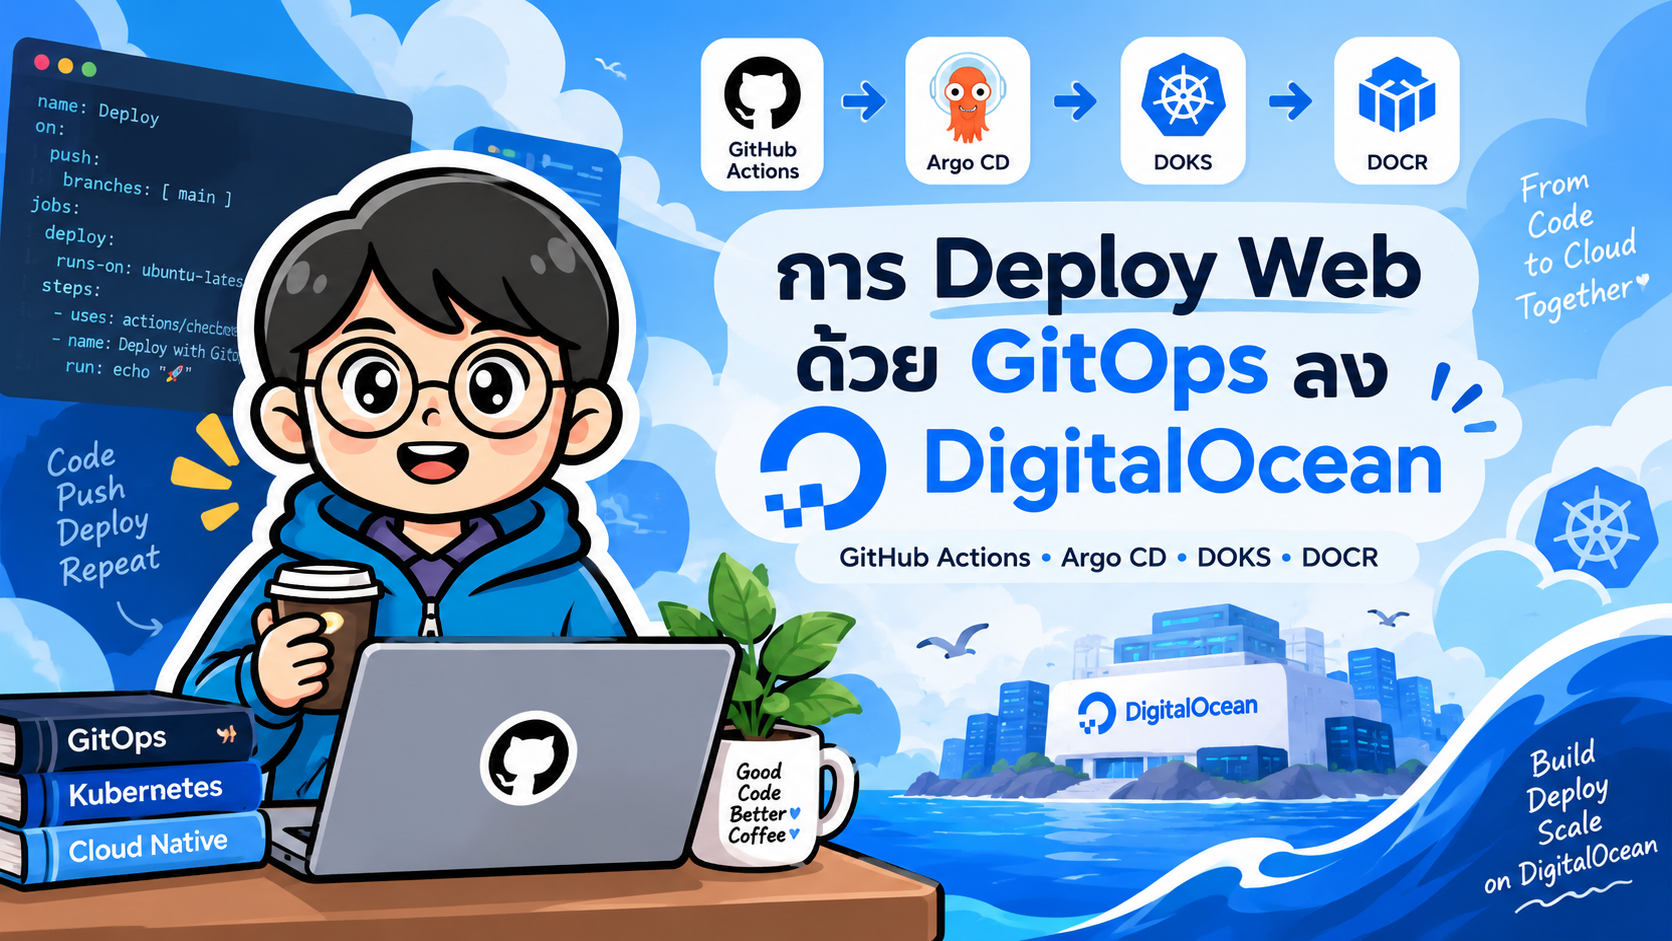
- Deploy Web ด้วย GitOps บน DigitalOcean ด้วย Argo CD และ GitHub Actions
- 1. เตรียมเครื่องมือ
- 2. สร้าง DigitalOcean Kubernetes Cluster
- 3. สร้าง DigitalOcean Container Registry
- 4. เตรียม Web Application
- 5. แยก Application Repository และ GitOps Repository
- 6. Kubernetes Deployment
- 7. Kubernetes Service
- 8. จัดการ Image Version ด้วย Kustomize
- 9. ติดตั้ง Argo CD
- 10. เข้า Argo CD
- 11. สร้าง Argo CD Application
- 12. GitHub Actions สำหรับ Build และ Push Image
- 13. Update GitOps Repository
- 14. GitOps Deployment Flow
- 15. เพิ่ม Domain ด้วย Ingress
- 16. HTTPS
- 17. Rollback ด้วย Git
- 18. Self-Healing
- 19. Dev / Staging / Production
- 20. Best Practices
- 21. GitOps กับ Security
- 22. GitOps ไม่ได้มาแทน CI
- 23. Production Architecture
- สรุป
#Deploy Web ด้วย GitOps บน DigitalOcean ด้วย Argo CD และ GitHub Actions
การ Deploy Web Application ในระบบ Cloud Native สามารถทำให้เป็นอัตโนมัติ ปลอดภัย และตรวจสอบย้อนหลังได้มากขึ้นด้วยแนวคิด GitOps
แทนที่จะให้ CI Pipeline เชื่อมต่อ Kubernetes แล้วรัน kubectl apply เข้า Production โดยตรง เราสามารถให้ Git Repository เป็น Source of Truth และใช้ Argo CD ทำหน้าที่ตรวจสอบและปรับสถานะของ Kubernetes Cluster ให้ตรงกับ Configuration ที่กำหนดไว้ใน Git
บทความนี้ใช้ Stack หลักดังนี้
- GitHub
- GitHub Actions
- Docker
- DigitalOcean Container Registry (DOCR)
- DigitalOcean Kubernetes (DOKS)
- Argo CD
- Kustomize
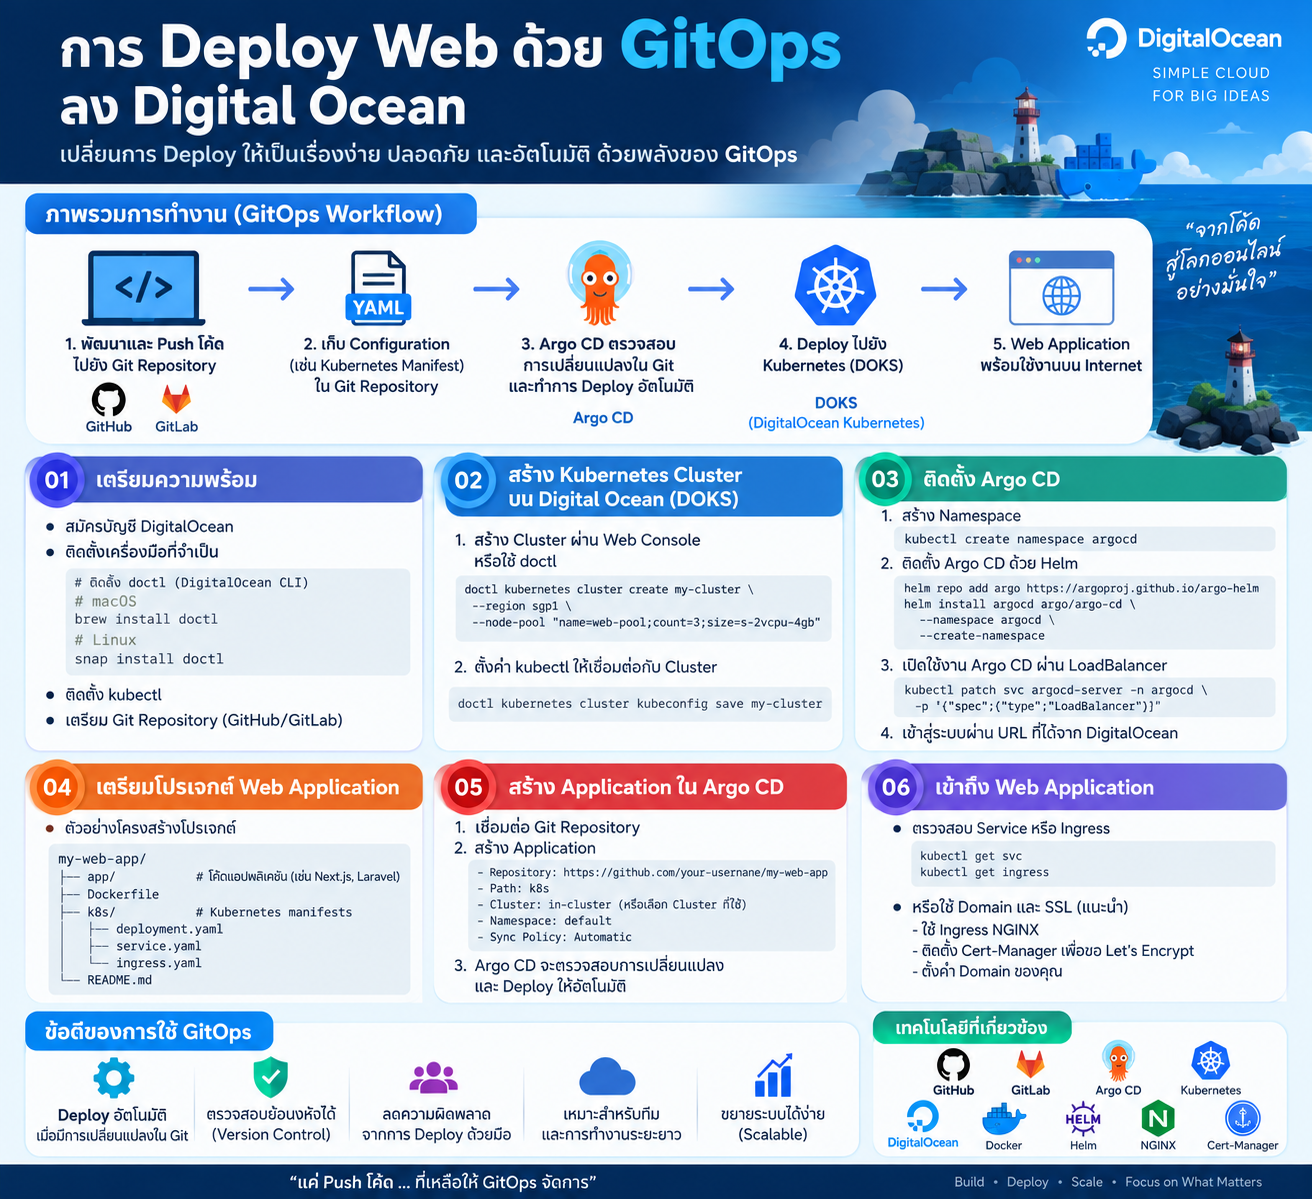
#GitOps คืออะไร?
GitOps คือแนวทางในการจัดการ Application และ Infrastructure โดยเก็บ Desired State ของระบบไว้ใน Git
ตัวอย่างเช่น Kubernetes Manifest กำหนดจำนวน Pod
replicas: 2
และกำหนด Container Image
image: registry.digitalocean.com/my-registry/my-web:a12bc34
Argo CD จะเปรียบเทียบ
Desired State in Git
        VS
Actual State in Kubernetes
หากสถานะไม่ตรงกัน Argo CD สามารถ Sync และ Reconcile ระบบให้กลับมาตรงกับ Git ได้
#CI/CD แบบทั่วไป
Developer
   |
   v
GitHub
   |
   v
GitHub Actions
   |
   +-- Test
   +-- Build Docker Image
   +-- Push Image
   +-- kubectl apply
           |
           v
       Kubernetes
วิธีนี้ทำงานได้ แต่ CI Pipeline ต้องถือ Credential ที่สามารถ Deploy เข้า Kubernetes Cluster โดยตรง
#GitOps Architecture
Developer
   |
   v
Application Repository
   |
   v
GitHub Actions
   |
   +-- Test
   +-- Build
   +-- Push Image --------> DOCR
   |
   +-- Update GitOps Repository
                   |
                   v
                Argo CD
                   |
                   v
                  DOKS
GitHub Actions ทำหน้าที่ด้าน CI ส่วน Argo CD ทำหน้าที่ด้าน Continuous Delivery
#1. เตรียมเครื่องมือ
ตรวจสอบเครื่องมือที่จำเป็น
docker --version
kubectl version --client
doctl version
git --version
argocd version --client
ควรมี
- DigitalOcean Account
- GitHub Account
- Application Repository
- GitOps Repository
- DigitalOcean Kubernetes Cluster
- DigitalOcean Container Registry
- Domain Name สำหรับ Production
#2. สร้าง DigitalOcean Kubernetes Cluster
หลังสร้าง DOKS Cluster แล้ว ดาวน์โหลด kubeconfig
doctl kubernetes cluster kubeconfig save my-cluster
ตรวจสอบ Node
kubectl get nodes
หาก Node อยู่ในสถานะ Ready แสดงว่า Cluster พร้อมใช้งาน
#3. สร้าง DigitalOcean Container Registry
สร้าง Registry
doctl registries create my-registry --region sgp1
Login
doctl registries login
Container Image จะมีรูปแบบ
registry.digitalocean.com/my-registry/my-web:TAG
เชื่อม Registry กับ DOKS
doctl kubernetes cluster registry add my-cluster
#4. เตรียม Web Application
ตัวอย่าง Node.js + Express
import express from "express";

const app = express();

app.get("/", (req, res) => {
  res.send("Hello GitOps on DigitalOcean");
});

app.listen(3000, () => {
  console.log("Server running on port 3000");
});
ตัวอย่าง Dockerfile
FROM node:22-alpine

WORKDIR /app

COPY package*.json ./
RUN npm ci --omit=dev

COPY . .

EXPOSE 3000

CMD ["npm", "start"]
Build และ Run
docker build -t my-web .
docker run -p 3000:3000 my-web
#5. แยก Application Repository และ GitOps Repository
#Application Repository
my-web/
├── src/
├── package.json
├── Dockerfile
└── .github/
    └── workflows/
        └── build.yml
#GitOps Repository
my-web-gitops/
└── environments/
    └── production/
        ├── deployment.yaml
        ├── service.yaml
        ├── ingress.yaml
        └── kustomization.yaml
ข้อดี
- แยก Source Code และ Deployment Configuration
- Audit Production ได้ง่าย
- Rollback ผ่าน Git ได้
- แยก Permission ได้ชัดเจน
- ใช้ Pull Request Review ก่อน Production ได้
#6. Kubernetes Deployment
สร้าง deployment.yaml
apiVersion: apps/v1
kind: Deployment

metadata:
  name: my-web

spec:
  replicas: 2

  selector:
    matchLabels:
      app: my-web

  template:
    metadata:
      labels:
        app: my-web

    spec:
      containers:
        - name: my-web
          image: registry.digitalocean.com/my-registry/my-web:INITIAL

          ports:
            - containerPort: 3000

          readinessProbe:
            httpGet:
              path: /
              port: 3000

          livenessProbe:
            httpGet:
              path: /
              port: 3000

          resources:
            requests:
              cpu: "100m"
              memory: "128Mi"

            limits:
              cpu: "500m"
              memory: "512Mi"
#7. Kubernetes Service
สร้าง service.yaml
apiVersion: v1
kind: Service

metadata:
  name: my-web

spec:
  selector:
    app: my-web

  ports:
    - port: 80
      targetPort: 3000

  type: ClusterIP
#8. จัดการ Image Version ด้วย Kustomize
สร้าง kustomization.yaml
apiVersion: kustomize.config.k8s.io/v1beta1
kind: Kustomization

resources:
  - deployment.yaml
  - service.yaml

images:
  - name: registry.digitalocean.com/my-registry/my-web
    newTag: INITIAL
เมื่อมี Release ใหม่ แก้เพียง
newTag: a12bc34
#9. ติดตั้ง Argo CD
kubectl create namespace argocd
ติดตั้ง
kubectl apply -n argocd \
  --server-side \
  --force-conflicts \
  -f https://raw.githubusercontent.com/argoproj/argo-cd/stable/manifests/install.yaml
ตรวจสอบ
kubectl get pods -n argocd
สำหรับ Production ควร Pin Version ที่ผ่านการทดสอบแล้ว
#10. เข้า Argo CD
Port Forward
kubectl port-forward svc/argocd-server \
  -n argocd \
  8080:443
เปิด
https://localhost:8080
ดู Initial Password
argocd admin initial-password -n argocd
#11. สร้าง Argo CD Application
apiVersion: argoproj.io/v1alpha1
kind: Application

metadata:
  name: my-web
  namespace: argocd

spec:
  project: default

  source:
    repoURL: https://github.com/YOUR_USERNAME/my-web-gitops.git
    targetRevision: main
    path: environments/production

  destination:
    server: https://kubernetes.default.svc
    namespace: production

  syncPolicy:
    automated:
      enabled: true
      prune: true
      selfHeal: true

    syncOptions:
      - CreateNamespace=true
Apply
kubectl apply -f application.yaml
#12. GitHub Actions สำหรับ Build และ Push Image
สร้าง .github/workflows/build.yml
name: Build and Release

on:
  push:
    branches:
      - main

permissions:
  contents: read

jobs:
  build:
    runs-on: ubuntu-latest

    steps:
      - name: Checkout
        uses: actions/checkout@v4

      - name: Install doctl
        uses: digitalocean/action-doctl@v2
        with:
          token: ${{ secrets.DIGITALOCEAN_ACCESS_TOKEN }}

      - name: Login to DOCR
        run: doctl registries login --expiry-seconds 1200

      - name: Build Docker Image
        run: |
          IMAGE_TAG=$(echo "$GITHUB_SHA" | cut -c1-7)

          docker build \
            -t registry.digitalocean.com/${{ secrets.REGISTRY_NAME }}/my-web:$IMAGE_TAG \
            .

      - name: Push Docker Image
        run: |
          IMAGE_TAG=$(echo "$GITHUB_SHA" | cut -c1-7)

          docker push \
            registry.digitalocean.com/${{ secrets.REGISTRY_NAME }}/my-web:$IMAGE_TAG
GitHub Secrets ที่ต้องใช้
DIGITALOCEAN_ACCESS_TOKEN
REGISTRY_NAME
#13. Update GitOps Repository
Checkout GitOps Repository
- name: Checkout GitOps Repository
  uses: actions/checkout@v4
  with:
    repository: YOUR_USERNAME/my-web-gitops
    token: ${{ secrets.GITOPS_TOKEN }}
    path: gitops
Update Image Tag
- name: Update Image Tag
  run: |
    IMAGE_TAG=$(echo "$GITHUB_SHA" | cut -c1-7)

    cd gitops/environments/production

    kustomize edit set image \
      registry.digitalocean.com/${{ secrets.REGISTRY_NAME }}/my-web=registry.digitalocean.com/${{ secrets.REGISTRY_NAME }}/my-web:$IMAGE_TAG
Commit
- name: Commit GitOps Change
  run: |
    cd gitops

    IMAGE_TAG=$(echo "$GITHUB_SHA" | cut -c1-7)

    git config user.name "gitops-bot"
    git config user.email "gitops-bot@users.noreply.github.com"

    git add .
    git commit -m "deploy: my-web $IMAGE_TAG" || exit 0
    git push
#14. GitOps Deployment Flow
Git Push
   |
   v
GitHub Actions
   |
   v
Automated Test
   |
   v
Docker Build
   |
   v
Push Image -> DOCR
   |
   v
Update GitOps Repository
   |
   v
Argo CD Detects Change
   |
   v
Sync -> DOKS
   |
   v
Kubernetes Rolling Update
   |
   v
Production
จุดสำคัญคือ GitHub Actions ไม่จำเป็นต้อง kubectl apply เข้า Production Cluster โดยตรง
#15. เพิ่ม Domain ด้วย Ingress
apiVersion: networking.k8s.io/v1
kind: Ingress

metadata:
  name: my-web

spec:
  ingressClassName: nginx

  rules:
    - host: app.example.com

      http:
        paths:
          - path: /
            pathType: Prefix

            backend:
              service:
                name: my-web

                port:
                  number: 80
เพิ่มใน Kustomize
resources:
  - deployment.yaml
  - service.yaml
  - ingress.yaml
#16. HTTPS
Production สามารถใช้
Ingress Controller
+
cert-manager
+
Let's Encrypt
Flow
Internet
   |
   v
DigitalOcean Load Balancer
   |
   v
Ingress Controller
   |
   v
HTTPS / TLS
   |
   v
Service
   |
   v
Pod
#17. Rollback ด้วย Git
หาก Release ใหม่มีปัญหา
git revert <commit-id>
git push
Argo CD จะตรวจพบ Desired State ใหม่และ Deploy Version ก่อนหน้ากลับมา
Rollback = Git Operation
#18. Self-Healing
ถ้า Git ระบุ
replicas: 2
แต่มีคนแก้ Cluster
kubectl scale deployment my-web --replicas=10
เมื่อเปิด
selfHeal: true
Argo CD จะนำระบบกลับไปเป็นจำนวน Replica ตาม Git
#19. Dev / Staging / Production
gitops/
└── environments/
    ├── development/
    ├── staging/
    └── production/
Promotion Flow
Development
     |
     v
Automated Test
     |
     v
Staging
     |
     v
Pull Request / Approval
     |
     v
Production
#20. Best Practices
#ใช้ Immutable Image Tag
ไม่แนะนำ
image: my-web:latest
แนะนำ
image: my-web:a12bc34
หรือ
image: my-web:v1.4.0
#ไม่เก็บ Secret แบบ Plain Text
ควรพิจารณา
- External Secrets Operator
- Sealed Secrets
- SOPS
- Secret Manager
#ใช้ Health Probe
ควรกำหนด
readinessProbe:
livenessProbe:
#กำหนด Resource Requests และ Limits
resources:
  requests:
    cpu: "100m"
    memory: "128Mi"

  limits:
    cpu: "500m"
    memory: "512Mi"
#21. GitOps กับ Security
Architecture ที่แนะนำ
GitHub Actions
      |
      +---- Push Image ----> DOCR
      |
      +---- Update Git ----> GitOps Repository
                                   |
                                   v
                                Argo CD
                                   |
                                   v
                                  DOKS
CI ไม่จำเป็นต้องมี cluster-admin credential
จึงช่วยลด Attack Surface ของ Deployment Pipeline
#22. GitOps ไม่ได้มาแทน CI
CI
GitHub Actions
=
Test + Build + Scan + Push Image
CD
Argo CD
=
Observe + Compare + Sync + Reconcile
ทั้งสองส่วนทำงานร่วมกัน
#23. Production Architecture
GitHub
   |
   v
GitHub Actions
   |
   +-- Unit Test
   +-- Integration Test
   +-- Docker Build
   +-- Security Scan
   +-- Push Image
            |
            v
           DOCR

GitHub Actions
   |
   v
GitOps Repository
   |
   v
Argo CD
   |
   v
DOKS
   |
   v
Ingress Controller
   |
   v
DigitalOcean Load Balancer
   |
   v
app.example.com
สามารถเพิ่ม Monitoring และ Observability ด้วย
- Prometheus
- Grafana
- Loki
- OpenTelemetry
#สรุป
Stack สำหรับ Deploy Web แบบ GitOps บน DigitalOcean
GitHub
+
GitHub Actions
+
Docker
+
DigitalOcean Container Registry
+
DigitalOcean Kubernetes
+
Argo CD
+
Kustomize
Flow หลัก
Git Commit
   |
   v
GitHub Actions
   |
   v
Test + Build
   |
   v
Docker Image
   |
   v
DOCR
   |
   v
GitOps Commit
   |
   v
Argo CD
   |
   v
DOKS
   |
   v
Rolling Update
   |
   v
Production
ข้อดีสำคัญของ GitOps
- Git เป็น Source of Truth
- Deployment ตรวจสอบย้อนหลังได้
- Rollback ด้วย Git ได้
- ตรวจจับ Configuration Drift ได้
- รองรับ Self-Healing
- ลดสิทธิ์ของ CI ต่อ Production Cluster
- รองรับ Development / Staging / Production
- เหมาะกับ Kubernetes และ Cloud Native Application
สำหรับระบบที่ Deploy บน DigitalOcean Kubernetes การใช้ GitHub Actions + DOCR + Argo CD + DOKS เป็นแนวทางที่ดีสำหรับสร้าง Deployment Pipeline ที่มี Automation, Auditability และ Governance มากขึ้น
#References
-
DigitalOcean Kubernetes
https://docs.digitalocean.com/products/kubernetes/ -
DigitalOcean Container Registry
https://docs.digitalocean.com/products/container-registry/ -
DigitalOcean Kubernetes + DOCR
https://docs.digitalocean.com/products/kubernetes/how-to/integrate-with-docr/ -
Argo CD Getting Started
https://argo-cd.readthedocs.io/en/latest/getting_started/ -
Argo CD Application Specification
https://argo-cd.readthedocs.io/en/latest/user-guide/application-specification/ -
Kustomize
https://kustomize.io/