- การตั้งค่า Laravel 13 + Inertia.js 3 + React 19
- 1. เตรียมเครื่องมือ
- 2. สร้าง Laravel Project
- 3. โครงสร้างโปรเจกต์
- 4. สร้าง React Page แรก
- 5. สร้าง Route
- 6. ส่งข้อมูลจาก Laravel ไป React
- 7. ใช้งาน Controller
- 8. สร้างหน้า Users
- 9. Navigation ด้วย Inertia Link
- 10. Form ด้วย useForm
- 11. Validation ใน Laravel
- 12. ใช้งาน Layout
- 13. ใช้งาน shadcn/ui
- 14. ตั้งค่า Database
- 15. Development Workflow
- 16. Production Build
- 17. Server-Side Rendering
- 18. ถ้ามี Laravel Project อยู่แล้ว
- 19. Request Flow
- 20. Inertia ต่างจาก REST API อย่างไร
- 21. เหมาะกับระบบแบบใด
- 22. Stack ที่แนะนำ
- 23. คำสั่งที่ใช้บ่อย
- 24. สรุป
#การตั้งค่า Laravel 13 + Inertia.js 3 + React 19
การพัฒนา Web Application ด้วย Laravel + React ไม่จำเป็นต้องแยก Backend และ Frontend ออกเป็นคนละโปรเจกต์เสมอไป เพราะสามารถใช้ Inertia.js เป็นตัวเชื่อม Laravel กับ React ได้โดยตรง
แนวทางนี้เรียกว่า Modern Monolith คือยังใช้ Routing, Controller, Validation, Authentication, Session และ Eloquent ORM ของ Laravel ตามปกติ แต่ส่วน User Interface เขียนด้วย React
Laravel React Starter Kit ปัจจุบันมาพร้อม React 19, TypeScript, Inertia.js 3, Tailwind CSS 4 และ shadcn/ui ทำให้เริ่มต้นระบบได้รวดเร็วและลด Boilerplate
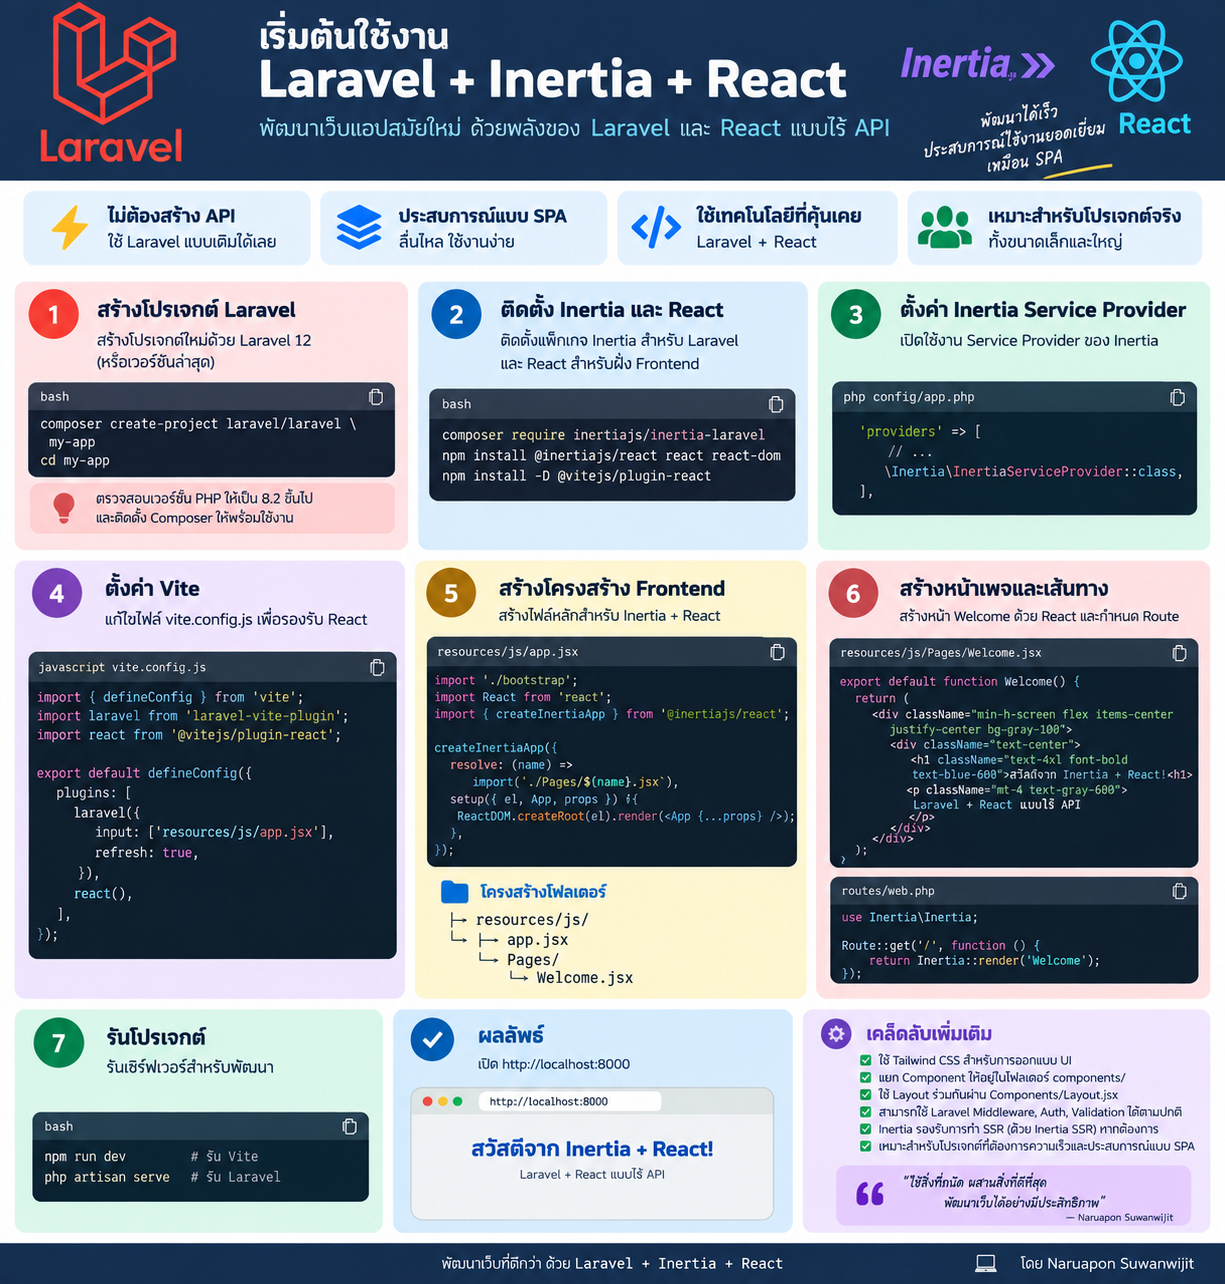
#Laravel + Inertia + React ทำงานอย่างไร
Browser
   |
   v
Laravel Route
   |
   v
Controller
   |
   v
Inertia::render()
   |
   v
React Page
   |
   v
Browser
Laravel Controller สามารถส่งข้อมูลไปยัง React ได้โดยตรงผ่าน Inertia Props
return Inertia::render('users/index', [
    'users' => User::all(),
]);
React รับข้อมูลผ่าน Props
export default function Index({ users }) {
    return (
        <div>
            {users.map((user) => (
                <div key={user.id}>{user.name}</div>
            ))}
        </div>
    );
}
ดังนั้นจึงไม่จำเป็นต้องสร้าง REST API สำหรับทุกหน้าของระบบ
#Technology Stack
| Layer | Technology |
|---|---|
| Backend | Laravel 13 |
| Frontend | React 19 |
| Bridge | Inertia.js 3 |
| Language | TypeScript |
| CSS | Tailwind CSS 4 |
| UI | shadcn/ui |
| Build Tool | Vite |
| Database | MySQL / PostgreSQL / SQLite |
#1. เตรียมเครื่องมือ
ควรมีเครื่องมือพื้นฐานดังนี้
PHP
Composer
Node.js
npm
Laravel Installer
Database
ตรวจสอบเวอร์ชัน
php -v
composer -V
node -v
npm -v
ติดตั้ง Laravel Installer
composer global require laravel/installer
ตรวจสอบ
laravel --version
#2. สร้าง Laravel Project
สร้างโปรเจกต์ใหม่
laravel new my-app
เมื่อ Laravel Installer แสดงตัวเลือก Starter Kit ให้เลือก
React
จากนั้นเข้าโฟลเดอร์โปรเจกต์
cd my-app
ติดตั้ง Frontend dependencies
npm install
Build assets
npm run build
เริ่ม Development Environment
composer run dev
เปิด
http://localhost:8000
#3. โครงสร้างโปรเจกต์
my-app/
├── app/
│   ├── Http/
│   │   └── Controllers/
│   └── Models/
├── resources/
│   ├── css/
│   └── js/
│       ├── components/
│       ├── hooks/
│       ├── layouts/
│       ├── lib/
│       ├── pages/
│       └── types/
├── routes/
│   └── web.php
├── database/
├── public/
├── vite.config.ts
├── package.json
└── composer.json
React Page หลักจะอยู่ที่
resources/js/pages/
เช่น
resources/js/pages/
├── dashboard.tsx
├── users/
│   ├── index.tsx
│   ├── create.tsx
│   └── edit.tsx
└── settings/
#4. สร้าง React Page แรก
สร้างไฟล์
resources/js/pages/hello.tsx
import { Head } from '@inertiajs/react';

export default function Hello() {
    return (
        <>
            <Head title="Hello" />

            <main className="p-10">
                <h1 className="text-3xl font-bold">
                    Laravel + Inertia + React
                </h1>

                <p className="mt-4 text-gray-600">
                    Welcome to Laravel React Application
                </p>
            </main>
        </>
    );
}
#5. สร้าง Route
แก้ไฟล์
routes/web.php
เพิ่ม
use Illuminate\Support\Facades\Route;
use Inertia\Inertia;

Route::get('/hello', function () {
    return Inertia::render('hello');
});
เปิด
http://localhost:8000/hello
#6. ส่งข้อมูลจาก Laravel ไป React
Laravel สามารถส่งข้อมูลผ่าน Inertia Props
Route::get('/profile', function () {
    return Inertia::render('profile', [
        'name' => 'Naruapon',
        'role' => 'Software Engineer',
    ]);
});
React
type Props = {
    name: string;
    role: string;
};

export default function Profile({ name, role }: Props) {
    return (
        <div className="p-10">
            <h1 className="text-2xl font-bold">{name}</h1>
            <p>{role}</p>
        </div>
    );
}
Data Flow
Laravel Controller
       |
       v
Inertia::render()
       |
       v
Props
       |
       v
React Component
#7. ใช้งาน Controller
สร้าง Controller
php artisan make:controller UserController
ตัวอย่าง
<?php

namespace App\Http\Controllers;

use App\Models\User;
use Inertia\Inertia;

class UserController extends Controller
{
    public function index()
    {
        return Inertia::render('users/index', [
            'users' => User::query()
                ->select('id', 'name', 'email')
                ->latest()
                ->get(),
        ]);
    }
}
Route
use App\Http\Controllers\UserController;

Route::get('/users', [UserController::class, 'index']);
#8. สร้างหน้า Users
ไฟล์
resources/js/pages/users/index.tsx
type User = {
    id: number;
    name: string;
    email: string;
};

type Props = {
    users: User[];
};

export default function Index({ users }: Props) {
    return (
        <main className="p-8">
            <h1 className="mb-6 text-3xl font-bold">Users</h1>

            <div className="space-y-3">
                {users.map((user) => (
                    <div
                        key={user.id}
                        className="rounded-lg border p-4"
                    >
                        <div className="font-semibold">
                            {user.name}
                        </div>

                        <div className="text-sm text-gray-500">
                            {user.email}
                        </div>
                    </div>
                ))}
            </div>
        </main>
    );
}
#9. Navigation ด้วย Inertia Link
สำหรับ Internal Navigation ควรใช้ Link
import { Link } from '@inertiajs/react';

export default function Menu() {
    return (
        <nav>
            <Link href="/users">
                Users
            </Link>
        </nav>
    );
}
Inertia จะเปลี่ยนหน้าโดยไม่ reload Browser ทั้งหน้า ทำให้ UX ใกล้เคียง SPA
#10. Form ด้วย useForm
import { useForm } from '@inertiajs/react';

export default function CreateUser() {
    const {
        data,
        setData,
        post,
        processing,
        errors,
    } = useForm({
        name: '',
        email: '',
        password: '',
    });

    function submit(e: React.FormEvent) {
        e.preventDefault();
        post('/users');
    }

    return (
        <form onSubmit={submit} className="space-y-4">
            <div>
                <input
                    value={data.name}
                    onChange={(e) =>
                        setData('name', e.target.value)
                    }
                    placeholder="Name"
                    className="rounded border p-2"
                />

                {errors.name && (
                    <p className="text-sm text-red-500">
                        {errors.name}
                    </p>
                )}
            </div>

            <div>
                <input
                    type="email"
                    value={data.email}
                    onChange={(e) =>
                        setData('email', e.target.value)
                    }
                    placeholder="Email"
                    className="rounded border p-2"
                />

                {errors.email && (
                    <p className="text-sm text-red-500">
                        {errors.email}
                    </p>
                )}
            </div>

            <button
                type="submit"
                disabled={processing}
                className="rounded bg-black px-4 py-2 text-white"
            >
                {processing ? 'Saving...' : 'Save'}
            </button>
        </form>
    );
}
#11. Validation ใน Laravel
use App\Models\User;
use Illuminate\Http\Request;
use Illuminate\Support\Facades\Hash;

public function store(Request $request)
{
    $data = $request->validate([
        'name' => ['required', 'string', 'max:255'],
        'email' => ['required', 'email', 'unique:users,email'],
        'password' => ['required', 'string', 'min:8'],
    ]);

    User::create([
        'name' => $data['name'],
        'email' => $data['email'],
        'password' => Hash::make($data['password']),
    ]);

    return redirect('/users');
}
เพิ่ม Route
Route::post('/users', [UserController::class, 'store']);
เมื่อ Validation ไม่ผ่าน Error จะถูกส่งกลับมายัง React ผ่าน Inertia โดยอัตโนมัติ
#12. ใช้งาน Layout
Starter Kit มี Layout พร้อมใช้งาน
resources/js/layouts/
├── app-layout.tsx
├── auth-layout.tsx
└── app/
ตัวอย่าง
import AppLayout from '@/layouts/app-layout';

export default function Dashboard() {
    return (
        <AppLayout>
            <div className="p-8">
                <h1 className="text-3xl font-bold">
                    Dashboard
                </h1>
            </div>
        </AppLayout>
    );
}
#13. ใช้งาน shadcn/ui
เพิ่ม Button
npx shadcn@latest add button
เพิ่ม Dialog
npx shadcn@latest add dialog
ตัวอย่าง
import { Button } from '@/components/ui/button';

export default function Example() {
    return (
        <Button>
            Save
        </Button>
    );
}
#14. ตั้งค่า Database
แก้ .env
DB_CONNECTION=mysql
DB_HOST=127.0.0.1
DB_PORT=3306
DB_DATABASE=my_app
DB_USERNAME=root
DB_PASSWORD=
รัน Migration
php artisan migrate
ตรวจสอบสถานะ
php artisan migrate:status
#15. Development Workflow
วิธีแนะนำ
composer run dev
หรือเปิดแยก Terminal
Terminal 1
php artisan serve
Terminal 2
npm run dev
เข้าใช้งาน
http://localhost:8000
#16. Production Build
Build Frontend
npm run build
ตั้งค่า Production
APP_ENV=production
APP_DEBUG=false
Optimize
php artisan optimize
Clear Cache เมื่อจำเป็น
php artisan optimize:clear
#17. Server-Side Rendering
Inertia รองรับ SSR
npm run build:ssr
SSR เหมาะกับ
- Public Content
- SEO
- Social Media Preview
- หน้า Landing Page
- ระบบที่ต้องการ Initial Rendering เร็วขึ้น
สำหรับ Dashboard หรือระบบภายในองค์กร SSR อาจไม่จำเป็น
#18. ถ้ามี Laravel Project อยู่แล้ว
ติดตั้ง Inertia Server Adapter
composer require inertiajs/inertia-laravel
สร้าง Middleware
php artisan inertia:middleware
ติดตั้ง React Adapter
npm install @inertiajs/react react react-dom
อย่างไรก็ตาม หากเป็นโปรเจกต์ใหม่ การใช้ Laravel React Starter Kit จะสะดวกกว่า เพราะ Authentication, TypeScript, Tailwind CSS, Layout และ UI Components ถูกเตรียมไว้แล้ว
#19. Request Flow
ตัวอย่างเมื่อเปิด /users
Browser
   |
   | GET /users
   v
routes/web.php
   |
   v
UserController@index
   |
   v
Eloquent ORM
   |
   v
Database
   |
   v
Inertia::render('users/index')
   |
   v
resources/js/pages/users/index.tsx
   |
   v
React
   |
   v
Browser
#20. Inertia ต่างจาก REST API อย่างไร
#React + REST API
React
  |
  v
REST API
  |
  v
Laravel
  |
  v
Database
มักต้องจัดการ
- API Routes
- JSON Response
- API Authentication
- CORS
- Frontend Router
- API Client
- State Synchronization
#Laravel + Inertia
React
  ^
  |
Inertia
  ^
  |
Laravel
  |
  v
Database
Laravel ยังคงควบคุม Routing และ Controller โดยตรง จึงลดความซับซ้อนของ Full-stack Web Application ได้มาก
#21. เหมาะกับระบบแบบใด
Laravel + Inertia + React เหมาะกับ
- Admin Dashboard
- ERP
- CRM
- CMS
- Student Information System
- Internship Management System
- Project Management
- SaaS
- University Management System
- E-Commerce Back Office
หากระบบต้องให้ Mobile App หรือ Third-party ใช้ข้อมูลด้วย การสร้าง API เพิ่มก็ยังเหมาะสม
#22. Stack ที่แนะนำ
Laravel 13
React 19
Inertia.js 3
TypeScript
Tailwind CSS 4
shadcn/ui
PostgreSQL / MySQL
Redis
Laravel Queue
Laravel Reverb
Docker
Caddy / Nginx
Architecture
                   Browser
                      |
                      v
                Laravel Route
                      |
                      v
                  Controller
                      |
          +-----------+-----------+
          |                       |
          v                       v
     Eloquent ORM              Services
          |                       |
          v                       v
       Database              Redis / Queue
          |
          v
     Inertia Response
          |
          v
        React
          |
          v
 Tailwind CSS + shadcn/ui
#23. คำสั่งที่ใช้บ่อย
# Controller
php artisan make:controller ProductController

# Model + Migration
php artisan make:model Product -m

# Migration
php artisan migrate

# Rollback
php artisan migrate:rollback

# Development
composer run dev

# Frontend
npm run dev

# Production Build
npm run build

# Clear Cache
php artisan optimize:clear

# Optimize
php artisan optimize
#24. สรุป
Laravel + Inertia.js + React เหมาะสำหรับการสร้าง Modern Full-stack Web Application ที่ต้องการพลังของ React แต่ยังคงความเรียบง่ายของ Laravel
ข้อดีหลัก ได้แก่
- ใช้ Laravel Routing และ Controller ได้โดยตรง
- ใช้ Eloquent ORM และ Validation ตามปกติ
- React รับข้อมูลผ่าน Inertia Props
- ไม่ต้องสร้าง REST API สำหรับทุกหน้า
- Navigation ให้ UX แบบ SPA
- Authentication จัดการผ่าน Laravel ได้ง่าย
- รองรับ TypeScript
- ใช้ Tailwind CSS และ shadcn/ui ได้
- Backend และ Frontend อยู่ใน Repository เดียว
- เหมาะกับ Dashboard, SaaS และ Business Application
เริ่มต้นอย่างรวดเร็ว
composer global require laravel/installer
laravel new my-app
เลือก
React Starter Kit
แล้วรัน
cd my-app
npm install
npm run build
composer run dev
เปิด
http://localhost:8000
เพียงเท่านี้ก็พร้อมพัฒนา Laravel + Inertia.js + React ได้แล้ว
#References
- Laravel Installation: https://laravel.com/framework/docs
- Laravel Starter Kits: https://laravel.com/starter-kits
- Laravel Starter Kits Documentation: https://laravel.com/framework/docs/starter-kits
- Inertia.js Documentation: https://inertiajs.com/
- React Documentation: https://react.dev/
- Tailwind CSS: https://tailwindcss.com/
- shadcn/ui: https://ui.shadcn.com/