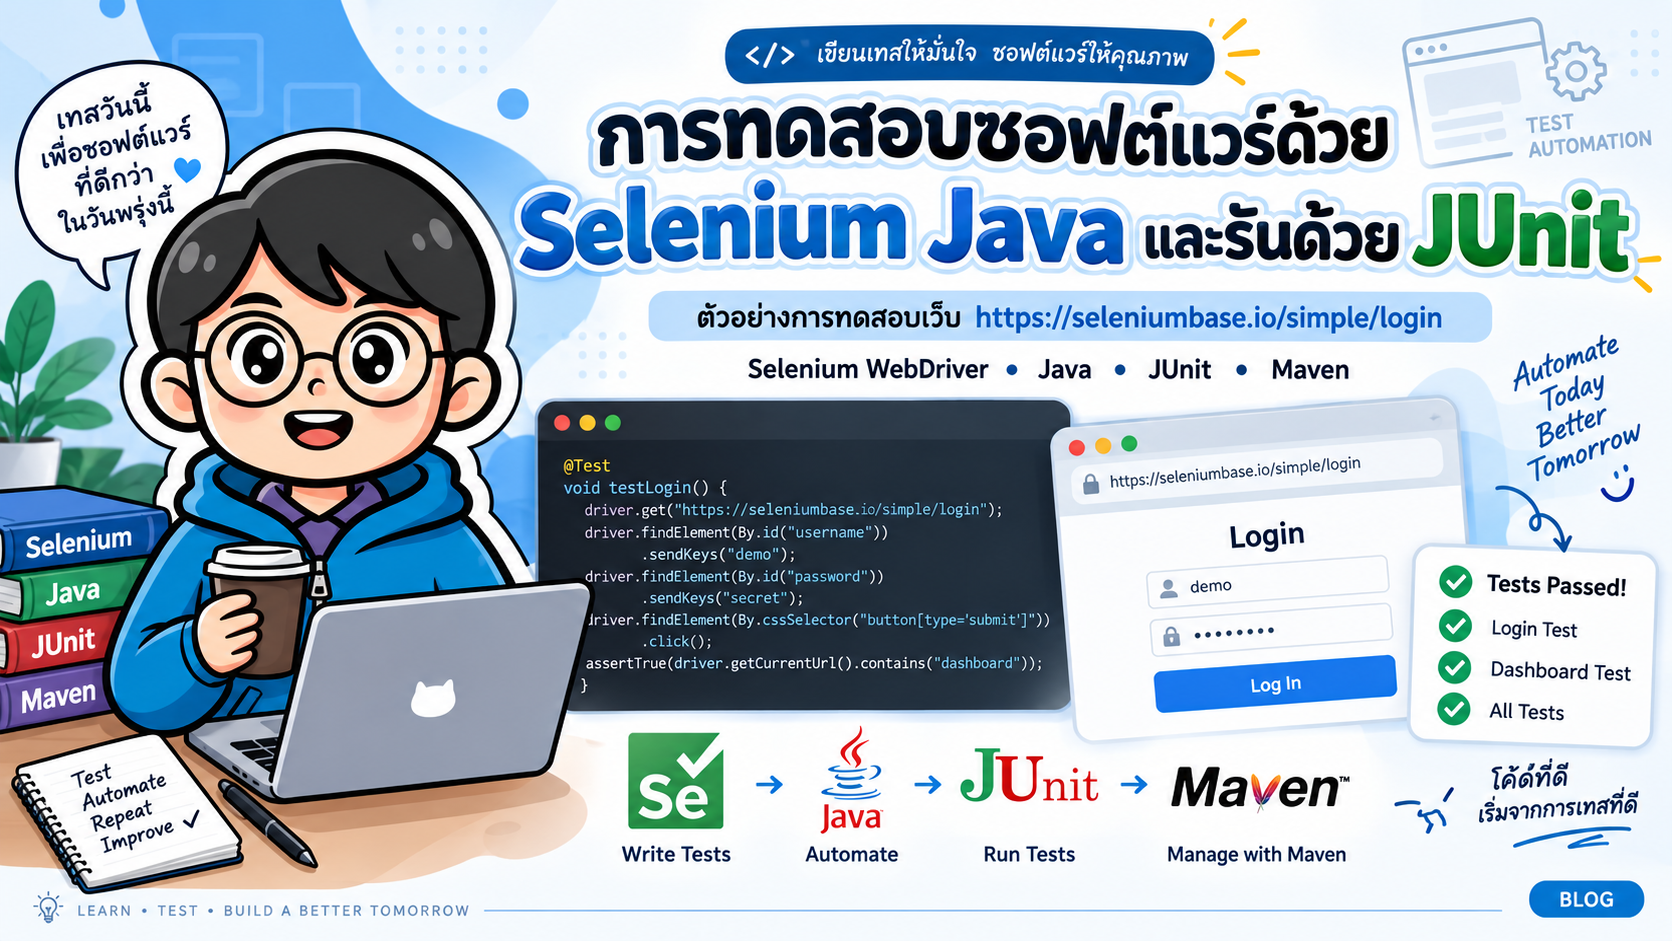
- การทดสอบซอฟต์แวร์ด้วย Selenium Java และ JUnit
- 3. สิ่งที่ต้องติดตั้ง
- 4. ติดตั้ง Java และ Maven บน macOS
- 5. ติดตั้ง Java และ Maven บน Windows
- 6. สร้าง Project
- 7. สร้างไฟล์ pom.xml
- 8. Dependency ที่สำคัญ
- 9. Selenium Manager
- 10. สำรวจหน้าเว็บที่จะทดสอบ
- 11. Test Scenario
- 12. เขียน Test แรกด้วย Selenium + JUnit
- 13. อธิบาย Code
- 14. รัน Test
- 15. รันเฉพาะ Test Class
- 16. รันเฉพาะ Test Method
- 17. ปรับปรุง Test ด้วย WebDriverWait
- 18. ทดสอบ Login และ Logout
- 19. Test Class ฉบับสมบูรณ์
- 20. รันแบบ Headless
- 21. แนะนำให้หลีกเลี่ยง Thread.sleep()
- 22. Locator ที่นิยมใช้
- 23. CSS Selector กับ Selenium
- 24. Page Object Model
- 25. สร้าง LoginPage
- 26. Test ด้วย Page Object
- 27. โครงสร้าง Project ที่แนะนำ
- 28. รายงานผลการทดสอบ
- 29. Lifecycle ของ JUnit Test
- 30. อย่าลืม driver.quit()
- 31. ปัญหาที่พบบ่อย
- 32. Workflow ของ Selenium + Java + JUnit
- 33. Workflow เมื่อรันด้วย Maven
- 34. คำสั่งที่ใช้บ่อย
- 35. แนวทางพัฒนาต่อ
- 36. สรุป
- Source Code ฉบับย่อ
- อ้างอิง
#การทดสอบซอฟต์แวร์ด้วย Selenium Java และ JUnit
การทดสอบเว็บแบบอัตโนมัติ หรือ Web UI Test Automation ช่วยให้เราสามารถจำลองพฤติกรรมของผู้ใช้ เช่น เปิดหน้าเว็บ กรอก Username/Password คลิกปุ่ม Login และตรวจสอบผลลัพธ์ได้โดยอัตโนมัติ
บทความนี้สาธิตการใช้
- Java สำหรับเขียน Test Script
- Selenium WebDriver สำหรับควบคุม Browser
- JUnit Jupiter สำหรับจัดการ Test Case และ Assertion
- Maven สำหรับจัดการ Dependency และรัน Test
- Selenium Manager สำหรับจัดการ Browser Driver อัตโนมัติ
เว็บที่ใช้ทดลองคือ
https://seleniumbase.io/simple/login
ข้อมูล Login สำหรับหน้า Demo คือ
Username: demo_user
Password: secret_pass
บทความนี้ใช้ Selenium Java
4.49.0, JUnit Jupiter6.1.3และ Maven Surefire3.6.0ซึ่งเป็นเวอร์ชันปัจจุบัน ณ วันที่จัดทำบทความ หากใช้ในอนาคตสามารถปรับเลขเวอร์ชันในpom.xmlให้เป็นเวอร์ชันล่าสุดได้
#1. Selenium คืออะไร
Selenium เป็นชุดเครื่องมือสำหรับทำ Browser Automation โดย Selenium WebDriver สามารถสั่ง Browser ให้ทำงานเหมือนผู้ใช้จริง เช่น
- เปิด URL
- ค้นหา Element
- กรอกข้อมูลใน Form
- คลิก Button/Link
- อ่านข้อความบนหน้าเว็บ
- ตรวจสอบผลลัพธ์
- ทำ Screenshot
- รันแบบ Headless
- ใช้งานร่วมกับ CI/CD
Selenium รองรับ Browser หลัก เช่น
- Google Chrome
- Mozilla Firefox
- Microsoft Edge
- Safari
#2. JUnit คืออะไร
JUnit เป็น Testing Framework สำหรับภาษา Java
เมื่อนำมาใช้ร่วมกับ Selenium เราสามารถแยกขั้นตอนการทดสอบออกเป็น Test Case และใช้ Annotation เช่น
@Test
@BeforeEach
@AfterEach
รวมถึง Assertion เช่น
assertEquals()
assertTrue()
assertNotNull()
เพื่อยืนยันว่าผลลัพธ์จากระบบตรงกับสิ่งที่คาดหวัง
แนวคิดการทำงานโดยรวมคือ
JUnit
   |
   v
Test Case
   |
   v
Selenium WebDriver
   |
   v
Browser
   |
   v
Web Application
#3. สิ่งที่ต้องติดตั้ง
แนะนำให้ใช้
JDK 17+
Maven 3.6.3+
Google Chrome
Git (ถ้าต้องการ)
IDE เช่น IntelliJ IDEA / VS Code / Eclipse
ตรวจสอบ Java
java -version
ตรวจสอบ Java Compiler
javac -version
ตรวจสอบ Maven
mvn -version
#4. ติดตั้ง Java และ Maven บน macOS
หากใช้ Homebrew สามารถติดตั้ง OpenJDK และ Maven ได้ดังนี้
brew install openjdk@17
brew install maven
ตรวจสอบ
java -version
mvn -version
หากระบบยังไม่พบ Java อาจต้องเพิ่ม JDK เข้า PATH ตามคำแนะนำของ Homebrew
ตัวอย่าง
export PATH="/opt/homebrew/opt/openjdk@17/bin:$PATH"
สำหรับ Mac Intel อาจเป็น
export PATH="/usr/local/opt/openjdk@17/bin:$PATH"
#5. ติดตั้ง Java และ Maven บน Windows
สามารถใช้ winget
winget install EclipseAdoptium.Temurin.17.JDK
ติดตั้ง Maven
winget install Apache.Maven
จากนั้นเปิด Terminal ใหม่และตรวจสอบ
java -version
mvn -version
หาก mvn หรือ java ยังไม่ถูกพบ ให้ตรวจสอบค่า Environment Variables ได้แก่
JAVA_HOME
PATH
#6. สร้าง Project
สร้าง Folder สำหรับโปรเจกต์
mkdir selenium-java-junit
cd selenium-java-junit
สร้างโครงสร้างดังนี้
selenium-java-junit/
├── pom.xml
└── src/
    └── test/
        └── java/
            └── com/
                └── example/
                    └── LoginTest.java
บน macOS/Linux สามารถใช้
mkdir -p src/test/java/com/example
บน Windows PowerShell
New-Item -ItemType Directory -Force src/test/java/com/example
#7. สร้างไฟล์ pom.xml
สร้างไฟล์
pom.xml
แล้วเพิ่ม
<?xml version="1.0" encoding="UTF-8"?>

<project xmlns="http://maven.apache.org/POM/4.0.0"
         xmlns:xsi="http://www.w3.org/2001/XMLSchema-instance"
         xsi:schemaLocation="
            http://maven.apache.org/POM/4.0.0
            https://maven.apache.org/xsd/maven-4.0.0.xsd">

    <modelVersion>4.0.0</modelVersion>

    <groupId>com.example</groupId>
    <artifactId>selenium-java-junit</artifactId>
    <version>1.0-SNAPSHOT</version>

    <properties>
        <maven.compiler.release>17</maven.compiler.release>
        <project.build.sourceEncoding>UTF-8</project.build.sourceEncoding>

        <selenium.version>4.49.0</selenium.version>
        <junit.version>6.1.3</junit.version>
        <surefire.version>3.6.0</surefire.version>
    </properties>

    <dependencies>

        <dependency>
            <groupId>org.seleniumhq.selenium</groupId>
            <artifactId>selenium-java</artifactId>
            <version>${selenium.version}</version>
        </dependency>

        <dependency>
            <groupId>org.junit.jupiter</groupId>
            <artifactId>junit-jupiter</artifactId>
            <version>${junit.version}</version>
            <scope>test</scope>
        </dependency>

    </dependencies>

    <build>
        <plugins>

            <plugin>
                <groupId>org.apache.maven.plugins</groupId>
                <artifactId>maven-surefire-plugin</artifactId>
                <version>${surefire.version}</version>
            </plugin>

        </plugins>
    </build>

</project>
#8. Dependency ที่สำคัญ
#Selenium Java
<dependency>
    <groupId>org.seleniumhq.selenium</groupId>
    <artifactId>selenium-java</artifactId>
    <version>4.49.0</version>
</dependency>
ใช้สำหรับ
WebDriver
ChromeDriver
By
WebElement
WebDriverWait
ExpectedConditions
#JUnit Jupiter
<dependency>
    <groupId>org.junit.jupiter</groupId>
    <artifactId>junit-jupiter</artifactId>
    <version>6.1.3</version>
    <scope>test</scope>
</dependency>
ใช้สำหรับ
@Test
@BeforeEach
@AfterEach
Assertions
#9. Selenium Manager
ใน Selenium รุ่นใหม่ เราไม่จำเป็นต้อง Download chromedriver ด้วยตนเองในกรณีใช้งานทั่วไป
ดังนั้นไม่จำเป็นต้องเขียน
System.setProperty(
    "webdriver.chrome.driver",
    "/path/to/chromedriver"
);
สามารถสร้าง Browser ได้โดยตรง
WebDriver driver = new ChromeDriver();
Selenium จะใช้ Selenium Manager เพื่อช่วยค้นหาและจัดการ Driver ที่เหมาะสมให้อัตโนมัติ
ดังนั้นโค้ดเริ่มต้นจึงสั้นลงมาก
WebDriver driver = new ChromeDriver();

driver.get("https://seleniumbase.io/simple/login");

driver.quit();
#10. สำรวจหน้าเว็บที่จะทดสอบ
เปิด
https://seleniumbase.io/simple/login
หน้าเว็บมีข้อมูลหลัก ได้แก่
Username
Password
Sign in
ตัวอย่าง Locator ที่เราจะใช้คือ
Username: #username
Password: #password
Sign in:  #log-in
หลัง Login สำเร็จ สามารถตรวจข้อความ
Welcome!
จาก Element
<h1>
และมีรูปภาพที่สามารถระบุด้วย
#image1
#11. Test Scenario
เราจะสร้าง Test Scenario ดังนี้
1. เปิดหน้า Login
2. กรอก Username = demo_user
3. กรอก Password = secret_pass
4. คลิก Sign in
5. ตรวจสอบว่ามีข้อความ Welcome!
6. ตรวจสอบว่ารูป #image1 แสดงอยู่
7. คลิก Sign out
8. ตรวจสอบข้อความ signed out
เขียนในรูปแบบ Given / When / Then ได้ดังนี้
Given
ผู้ใช้เปิดหน้า Login

When
ผู้ใช้กรอก Username และ Password ที่ถูกต้อง
และกด Sign in

Then
ระบบต้องแสดงข้อความ Welcome!

When
ผู้ใช้กด Sign out

Then
ระบบต้องแสดงข้อความว่า signed out
#12. เขียน Test แรกด้วย Selenium + JUnit
สร้างไฟล์
src/test/java/com/example/LoginTest.java
เพิ่มโค้ด
package com.example;

import org.junit.jupiter.api.AfterEach;
import org.junit.jupiter.api.BeforeEach;
import org.junit.jupiter.api.Test;

import org.openqa.selenium.By;
import org.openqa.selenium.WebDriver;
import org.openqa.selenium.chrome.ChromeDriver;

import static org.junit.jupiter.api.Assertions.assertEquals;

class LoginTest {

    private WebDriver driver;

    @BeforeEach
    void setUp() {
        driver = new ChromeDriver();
    }

    @AfterEach
    void tearDown() {
        if (driver != null) {
            driver.quit();
        }
    }

    @Test
    void shouldLoginSuccessfully() {

        driver.get("https://seleniumbase.io/simple/login");

        driver.findElement(By.id("username"))
                .sendKeys("demo_user");

        driver.findElement(By.id("password"))
                .sendKeys("secret_pass");

        driver.findElement(By.id("log-in"))
                .click();

        String heading = driver.findElement(By.tagName("h1"))
                .getText();

        assertEquals("Welcome!", heading);
    }
}
#13. อธิบาย Code
#สร้าง WebDriver
driver = new ChromeDriver();
คำสั่งนี้เปิด Google Chrome และสร้าง Selenium Session
#เปิดหน้าเว็บ
driver.get("https://seleniumbase.io/simple/login");
เทียบได้กับการพิมพ์ URL ใน Address Bar ของ Browser
#ค้นหา Username
driver.findElement(By.id("username"))
Selenium จะหา Element ที่มี
id="username"
แล้วกรอกข้อมูลด้วย
.sendKeys("demo_user");
#กรอก Password
driver.findElement(By.id("password"))
        .sendKeys("secret_pass");
#คลิก Sign in
driver.findElement(By.id("log-in"))
        .click();
#อ่านข้อความจาก h1
String heading = driver.findElement(By.tagName("h1"))
        .getText();
#Assertion
assertEquals("Welcome!", heading);
JUnit จะเปรียบเทียบ
Expected = Welcome!
Actual   = ข้อความที่ Selenium อ่านได้
ถ้าตรงกัน Test จะ Pass
ถ้าไม่ตรงกัน Test จะ Fail
#14. รัน Test
ใช้คำสั่ง
mvn test
Maven จะ
อ่าน pom.xml
      ↓
Download Dependencies
      ↓
Compile Test
      ↓
JUnit Platform
      ↓
Run LoginTest
      ↓
Selenium เปิด Chrome
      ↓
ทดสอบหน้า Login
      ↓
แสดงผล Pass / Fail
ตัวอย่างผลลัพธ์
Tests run: 1,
Failures: 0,
Errors: 0,
Skipped: 0
#15. รันเฉพาะ Test Class
mvn -Dtest=LoginTest test
#16. รันเฉพาะ Test Method
mvn -Dtest=LoginTest#shouldLoginSuccessfully test
บน shell บางชนิด
#อาจมีความหมายพิเศษ ให้ครอบค่าด้วย quote หากจำเป็น
ตัวอย่าง
mvn "-Dtest=LoginTest#shouldLoginSuccessfully" test
#17. ปรับปรุง Test ด้วย WebDriverWait
ในการทดสอบจริง ไม่ควรพึ่งการทำงานทันทีหลัง Click เพราะหน้าเว็บอาจต้องใช้เวลาโหลด
แนวทางที่ดีกว่าคือใช้ Explicit Wait
package com.example;

import org.junit.jupiter.api.AfterEach;
import org.junit.jupiter.api.BeforeEach;
import org.junit.jupiter.api.Test;

import org.openqa.selenium.By;
import org.openqa.selenium.WebDriver;
import org.openqa.selenium.chrome.ChromeDriver;

import org.openqa.selenium.support.ui.ExpectedConditions;
import org.openqa.selenium.support.ui.WebDriverWait;

import java.time.Duration;

import static org.junit.jupiter.api.Assertions.assertEquals;

class LoginTest {

    private WebDriver driver;
    private WebDriverWait wait;

    @BeforeEach
    void setUp() {

        driver = new ChromeDriver();

        wait = new WebDriverWait(
                driver,
                Duration.ofSeconds(10)
        );
    }

    @AfterEach
    void tearDown() {

        if (driver != null) {
            driver.quit();
        }
    }

    @Test
    void shouldLoginSuccessfully() {

        driver.get(
            "https://seleniumbase.io/simple/login"
        );

        wait.until(
            ExpectedConditions.visibilityOfElementLocated(
                By.id("username")
            )
        ).sendKeys("demo_user");

        driver.findElement(By.id("password"))
                .sendKeys("secret_pass");

        driver.findElement(By.id("log-in"))
                .click();

        String heading = wait.until(
            ExpectedConditions.visibilityOfElementLocated(
                By.tagName("h1")
            )
        ).getText();

        assertEquals("Welcome!", heading);
    }
}
ข้อดีคือ Test ไม่ต้องหยุดแบบตายตัวด้วย
Thread.sleep(...)
แต่จะรอจนกว่า Condition ที่กำหนดจะสำเร็จ หรือ Timeout
#18. ทดสอบ Login และ Logout
ปรับ Test ให้ครบ Flow
@Test
void shouldLoginAndLogoutSuccessfully() {

    driver.get(
        "https://seleniumbase.io/simple/login"
    );

    wait.until(
        ExpectedConditions.visibilityOfElementLocated(
            By.id("username")
        )
    ).sendKeys("demo_user");

    driver.findElement(By.id("password"))
            .sendKeys("secret_pass");

    driver.findElement(By.id("log-in"))
            .click();

    String heading = wait.until(
        ExpectedConditions.visibilityOfElementLocated(
            By.tagName("h1")
        )
    ).getText();

    assertEquals("Welcome!", heading);

    wait.until(
        ExpectedConditions.visibilityOfElementLocated(
            By.id("image1")
        )
    );

    wait.until(
        ExpectedConditions.elementToBeClickable(
            By.linkText("Sign out")
        )
    ).click();

    String message = wait.until(
        ExpectedConditions.visibilityOfElementLocated(
            By.id("top_message")
        )
    ).getText();

    org.junit.jupiter.api.Assertions.assertTrue(
        message.toLowerCase().contains("signed out")
    );
}
#19. Test Class ฉบับสมบูรณ์
ตัวอย่างที่เหมาะสำหรับใช้เป็น Workshop
package com.example;

import org.junit.jupiter.api.AfterEach;
import org.junit.jupiter.api.BeforeEach;
import org.junit.jupiter.api.DisplayName;
import org.junit.jupiter.api.Test;

import org.openqa.selenium.By;
import org.openqa.selenium.WebDriver;
import org.openqa.selenium.chrome.ChromeDriver;
import org.openqa.selenium.chrome.ChromeOptions;

import org.openqa.selenium.support.ui.ExpectedConditions;
import org.openqa.selenium.support.ui.WebDriverWait;

import java.time.Duration;

import static org.junit.jupiter.api.Assertions.assertEquals;
import static org.junit.jupiter.api.Assertions.assertTrue;

class LoginTest {

    private WebDriver driver;
    private WebDriverWait wait;

    private static final String BASE_URL =
            "https://seleniumbase.io/simple/login";

    @BeforeEach
    void setUp() {

        ChromeOptions options = new ChromeOptions();

        if (Boolean.getBoolean("headless")) {
            options.addArguments("--headless=new");
            options.addArguments("--window-size=1920,1080");
        }

        driver = new ChromeDriver(options);

        wait = new WebDriverWait(
                driver,
                Duration.ofSeconds(10)
        );
    }

    @AfterEach
    void tearDown() {

        if (driver != null) {
            driver.quit();
        }
    }

    @Test
    @DisplayName("Login ด้วยข้อมูลที่ถูกต้อง")
    void shouldLoginSuccessfully() {

        driver.get(BASE_URL);

        wait.until(
            ExpectedConditions.visibilityOfElementLocated(
                By.id("username")
            )
        ).sendKeys("demo_user");

        driver.findElement(By.id("password"))
                .sendKeys("secret_pass");

        driver.findElement(By.id("log-in"))
                .click();

        String heading = wait.until(
            ExpectedConditions.visibilityOfElementLocated(
                By.tagName("h1")
            )
        ).getText();

        assertEquals("Welcome!", heading);

        assertTrue(
            driver.findElement(By.id("image1"))
                    .isDisplayed()
        );
    }

    @Test
    @DisplayName("Login แล้ว Logout ได้สำเร็จ")
    void shouldLoginAndLogoutSuccessfully() {

        driver.get(BASE_URL);

        wait.until(
            ExpectedConditions.visibilityOfElementLocated(
                By.id("username")
            )
        ).sendKeys("demo_user");

        driver.findElement(By.id("password"))
                .sendKeys("secret_pass");

        driver.findElement(By.id("log-in"))
                .click();

        wait.until(
            ExpectedConditions.textToBe(
                By.tagName("h1"),
                "Welcome!"
            )
        );

        wait.until(
            ExpectedConditions.elementToBeClickable(
                By.linkText("Sign out")
            )
        ).click();

        String message = wait.until(
            ExpectedConditions.visibilityOfElementLocated(
                By.id("top_message")
            )
        ).getText();

        assertTrue(
            message.toLowerCase().contains("signed out")
        );
    }
}
#20. รันแบบ Headless
การรันแบบ Headless เหมาะกับ
- CI/CD
- GitHub Actions
- Jenkins
- GitLab CI
- Docker
- Server ที่ไม่มี Desktop GUI
จากโค้ดตัวอย่าง เราเปิด Headless ผ่าน System Property
mvn -Dheadless=true test
ใน Java ตรวจสอบด้วย
if (Boolean.getBoolean("headless")) {
    options.addArguments("--headless=new");
}
เมื่อรันแบบปกติ
mvn test
Browser จะเปิดให้เห็น
เมื่อรัน
mvn -Dheadless=true test
Browser จะทำงานเบื้องหลัง
#21. แนะนำให้หลีกเลี่ยง Thread.sleep()
ตัวอย่างที่ไม่ควรใช้เป็นแนวทางหลัก
Thread.sleep(5000);
ปัญหาคือ
ถ้าเว็บโหลด 1 วินาที
Test ก็ยังต้องรอ 5 วินาที

ถ้าเว็บโหลดเกิน 5 วินาที
Test อาจ Fail
ควรใช้
WebDriverWait
ร่วมกับ
ExpectedConditions
เช่น
wait.until(
    ExpectedConditions.elementToBeClickable(
        By.id("log-in")
    )
);
#22. Locator ที่นิยมใช้
Selenium รองรับ Locator หลายแบบ
#ID
By.id("username")
#Name
By.name("username")
#CSS Selector
By.cssSelector("#username")
#XPath
By.xpath("//input[@id='username']")
#Link Text
By.linkText("Sign out")
#Tag Name
By.tagName("h1")
โดยทั่วไป หาก Element มี id ที่ชัดเจน ควรใช้
By.id(...)
เพราะอ่านง่ายและดูแลรักษาง่าย
#23. CSS Selector กับ Selenium
ตัวอย่าง
driver.findElement(
    By.cssSelector("#username")
);
เทียบเท่า
driver.findElement(
    By.id("username")
);
ตัวอย่าง Selector อื่น
#username
#password
#log-in
img#image1
#24. Page Object Model
เมื่อจำนวน Test เพิ่มขึ้น ไม่ควรใส่ Locator และ Action ทั้งหมดไว้ใน Test Class
สามารถใช้ Page Object Model (POM)
โครงสร้าง
src/test/java/
└── com/example/
    ├── pages/
    │   └── LoginPage.java
    └── tests/
        └── LoginTest.java
#25. สร้าง LoginPage
สร้าง
src/test/java/com/example/pages/LoginPage.java
package com.example.pages;

import org.openqa.selenium.By;
import org.openqa.selenium.WebDriver;

public class LoginPage {

    private final WebDriver driver;

    private final By username =
            By.id("username");

    private final By password =
            By.id("password");

    private final By loginButton =
            By.id("log-in");

    public LoginPage(WebDriver driver) {
        this.driver = driver;
    }

    public LoginPage open() {

        driver.get(
            "https://seleniumbase.io/simple/login"
        );

        return this;
    }

    public LoginPage enterUsername(String value) {

        driver.findElement(username)
                .sendKeys(value);

        return this;
    }

    public LoginPage enterPassword(String value) {

        driver.findElement(password)
                .sendKeys(value);

        return this;
    }

    public void clickLogin() {

        driver.findElement(loginButton)
                .click();
    }

    public void login(
            String username,
            String password
    ) {

        enterUsername(username);
        enterPassword(password);
        clickLogin();
    }
}
#26. Test ด้วย Page Object
package com.example.tests;

import com.example.pages.LoginPage;

import org.junit.jupiter.api.AfterEach;
import org.junit.jupiter.api.BeforeEach;
import org.junit.jupiter.api.Test;

import org.openqa.selenium.By;
import org.openqa.selenium.WebDriver;
import org.openqa.selenium.chrome.ChromeDriver;

import static org.junit.jupiter.api.Assertions.assertEquals;

class LoginTest {

    private WebDriver driver;

    @BeforeEach
    void setUp() {
        driver = new ChromeDriver();
    }

    @AfterEach
    void tearDown() {

        if (driver != null) {
            driver.quit();
        }
    }

    @Test
    void shouldLoginSuccessfully() {

        LoginPage loginPage =
                new LoginPage(driver);

        loginPage
                .open()
                .enterUsername("demo_user")
                .enterPassword("secret_pass")
                .clickLogin();

        String heading =
                driver.findElement(
                        By.tagName("h1")
                ).getText();

        assertEquals(
                "Welcome!",
                heading
        );
    }
}
ข้อดีของ Page Object Model คือ
Test Code
    |
    v
Page Object
    |
    v
Selenium
    |
    v
Browser
เมื่อหน้าเว็บเปลี่ยน Locator เราสามารถแก้ที่ Page Object เป็นหลัก โดยไม่ต้องแก้ Test ทุกไฟล์
#27. โครงสร้าง Project ที่แนะนำ
selenium-java-junit/
├── pom.xml
└── src/
    └── test/
        └── java/
            └── com/
                └── example/
                    ├── pages/
                    │   └── LoginPage.java
                    └── tests/
                        └── LoginTest.java
เมื่อระบบมีหลายหน้า สามารถเพิ่ม
pages/
├── LoginPage.java
├── DashboardPage.java
├── ProfilePage.java
└── ProductPage.java
และ
tests/
├── LoginTest.java
├── ProfileTest.java
└── ProductTest.java
#28. รายงานผลการทดสอบ
หลังรัน
mvn test
Maven Surefire จะเก็บผลไว้ที่
target/surefire-reports/
ตรวจสอบ
ls target/surefire-reports
Windows
Get-ChildItem target/surefire-reports
โดยทั่วไปจะพบไฟล์ประเภท
TEST-com.example.LoginTest.xml
com.example.LoginTest.txt
#29. Lifecycle ของ JUnit Test
เมื่อมี Test Method หลายตัว
@Test
void testA() {}

@Test
void testB() {}
JUnit จะทำงานโดยประมาณดังนี้
@BeforeEach
   ↓
testA
   ↓
@AfterEach

@BeforeEach
   ↓
testB
   ↓
@AfterEach
ดังนั้นแต่ละ Test สามารถเปิด Browser Session ใหม่เพื่อเพิ่มความเป็นอิสระระหว่าง Test ได้
#30. อย่าลืม driver.quit()
ควรมี
@AfterEach
void tearDown() {

    if (driver != null) {
        driver.quit();
    }
}
ถ้าไม่ปิด Driver อาจเกิด
- Chrome Process ค้าง
- ใช้ Memory เพิ่มขึ้น
- CI Runner มี Process สะสม
- Test รอบถัดไปมีปัญหา
#31. ปัญหาที่พบบ่อย
#mvn: command not found
แสดงว่า Maven ยังไม่ได้ติดตั้ง หรือ PATH ยังไม่ถูกต้อง
ตรวจสอบ
mvn -version
#java: command not found
ตรวจสอบ
java -version
และค่า
JAVA_HOME
#Browser เปิดไม่ได้
ตรวจสอบว่า Chrome ถูกติดตั้ง
และทดลองสร้าง Driver แบบง่าย
WebDriver driver =
        new ChromeDriver();

driver.get(
    "https://example.com"
);

driver.quit();
#TimeoutException
มักเกิดจาก Element ยังไม่พร้อม
ควรใช้
WebDriverWait
แทนการค้นหา Element ทันที
#NoSuchElementException
ตรวจสอบ Locator
ตัวอย่าง
By.id("username")
ว่า Element ในหน้าเว็บยังใช้ ID เดิมหรือไม่
#32. Workflow ของ Selenium + Java + JUnit
ภาพรวม
Developer / Tester
       |
       v
Java Test Code
       |
       v
JUnit Jupiter
       |
       v
Selenium WebDriver
       |
       v
Selenium Manager
       |
       v
ChromeDriver
       |
       v
Google Chrome
       |
       v
Web Application
#33. Workflow เมื่อรันด้วย Maven
mvn test
   |
   v
Maven Surefire
   |
   v
JUnit Platform
   |
   v
LoginTest
   |
   v
@BeforeEach
   |
   v
ChromeDriver
   |
   v
Selenium Test Steps
   |
   v
Assertions
   |
   v
@AfterEach
   |
   v
Test Report
#34. คำสั่งที่ใช้บ่อย
ติดตั้ง Dependency และรัน Test
mvn test
Clean แล้วรัน Test
mvn clean test
รัน Test Class เดียว
mvn -Dtest=LoginTest test
รันแบบ Headless
mvn -Dheadless=true test
ดู Dependency
mvn dependency:tree
ลบ Build Output
mvn clean
#35. แนวทางพัฒนาต่อ
หลังจากเข้าใจตัวอย่างนี้แล้ว สามารถต่อยอดไปยัง
Selenium
   |
   +-- Page Object Model
   |
   +-- Data-Driven Testing
   |
   +-- Parameterized Tests
   |
   +-- Screenshots on Failure
   |
   +-- Parallel Testing
   |
   +-- Selenium Grid
   |
   +-- Docker
   |
   +-- GitHub Actions
   |
   +-- Jenkins
   |
   +-- Allure Report
#36. สรุป
การสร้าง Web UI Test ด้วย Java สามารถเริ่มได้ด้วย Stack ที่เรียบง่าย
Java
+
Selenium WebDriver
+
JUnit Jupiter
+
Maven
Selenium ทำหน้าที่ควบคุม Browser
Open
Click
Type
Read
Wait
JUnit ทำหน้าที่จัดการ Test Lifecycle และ Assertion
@BeforeEach
@Test
@AfterEach
assertEquals
assertTrue
Maven ทำหน้าที่จัดการ Dependency และรัน Test
mvn test
และ Selenium Manager ช่วยลดขั้นตอนการจัดการ Browser Driver ทำให้การเริ่มต้น Selenium Java ในปัจจุบันไม่จำเป็นต้องดาวน์โหลด chromedriver และกำหนด Path ด้วยตนเองในกรณีทั่วไป
ตัวอย่างนี้จึงเป็นจุดเริ่มต้นที่ดีสำหรับการพัฒนา Automated UI Testing ก่อนต่อยอดไปสู่ Page Object Model, CI/CD, Selenium Grid และการทดสอบระดับ Production
#Source Code ฉบับย่อ
package com.example;

import org.junit.jupiter.api.AfterEach;
import org.junit.jupiter.api.BeforeEach;
import org.junit.jupiter.api.Test;

import org.openqa.selenium.By;
import org.openqa.selenium.WebDriver;
import org.openqa.selenium.chrome.ChromeDriver;

import static org.junit.jupiter.api.Assertions.assertEquals;

class LoginTest {

    WebDriver driver;

    @BeforeEach
    void setUp() {
        driver = new ChromeDriver();
    }

    @AfterEach
    void tearDown() {
        if (driver != null) {
            driver.quit();
        }
    }

    @Test
    void loginTest() {

        driver.get(
            "https://seleniumbase.io/simple/login"
        );

        driver.findElement(
            By.id("username")
        ).sendKeys("demo_user");

        driver.findElement(
            By.id("password")
        ).sendKeys("secret_pass");

        driver.findElement(
            By.id("log-in")
        ).click();

        assertEquals(
            "Welcome!",
            driver.findElement(
                By.tagName("h1")
            ).getText()
        );
    }
}
รันด้วย
mvn test
#อ้างอิง
- Selenium Documentation: https://www.selenium.dev/documentation/
- Selenium Manager: https://www.selenium.dev/documentation/selenium_manager/
- Selenium Java on Maven Central: https://central.sonatype.com/artifact/org.seleniumhq.selenium/selenium-java
- JUnit Documentation: https://docs.junit.org/
- JUnit Jupiter on Maven Central: https://central.sonatype.com/artifact/org.junit.jupiter/junit-jupiter
- Maven Surefire Plugin: https://maven.apache.org/surefire/maven-surefire-plugin/
- SeleniumBase Simple Login: https://seleniumbase.io/simple/login
- SeleniumBase Demo Credentials: https://seleniumbase.io/simple/signup