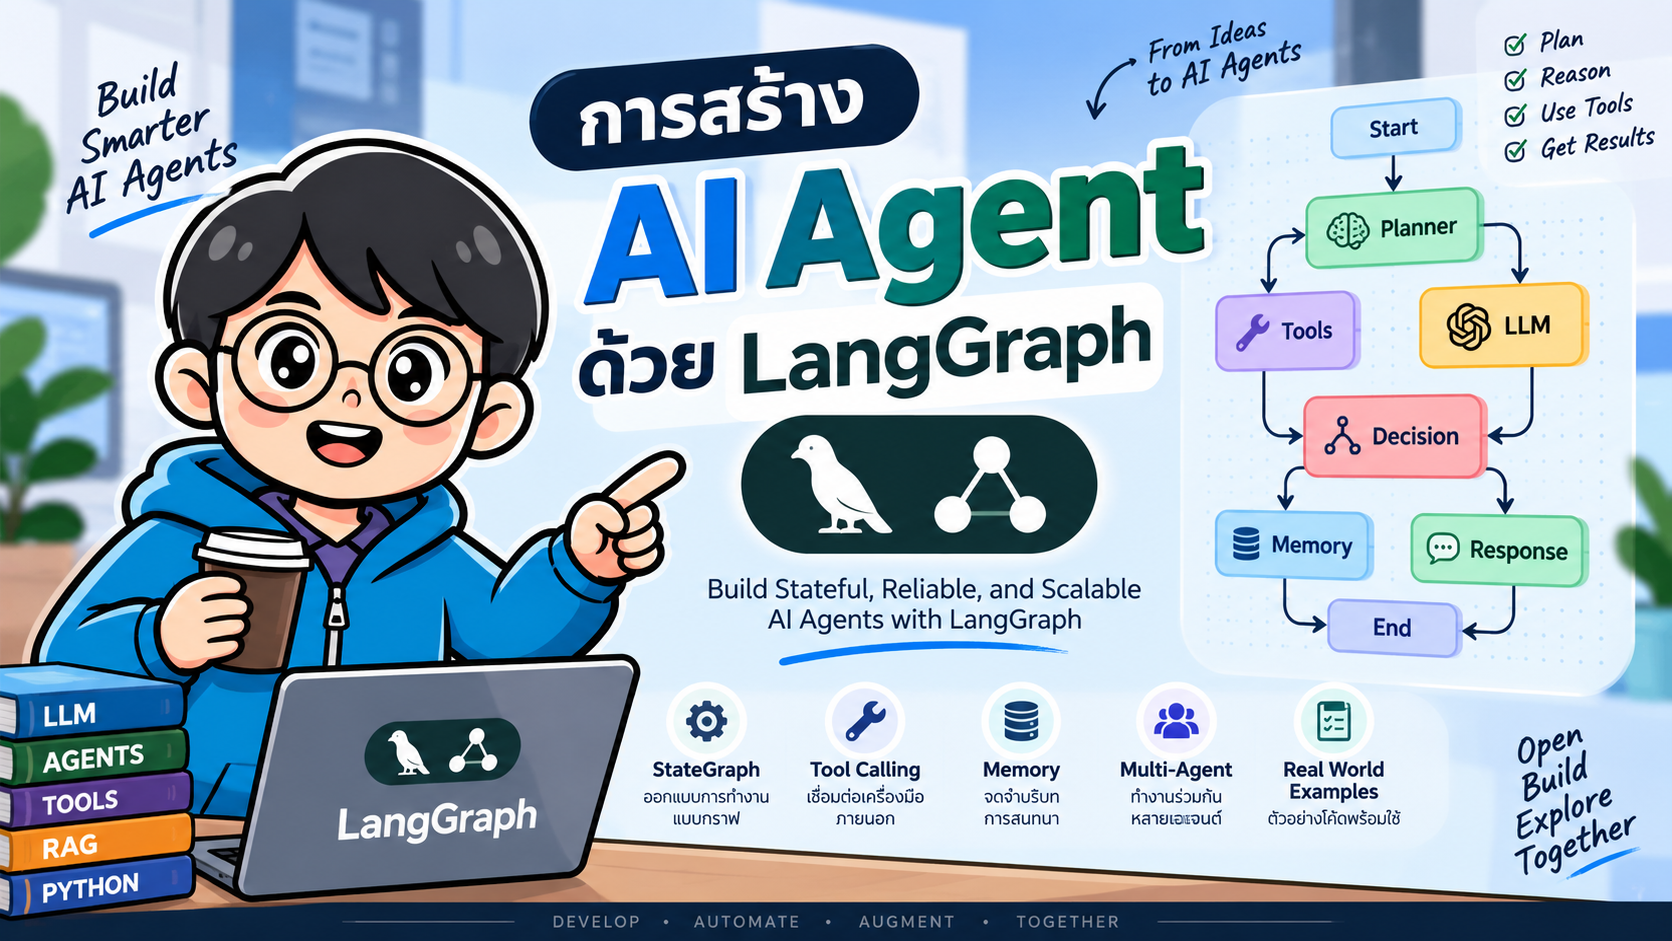
- การสร้าง AI Agent ด้วย LangGraph
- 2. สถาปัตยกรรมของ Agent
- 3. เตรียม Environment
- 4. สร้าง Tools
- 5. สร้าง Chat Model และ Bind Tools
- 6. สร้าง State
- 7. สร้าง LLM Node
- 8. สร้าง Tool Node
- 9. สร้าง Conditional Routing
- 10. สร้าง StateGraph
- 11. Code ฉบับสมบูรณ์
- 12. Agent ทำงานอย่างไรเมื่อ Run จริง
- 13. Visualize Graph
- 14. เพิ่ม Memory ด้วย Checkpointer
- 15. Human-in-the-loop
- 16. จาก Single Agent ไป Multi-Agent
- 17. แนวทางจัดโครงสร้าง Project
- 18. การทดสอบ Agent
- 19. LangGraph เหมาะกับงานแบบไหน
- 20. เมื่อไรไม่จำเป็นต้องใช้ LangGraph
- 21. Best Practices
- 22. LangGraph กับ LangChain Agent
- 23. สรุป
- References
#การสร้าง AI Agent ด้วย LangGraph
LangGraph เป็น framework ใน ecosystem ของ LangChain สำหรับสร้าง stateful AI agents และ agentic workflows ที่มีขั้นตอนการทำงานซับซ้อนกว่าการเรียก Large Language Model (LLM) เพียงครั้งเดียว
แนวคิดสำคัญของ LangGraph คือการมองระบบ Agent เป็น กราฟ (Graph) ซึ่งประกอบด้วย
- State — ข้อมูลหรือบริบทที่ไหลอยู่ในระบบ
- Node — ขั้นตอนการประมวลผล เช่น เรียก LLM หรือเรียก Tool
- Edge — เส้นทางเชื่อมระหว่าง Node
- Conditional Edge — เส้นทางที่เลือกตามเงื่อนไข
- Cycle — การวนกลับไปทำงานซ้ำ เช่น LLM → Tool → LLM
- Checkpoint / Persistence — การบันทึกสถานะเพื่อให้ Agent ทำงานต่อจากจุดเดิม
- Human-in-the-loop — แทรกมนุษย์เข้ามาตรวจสอบหรืออนุมัติบางขั้นตอนได้
LangGraph จึงเหมาะกับงานที่ต้องการควบคุม workflow ของ Agent อย่างชัดเจน เช่น
- AI Assistant ที่เรียก API หรือฐานข้อมูล
- Research Agent
- Coding Agent
- RAG Agent
- Customer Support Agent
- Workflow Automation
- Multi-Agent System
- Agent ที่ต้องมี Memory
- Agent ที่ต้องขออนุมัติจากมนุษย์ก่อนทำบาง Action
#1. LangGraph ต่างจากการเรียก LLM ปกติอย่างไร
การเรียก LLM แบบปกติอาจมีโครงสร้างประมาณนี้
User
  |
  v
LLM
  |
  v
Answer
แต่ Agent ต้องสามารถคิดว่าจะทำอะไรต่อ เช่น
User
  |
  v
LLM
  |
  +------ ไม่ต้องใช้ Tool ------> Answer
  |
  +------ ต้องใช้ Tool
             |
             v
            Tool
             |
             v
            LLM
             |
             +---- อาจเรียก Tool เพิ่ม
             |
             +---- Answer
LangGraph ช่วยให้เราเขียน workflow ลักษณะนี้ออกมาเป็น Graph โดยตรง
flowchart LR
    START --> LLM
    LLM -->|tool_calls| TOOL
    TOOL --> LLM
    LLM -->|no tool call| END
จุดเด่นสำคัญคือ เราควบคุมวงจรการทำงานของ Agent ได้อย่าง explicit
#2. สถาปัตยกรรมของ Agent
ตัวอย่างในบทความนี้จะสร้าง Agent ที่สามารถเลือกใช้เครื่องมือคำนวณได้ 3 ตัว
add(a, b)
multiply(a, b)
divide(a, b)
Workflow:
flowchart TD
    S([START])
    L[LLM Node]
    T[Tool Node]
    E([END])

    S --> L
    L -->|มี tool_calls| T
    T --> L
    L -->|ไม่มี tool_calls| E
หลักการคือ
- รับคำถามจากผู้ใช้
- ส่งข้อความเข้า LLM
- LLM วิเคราะห์ว่าต้องใช้ Tool หรือไม่
- ถ้าต้องใช้ Tool ให้ไปที่
tool_node - นำผลลัพธ์จาก Tool กลับไปให้ LLM
- LLM อาจเรียก Tool เพิ่ม หรือสร้างคำตอบสุดท้าย
- เมื่อไม่มี
tool_callsแล้ว Graph จบการทำงาน
#3. เตรียม Environment
บทความนี้ใช้ Python
แนะนำ Python 3.11 ขึ้นไป
สร้าง project
mkdir langgraph-agent
cd langgraph-agent
สร้าง virtual environment ด้วย uv
uv venv
ติดตั้ง package
uv add langgraph langchain langchain-anthropic python-dotenv
หรือใช้ pip
pip install -U langgraph langchain langchain-anthropic python-dotenv
สร้างไฟล์ .env
ANTHROPIC_API_KEY=your_api_key
ไม่ควร hard-code API Key ลงใน source code หรือ commit ไฟล์
.envขึ้น Git
#4. สร้าง Tools
สร้างไฟล์ main.py
from langchain.tools import tool


@tool
def add(a: int, b: int) -> int:
    """Add two integers."""
    return a + b


@tool
def multiply(a: int, b: int) -> int:
    """Multiply two integers."""
    return a * b


@tool
def divide(a: int, b: int) -> float:
    """Divide a by b."""
    if b == 0:
        raise ValueError("Cannot divide by zero")
    return a / b
Decorator
@tool
ทำให้ Python function สามารถถูก expose เป็น Tool ให้ LLM เรียกใช้งานได้
คำอธิบายใน docstring มีความสำคัญ เพราะโมเดลจะใช้ข้อมูลนี้เพื่อพิจารณาว่า Tool ทำหน้าที่อะไร
#5. สร้าง Chat Model และ Bind Tools
เพิ่ม code
from langchain.chat_models import init_chat_model


model = init_chat_model(
    "claude-sonnet-4-6",
    temperature=0,
)

tools = [add, multiply, divide]

tools_by_name = {
    tool.name: tool
    for tool in tools
}

model_with_tools = model.bind_tools(tools)
คำสั่ง
model.bind_tools(tools)
ทำให้ LLM ทราบว่ามี Tool อะไรให้เลือกใช้
ตัว LLM จะไม่ได้ execute function โดยตรง แต่จะส่ง tool_calls ออกมา เช่น
{
  "name": "multiply",
  "args": {
    "a": 25,
    "b": 4
  }
}
จากนั้น Graph ของเราจะเป็นผู้รับคำสั่งดังกล่าวไป execute จริง
#6. สร้าง State
หัวใจของ LangGraph คือ State
import operator

from langchain.messages import AnyMessage
from typing_extensions import Annotated, TypedDict


class AgentState(TypedDict):
    messages: Annotated[list[AnyMessage], operator.add]
    llm_calls: int
messages ใช้เก็บ conversation เช่น
HumanMessage
AIMessage
ToolMessage
AIMessage
ส่วน
Annotated[list[AnyMessage], operator.add]
กำหนด reducer ให้ LangGraph append ข้อความใหม่ต่อจากของเดิม แทนการเขียนทับ list ทั้งหมด
#7. สร้าง LLM Node
Node แรกทำหน้าที่เรียกโมเดล
from langchain.messages import SystemMessage


def llm_call(state: AgentState):
    response = model_with_tools.invoke(
        [
            SystemMessage(
                content=(
                    "You are a helpful AI assistant. "
                    "Use tools when calculation is required."
                )
            )
        ]
        + state["messages"]
    )

    return {
        "messages": [response],
        "llm_calls": state.get("llm_calls", 0) + 1,
    }
Node รับ
state
แล้วคืนค่าบางส่วนของ State ที่ต้องการ update
#8. สร้าง Tool Node
เมื่อ LLM ต้องการเรียก Tool เราจะอ่าน tool_calls
from langchain.messages import ToolMessage


def tool_node(state: AgentState):
    results = []

    last_message = state["messages"][-1]

    for tool_call in last_message.tool_calls:
        tool = tools_by_name[tool_call["name"]]

        observation = tool.invoke(
            tool_call["args"]
        )

        results.append(
            ToolMessage(
                content=str(observation),
                tool_call_id=tool_call["id"],
            )
        )

    return {
        "messages": results
    }
Workflow ณ จุดนี้จะเป็น
LLM
 |
 | tool_calls
 v
Tool Node
 |
 | ToolMessage
 v
LLM
#9. สร้าง Conditional Routing
Agent ต้องรู้ว่าเมื่อไรควรไป Tool และเมื่อไรควรจบ
from typing import Literal
from langgraph.graph import END


def should_continue(
    state: AgentState,
) -> Literal["tool_node", END]:

    last_message = state["messages"][-1]

    if last_message.tool_calls:
        return "tool_node"

    return END
ถ้า LLM ส่ง tool_calls
LLM → Tool
แต่ถ้าไม่มี
LLM → END
นี่คือส่วนที่ทำให้ workflow กลายเป็น Agent Loop
#10. สร้าง StateGraph
Import LangGraph
from langgraph.graph import StateGraph, START, END
สร้าง Graph
builder = StateGraph(AgentState)
เพิ่ม Node
builder.add_node(
    "llm_call",
    llm_call,
)

builder.add_node(
    "tool_node",
    tool_node,
)
กำหนดจุดเริ่มต้น
builder.add_edge(
    START,
    "llm_call",
)
เพิ่ม Conditional Edge
builder.add_conditional_edges(
    "llm_call",
    should_continue,
    ["tool_node", END],
)
หลัง Tool ทำงานเสร็จ ให้วนกลับไปหา LLM
builder.add_edge(
    "tool_node",
    "llm_call",
)
Compile
agent = builder.compile()
กราฟสมบูรณ์จึงเป็น
START
  |
  v
LLM
  |
  +------ ไม่มี Tool ------> END
  |
  +------ มี Tool
             |
             v
            TOOL
             |
             +-------------> LLM
#11. Code ฉบับสมบูรณ์
import operator
from typing import Literal

from dotenv import load_dotenv
from langchain.chat_models import init_chat_model
from langchain.messages import (
    AnyMessage,
    HumanMessage,
    SystemMessage,
    ToolMessage,
)
from langchain.tools import tool
from langgraph.graph import END, START, StateGraph
from typing_extensions import Annotated, TypedDict


load_dotenv()


# -------------------------
# Tools
# -------------------------

@tool
def add(a: int, b: int) -> int:
    """Add two integers."""
    return a + b


@tool
def multiply(a: int, b: int) -> int:
    """Multiply two integers."""
    return a * b


@tool
def divide(a: int, b: int) -> float:
    """Divide a by b."""
    if b == 0:
        raise ValueError("Cannot divide by zero")

    return a / b


tools = [
    add,
    multiply,
    divide,
]

tools_by_name = {
    tool.name: tool
    for tool in tools
}


# -------------------------
# Model
# -------------------------

model = init_chat_model(
    "claude-sonnet-4-6",
    temperature=0,
)

model_with_tools = model.bind_tools(tools)


# -------------------------
# State
# -------------------------

class AgentState(TypedDict):
    messages: Annotated[
        list[AnyMessage],
        operator.add,
    ]
    llm_calls: int


# -------------------------
# LLM Node
# -------------------------

def llm_call(state: AgentState):
    response = model_with_tools.invoke(
        [
            SystemMessage(
                content=(
                    "You are a helpful AI assistant. "
                    "Use tools when arithmetic is required."
                )
            )
        ]
        + state["messages"]
    )

    return {
        "messages": [response],
        "llm_calls": state.get(
            "llm_calls",
            0,
        ) + 1,
    }


# -------------------------
# Tool Node
# -------------------------

def tool_node(state: AgentState):
    results = []

    last_message = state["messages"][-1]

    for tool_call in last_message.tool_calls:
        tool = tools_by_name[
            tool_call["name"]
        ]

        observation = tool.invoke(
            tool_call["args"]
        )

        results.append(
            ToolMessage(
                content=str(observation),
                tool_call_id=tool_call["id"],
            )
        )

    return {
        "messages": results
    }


# -------------------------
# Router
# -------------------------

def should_continue(
    state: AgentState,
) -> Literal["tool_node", END]:

    last_message = state["messages"][-1]

    if last_message.tool_calls:
        return "tool_node"

    return END


# -------------------------
# Build Graph
# -------------------------

builder = StateGraph(AgentState)

builder.add_node(
    "llm_call",
    llm_call,
)

builder.add_node(
    "tool_node",
    tool_node,
)

builder.add_edge(
    START,
    "llm_call",
)

builder.add_conditional_edges(
    "llm_call",
    should_continue,
    ["tool_node", END],
)

builder.add_edge(
    "tool_node",
    "llm_call",
)

agent = builder.compile()


# -------------------------
# Run
# -------------------------

result = agent.invoke(
    {
        "messages": [
            HumanMessage(
                content=(
                    "คำนวณ 25 คูณ 8 "
                    "แล้วนำผลลัพธ์หารด้วย 4"
                )
            )
        ],
        "llm_calls": 0,
    }
)

print(
    result["messages"][-1].content
)

print(
    "LLM calls:",
    result["llm_calls"],
)
รันโปรแกรม
uv run python main.py
หรือ
python main.py
#12. Agent ทำงานอย่างไรเมื่อ Run จริง
สมมติผู้ใช้ถาม
คำนวณ 25 คูณ 8 แล้วนำผลลัพธ์หารด้วย 4
Agent อาจทำงานดังนี้
Human
  |
  v
LLM
  |
  | multiply(25, 8)
  v
Tool
  |
  | 200
  v
LLM
  |
  | divide(200, 4)
  v
Tool
  |
  | 50
  v
LLM
  |
  v
"คำตอบคือ 50"
สังเกตว่าเราไม่ได้เขียนว่า
multiply(...)
divide(...)
ตามลำดับแบบ hard-code
แต่ LLM เป็นผู้เลือกเองว่าจะใช้ Tool ใด
นี่คือความแตกต่างสำคัญระหว่าง Workflow ธรรมดา กับ AI Agent
#13. Visualize Graph
LangGraph สามารถสร้างภาพของ Graph ได้
from IPython.display import Image, display


display(
    Image(
        agent
        .get_graph(xray=True)
        .draw_mermaid_png()
    )
)
เหมาะสำหรับใช้ตรวจสอบว่า workflow เชื่อมต่อกันถูกต้องหรือไม่
#14. เพิ่ม Memory ด้วย Checkpointer
Agent ในตัวอย่างก่อนหน้ายังไม่ได้เก็บ state ข้ามการ invoke
สามารถเพิ่ม checkpointer ได้ เช่น In-Memory Checkpointer สำหรับ development
from langgraph.checkpoint.memory import InMemorySaver


checkpointer = InMemorySaver()

agent = builder.compile(
    checkpointer=checkpointer
)
จากนั้นกำหนด thread_id
config = {
    "configurable": {
        "thread_id": "user-001"
    }
}
เรียกครั้งแรก
agent.invoke(
    {
        "messages": [
            HumanMessage(
                content="ฉันมีเงิน 100 บาท"
            )
        ],
        "llm_calls": 0,
    },
    config=config,
)
เรียกครั้งถัดไปด้วย thread_id เดิม
result = agent.invoke(
    {
        "messages": [
            HumanMessage(
                content="เพิ่มอีก 50 บาท รวมเป็นเท่าไร"
            )
        ],
        "llm_calls": 0,
    },
    config=config,
)
แนวคิด thread_id มีประโยชน์กับ
- Chatbot
- Personal Assistant
- Customer Support
- Long-running Workflow
- Human approval flow
สำหรับ production ควรเลือก persistent checkpointer ที่เหมาะสมกับระบบ เช่น database-backed checkpoint storage แทนการเก็บเฉพาะใน process memory
#15. Human-in-the-loop
หนึ่งในจุดเด่นของ LangGraph คือ workflow สามารถหยุดรอมนุษย์ได้
ตัวอย่างงานที่เหมาะสม
AI สร้างคำสั่งโอนเงิน
        |
        v
Human Approval
        |
     Approve?
      /    \
    Yes     No
    |        |
 Execute   Cancel
แนวทางนี้สำคัญเมื่อ Agent มีสิทธิ์ทำ Action ที่มีผลจริง เช่น
- ส่ง Email
- Deploy Production
- ลบข้อมูล
- อนุมัติเอกสาร
- สร้าง Purchase Order
- เรียก Payment API
หลักการออกแบบที่ดีคือ
ให้ AI มี autonomy เฉพาะส่วนที่มีความเสี่ยงต่ำ และใส่ approval gate ก่อน action ที่มีผลกระทบสูง
#16. จาก Single Agent ไป Multi-Agent
เมื่อระบบซับซ้อนขึ้น เราสามารถสร้างหลาย Agent และเชื่อมเป็น Graph
ตัวอย่าง
flowchart TD
    U[User]
    S[Supervisor]
    R[Research Agent]
    C[Coding Agent]
    D[Database Agent]
    A[Answer Agent]

    U --> S
    S --> R
    S --> C
    S --> D

    R --> A
    C --> A
    D --> A

    A --> U
แต่ละ Agent มีหน้าที่เฉพาะ
| Agent | หน้าที่ |
|---|---|
| Supervisor | วิเคราะห์คำขอและ routing |
| Research Agent | ค้นหาและสรุปข้อมูล |
| Coding Agent | วิเคราะห์หรือสร้าง code |
| Database Agent | Query ข้อมูล |
| Answer Agent | รวมผลและสร้างคำตอบ |
LangGraph เหมาะกับ architecture ลักษณะนี้เพราะสามารถกำหนด
- state ร่วม
- routing
- loop
- parallel branches
- retry
- checkpoint
- human approval
ได้ในระดับ Graph
#17. แนวทางจัดโครงสร้าง Project
เมื่อ project เริ่มใหญ่ ไม่ควรรวมทุกอย่างไว้ใน main.py
โครงสร้างตัวอย่าง
langgraph-agent/
│
├── .env
├── pyproject.toml
│
├── app/
│   ├── __init__.py
│   │
│   ├── graph.py
│   ├── state.py
│   ├── models.py
│   │
│   ├── nodes/
│   │   ├── __init__.py
│   │   ├── llm_node.py
│   │   └── tool_node.py
│   │
│   └── tools/
│       ├── __init__.py
│       ├── calculator.py
│       ├── database.py
│       └── search.py
│
└── tests/
    ├── test_tools.py
    └── test_graph.py
แบ่ง responsibility ออกจากกันชัดเจน จะช่วยให้
- test ง่าย
- เปลี่ยน model ง่าย
- เพิ่ม tool ง่าย
- เพิ่ม node ง่าย
- ดูแล routing ง่าย
- รองรับ Multi-Agent ในอนาคต
#18. การทดสอบ Agent
Agent ไม่ควรทดสอบเฉพาะ final answer
ควรแยกทดสอบอย่างน้อย 4 ระดับ
#18.1 Tool Test
def test_add():
    assert add.invoke(
        {
            "a": 2,
            "b": 3,
        }
    ) == 5
#18.2 Node Test
ทดสอบว่าแต่ละ Node update state ถูกต้อง
#18.3 Routing Test
ตรวจสอบว่า
มี tool_calls
ต้อง route ไป Tool
และ
ไม่มี tool_calls
ต้องไป END
#18.4 End-to-End Agent Test
ทดสอบ workflow จริงตั้งแต่
User Input
   ↓
LLM
   ↓
Tool
   ↓
LLM
   ↓
Final Answer
สำหรับ production ควรเก็บ trace และวัด metric เช่น
- Task Success Rate
- Tool Selection Accuracy
- Tool Execution Error Rate
- Number of LLM Calls
- Latency
- Token Usage
- Cost
- Hallucination Rate
#19. LangGraph เหมาะกับงานแบบไหน
LangGraph เหมาะมากเมื่อระบบมีคุณสมบัติต่อไปนี้
#ต้องมีหลายขั้นตอน
เช่น
วิเคราะห์ → ค้นข้อมูล → ตรวจสอบ → สรุป
#ต้องมี Loop
เช่น
LLM → Tool → LLM → Tool → LLM
#ต้องเก็บ State
เช่น Chatbot หรือ workflow ที่ใช้เวลานาน
#ต้องมี Routing
เช่น
Question
  |
  +--> SQL Agent
  |
  +--> RAG Agent
  |
  +--> Web Search Agent
#ต้องมี Human Approval
เช่น Agent ที่มีสิทธิ์ execute action สำคัญ
#ต้องสร้าง Multi-Agent System
เช่น Supervisor + Specialized Agents
#20. เมื่อไรไม่จำเป็นต้องใช้ LangGraph
ถ้าระบบเป็นเพียง
Prompt → LLM → Answer
การใช้ LangGraph อาจซับซ้อนเกินความจำเป็น
ในกรณีที่ workflow เป็น sequence ตายตัว เช่น
Step A
  ↓
Step B
  ↓
Step C
โดยไม่มี routing, state, tool loop หรือ decision making การใช้ function ธรรมดาหรือ workflow engine ที่ง่ายกว่าอาจเพียงพอ
#21. Best Practices
#1. ให้ Tool ทำงานเฉพาะเจาะจง
ไม่ควรสร้าง Tool ที่ทำทุกอย่าง
ไม่ดี
do_everything()
ดีกว่า
search_documents()
get_customer()
create_ticket()
calculate_total()
#2. Tool Description ต้องชัดเจน
LLM ใช้ชื่อ Tool, argument schema และ description ในการตัดสินใจเลือก Tool
#3. จำกัด Loop
ควรมีแนวทางป้องกัน Agent วนไม่จบ เช่น
- recursion limit
- maximum tool calls
- timeout
- retry policy
#4. Validate Tool Input
อย่าเชื่อ argument จาก LLM โดยอัตโนมัติ โดยเฉพาะ Tool ที่ทำ action จริง
#5. แยก Read Tool และ Write Tool
ตัวอย่าง
Read
- search_order
- get_customer
- query_database

Write
- update_order
- delete_customer
- send_payment
Write Tool ควรมี security control สูงกว่า
#6. เก็บ Trace
Agent system มี behavior แบบ dynamic จึงควร trace
Input
 ↓
Node
 ↓
Model
 ↓
Tool call
 ↓
Tool result
 ↓
Routing
 ↓
Output
การดูเฉพาะ final answer ทำให้ debug ยาก
#7. ใส่ Human Approval ใน High-Risk Action
โดยเฉพาะงาน
- Payment
- Deployment
- Delete
- External Communication
- Permission Change
#22. LangGraph กับ LangChain Agent
โดยภาพรวม
LangChain Agent
      |
      | ใช้งานง่ายกว่า
      | abstraction สูงกว่า
      v
Prebuilt Agent Architecture

LangGraph
      |
      | ควบคุม workflow มากกว่า
      | abstraction ต่ำกว่า
      v
Custom Agent Architecture
LangChain agents เองสามารถใช้ LangGraph เป็น execution foundation ได้
ดังนั้นไม่ได้หมายความว่าต้องเลือกอย่างใดอย่างหนึ่งเสมอไป
เลือกตามระดับ control ที่ต้องการ
#23. สรุป
LangGraph ทำให้การสร้าง Agent เปลี่ยนจากแนวคิด
Prompt → LLM → Answer
ไปเป็น
State
  ↓
Node
  ↓
Decision
  ↓
Tool
  ↓
State Update
  ↓
Loop / Route
  ↓
Final Answer
หัวใจสำคัญที่ควรรู้มี 5 เรื่อง
- State — ข้อมูลกลางของ Agent
- Node — ขั้นตอนประมวลผล
- Edge — เส้นทางการทำงาน
- Conditional Edge — การตัดสินใจและ Routing
- Cycle — ทำให้ LLM เรียก Tool และกลับมาคิดต่อได้
เมื่อเข้าใจ 5 แนวคิดนี้แล้ว สามารถต่อยอดจาก Single Agent ไปสู่
RAG Agent
    ↓
Tool-Using Agent
    ↓
Agent with Memory
    ↓
Human-in-the-loop Agent
    ↓
Multi-Agent System
ได้อย่างเป็นระบบ
#References
- LangGraph Documentation — https://docs.langchain.com/oss/python/langgraph/
- LangGraph Quickstart — https://docs.langchain.com/oss/python/langgraph/quickstart
- LangGraph GitHub — https://github.com/langchain-ai/langgraph
- LangChain Documentation — https://docs.langchain.com/