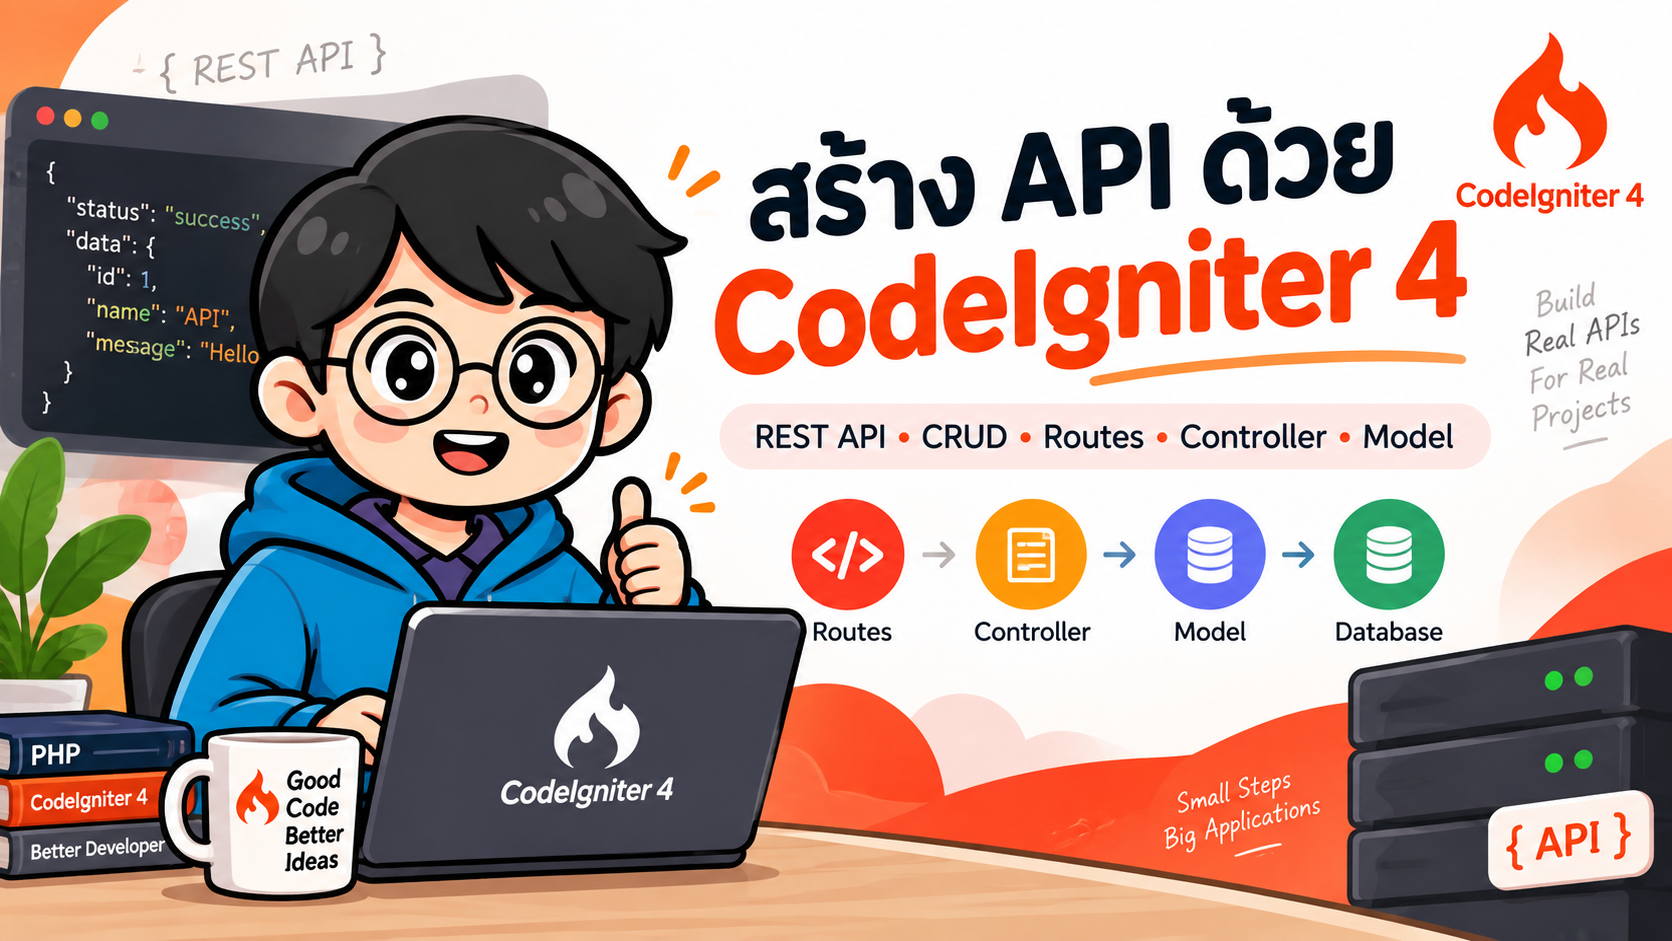
- สร้าง REST API ด้วย CodeIgniter 4 ตั้งแต่เริ่มต้นจนใช้งาน CRUD ได้จริง
- ส่วนที่ 1: สร้างฐานข้อมูลด้วย Migration
- ส่วนที่ 2: สร้าง Model
- ส่วนที่ 3: กำหนด REST API Routes
- ส่วนที่ 4: สร้าง ResourceController
- ส่วนที่ 5: Validation และการสร้างข้อมูล
- ส่วนที่ 6: Update API
- ส่วนที่ 7: DELETE API
- ส่วนที่ 8: Controller ฉบับเต็ม
- ส่วนที่ 9: ทดสอบ API แบบครบ CRUD
- ส่วนที่ 10: HTTP Status Code ที่ควรใช้
- ส่วนที่ 11: เพิ่ม Pagination
- ส่วนที่ 12: เพิ่ม Search
- ส่วนที่ 13: API Versioning
- ส่วนที่ 14: Authentication
- ส่วนที่ 15: CORS
- ส่วนที่ 16: CSRF และ API
- ส่วนที่ 17: รูปแบบ Response ที่สม่ำเสมอ
- ส่วนที่ 18: โครงสร้างโปรเจกต์ที่แนะนำ
- ส่วนที่ 19: Security Checklist
- ส่วนที่ 20: การ Deploy
- ส่วนที่ 21: สรุป
#สร้าง REST API ด้วย CodeIgniter 4 ตั้งแต่เริ่มต้นจนใช้งาน CRUD ได้จริง
CodeIgniter 4 เป็น PHP Framework ที่มีขนาดเล็ก เรียนรู้ไม่ยาก และมีเครื่องมือสำหรับสร้าง Web Application และ REST API มาให้ค่อนข้างครบ เช่น Routing, Model, Database Migration, Validation และ ResourceController
บทความนี้จะสร้าง REST API สำหรับจัดการข้อมูล สินค้า (Products) แบบ CRUD ได้แก่
GET /api/v1/products— อ่านสินค้าทั้งหมดGET /api/v1/products/{id}— อ่านสินค้าตาม IDPOST /api/v1/products— เพิ่มสินค้าPUT /api/v1/products/{id}— แก้ไขสินค้าPATCH /api/v1/products/{id}— แก้ไขข้อมูลบางส่วนDELETE /api/v1/products/{id}— ลบสินค้า
ตัวอย่างนี้เน้น JSON API และใช้แนวทางของ CodeIgniter 4 รุ่นปัจจุบัน เช่น ResourceController, resource() routing, validateData() และ getValidated() เพื่อให้โค้ดอ่านง่ายและปลอดภัยมากขึ้น
ณ วันที่เขียนบทความ CodeIgniter 4 รุ่นปัจจุบันอยู่ในสาย 4.7 และต้องการ PHP 8.1 ขึ้นไป ควรตรวจสอบ requirement ล่าสุดจากเอกสารทางการก่อนเริ่มโปรเจกต์จริง
#1. สิ่งที่ต้องเตรียม
เครื่องควรมีเครื่องมืออย่างน้อยดังนี้
PHP 8.1+
Composer
MySQL หรือ MariaDB
Git (แนะนำ)
Postman / Bruno / Insomnia หรือ cURL
ตรวจสอบ PHP
php -v
ตรวจสอบ Composer
composer --version
#2. สร้างโปรเจกต์ CodeIgniter 4
วิธีที่แนะนำคือสร้างโปรเจกต์ผ่าน Composer
composer create-project codeigniter4/appstarter ci4-api
เข้าไปยังโฟลเดอร์โปรเจกต์
cd ci4-api
โครงสร้างสำคัญจะมีลักษณะประมาณนี้
ci4-api/
├── app/
│   ├── Config/
│   ├── Controllers/
│   ├── Database/
│   │   └── Migrations/
│   ├── Models/
│   └── Views/
├── public/
├── tests/
├── writable/
├── env
├── spark
└── composer.json
ไฟล์ที่ใช้บ่อยในการสร้าง API คือ
| ตำแหน่ง | หน้าที่ |
|---|---|
app/Config/Routes.php |
กำหนด URL และ HTTP Method |
app/Controllers/ |
รับ Request และสร้าง Response |
app/Models/ |
ติดต่อฐานข้อมูล |
app/Database/Migrations/ |
จัดการโครงสร้างฐานข้อมูล |
.env |
Environment configuration |
spark |
CLI ของ CodeIgniter |
#3. ตั้งค่า Environment
CodeIgniter ให้ไฟล์ตัวอย่างชื่อ env
บน macOS/Linux สามารถใช้
cp env .env
บน Windows สามารถคัดลอกไฟล์ env แล้วเปลี่ยนชื่อเป็น .env
จากนั้นเปิด .env และตั้งค่า
CI_ENVIRONMENT = development

app.baseURL = 'http://localhost:8080/'
โหมด development เหมาะกับช่วงพัฒนา เพราะแสดงรายละเอียด Error ได้มากกว่า production
อย่าใช้
developmentบน Production Server เพราะอาจเปิดเผยข้อมูลภายในระบบ
#4. สร้างฐานข้อมูล
ตัวอย่างนี้ใช้ MySQL และฐานข้อมูลชื่อ ci4_api
CREATE DATABASE ci4_api
CHARACTER SET utf8mb4
COLLATE utf8mb4_unicode_ci;
แก้ไข .env
database.default.hostname = localhost
database.default.database = ci4_api
database.default.username = root
database.default.password =
database.default.DBDriver = MySQLi
database.default.DBPrefix =
database.default.port = 3306
ค่าจริงขึ้นอยู่กับ MySQL ของแต่ละเครื่อง
#5. ทดสอบการรัน CodeIgniter
CodeIgniter มี Development Server มาให้
php spark serve
โดยปกติจะเปิดที่
http://localhost:8080
หากเห็นหน้า Welcome ของ CodeIgniter แสดงว่าโปรเจกต์พร้อมใช้งานแล้ว
#ส่วนที่ 1: สร้างฐานข้อมูลด้วย Migration
#6. สร้าง Migration สำหรับ Products
สร้าง Migration
php spark make:migration CreateProductsTable
จะได้ไฟล์ใหม่ใน
app/Database/Migrations/
ตัวอย่างไฟล์ Migration
<?php

namespace App\Database\Migrations;

use CodeIgniter\Database\Migration;

class CreateProductsTable extends Migration
{
    public function up()
    {
        $this->forge->addField([
            'id' => [
                'type'           => 'INT',
                'constraint'     => 11,
                'unsigned'       => true,
                'auto_increment' => true,
            ],
            'name' => [
                'type'       => 'VARCHAR',
                'constraint' => 150,
            ],
            'description' => [
                'type' => 'TEXT',
                'null' => true,
            ],
            'price' => [
                'type'       => 'DECIMAL',
                'constraint' => '10,2',
                'default'    => 0,
            ],
            'stock' => [
                'type'       => 'INT',
                'constraint' => 11,
                'default'    => 0,
            ],
            'created_at' => [
                'type' => 'DATETIME',
                'null' => true,
            ],
            'updated_at' => [
                'type' => 'DATETIME',
                'null' => true,
            ],
        ]);

        $this->forge->addKey('id', true);
        $this->forge->createTable('products');
    }

    public function down()
    {
        $this->forge->dropTable('products');
    }
}
รัน Migration
php spark migrate
ตรวจสอบใน MySQL จะพบตาราง
products
#ส่วนที่ 2: สร้าง Model
#7. สร้าง ProductModel
สร้างไฟล์
app/Models/ProductModel.php
ใส่โค้ด
<?php

namespace App\Models;

use CodeIgniter\Model;

class ProductModel extends Model
{
    protected $table      = 'products';
    protected $primaryKey = 'id';

    protected $returnType = 'array';

    protected $allowedFields = [
        'name',
        'description',
        'price',
        'stock',
    ];

    protected $useTimestamps = true;
}
#ความหมายของค่าที่สำคัญ
$table
protected $table = 'products';
กำหนดชื่อตารางที่ Model จะใช้งาน
$primaryKey
protected $primaryKey = 'id';
กำหนด Primary Key
$allowedFields
protected $allowedFields = [
    'name',
    'description',
    'price',
    'stock',
];
ใช้ควบคุม field ที่อนุญาตให้ insert/update ผ่าน Model
จึงไม่ควรใส่ field ที่ client ไม่ควรแก้ไข เช่น
id
is_admin
role
created_by
โดยไม่จำเป็น
#ส่วนที่ 3: กำหนด REST API Routes
#8. สร้าง Resource Routes
เปิด
app/Config/Routes.php
เพิ่ม
$routes->group('api/v1', static function ($routes) {
    $routes->resource('products', [
        'controller'  => 'Api\ProductsController',
        'placeholder' => '(:num)',
        'except'      => ['new', 'edit'],
    ]);
});
resource() จะสร้าง RESTful routes ให้อัตโนมัติ
เมื่อใช้
$routes->resource('products');
แนวคิดหลักของ route จะเป็น
| Method | URL | Controller Method |
|---|---|---|
| GET | /products |
index() |
| GET | /products/{id} |
show($id) |
| POST | /products |
create() |
| PUT/PATCH | /products/{id} |
update($id) |
| DELETE | /products/{id} |
delete($id) |
ในตัวอย่างของเรา URL ถูกครอบด้วย
/api/v1
ดังนั้น API จริงคือ
GET    /api/v1/products
GET    /api/v1/products/1
POST   /api/v1/products
PUT    /api/v1/products/1
PATCH  /api/v1/products/1
DELETE /api/v1/products/1
ตรวจสอบ routes ทั้งหมดได้ด้วย
php spark routes
#ส่วนที่ 4: สร้าง ResourceController
#9. สร้าง ProductsController
สร้างโฟลเดอร์
app/Controllers/Api/
แล้วสร้างไฟล์
app/Controllers/Api/ProductsController.php
เริ่มต้นด้วย
<?php

namespace App\Controllers\Api;

use CodeIgniter\RESTful\ResourceController;

class ProductsController extends ResourceController
{
    protected $modelName = 'App\Models\ProductModel';
    protected $format    = 'json';
}
ResourceController ช่วยให้เราสร้าง REST API ได้ง่ายขึ้น และมี API Response Helper ให้ใช้งาน เช่น
$this->respond()
$this->respondCreated()
$this->respondUpdated()
$this->respondDeleted()
$this->failNotFound()
$this->failValidationErrors()
#10. GET: อ่านสินค้าทั้งหมด
เพิ่ม method
public function index()
{
    $products = $this->model
        ->orderBy('id', 'DESC')
        ->findAll();

    return $this->respond([
        'status' => 'success',
        'data'   => $products,
    ]);
}
ทดสอบ
curl http://localhost:8080/api/v1/products
ตัวอย่าง Response
{
  "status": "success",
  "data": []
}
#11. GET: อ่านสินค้าตาม ID
เพิ่ม
public function show($id = null)
{
    $product = $this->model->find($id);

    if ($product === null) {
        return $this->failNotFound(
            "Product with ID {$id} was not found."
        );
    }

    return $this->respond([
        'status' => 'success',
        'data'   => $product,
    ]);
}
ทดสอบ
curl http://localhost:8080/api/v1/products/1
ถ้าไม่พบข้อมูล API จะตอบ HTTP Status
404 Not Found
#ส่วนที่ 5: Validation และการสร้างข้อมูล
#12. POST: เพิ่มสินค้า
API ควรตรวจสอบข้อมูลก่อนบันทึกเสมอ
เพิ่ม method
public function create()
{
    $data = $this->request->getJSON(true) ?? [];

    $rules = [
        'name'        => 'required|min_length[2]|max_length[150]',
        'description' => 'permit_empty|max_length[1000]',
        'price'       => 'required|decimal|greater_than_equal_to[0]',
        'stock'       => 'required|integer|greater_than_equal_to[0]',
    ];

    if (! $this->validateData($data, $rules)) {
        return $this->failValidationErrors(
            $this->validator->getErrors()
        );
    }

    $validData = $this->validator->getValidated();

    $id = $this->model->insert($validData);

    if ($id === false) {
        return $this->fail(
            $this->model->errors(),
            400
        );
    }

    return $this->respondCreated([
        'status'  => 'success',
        'message' => 'Product created successfully.',
        'data'    => $this->model->find($id),
    ]);
}
จุดสำคัญคือ
$validData = $this->validator->getValidated();
เราเลือกนำ ข้อมูลที่ผ่าน Validation แล้ว ไปใช้ต่อ แทนการนำ Request ทั้งก้อนไปบันทึกโดยตรง
#13. ทดสอบ POST ด้วย cURL
curl -X POST http://localhost:8080/api/v1/products \
  -H "Content-Type: application/json" \
  -d '{
    "name": "Mechanical Keyboard",
    "description": "Wireless mechanical keyboard",
    "price": 2590.00,
    "stock": 15
  }'
ตัวอย่าง Response
{
  "status": "success",
  "message": "Product created successfully.",
  "data": {
    "id": "1",
    "name": "Mechanical Keyboard",
    "description": "Wireless mechanical keyboard",
    "price": "2590.00",
    "stock": "15",
    "created_at": "2026-09-15 01:00:00",
    "updated_at": "2026-09-15 01:00:00"
  }
}
HTTP Status ที่เหมาะสมคือ
201 Created
ซึ่ง respondCreated() จัดการให้โดยอัตโนมัติ
#14. กรณี Validation ไม่ผ่าน
ลองส่ง
{
  "name": "",
  "price": -100,
  "stock": -1
}
API จะตอบประมาณ
{
  "status": 400,
  "error": 400,
  "messages": {
    "name": "The name field is required.",
    "price": "The price field must contain a number greater than or equal to 0.",
    "stock": "The stock field must contain a number greater than or equal to 0."
  }
}
ทำให้ Frontend สามารถนำ error ของแต่ละ field ไปแสดงผลได้ง่าย
#ส่วนที่ 6: Update API
#15. PUT / PATCH: แก้ไขสินค้า
สำหรับการแก้ไขข้อมูล เราต้อง
- ตรวจสอบว่า Product มีจริง
- รับ JSON
- ตรวจสอบ field ที่ถูกส่งมา
- ใช้เฉพาะ validated data
- update
- ส่งข้อมูลล่าสุดกลับไป
เพิ่ม method
public function update($id = null)
{
    $product = $this->model->find($id);

    if ($product === null) {
        return $this->failNotFound(
            "Product with ID {$id} was not found."
        );
    }

    $data = $this->request->getJSON(true) ?? [];

    if ($data === []) {
        return $this->fail(
            'No data was supplied.',
            400
        );
    }

    $rules = [
        'name'        => 'if_exist|required|min_length[2]|max_length[150]',
        'description' => 'if_exist|permit_empty|max_length[1000]',
        'price'       => 'if_exist|required|decimal|greater_than_equal_to[0]',
        'stock'       => 'if_exist|required|integer|greater_than_equal_to[0]',
    ];

    if (! $this->validateData($data, $rules)) {
        return $this->failValidationErrors(
            $this->validator->getErrors()
        );
    }

    $validData = $this->validator->getValidated();

    if ($validData === []) {
        return $this->fail(
            'No valid product fields were supplied.',
            400
        );
    }

    if (! $this->model->update($id, $validData)) {
        return $this->fail(
            $this->model->errors(),
            400
        );
    }

    return $this->respondUpdated([
        'status'  => 'success',
        'message' => 'Product updated successfully.',
        'data'    => $this->model->find($id),
    ]);
}
if_exist มีประโยชน์กับ PATCH เพราะ Validation จะตรวจ field เฉพาะเมื่อ field นั้นถูกส่งเข้ามา
#16. ทดสอบ PATCH
curl -X PATCH http://localhost:8080/api/v1/products/1 \
  -H "Content-Type: application/json" \
  -d '{
    "price": 2290,
    "stock": 20
  }'
เราไม่จำเป็นต้องส่ง name และ description ใหม่ทั้งหมด
#ส่วนที่ 7: DELETE API
#17. ลบสินค้า
เพิ่ม
public function delete($id = null)
{
    $product = $this->model->find($id);

    if ($product === null) {
        return $this->failNotFound(
            "Product with ID {$id} was not found."
        );
    }

    if (! $this->model->delete($id)) {
        return $this->fail(
            'Unable to delete product.',
            500
        );
    }

    return $this->respondDeleted([
        'status'  => 'success',
        'message' => 'Product deleted successfully.',
        'data'    => [
            'id' => (int) $id,
        ],
    ]);
}
ทดสอบ
curl -X DELETE http://localhost:8080/api/v1/products/1
#ส่วนที่ 8: Controller ฉบับเต็ม
ไฟล์
app/Controllers/Api/ProductsController.php
สามารถรวมได้ดังนี้
<?php

namespace App\Controllers\Api;

use CodeIgniter\RESTful\ResourceController;

class ProductsController extends ResourceController
{
    protected $modelName = 'App\Models\ProductModel';
    protected $format    = 'json';

    public function index()
    {
        $products = $this->model
            ->orderBy('id', 'DESC')
            ->findAll();

        return $this->respond([
            'status' => 'success',
            'data'   => $products,
        ]);
    }

    public function show($id = null)
    {
        $product = $this->model->find($id);

        if ($product === null) {
            return $this->failNotFound(
                "Product with ID {$id} was not found."
            );
        }

        return $this->respond([
            'status' => 'success',
            'data'   => $product,
        ]);
    }

    public function create()
    {
        $data = $this->request->getJSON(true) ?? [];

        $rules = [
            'name'        => 'required|min_length[2]|max_length[150]',
            'description' => 'permit_empty|max_length[1000]',
            'price'       => 'required|decimal|greater_than_equal_to[0]',
            'stock'       => 'required|integer|greater_than_equal_to[0]',
        ];

        if (! $this->validateData($data, $rules)) {
            return $this->failValidationErrors(
                $this->validator->getErrors()
            );
        }

        $validData = $this->validator->getValidated();

        $id = $this->model->insert($validData);

        if ($id === false) {
            return $this->fail(
                $this->model->errors(),
                400
            );
        }

        return $this->respondCreated([
            'status'  => 'success',
            'message' => 'Product created successfully.',
            'data'    => $this->model->find($id),
        ]);
    }

    public function update($id = null)
    {
        $product = $this->model->find($id);

        if ($product === null) {
            return $this->failNotFound(
                "Product with ID {$id} was not found."
            );
        }

        $data = $this->request->getJSON(true) ?? [];

        if ($data === []) {
            return $this->fail(
                'No data was supplied.',
                400
            );
        }

        $rules = [
            'name'        => 'if_exist|required|min_length[2]|max_length[150]',
            'description' => 'if_exist|permit_empty|max_length[1000]',
            'price'       => 'if_exist|required|decimal|greater_than_equal_to[0]',
            'stock'       => 'if_exist|required|integer|greater_than_equal_to[0]',
        ];

        if (! $this->validateData($data, $rules)) {
            return $this->failValidationErrors(
                $this->validator->getErrors()
            );
        }

        $validData = $this->validator->getValidated();

        if ($validData === []) {
            return $this->fail(
                'No valid product fields were supplied.',
                400
            );
        }

        if (! $this->model->update($id, $validData)) {
            return $this->fail(
                $this->model->errors(),
                400
            );
        }

        return $this->respondUpdated([
            'status'  => 'success',
            'message' => 'Product updated successfully.',
            'data'    => $this->model->find($id),
        ]);
    }

    public function delete($id = null)
    {
        $product = $this->model->find($id);

        if ($product === null) {
            return $this->failNotFound(
                "Product with ID {$id} was not found."
            );
        }

        if (! $this->model->delete($id)) {
            return $this->fail(
                'Unable to delete product.',
                500
            );
        }

        return $this->respondDeleted([
            'status'  => 'success',
            'message' => 'Product deleted successfully.',
            'data'    => [
                'id' => (int) $id,
            ],
        ]);
    }
}
#ส่วนที่ 9: ทดสอบ API แบบครบ CRUD
#GET Products
curl http://localhost:8080/api/v1/products
#GET Product
curl http://localhost:8080/api/v1/products/1
#POST Product
curl -X POST http://localhost:8080/api/v1/products \
  -H "Content-Type: application/json" \
  -d '{
    "name": "USB-C Hub",
    "description": "7-in-1 USB-C Hub",
    "price": 1290,
    "stock": 30
  }'
#PUT Product
curl -X PUT http://localhost:8080/api/v1/products/1 \
  -H "Content-Type: application/json" \
  -d '{
    "name": "USB-C Hub Pro",
    "description": "9-in-1 USB-C Hub",
    "price": 1690,
    "stock": 25
  }'
#PATCH Product
curl -X PATCH http://localhost:8080/api/v1/products/1 \
  -H "Content-Type: application/json" \
  -d '{
    "stock": 50
  }'
#DELETE Product
curl -X DELETE http://localhost:8080/api/v1/products/1
#ส่วนที่ 10: HTTP Status Code ที่ควรใช้
REST API ที่ดีไม่ควรส่ง 200 ทุกกรณี
ควรใช้ HTTP Status ให้ตรงกับเหตุการณ์
| Status | ความหมาย | ตัวอย่าง |
|---|---|---|
200 OK |
Request สำเร็จ | GET, UPDATE, DELETE |
201 Created |
สร้างข้อมูลสำเร็จ | POST |
204 No Content |
สำเร็จแต่ไม่มี body | DELETE บางรูปแบบ |
400 Bad Request |
Request/Validation ผิด | field ไม่ครบ |
401 Unauthorized |
ยังไม่ Authenticate | Token ไม่มี/ผิด |
403 Forbidden |
ไม่มีสิทธิ์ | role ไม่อนุญาต |
404 Not Found |
ไม่พบ Resource | product ไม่มี |
409 Conflict |
ข้อมูลขัดแย้ง | unique field ซ้ำ |
422 Unprocessable Content |
semantic validation error ใน API บางรูปแบบ | validation |
500 Internal Server Error |
server error | exception/database failure |
CodeIgniter มี Response Trait ช่วยจัดการ status code หลายกรณี ทำให้ Controller อ่านง่ายขึ้น
#ส่วนที่ 11: เพิ่ม Pagination
ถ้ามีข้อมูลหลักหมื่นรายการ ไม่ควรใช้
$this->model->findAll();
แล้วส่งทั้งหมดกลับไป
ควรใช้ Pagination
ตัวอย่าง
public function index()
{
    $perPage = (int) ($this->request->getGet('per_page') ?? 10);

    $perPage = max(1, min($perPage, 100));

    $products = $this->model
        ->orderBy('id', 'DESC')
        ->paginate($perPage);

    return $this->respond([
        'status' => 'success',
        'data'   => $products,
        'meta'   => [
            'current_page' => $this->model->pager->getCurrentPage(),
            'per_page'     => $perPage,
            'total'        => $this->model->pager->getTotal(),
            'page_count'   => $this->model->pager->getPageCount(),
        ],
    ]);
}
เรียก
GET /api/v1/products?page=2&per_page=20
ควรจำกัดค่า per_page สูงสุดเพื่อป้องกัน client ขอข้อมูลจำนวนมากเกินไป
#ส่วนที่ 12: เพิ่ม Search
สามารถเพิ่ม Query Parameter
GET /api/v1/products?search=keyboard
ตัวอย่าง
public function index()
{
    $search = trim(
        (string) $this->request->getGet('search')
    );

    $builder = $this->model
        ->orderBy('id', 'DESC');

    if ($search !== '') {
        $builder->groupStart()
            ->like('name', $search)
            ->orLike('description', $search)
            ->groupEnd();
    }

    $products = $builder->findAll();

    return $this->respond([
        'status' => 'success',
        'data'   => $products,
    ]);
}
สำหรับระบบจริงมักนำ Search, Filter, Sort และ Pagination มาทำงานร่วมกัน
#ส่วนที่ 13: API Versioning
แทนที่จะใช้
/api/products
แนะนำ
/api/v1/products
เมื่ออนาคตเปลี่ยน contract ครั้งใหญ่ สามารถเพิ่ม
/api/v2/products
โดยไม่ทำให้ Client รุ่นเก่าหยุดทำงานทันที
ตัวอย่าง
$routes->group('api/v1', static function ($routes) {
    $routes->resource('products', [
        'controller' => 'Api\V1\ProductsController',
        'except'     => ['new', 'edit'],
    ]);
});

$routes->group('api/v2', static function ($routes) {
    $routes->resource('products', [
        'controller' => 'Api\V2\ProductsController',
        'except'     => ['new', 'edit'],
    ]);
});
#ส่วนที่ 14: Authentication
ตัวอย่างในบทความนี้ยังเป็น Public API
ระบบจริงควรเพิ่ม Authentication เช่น
Bearer Token
JWT
OAuth 2.0 / OpenID Connect
CodeIgniter Shield
API Key
รูปแบบ Header ที่พบบ่อย
Authorization: Bearer <access_token>
และควรใช้ Route Filter เพื่อป้องกัน endpoint ที่ต้อง Login
แนวคิด
Client
  |
  | Authorization: Bearer ...
  v
Authentication Filter
  |
  +---- invalid ---> 401 Unauthorized
  |
  v
ProductsController
  |
  v
ProductModel
  |
  v
Database
สำหรับ CodeIgniter 4 ควรพิจารณา CodeIgniter Shield หากต้องการระบบ Authentication/Authorization ที่อยู่ใน ecosystem ของ CodeIgniter
#ส่วนที่ 15: CORS
ถ้า Frontend เช่น React, Vue หรือ Angular อยู่คนละ origin กับ API อาจต้องตั้งค่า CORS
ตัวอย่างสถานการณ์
Frontend
http://localhost:5173

API
http://localhost:8080
Browser จะใช้ CORS policy ควบคุม request ข้าม origin
สำหรับ Production ควรกำหนดเฉพาะ origin ที่อนุญาต เช่น
https://app.example.com
ไม่ควรเปิด
Access-Control-Allow-Origin: *
แบบไม่จำเป็น โดยเฉพาะ API ที่เกี่ยวข้องกับ credential หรือข้อมูลสำคัญ
#ส่วนที่ 16: CSRF และ API
CSRF มีความสำคัญโดยเฉพาะ application ที่ใช้ cookie/session authentication
ถ้าเปิด CSRF Filter แบบ global แล้ว API ถูกเรียกจาก client ภายนอก อาจต้องออกแบบ Filter และ Authentication ให้เหมาะสม
ไม่ควรแก้ปัญหาด้วยการปิด security ทั้งหมดโดยไม่วิเคราะห์ threat model
แนวทางขึ้นอยู่กับรูปแบบ Authentication เช่น
Cookie + Session
Bearer Token
OAuth 2.0
แต่ละแบบมีความเสี่ยงและการตั้งค่าไม่เหมือนกัน
#ส่วนที่ 17: รูปแบบ Response ที่สม่ำเสมอ
ระบบใหญ่ควรออกแบบ Response Contract ให้เหมือนกัน
ตัวอย่างสำเร็จ
{
  "status": "success",
  "message": "Product created successfully.",
  "data": {
    "id": 1,
    "name": "Mechanical Keyboard"
  }
}
ตัวอย่างไม่สำเร็จ
{
  "status": 400,
  "error": 400,
  "messages": {
    "name": "The name field is required."
  }
}
ข้อดีคือ Frontend เขียน logic ประมวลผลได้ง่ายกว่า API ที่แต่ละ endpoint ส่งรูปแบบไม่เหมือนกัน
#ส่วนที่ 18: โครงสร้างโปรเจกต์ที่แนะนำ
เมื่อ API เริ่มใหญ่ขึ้น อาจจัดโครงสร้าง
app/
├── Config/
│   └── Routes.php
├── Controllers/
│   └── Api/
│       └── V1/
│           ├── ProductsController.php
│           ├── UsersController.php
│           └── OrdersController.php
├── Database/
│   ├── Migrations/
│   └── Seeds/
├── Entities/
├── Filters/
├── Models/
│   ├── ProductModel.php
│   ├── UserModel.php
│   └── OrderModel.php
├── Services/
└── Validation/
Controller ไม่ควรมี Business Logic จำนวนมาก
แนวคิดที่ดีกว่าเมื่อระบบซับซ้อนคือ
Controller
    |
    v
Service
    |
    v
Model / Repository
    |
    v
Database
ตัวอย่าง
ProductsController
        |
        v
ProductService
        |
        +--> ProductModel
        |
        +--> InventoryService
        |
        +--> AuditLogService
ช่วยให้
- ทดสอบง่ายขึ้น
- ลด Controller ที่ยาวเกินไป
- reuse business logic ได้
- ลด coupling ระหว่าง HTTP layer กับ domain logic
#ส่วนที่ 19: Security Checklist
ก่อนนำ API ขึ้น Production ควรตรวจอย่างน้อย
- [ ] ใช้ HTTPS
- [ ] ปิด
developmentmode - [ ] ไม่ commit
.env - [ ] Validate input ทุก endpoint
- [ ] ใช้เฉพาะ validated data
- [ ] จำกัด
$allowedFields - [ ] ทำ Authentication
- [ ] ทำ Authorization
- [ ] จำกัด CORS
- [ ] Rate Limit endpoint สำคัญ
- [ ] ไม่ส่ง stack trace ให้ client
- [ ] จัดการ Database Credential ผ่าน environment
- [ ] Log error โดยไม่บันทึก password/token
- [ ] ทำ Pagination กับ endpoint ที่อาจมีข้อมูลจำนวนมาก
- [ ] ตรวจสอบ File Upload อย่างเข้มงวด หากมี
- [ ] อัปเดต CodeIgniter และ dependency อย่างสม่ำเสมอ
#ส่วนที่ 20: การ Deploy
ในการพัฒนาเราใช้
php spark serve
แต่ ไม่ควรใช้ Development Server เป็น Production Web Server
Production ควรใช้ Web Server เช่น
Nginx
Apache
Caddy
และต้องตั้ง Document Root ไปยัง
public/
ไม่ใช่ root directory ของ CodeIgniter ทั้งโปรเจกต์
โครงสร้างแนวคิด
Internet
   |
 HTTPS
   |
   v
Nginx / Caddy / Apache
   |
   v
public/index.php
   |
   v
CodeIgniter 4
   |
   v
MySQL
ถ้าใช้ Docker อาจแยก service เป็น
Reverse Proxy
    |
    v
PHP / CodeIgniter
    |
    +---- MySQL
    |
    +---- Redis
#ส่วนที่ 21: สรุป
CodeIgniter 4 มีองค์ประกอบสำหรับสร้าง REST API อยู่ใน Framework โดยตรง ทำให้เราสร้าง CRUD API ได้โดยไม่ต้องติดตั้ง library จำนวนมาก
Flow หลักของตัวอย่างนี้คือ
Client
  |
  | HTTP + JSON
  v
Routes
  |
  v
ResourceController
  |
  +--> Validation
  |
  v
Model
  |
  v
MySQL
  |
  v
JSON Response
ขั้นตอนที่ทำในบทความประกอบด้วย
1. สร้าง CodeIgniter 4 Project
2. ตั้งค่า .env
3. เชื่อมต่อ MySQL
4. สร้าง Migration
5. สร้าง ProductModel
6. สร้าง Resource Routes
7. สร้าง ResourceController
8. ทำ CRUD API
9. Validate JSON Input
10. ใช้ HTTP Status Code
11. ทดสอบด้วย cURL
12. เตรียมแนวทางสำหรับ Authentication, Pagination และ Production
สำหรับผู้ที่เริ่มสร้าง Backend ด้วย PHP จุดเด่นของ CodeIgniter 4 คือมีโครงสร้างไม่ซับซ้อนมาก แต่ยังรองรับแนวคิดสำคัญของ Modern Web API เช่น RESTful routing, JSON response, validation, migration และ modular application structure
เมื่อ API เริ่มมีขนาดใหญ่ ขั้นตอนต่อไปที่ควรศึกษา ได้แก่
CodeIgniter Shield
Authentication / Authorization
JWT / OAuth 2.0
API Testing
Feature Testing
Rate Limiting
CORS
Docker
Redis Cache
Queue / Background Jobs
OpenAPI / Swagger
CI/CD
Observability
#แหล่งอ้างอิง
- CodeIgniter — https://codeigniter.com/
- CodeIgniter 4 User Guide — https://codeigniter.com/user_guide/
- RESTful Resource Handling — https://codeigniter4.github.io/userguide/incoming/restful.html
- API Responses — https://codeigniter4.github.io/CodeIgniter4/outgoing/api_responses.html
- Validation — https://codeigniter4.github.io/userguide/libraries/validation.html
- CodeIgniter 4 GitHub — https://github.com/codeigniter4/CodeIgniter4
#Endpoint สรุป
GET    /api/v1/products
GET    /api/v1/products/{id}
POST   /api/v1/products
PUT    /api/v1/products/{id}
PATCH  /api/v1/products/{id}
DELETE /api/v1/products/{id}
พร้อมนำโครงสร้างนี้ไปต่อยอดเป็น API สำหรับ
User Management
Student Management
Inventory
E-Commerce
Booking
Course Management
Project Management
Mobile Application Backend
React / Vue / Next.js Backend API