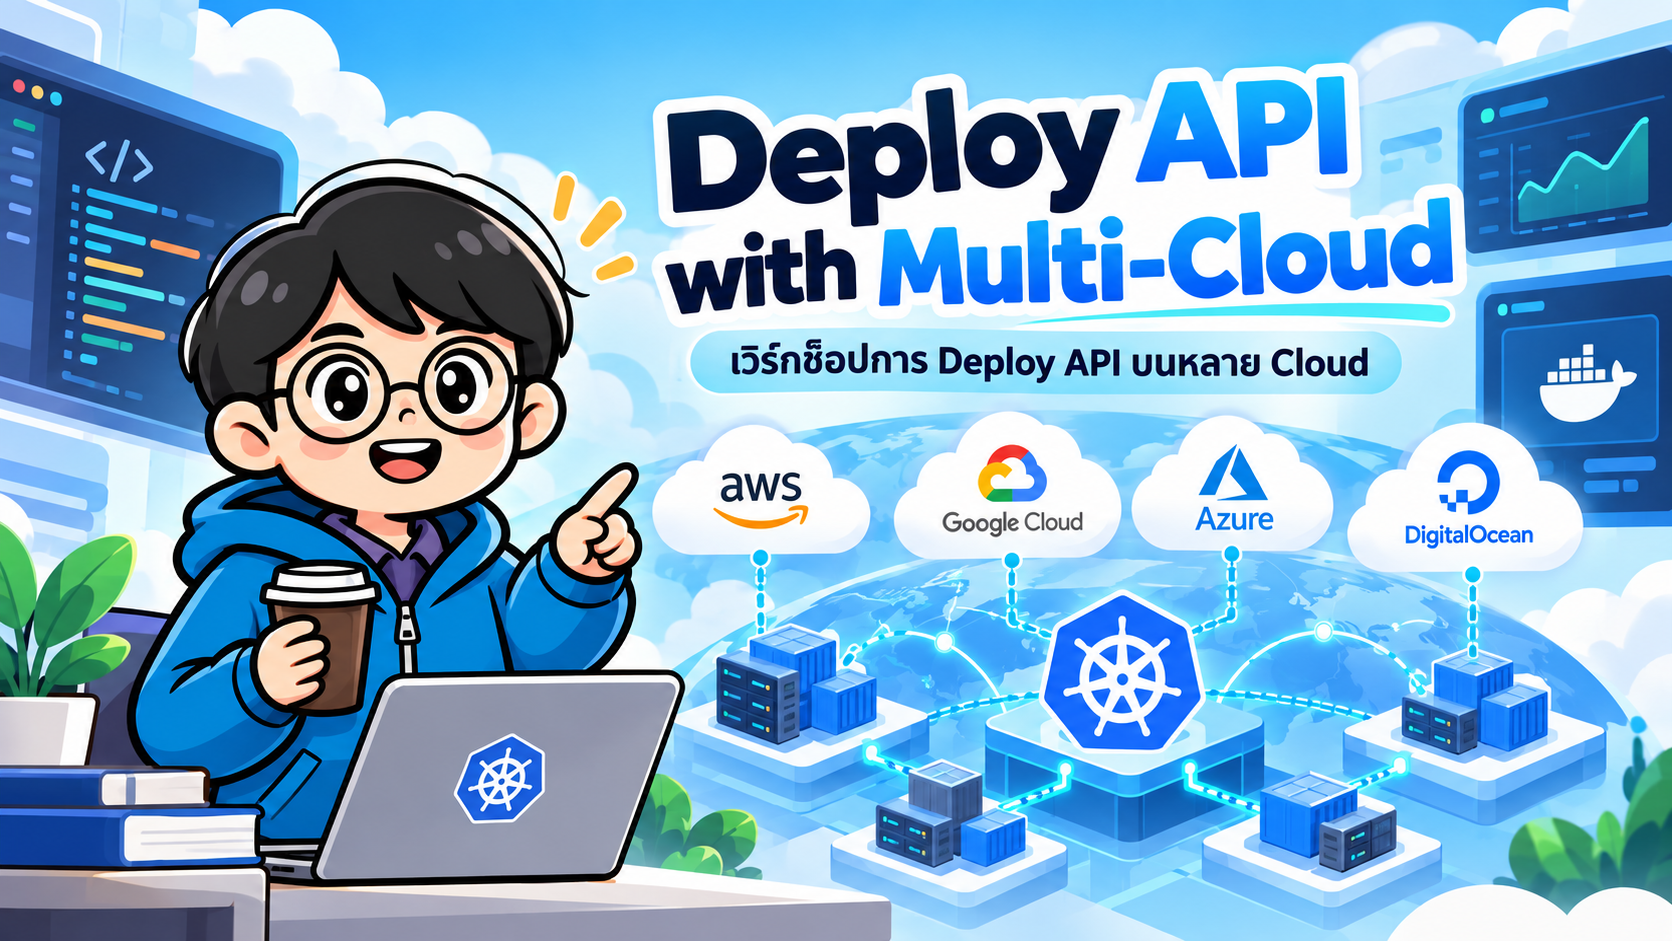
- Workshop: Deploy API เดียวไปยัง AWS, Google Cloud, Azure และ DigitalOcean
- เนื้อหาใน Workshop
- 1. Multi-Cloud คืออะไร
- 2. ทำไมต้องใช้ Multi-Cloud
- 3. รูปแบบ Multi-Cloud ที่พบบ่อย
- 4. Architecture ของ Workshop
- 5. Project Structure
- 6. Step 1 — สร้าง REST API
- 7. Step 2 — Dockerize API
- 8. Step 3 — Push Image ไป Container Registry
- 9. Step 4 — สร้าง Kubernetes Namespace
- 10. Step 5 — สร้าง Kubernetes Deployment
- 11. Step 6 — สร้าง Kubernetes Service
- 12. Step 7 — Deploy บน Amazon EKS
- 13. Step 8 — Deploy บน Google Kubernetes Engine
- 14. Step 9 — Deploy บน Azure Kubernetes Service
- 15. Step 10 — Deploy บน DigitalOcean Kubernetes
- 16. Kubernetes Context
- 17. ตรวจสอบ Public Endpoint
- 18. แยก Configuration ของแต่ละ Cloud ด้วย Kustomize
- 19. ใช้ Helm
- 20. Infrastructure as Code ด้วย Terraform
- 21. CI/CD Pipeline
- 22. GitHub Actions สำหรับ Build Image
- 23. Deploy หลาย Cloud ด้วย Matrix
- 24. Authentication ใน CI/CD
- 25. Global Traffic Management
- 26. Routing Strategy
- 27. Health Check
- 28. Stateless API
- 29. Database คือส่วนที่ยากที่สุดของ Multi-Cloud
- 30. Secret Management
- 31. Observability
- 32. Logging
- 33. Distributed Tracing
- 34. Autoscaling
- 35. Pod Disruption Budget
- 36. Deployment Strategy
- 37. Failover Test
- 38. Smoke Test ทุก Cloud
- 39. Performance Test ด้วย k6
- 40. GitOps สำหรับ Multi-Cloud
- 41. GitOps Repository
- 42. Production Architecture
- 43. Security Checklist
- 44. Cost Consideration
- 45. Cleanup
- 46. Recommended Stack
- 47. หลักคิดสำคัญ
- 48. สรุป
- เอกสารอ้างอิง
#Workshop: Deploy API เดียวไปยัง AWS, Google Cloud, Azure และ DigitalOcean
แนวคิดหลักของ Workshop นี้คือ Build once, deploy many
สร้าง API และ Container Image เพียงครั้งเดียว แล้วนำ Image เดียวกันไป Deploy บนหลาย Cloud ผ่าน Kubernetes
#เนื้อหาใน Workshop
บทความนี้จะทดลองสร้าง API ด้วย FastAPI แล้ว Deploy ไปยัง Kubernetes ของ Cloud Provider หลัก ได้แก่
- Amazon Web Services — Amazon EKS
- Google Cloud — Google Kubernetes Engine (GKE)
- Microsoft Azure — Azure Kubernetes Service (AKS)
- DigitalOcean — DigitalOcean Kubernetes (DOKS)
Technology Stack:
FastAPI
   |
Docker
   |
Container Registry
   |
Kubernetes
   |
   +------------------+------------------+------------------+
   |                  |                  |                  |
 AWS EKS            GCP GKE           Azure AKS          DO DOKS
   |
Terraform
   |
GitHub Actions / GitOps
#1. Multi-Cloud คืออะไร
Multi-Cloud คือแนวทางที่ระบบใช้งาน Cloud Provider มากกว่าหนึ่งรายในสถาปัตยกรรมเดียวกัน
ตัวอย่างเช่น
Users
  |
  v
Global DNS
  |
  +------ AWS
  |
  +------ Google Cloud
  |
  +------ Azure
  |
  +------ DigitalOcean
ระบบ API อาจ Deploy เหมือนกันทุก Cloud แล้วใช้ DNS หรือ Global Traffic Manager เป็นตัวเลือกปลายทาง
#2. ทำไมต้องใช้ Multi-Cloud
ข้อดีหลักได้แก่
- เพิ่ม Availability
- ลด Vendor Lock-in
- รองรับ Disaster Recovery
- กระจาย Workload ไปยังหลาย Region
- เลือกบริการที่เหมาะสมจากแต่ละ Cloud
- เปรียบเทียบ Cost และ Performance ได้
แต่ Multi-Cloud ก็มีความซับซ้อนมากขึ้น โดยเฉพาะ
- Networking
- Identity และ Access Control
- Secret Management
- Database Replication
- Observability
- Cost Management
- CI/CD
- Configuration Drift
ดังนั้น Multi-Cloud ไม่ควรถูกเลือกเพียงเพราะ “ต้องการใช้หลาย Cloud” แต่ควรมีเหตุผลด้าน Availability, Compliance, DR หรือ Portability ที่ชัดเจน
#3. รูปแบบ Multi-Cloud ที่พบบ่อย
#3.1 Active-Passive
Cloud หลักรับ Traffic ตามปกติ และ Cloud สำรองถูกใช้เมื่อระบบหลักมีปัญหา
Users
  |
DNS Failover
  |
  +--> AWS        Active
  |
  +--> GCP        Standby
เหมาะกับ
- Disaster Recovery
- ระบบที่ต้องการลดค่าใช้จ่าย Cloud สำรอง
- Production + DR Site
#3.2 Active-Active
ทุก Cloud รับ Traffic พร้อมกัน
                +--> AWS
                |
Users --> DNS --+--> GCP
                |
                +--> Azure
                |
                +--> DigitalOcean
ข้อดี
- Availability สูง
- กระจาย Load
- รองรับ Geo Routing
- ลด Latency ของผู้ใช้ต่างภูมิภาค
ข้อเสีย
- Data Synchronization ซับซ้อน
- Cross-Cloud Traffic มีค่าใช้จ่าย
- Observability ยากขึ้น
#3.3 Cloud Portability
ระบบไม่ได้เปิดทุก Cloud พร้อมกัน แต่สามารถย้ายไป Cloud อื่นได้ง่าย
หัวใจสำคัญคือ
Docker
+
Kubernetes
+
Terraform
+
CI/CD
#4. Architecture ของ Workshop
Developer
   |
   v
GitHub
   |
   v
GitHub Actions
   |
   +--> Test
   |
   +--> Build Docker Image
   |
   +--> Push Container Registry
   |
   v
Terraform / Kubernetes
   |
   +---------------+---------------+---------------+
   |               |               |               |
   v               v               v               v
 AWS EKS          GKE             AKS             DOKS
   |               |               |               |
 API Pods         API Pods        API Pods        API Pods
   \               |               |              /
    \______________|_______________|_____________/
                    |
                    v
          Global DNS / Traffic Manager
                    |
                    v
                  Users
#5. Project Structure
multi-cloud-api/
├── app/
│   └── main.py
│
├── requirements.txt
├── Dockerfile
│
├── kubernetes/
│   ├── namespace.yaml
│   ├── deployment.yaml
│   └── service.yaml
│
├── terraform/
│   ├── aws/
│   ├── gcp/
│   ├── azure/
│   └── digitalocean/
│
└── .github/
    └── workflows/
        └── deploy.yml
#6. Step 1 — สร้าง REST API
สร้างไฟล์
app/main.py
from fastapi import FastAPI
import os
import socket

app = FastAPI(
    title="Multi-Cloud API"
)

@app.get("/")
def root():
    return {
        "message": "Multi-Cloud API",
        "cloud": os.getenv(
            "CLOUD_PROVIDER",
            "local"
        ),
        "hostname": socket.gethostname()
    }

@app.get("/health")
def health():
    return {
        "status": "ok",
        "cloud": os.getenv(
            "CLOUD_PROVIDER",
            "local"
        )
    }
สร้างไฟล์
requirements.txt
fastapi
uvicorn[standard]
ติดตั้ง Dependency
pip install -r requirements.txt
Run
uvicorn app.main:app \
  --host 0.0.0.0 \
  --port 8000
ทดสอบ
curl http://localhost:8000/
ตัวอย่าง Response
{
  "message": "Multi-Cloud API",
  "cloud": "local",
  "hostname": "developer-machine"
}
#7. Step 2 — Dockerize API
สร้างไฟล์
Dockerfile
FROM python:3.13-slim

WORKDIR /app

COPY requirements.txt .

RUN pip install \
    --no-cache-dir \
    -r requirements.txt

COPY app ./app

EXPOSE 8000

CMD [
  "uvicorn",
  "app.main:app",
  "--host",
  "0.0.0.0",
  "--port",
  "8000"
]
Build
docker build \
  -t multi-cloud-api:1.0 .
Run
docker run \
  --rm \
  -p 8000:8000 \
  -e CLOUD_PROVIDER=local \
  multi-cloud-api:1.0
ทดสอบ
curl http://localhost:8000/health
#8. Step 3 — Push Image ไป Container Registry
ตัวอย่างนี้ใช้ GitHub Container Registry
กำหนดค่า
export GITHUB_USER=YOUR_GITHUB_USERNAME
Login
echo "$GITHUB_TOKEN" | \
docker login ghcr.io \
  -u "$GITHUB_USER" \
  --password-stdin
Tag
docker tag \
  multi-cloud-api:1.0 \
  ghcr.io/$GITHUB_USER/multi-cloud-api:1.0
Push
docker push \
  ghcr.io/$GITHUB_USER/multi-cloud-api:1.0
แนวคิดสำคัญ
Source Code
   |
   v
Build Once
   |
   v
Container Image
   |
   +--> AWS
   +--> GCP
   +--> Azure
   +--> DigitalOcean
ไม่ควร Build Application ใหม่แยกในแต่ละ Cloud เพราะอาจทำให้ Artifact ไม่เหมือนกัน
#9. Step 4 — สร้าง Kubernetes Namespace
ไฟล์
kubernetes/namespace.yaml
apiVersion: v1
kind: Namespace

metadata:
  name: multi-cloud-api
#10. Step 5 — สร้าง Kubernetes Deployment
ไฟล์
kubernetes/deployment.yaml
apiVersion: apps/v1
kind: Deployment

metadata:
  name: multi-cloud-api
  namespace: multi-cloud-api

spec:

  replicas: 3

  selector:
    matchLabels:
      app: multi-cloud-api

  template:

    metadata:
      labels:
        app: multi-cloud-api

    spec:

      containers:

        - name: api

          image: ghcr.io/YOUR_GITHUB_USERNAME/multi-cloud-api:1.0

          ports:
            - containerPort: 8000

          env:
            - name: CLOUD_PROVIDER
              value: unknown

          readinessProbe:

            httpGet:
              path: /health
              port: 8000

            initialDelaySeconds: 5
            periodSeconds: 10

          livenessProbe:

            httpGet:
              path: /health
              port: 8000

            initialDelaySeconds: 15
            periodSeconds: 20

          resources:

            requests:
              cpu: "100m"
              memory: "128Mi"

            limits:
              cpu: "500m"
              memory: "512Mi"
#11. Step 6 — สร้าง Kubernetes Service
ไฟล์
kubernetes/service.yaml
apiVersion: v1
kind: Service

metadata:
  name: multi-cloud-api
  namespace: multi-cloud-api

spec:

  type: LoadBalancer

  selector:
    app: multi-cloud-api

  ports:

    - port: 80
      targetPort: 8000
เมื่อใช้
type: LoadBalancer
Managed Kubernetes ของแต่ละ Cloud จะเชื่อมต่อกับ Load Balancer ของ Cloud นั้น
#12. Step 7 — Deploy บน Amazon EKS
เครื่องมือที่ต้องใช้
AWS CLI
eksctl
kubectl
Login
aws configure
ตรวจสอบ Account
aws sts get-caller-identity
สร้าง Cluster
eksctl create cluster \
  --name multi-cloud-api \
  --region ap-southeast-1
ตรวจสอบ
kubectl get nodes
Deploy
kubectl apply \
  -f kubernetes/namespace.yaml

kubectl apply \
  -f kubernetes/deployment.yaml

kubectl apply \
  -f kubernetes/service.yaml
ตั้งค่า Cloud Provider
kubectl set env \
  deployment/multi-cloud-api \
  CLOUD_PROVIDER=aws \
  -n multi-cloud-api
ตรวจสอบ Service
kubectl get svc \
  -n multi-cloud-api
#13. Step 8 — Deploy บน Google Kubernetes Engine
Login
gcloud auth login
กำหนด Project
gcloud config set project PROJECT_ID
เปิด Kubernetes Engine API
gcloud services enable \
  container.googleapis.com
สร้าง GKE Autopilot
gcloud container clusters create-auto \
  multi-cloud-api \
  --location=asia-southeast1
ดึง Credentials
gcloud container clusters get-credentials \
  multi-cloud-api \
  --location=asia-southeast1
Deploy
kubectl apply \
  -f kubernetes/
กำหนด Cloud
kubectl set env \
  deployment/multi-cloud-api \
  CLOUD_PROVIDER=gcp \
  -n multi-cloud-api
ตรวจสอบ
kubectl get all \
  -n multi-cloud-api
#14. Step 9 — Deploy บน Azure Kubernetes Service
Login
az login
สร้าง Resource Group
az group create \
  --name multi-cloud-api-rg \
  --location southeastasia
สร้าง AKS
az aks create \
  --resource-group multi-cloud-api-rg \
  --name multi-cloud-api \
  --node-count 2 \
  --generate-ssh-keys
ดึง Credentials
az aks get-credentials \
  --resource-group multi-cloud-api-rg \
  --name multi-cloud-api
Deploy
kubectl apply \
  -f kubernetes/
กำหนด Cloud
kubectl set env \
  deployment/multi-cloud-api \
  CLOUD_PROVIDER=azure \
  -n multi-cloud-api
#15. Step 10 — Deploy บน DigitalOcean Kubernetes
Login
doctl auth init
ดู Region
doctl kubernetes options regions
สร้าง Cluster
doctl kubernetes cluster create \
  multi-cloud-api \
  --region sgp1
ตรวจสอบ
kubectl get nodes
Deploy
kubectl apply \
  -f kubernetes/
กำหนด Cloud
kubectl set env \
  deployment/multi-cloud-api \
  CLOUD_PROVIDER=digitalocean \
  -n multi-cloud-api
#16. Kubernetes Context
เมื่อมีหลาย Cluster ควรตั้งชื่อ Context ให้ชัดเจน
kubectl config get-contexts
ตัวอย่างชื่อ
aws-eks
gcp-gke
azure-aks
do-doks
Switch Cluster
kubectl config use-context aws-eks
หรือ
kubectl config use-context gcp-gke
ตรวจสอบ
kubectl config current-context
#17. ตรวจสอบ Public Endpoint
kubectl get svc \
  multi-cloud-api \
  -n multi-cloud-api
ตัวอย่าง
NAME              TYPE           EXTERNAL-IP
multi-cloud-api   LoadBalancer   203.x.x.x
ทดสอบ
curl http://EXTERNAL_IP/
ตัวอย่าง
{
  "message": "Multi-Cloud API",
  "cloud": "aws",
  "hostname": "multi-cloud-api-xxxx"
}
#18. แยก Configuration ของแต่ละ Cloud ด้วย Kustomize
Production ไม่ควรใช้ kubectl set env ทุกครั้ง
ควรแยก Base และ Overlay
kubernetes/
├── base/
│   ├── deployment.yaml
│   ├── service.yaml
│   └── kustomization.yaml
│
└── overlays/
    ├── aws/
    ├── gcp/
    ├── azure/
    └── digitalocean/
ตัวอย่าง
# kubernetes/overlays/aws/kustomization.yaml

resources:
  - ../../base

patches:

  - target:
      kind: Deployment
      name: multi-cloud-api

    patch: |-

      - op: add
        path: /spec/template/spec/containers/0/env
        value:

          - name: CLOUD_PROVIDER
            value: aws
Deploy
kubectl apply \
  -k kubernetes/overlays/aws
#19. ใช้ Helm
อีกแนวทางคือใช้ Helm
helm/
└── multi-cloud-api/
    ├── Chart.yaml
    ├── values.yaml
    ├── values-aws.yaml
    ├── values-gcp.yaml
    ├── values-azure.yaml
    ├── values-digitalocean.yaml
    └── templates/
ตัวอย่าง
# values-aws.yaml

cloudProvider: aws

replicaCount: 3
Deploy
helm upgrade \
  --install multi-cloud-api \
  ./helm/multi-cloud-api \
  -f ./helm/multi-cloud-api/values-aws.yaml
#20. Infrastructure as Code ด้วย Terraform
Terraform สามารถใช้ Provider หลายตัวใน Project เดียวได้
ตัวอย่าง
terraform {

  required_providers {

    aws = {
      source = "hashicorp/aws"
    }

    google = {
      source = "hashicorp/google"
    }

    azurerm = {
      source = "hashicorp/azurerm"
    }

    digitalocean = {
      source = "digitalocean/digitalocean"
    }

  }
}
Provider Configuration
provider "aws" {
  region = "ap-southeast-1"
}

provider "google" {
  project = var.gcp_project
  region  = "asia-southeast1"
}

provider "azurerm" {
  features {}
}

provider "digitalocean" {
  token = var.do_token
}
แนะนำแยก Module
terraform/
├── main.tf
├── providers.tf
├── variables.tf
├── outputs.tf
│
└── modules/
    ├── aws-eks/
    ├── gcp-gke/
    ├── azure-aks/
    └── do-doks/
Deploy
terraform init

terraform plan

terraform apply
#21. CI/CD Pipeline
Pipeline ที่แนะนำ
Developer
   |
   v
Git Push
   |
   v
GitHub Actions
   |
   +--> Test
   |
   +--> Build
   |
   +--> Security Scan
   |
   +--> Push Image
   |
   +--> Deploy AWS
   |
   +--> Deploy GCP
   |
   +--> Deploy Azure
   |
   +--> Deploy DigitalOcean
#22. GitHub Actions สำหรับ Build Image
ไฟล์
.github/workflows/deploy.yml
name: Multi-Cloud API

on:

  push:

    branches:
      - main

env:

  IMAGE: ghcr.io/${{ github.repository_owner }}/multi-cloud-api

jobs:

  build:

    runs-on: ubuntu-latest

    permissions:

      contents: read
      packages: write

    steps:

      - uses: actions/checkout@v4

      - name: Login GHCR
        uses: docker/login-action@v3

        with:

          registry: ghcr.io
          username: ${{ github.actor }}
          password: ${{ secrets.GITHUB_TOKEN }}

      - name: Build

        run: |

          docker build \
            -t $IMAGE:${{ github.sha }} .

      - name: Push

        run: |

          docker push \
            $IMAGE:${{ github.sha }}
#23. Deploy หลาย Cloud ด้วย Matrix
GitHub Actions รองรับ Matrix Strategy
strategy:

  matrix:

    cloud:

      - aws
      - gcp
      - azure
      - digitalocean
Architecture
               +--> AWS
               |
Docker Image --+--> GCP
               |
               +--> Azure
               |
               +--> DigitalOcean
ช่วยให้ Job สามารถรันแบบ Parallel ได้
#24. Authentication ใน CI/CD
ควรหลีกเลี่ยง Long-Lived Credentials
Architecture ที่เหมาะสม
GitHub Actions
      |
      v
OIDC
      |
      +--> AWS IAM
      |
      +--> Google Cloud IAM
      |
      +--> Azure Entra ID
ข้อดี
- ไม่ต้องเก็บ Access Key ถาวร
- ลด Credential Leakage
- จำกัด Permission ตาม Repository ได้
- รองรับ Audit
#25. Global Traffic Management
เมื่อ API มีหลาย Endpoint
api-aws.example.com
api-gcp.example.com
api-azure.example.com
api-do.example.com
สามารถสร้าง Endpoint กลาง
api.example.com
Architecture
Users
  |
  v
Global DNS
  |
  v
Health Check
  |
  +--> AWS
  +--> GCP
  +--> Azure
  +--> DigitalOcean
#26. Routing Strategy
#Weighted Routing
AWS           40%
GCP           30%
Azure         20%
DigitalOcean  10%
เหมาะกับ
- Canary Release
- Cost Distribution
- Capacity Management
#Geo Routing
Thailand
   |
Singapore Cluster

Europe
   |
Europe Cluster

USA
   |
US Cluster
#Failover Routing
Primary
  |
  X
  |
Secondary
เมื่อ Health Check ของ Primary Fail ระบบจะส่ง Traffic ไป Secondary
#27. Health Check
API ควรมี Endpoint เช่น
GET /health
Response
{
  "status": "ok"
}
ใช้สำหรับ
- Kubernetes Liveness Probe
- Kubernetes Readiness Probe
- Load Balancer
- Global Traffic Manager
- Monitoring
#28. Stateless API
API ที่เหมาะกับ Multi-Cloud ควรเป็น Stateless
ไม่ควรเก็บ Session ใน Pod
Bad

Client
  |
Pod
  |
Local Session
เพราะ Pod อาจถูก Restart หรือ Request ครั้งถัดไปไปอีก Cloud
ควรใช้
JWT

หรือ

External Session Store
ตัวอย่าง
Redis
Database
Distributed Cache
#29. Database คือส่วนที่ยากที่สุดของ Multi-Cloud
Application Layer ย้ายข้าม Cloud ได้ค่อนข้างง่ายเมื่อใช้ Container
แต่ Data Layer ต้องออกแบบอย่างรอบคอบ
#Pattern A — Central Database
AWS API -------GCP API --------Azure API -------+--> Central DB
DO API ---------/
ข้อดี
- Implementation ง่าย
- Consistency สูง
ข้อเสีย
- Cross-Cloud Latency
- Egress Cost
- DB อาจเป็น Single Point of Failure
#Pattern B — Primary + Replica
Primary DB
  |
  +--> Replica A
  |
  +--> Replica B
เหมาะกับ Read-heavy System
#Pattern C — Distributed Database
ตัวอย่างแนวคิด
CockroachDB
YugabyteDB
Cassandra
MongoDB Atlas
ต้องพิจารณา
Consistency
Latency
Network Partition
Replication
Conflict Resolution
Cost
#30. Secret Management
ห้ามใส่ Password ลง Manifest
ตัวอย่างที่ไม่ควรทำ
password: admin123
แนวทางที่เหมาะสม
AWS Secrets Manager

Google Secret Manager

Azure Key Vault

External Secret Backend
แล้ว Sync เข้ามาใน Kubernetes
Secret Manager
      |
      v
External Secrets Operator
      |
      v
Kubernetes Secret
      |
      v
API Pod
#31. Observability
Multi-Cloud ต้องมี Centralized Observability
AWS -------GCP --------Azure -------+--> Prometheus / Grafana
DO ---------/
Metrics ที่ควรดู
- Request per Second
- Latency
- HTTP 4xx
- HTTP 5xx
- CPU
- Memory
- Pod Restart
- Availability
- Error Rate
#32. Logging
ควรมี Request ID หรือ Correlation ID
ตัวอย่าง
X-Request-ID: 72e98fd1
Log
{
  "request_id": "72e98fd1",
  "cloud": "aws",
  "service": "multi-cloud-api",
  "status": 200
}
ทำให้ค้นหา Request เดียวกันในหลายระบบได้ง่ายขึ้น
#33. Distributed Tracing
ใช้ OpenTelemetry
Client
  |
  v
API Gateway
  |
  v
API
  |
  v
Database
ส่ง Trace ไปยัง
Jaeger

Grafana Tempo

Cloud-native APM
#34. Autoscaling
ใช้ Horizontal Pod Autoscaler
kubectl autoscale \
  deployment multi-cloud-api \
  --cpu-percent=60 \
  --min=3 \
  --max=10 \
  -n multi-cloud-api
ตรวจสอบ
kubectl get hpa \
  -n multi-cloud-api
#35. Pod Disruption Budget
Production ควรกำหนด PDB
apiVersion: policy/v1
kind: PodDisruptionBudget

metadata:
  name: multi-cloud-api
  namespace: multi-cloud-api

spec:

  minAvailable: 2

  selector:

    matchLabels:
      app: multi-cloud-api
#36. Deployment Strategy
#Rolling Update
v1 v1 v1

v2 v1 v1

v2 v2 v1

v2 v2 v2
#Blue-Green
Blue
v1

Green
v2
เมื่อ Green ผ่านการทดสอบแล้วจึง Switch Traffic
#Canary
v1 90%

v2 10%
ถ้า v2 ทำงานได้ดีค่อยเพิ่ม Traffic
v2 25%

v2 50%

v2 100%
#37. Failover Test
ตัวอย่างจำลอง AWS Down
เลือก AWS Context
kubectl config use-context aws-eks
Scale เป็น 0
kubectl scale \
  deployment multi-cloud-api \
  --replicas=0 \
  -n multi-cloud-api
Health Check ควรตรวจพบว่า Endpoint ใช้งานไม่ได้
AWS
DOWN
จากนั้น Global Routing ควรส่ง Traffic ไปยัง Cloud อื่น
GCP
Azure
DigitalOcean
นี่คือ Disaster Recovery Drill
#38. Smoke Test ทุก Cloud
สร้างไฟล์
smoke-test.sh
#!/bin/bash

ENDPOINTS=(

  "https://api-aws.example.com/health"

  "https://api-gcp.example.com/health"

  "https://api-azure.example.com/health"

  "https://api-do.example.com/health"

)

for endpoint in "${ENDPOINTS[@]}"
do

  echo "Testing $endpoint"

  curl \
    --fail \
    --silent \
    "$endpoint"

  echo

done
#39. Performance Test ด้วย k6
import http from 'k6/http';

export const options = {

  vus: 20,

  duration: '30s'

};

export default function () {

  http.get(
    'https://api.example.com/'
  );

}
Run
k6 run load-test.js
เปรียบเทียบ
AWS Latency

GCP Latency

Azure Latency

DigitalOcean Latency
#40. GitOps สำหรับ Multi-Cloud
สำหรับ Production แนะนำ GitOps
Architecture
Developer
   |
   v
Git Push
   |
   v
Git Repository
   |
   v
Argo CD
   |
   +--> AWS EKS
   |
   +--> GCP GKE
   |
   +--> Azure AKS
   |
   +--> DO DOKS
ข้อดี
- Configuration อยู่ใน Git
- Audit ได้
- Rollback ง่าย
- ลด Manual Deployment
- รองรับหลาย Cluster
- ลด Configuration Drift
#41. GitOps Repository
multi-cloud-gitops/
├── base/
│   └── api/
│
├── overlays/
│   ├── aws/
│   ├── gcp/
│   ├── azure/
│   └── digitalocean/
│
└── argocd/
    ├── aws.yaml
    ├── gcp.yaml
    ├── azure.yaml
    └── digitalocean.yaml
#42. Production Architecture
                       Internet
                          |
                          v
                  Global DNS / WAF
                          |
                          v
                Health / Geo Routing
                          |
       +------------------+------------------+
       |                  |                  |
       v                  v                  v
    AWS EKS             GCP GKE           Azure AKS
       |                  |                  |
   Ingress/LB          Ingress/LB         Ingress/LB
       |                  |                  |
    API Pods           API Pods           API Pods
       \                  |                 /
        \_________________|________________/
                          |
                          v
                Database / Cache
                          |
                          v
                    Observability
DigitalOcean DOKS สามารถเพิ่มเป็น
Secondary Production

DR Cluster

Staging Cluster

Low-cost Workload
#43. Security Checklist
Production ควรตรวจสอบอย่างน้อย
- HTTPS ทุก Endpoint
- ใช้ OIDC สำหรับ CI/CD หากรองรับ
- ไม่เก็บ Secret ใน Git
- ใช้ Least Privilege
- เปิด RBAC
- Scan Container Image
- ใช้ Non-root Container
- กำหนด CPU / Memory Requests และ Limits
- ใช้ Network Policy
- เปิด Audit Log
- จำกัด Kubernetes API Endpoint
- ใช้ Private Nodes หากเหมาะสม
- กำหนด Pod Security
- Update Kubernetes Version
- Patch Dependencies สม่ำเสมอ
#44. Cost Consideration
Multi-Cloud ไม่ได้หมายความว่าจะประหยัดเสมอไป
ต้นทุนหลักได้แก่
Kubernetes Cluster

Worker Nodes

Load Balancer

Container Registry

Logging

Monitoring

Database

Storage

Network Egress

Cross-Cloud Replication
ส่วนที่ต้องระวังเป็นพิเศษคือ
Cross-Cloud Network Egress
เพราะ Data Replication, Log Shipping และ Service-to-Service Traffic อาจทำให้ค่าใช้จ่ายสูงขึ้น
#45. Cleanup
หลัง Workshop ควรลบ Resource เพื่อป้องกันค่าใช้จ่าย
#AWS
eksctl delete cluster \
  --name multi-cloud-api \
  --region ap-southeast-1 \
  --wait
#Google Cloud
gcloud container clusters delete \
  multi-cloud-api \
  --location=asia-southeast1
#Azure
az group delete \
  --name multi-cloud-api-rg \
  --yes
#DigitalOcean
doctl kubernetes cluster delete \
  multi-cloud-api
อย่าลืมตรวจสอบ Resource ที่อาจยังเหลือ เช่น
Load Balancer

Persistent Volume

Static IP

Container Registry

DNS Record

Database
#46. Recommended Stack
สำหรับ Production Multi-Cloud API
Application
   |
FastAPI / Spring Boot / Node.js / Go
   |
Docker
   |
Kubernetes
   |
Helm / Kustomize
   |
Terraform
   |
GitHub Actions
   |
Argo CD
   |
External Secrets
   |
Prometheus
   |
Grafana
   |
OpenTelemetry
#47. หลักคิดสำคัญ
สิ่งที่ควรทำให้เหมือนกันทุก Cloud
Docker Image

Kubernetes API

Application Configuration

Health Endpoint

Metrics

Logs

Tracing

CI/CD Process
ส่วนที่อาจแตกต่างกันตาม Cloud
IAM

VPC / VNet

Load Balancer

Storage Class

Secret Backend

Managed Database

DNS Integration
หลักการคือ
Standardize the Application Layer, Abstract the Infrastructure Layer.
#48. สรุป
การ Deploy API แบบ Multi-Cloud ไม่ใช่เพียงการนำ Source Code ไปวางในหลาย Cloud แต่ต้องออกแบบระบบให้
Portable

Automated

Observable

Resilient

Secure
Workflow ที่แนะนำ
Code
  |
  v
Test
  |
  v
Docker Build
  |
  v
Container Registry
  |
  v
Terraform
  |
  v
Kubernetes
  |
  +--> AWS EKS
  |
  +--> GCP GKE
  |
  +--> Azure AKS
  |
  +--> DigitalOcean DOKS
  |
  v
Global Traffic Manager
  |
  v
Users
หัวใจสำคัญมีดังนี้
- Build once, deploy many
- ใช้ Container Image เดียวกัน
- ใช้ Kubernetes เป็น Platform กลาง
- ใช้ Terraform จัดการ Infrastructure
- ใช้ CI/CD หรือ GitOps ลด Manual Deployment
- ทำ API ให้เป็น Stateless
- ออกแบบ Data Layer อย่างรอบคอบ
- ใช้ Health Check และ Global Routing
- มี Centralized Observability
- ต้องทดสอบ Failover จริง
#เอกสารอ้างอิง
-
Amazon EKS Documentation
https://docs.aws.amazon.com/eks/ -
Amazon EKS Getting Started
https://docs.aws.amazon.com/eks/latest/userguide/getting-started.html -
Google Kubernetes Engine Documentation
https://cloud.google.com/kubernetes-engine/docs -
GKE Deploy Workloads
https://cloud.google.com/kubernetes-engine/docs/get-started/deploy-workloads -
Azure Kubernetes Service Documentation
https://learn.microsoft.com/azure/aks/ -
AKS Deploy Application Tutorial
https://learn.microsoft.com/azure/aks/tutorial-kubernetes-deploy-application -
DigitalOcean Kubernetes Documentation
https://docs.digitalocean.com/products/kubernetes/ -
DigitalOcean Kubernetes Quickstart
https://docs.digitalocean.com/products/kubernetes/getting-started/quickstart/ -
Terraform Multi-Cloud Kubernetes
https://developer.hashicorp.com/terraform/tutorials/networking/multicloud-kubernetes