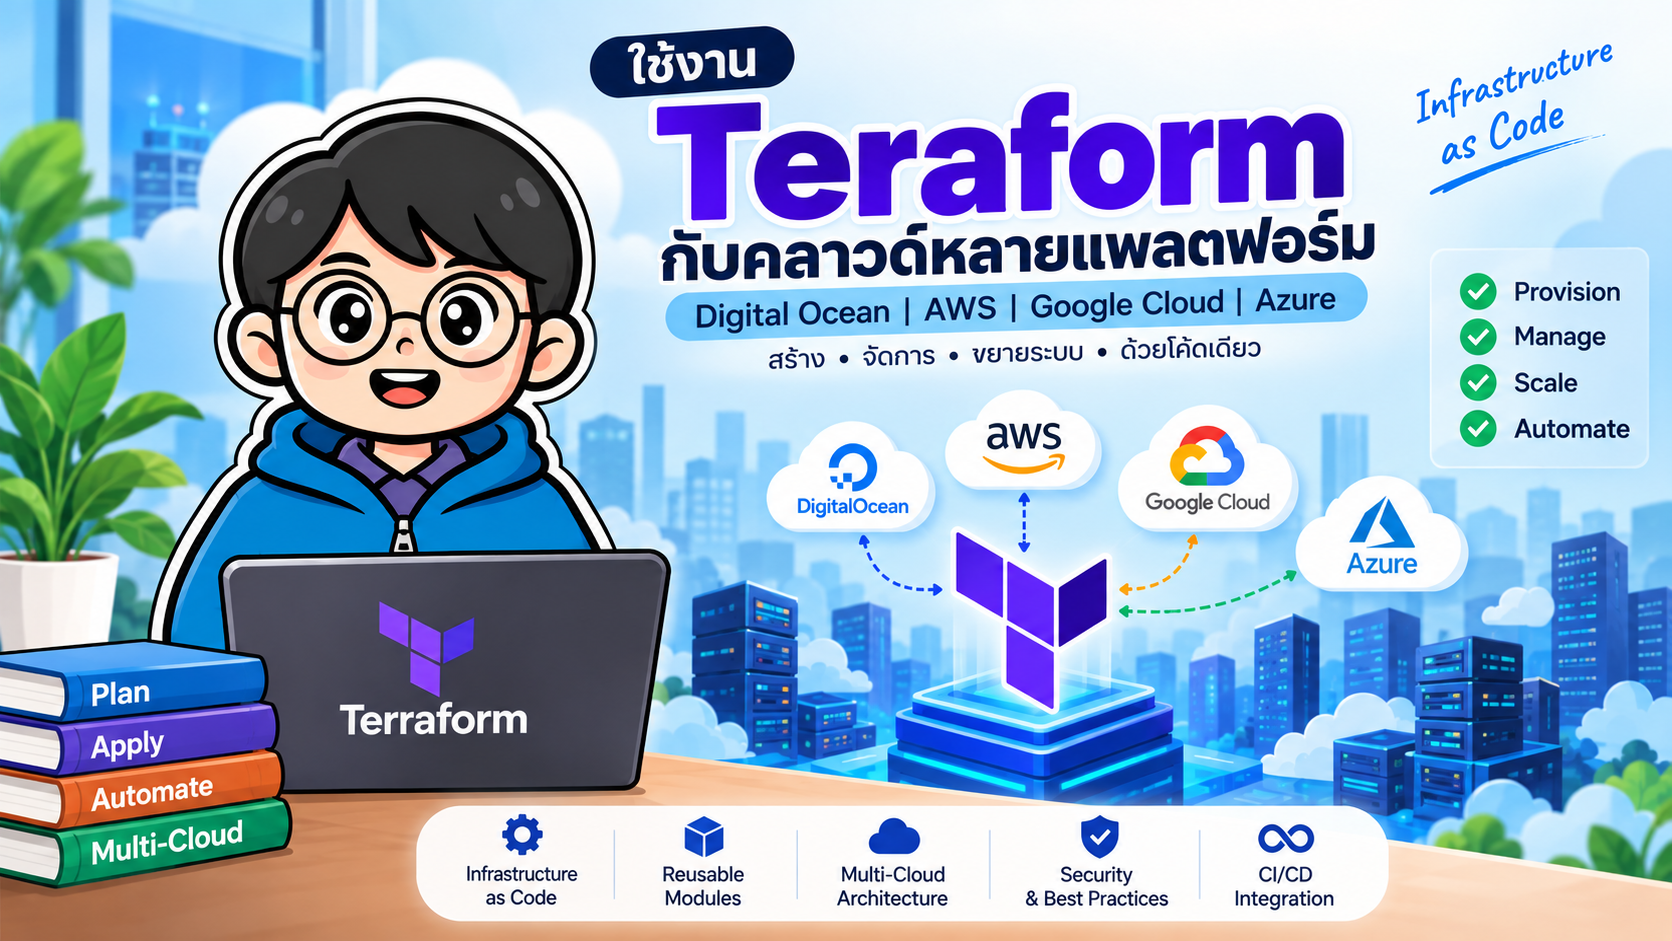
- ใช้งาน Terraform กับ DigitalOcean, AWS, Google Cloud และ Azure
- 2. ติดตั้ง Terraform
- 3. โครงสร้างไฟล์ Terraform พื้นฐาน
- 4. ใช้งาน Terraform กับ DigitalOcean
- 5. ใช้งาน Terraform กับ AWS
- 6. ใช้งาน Terraform กับ Google Cloud
- 7. ใช้งาน Terraform กับ Microsoft Azure
- 8. เปรียบเทียบ Resource หลักทั้ง 4 Cloud
- 9. ใช้หลาย Cloud ใน Terraform โปรเจกต์เดียวได้หรือไม่
- 10. โครงสร้าง Multi-Cloud ที่แนะนำ
- 11. Terraform State คืออะไร
- 12. Remote State
- 13. Variables และ Sensitive Data
- 14. Outputs
- 15. Format และ Validate
- 16. ตัวอย่าง Multi-Cloud Architecture
- 17. Module สำหรับใช้ซ้ำ
- 18. Import Infrastructure เดิมเข้า Terraform
- 19. Terraform Lifecycle ที่ควรรู้
- 20. Best Practices สำหรับ Multi-Cloud
- 21. Terraform กับ Ansible ต่างกันอย่างไร
- 22. Terraform กับ Kubernetes
- 23. Workflow สำหรับการฝึก
- 24. สรุป
- แหล่งอ้างอิง
#ใช้งาน Terraform กับ DigitalOcean, AWS, Google Cloud และ Azure
Terraform เป็นเครื่องมือ Infrastructure as Code (IaC) สำหรับกำหนด Infrastructure ด้วยไฟล์ข้อความแบบ declarative โดยใช้ภาษา HCL (HashiCorp Configuration Language) จากนั้น Terraform จะคำนวณความแตกต่างระหว่างสถานะที่ต้องการกับ Infrastructure จริง และสร้างแผนการเปลี่ยนแปลงก่อนดำเนินการ
จุดเด่นสำคัญคือแนวคิดเดียวกันสามารถใช้กับ Cloud หลายรายผ่าน Provider เช่น
- DigitalOcean →
digitalocean/digitalocean - AWS →
hashicorp/aws - Google Cloud →
hashicorp/google - Microsoft Azure →
hashicorp/azurerm
เหมาะสำหรับ DevOps, Cloud Engineer และทีมพัฒนาที่ต้องการให้การสร้าง Server, Network, Storage, Database หรือ Kubernetes ทำซ้ำได้ ตรวจสอบย้อนหลังได้ และเก็บ Configuration ไว้ใน Git
#1. Terraform ทำงานอย่างไร
Workflow หลักของ Terraform คือ
เขียน .tf
   ↓
terraform init
   ↓
terraform fmt
   ↓
terraform validate
   ↓
terraform plan
   ↓
ตรวจสอบ Plan
   ↓
terraform apply
   ↓
Cloud Provider API
   ↓
Infrastructure จริง
คำสั่งสำคัญ:
terraform init
terraform fmt
terraform validate
terraform plan
terraform apply
terraform destroy
#terraform init
ดาวน์โหลด Provider และเตรียม Working Directory
terraform init
#terraform plan
แสดงสิ่งที่ Terraform กำลังจะสร้าง แก้ไข หรือลบ โดยยังไม่เปลี่ยน Infrastructure จริง
terraform plan
แนะนำให้สร้าง Plan file สำหรับงานจริง
terraform plan -out=tfplan
terraform apply tfplan
#terraform destroy
ลบ Resource ที่ Terraform จัดการอยู่ใน State
terraform destroy
ควรตรวจสอบ Plan ทุกครั้งก่อน
applyหรือdestroyโดยเฉพาะ Production
#2. ติดตั้ง Terraform
#macOS
ติดตั้งผ่าน Homebrew:
brew tap hashicorp/tap
brew install hashicorp/tap/terraform
ตรวจสอบ:
terraform version
#Windows
ตัวอย่างผ่าน Chocolatey:
choco install terraform
หรือใช้วิธีติดตั้งตามเอกสารของ HashiCorp
ตรวจสอบ:
terraform version
#Ubuntu / Debian
แนวทางหนึ่งคือเพิ่ม HashiCorp APT repository แล้วติดตั้งแพ็กเกจ terraform
หลังติดตั้งตรวจสอบ:
terraform version
#3. โครงสร้างไฟล์ Terraform พื้นฐาน
ตัวอย่าง:
terraform-demo/
├── versions.tf
├── providers.tf
├── variables.tf
├── main.tf
├── outputs.tf
└── terraform.tfvars
หน้าที่ของไฟล์:
| ไฟล์ | หน้าที่ |
|---|---|
versions.tf |
กำหนด Terraform และ Provider ที่ต้องใช้ |
providers.tf |
ตั้งค่า Provider |
variables.tf |
ประกาศ Input Variables |
main.tf |
Resource หลัก |
outputs.tf |
ค่าที่ต้องการแสดงหลัง Deploy |
terraform.tfvars |
ค่าของ Variables |
Terraform ไม่บังคับว่าต้องแยกไฟล์ตามนี้ แต่การแยกจะช่วยให้โปรเจกต์อ่านง่ายขึ้น
#4. ใช้งาน Terraform กับ DigitalOcean
DigitalOcean มี Terraform Provider สำหรับจัดการ Droplet, VPC, Load Balancer, Database, Kubernetes และ Resource อื่น ๆ
#4.1 เตรียม API Token
สร้าง Personal Access Token จาก DigitalOcean แล้วกำหนดเป็น Environment Variable
#macOS / Linux
export DIGITALOCEAN_TOKEN="YOUR_TOKEN"
#PowerShell
$env:DIGITALOCEAN_TOKEN="YOUR_TOKEN"
ไม่ควรเขียน Token ลงใน Git repository
#4.2 สร้าง versions.tf
terraform {
  required_providers {
    digitalocean = {
      source  = "digitalocean/digitalocean"
      version = "~> 2.0"
    }
  }
}
#4.3 สร้าง providers.tf
provider "digitalocean" {}
Provider สามารถอ่าน Token จาก Environment Variable ได้
#4.4 สร้าง Droplet
main.tf
resource "digitalocean_droplet" "web" {
  name   = "terraform-web"
  region = "sgp1"
  size   = "s-1vcpu-1gb"
  image  = "ubuntu-24-04-x64"

  tags = [
    "terraform",
    "web"
  ]
}
outputs.tf
output "droplet_ip" {
  value = digitalocean_droplet.web.ipv4_address
}
Deploy:
terraform init
terraform fmt
terraform validate
terraform plan
terraform apply
ดู Output:
terraform output
ลบ Droplet:
terraform destroy
#5. ใช้งาน Terraform กับ AWS
AWS Provider สามารถจัดการบริการจำนวนมาก เช่น EC2, VPC, S3, RDS, Lambda, ECS, EKS และ IAM
#5.1 Authentication
สำหรับเครื่อง Developer สามารถใช้ AWS CLI
aws configure
หรือใช้ AWS profile / IAM Identity Center ตามนโยบายขององค์กร
ตรวจสอบว่า AWS CLI เข้าถึง Account ได้:
aws sts get-caller-identity
สำหรับ CI/CD ควรใช้ Identity Federation หรือ OIDC แทนการเก็บ Access Key ระยะยาวเมื่อทำได้
#5.2 Provider
versions.tf
terraform {
  required_providers {
    aws = {
      source  = "hashicorp/aws"
      version = "~> 6.0"
    }
  }
}
providers.tf
provider "aws" {
  region = "ap-southeast-1"
}
#5.3 สร้าง EC2
ใช้ Data Source หา Ubuntu AMI ล่าสุดแทนการ hard-code AMI ID
data "aws_ami" "ubuntu" {
  most_recent = true

  filter {
    name   = "name"
    values = ["ubuntu/images/hvm-ssd/ubuntu-*-24.04-amd64-server-*"]
  }

  filter {
    name   = "virtualization-type"
    values = ["hvm"]
  }

  owners = ["099720109477"]
}

resource "aws_instance" "web" {
  ami           = data.aws_ami.ubuntu.id
  instance_type = "t3.micro"

  tags = {
    Name      = "terraform-web"
    ManagedBy = "Terraform"
  }
}
outputs.tf
output "instance_id" {
  value = aws_instance.web.id
}

output "public_ip" {
  value = aws_instance.web.public_ip
}
รัน:
terraform init
terraform plan
terraform apply
#6. ใช้งาน Terraform กับ Google Cloud
Google Cloud Provider ใช้จัดการ Compute Engine, VPC, Cloud Storage, Cloud SQL, GKE, BigQuery และบริการอื่น ๆ
#6.1 Login ด้วย Application Default Credentials
สำหรับเครื่อง Developer Google แนะนำ Application Default Credentials (ADC)
gcloud auth application-default login
กำหนด Project:
gcloud config set project YOUR_PROJECT_ID
ตรวจสอบ:
gcloud auth list
gcloud config get-value project
#6.2 Provider
versions.tf
terraform {
  required_providers {
    google = {
      source  = "hashicorp/google"
      version = "~> 8.0"
    }
  }
}
variables.tf
variable "gcp_project_id" {
  type = string
}
providers.tf
provider "google" {
  project = var.gcp_project_id
  region  = "asia-southeast1"
  zone    = "asia-southeast1-a"
}
terraform.tfvars
gcp_project_id = "YOUR_PROJECT_ID"
อย่าเก็บข้อมูลลับไว้ใน
terraform.tfvarsหากไฟล์จะถูก commit
#6.3 สร้าง Compute Engine VM
resource "google_compute_instance" "web" {
  name         = "terraform-web"
  machine_type = "e2-micro"
  zone         = "asia-southeast1-a"

  boot_disk {
    initialize_params {
      image = "ubuntu-os-cloud/ubuntu-2404-lts-amd64"
    }
  }

  network_interface {
    network = "default"

    access_config {}
  }

  labels = {
    managed_by = "terraform"
  }
}
outputs.tf
output "gcp_external_ip" {
  value = google_compute_instance.web.network_interface[0].access_config[0].nat_ip
}
ก่อนใช้งาน Compute Engine อาจต้องเปิด API ที่เกี่ยวข้องใน Project
ตัวอย่าง:
gcloud services enable compute.googleapis.com
#7. ใช้งาน Terraform กับ Microsoft Azure
AzureRM Provider ใช้จัดการ Resource Group, Virtual Network, VM, Storage Account, AKS, Database และบริการอื่น ๆ
#7.1 Login สำหรับเครื่อง Developer
az login
ดู Subscription:
az account show
หากมีหลาย Subscription:
az account list --output table
เลือก Subscription:
az account set --subscription "SUBSCRIPTION_ID"
สำหรับระบบ Automation ควรใช้ Service Principal หรือ Workload Identity ที่จำกัดสิทธิ์ตามหลัก Least Privilege
#7.2 Provider
versions.tf
terraform {
  required_providers {
    azurerm = {
      source  = "hashicorp/azurerm"
      version = "~> 4.0"
    }
  }
}
providers.tf
provider "azurerm" {
  features {}
}
#7.3 สร้าง Resource Group และ Network
resource "azurerm_resource_group" "demo" {
  name     = "rg-terraform-demo"
  location = "Southeast Asia"
}

resource "azurerm_virtual_network" "demo" {
  name                = "vnet-terraform-demo"
  address_space       = ["10.10.0.0/16"]
  location            = azurerm_resource_group.demo.location
  resource_group_name = azurerm_resource_group.demo.name
}

resource "azurerm_subnet" "demo" {
  name                 = "subnet-web"
  resource_group_name  = azurerm_resource_group.demo.name
  virtual_network_name = azurerm_virtual_network.demo.name
  address_prefixes     = ["10.10.1.0/24"]
}
#7.4 Public IP และ Network Interface
resource "azurerm_public_ip" "web" {
  name                = "pip-terraform-web"
  location            = azurerm_resource_group.demo.location
  resource_group_name = azurerm_resource_group.demo.name
  allocation_method   = "Static"
  sku                 = "Standard"
}

resource "azurerm_network_interface" "web" {
  name                = "nic-terraform-web"
  location            = azurerm_resource_group.demo.location
  resource_group_name = azurerm_resource_group.demo.name

  ip_configuration {
    name                          = "internal"
    subnet_id                     = azurerm_subnet.demo.id
    private_ip_address_allocation = "Dynamic"
    public_ip_address_id          = azurerm_public_ip.web.id
  }
}
#7.5 สร้าง Linux VM
สร้าง SSH key ก่อน เช่น
ssh-keygen -t ed25519 -C "terraform"
ตัวอย่าง Resource:
resource "azurerm_linux_virtual_machine" "web" {
  name                = "vm-terraform-web"
  resource_group_name = azurerm_resource_group.demo.name
  location            = azurerm_resource_group.demo.location
  size                = "Standard_B1s"
  admin_username      = "azureuser"

  network_interface_ids = [
    azurerm_network_interface.web.id
  ]

  admin_ssh_key {
    username   = "azureuser"
    public_key = file("~/.ssh/id_ed25519.pub")
  }

  os_disk {
    caching              = "ReadWrite"
    storage_account_type = "Standard_LRS"
  }

  source_image_reference {
    publisher = "Canonical"
    offer     = "ubuntu-24_04-lts"
    sku       = "server"
    version   = "latest"
  }
}
Output:
output "azure_public_ip" {
  value = azurerm_public_ip.web.ip_address
}
#8. เปรียบเทียบ Resource หลักทั้ง 4 Cloud
| แนวคิด | DigitalOcean | AWS | Google Cloud | Azure |
|---|---|---|---|---|
| VM | Droplet | EC2 | Compute Engine | Azure VM |
| Virtual Network | VPC | VPC | VPC Network | Virtual Network |
| Object Storage | Spaces | S3 | Cloud Storage | Blob Storage |
| Managed Kubernetes | DOKS | EKS | GKE | AKS |
| Managed Database | Managed DB | RDS | Cloud SQL | Azure Database |
| Load Balancer | Load Balancer | ELB/ALB/NLB | Cloud Load Balancing | Azure Load Balancer/Application Gateway |
| Terraform Provider | digitalocean |
aws |
google |
azurerm |
#9. ใช้หลาย Cloud ใน Terraform โปรเจกต์เดียวได้หรือไม่
ได้ Terraform สามารถโหลดหลาย Provider พร้อมกันได้ เช่น
terraform {
  required_providers {
    digitalocean = {
      source = "digitalocean/digitalocean"
    }

    aws = {
      source = "hashicorp/aws"
    }

    google = {
      source = "hashicorp/google"
    }

    azurerm = {
      source = "hashicorp/azurerm"
    }
  }
}

provider "digitalocean" {}

provider "aws" {
  region = "ap-southeast-1"
}

provider "google" {
  project = var.gcp_project_id
  region  = "asia-southeast1"
}

provider "azurerm" {
  features {}
}
จากนั้นสามารถประกาศ Resource ของหลาย Cloud ใน Root Module เดียวกันได้
อย่างไรก็ตาม การรวมทุกอย่างไว้ใน State เดียวจะเพิ่ม blast radius และทำให้ Lifecycle ของแต่ละ Cloud ผูกกันมากขึ้น
สำหรับระบบจริงมักแนะนำให้แยก State ตามระบบหรือขอบเขตที่ deploy ร่วมกัน
#10. โครงสร้าง Multi-Cloud ที่แนะนำ
แทนที่จะมี main.tf ใหญ่มาก ควรแบ่งเป็น Module และ Environment
terraform-multicloud/
├── modules/
│   ├── digitalocean-vm/
│   ├── aws-vm/
│   ├── gcp-vm/
│   └── azure-vm/
│
├── environments/
│   ├── dev/
│   │   ├── digitalocean/
│   │   ├── aws/
│   │   ├── gcp/
│   │   └── azure/
│   │
│   └── production/
│       ├── digitalocean/
│       ├── aws/
│       ├── gcp/
│       └── azure/
│
└── README.md
ข้อดี:
- ลดความเสี่ยงเมื่อ
apply - แต่ละ Cloud มี State ของตัวเอง
- กำหนด Permission แยกได้
- Pipeline แยก Deploy ได้
- ลดปัญหา Resource ที่ไม่เกี่ยวข้องถูกเปลี่ยนพร้อมกัน
- ใช้ Module ซ้ำได้
#11. Terraform State คืออะไร
Terraform เก็บ Mapping ระหว่าง Resource ใน .tf กับ Infrastructure จริงไว้ใน State
Default คือไฟล์:
terraform.tfstate
ไม่ควรแก้ไฟล์นี้ด้วยมือ
และไม่ควร commit State ที่มีข้อมูลสำคัญเข้า Git
เพิ่มใน .gitignore
.terraform/
*.tfstate
*.tfstate.*
*.tfplan
*.tfvars
.terraform.lock.hcl
หมายเหตุ: ในหลายทีมควร commit
.terraform.lock.hclเพื่อให้การเลือก Provider version ทำซ้ำได้ ดังนั้นให้ปรับ.gitignoreให้เข้ากับ Workflow ของทีม แทนการคัดลอกตัวอย่างนี้แบบตายตัว
เวอร์ชันที่เหมาะกับทีมทั่วไป:
.terraform/
*.tfstate
*.tfstate.*
*.tfplan
*.tfvars
และ commit:
.terraform.lock.hcl
#12. Remote State
เมื่อทำงานเป็นทีม ไม่ควรใช้ Local State เพียงอย่างเดียว
ตัวเลือกที่ใช้ได้ เช่น
- HCP Terraform
- AWS S3 backend
- Google Cloud Storage backend
- Azure Blob Storage backend
- DigitalOcean Spaces แบบ S3-compatible ตามแนวทางที่ผู้ให้บริการรองรับ
หลักสำคัญคือ
- State ต้องเก็บในที่ส่วนกลาง
- จำกัดสิทธิ์อ่าน/เขียน
- เปิด Encryption
- มี State Locking หรือกลไกป้องกันการแก้พร้อมกัน
- แยก State ระหว่าง Dev / Staging / Production
#13. Variables และ Sensitive Data
ประกาศ Variable:
variable "environment" {
  type        = string
  description = "Deployment environment"
  default     = "dev"
}
ใช้:
tags = {
  Environment = var.environment
}
Sensitive Variable:
variable "api_token" {
  type      = string
  sensitive = true
}
แต่ sensitive = true หมายถึง Terraform พยายามไม่แสดงค่าบางส่วนใน CLI เท่านั้น ไม่ได้แปลว่าค่านั้นจะไม่ปรากฏใน State
ดังนั้นควรป้องกัน State อย่างเหมาะสม
#14. Outputs
Output ช่วยส่งค่าที่สร้างขึ้นไปให้ Pipeline หรือผู้ใช้
output "server_ip" {
  value = digitalocean_droplet.web.ipv4_address
}
ดูทั้งหมด:
terraform output
อ่านค่าเดียว:
terraform output server_ip
JSON:
terraform output -json
เหมาะสำหรับใช้กับ CI/CD script
#15. Format และ Validate
ก่อน commit ควรรัน
terraform fmt -recursive
terraform validate
สามารถเพิ่มใน CI Pipeline ได้
ตัวอย่าง Flow:
Pull Request
    ↓
terraform fmt -check
    ↓
terraform init
    ↓
terraform validate
    ↓
terraform plan
    ↓
Code Review
    ↓
Merge
    ↓
terraform apply
Production ควรมี Approval ก่อน Apply
#16. ตัวอย่าง Multi-Cloud Architecture
ตัวอย่างระบบหนึ่งอาจใช้ Cloud แต่ละรายตามหน้าที่
                         GitHub
                            |
                     CI/CD Pipeline
                            |
                     Terraform CLI
                            |
          +-----------------+-----------------+
          |                 |                 |
          |                 |                 |
   DigitalOcean            AWS              GCP              Azure
       |                    |                |                 |
   Droplet/DOKS         EC2/EKS/S3        GCE/GKE          VM/AKS
       |                    |                |                 |
       +--------------------+----------------+-----------------+
                            |
                      Application
Terraform ไม่ได้ทำให้ Resource ของแต่ละ Cloud เหมือนกันทั้งหมด แต่ทำให้ใช้ Workflow และแนวคิด IaC เดียวกันได้
#17. Module สำหรับใช้ซ้ำ
สมมติสร้าง Module สำหรับ DigitalOcean VM
modules/
└── digitalocean-vm/
    ├── main.tf
    ├── variables.tf
    └── outputs.tf
modules/digitalocean-vm/main.tf
resource "digitalocean_droplet" "this" {
  name   = var.name
  region = var.region
  size   = var.size
  image  = var.image
}
variables.tf
variable "name" {
  type = string
}

variable "region" {
  type = string
}

variable "size" {
  type = string
}

variable "image" {
  type = string
}
Root Module:
module "web" {
  source = "../../modules/digitalocean-vm"

  name   = "dev-web"
  region = "sgp1"
  size   = "s-1vcpu-1gb"
  image  = "ubuntu-24-04-x64"
}
แนวคิดเดียวกันสามารถสร้าง Module สำหรับ AWS, GCP และ Azure ได้
#18. Import Infrastructure เดิมเข้า Terraform
ถ้ามี Resource อยู่แล้ว ไม่จำเป็นต้องสร้างใหม่ทั้งหมด
ตัวอย่างแนวคิด:
terraform import RESOURCE_ADDRESS RESOURCE_ID
เช่น
terraform import digitalocean_droplet.web 123456789
หลัง Import ต้องเขียน Configuration ให้สอดคล้องกับ Resource จริง แล้วตรวจด้วย
terraform plan
เป้าหมายคือให้ Plan ไม่มีการเปลี่ยนแปลงที่ไม่ตั้งใจ
#19. Terraform Lifecycle ที่ควรรู้
ตัวอย่าง:
resource "aws_instance" "web" {
  # ...

  lifecycle {
    prevent_destroy = true
  }
}
prevent_destroy ช่วยลดความเสี่ยงต่อ Resource สำคัญ แต่ไม่ควรใช้แทน Backup, IAM, Approval และ Change Management
อีกตัวอย่าง:
lifecycle {
  create_before_destroy = true
}
เหมาะกับ Resource บางชนิดที่ต้องสร้างตัวใหม่ก่อนลบตัวเดิม
#20. Best Practices สำหรับ Multi-Cloud
#20.1 แยก State ตามขอบเขต
หลีกเลี่ยง State ใหญ่ที่รวมทุก Environment และทุก Cloud
ตัวอย่างที่ดีกว่า:
dev/do
dev/aws
dev/gcp
dev/azure

prod/do
prod/aws
prod/gcp
prod/azure
#20.2 Pin Provider Version
เช่น
version = "~> 6.0"
และ commit .terraform.lock.hcl
#20.3 ไม่เก็บ Secret ใน Git
หลีกเลี่ยง:
provider "digitalocean" {
  token = "dop_v1_xxxxxxxxx"
}
ใช้ Environment Variable, Secret Manager, Workload Identity หรือ OIDC แทน
#20.4 ใช้ Least Privilege
Credential ของ Terraform ควรมีสิทธิ์เฉพาะ Resource ที่ Pipeline ต้องจัดการ
#20.5 Review terraform plan
ไม่ควร terraform apply -auto-approve ใน Production โดยไม่มี Control เพิ่มเติม
#20.6 ใช้ Module
เมื่อ Resource Pattern เริ่มซ้ำ ควรแยกเป็น Module
#20.7 CI/CD ต้องแยก Plan และ Apply
Pull Request:
terraform plan
หลัง Approve / Merge:
terraform apply
#20.8 ตรวจ Drift
หากมีคนแก้ Infrastructure จาก Console โดยตรง Terraform อาจตรวจพบความต่างในรอบ plan ถัดไป
จึงควรกำหนด Governance ว่า Resource ที่ Terraform จัดการควรแก้ผ่าน Code เป็นหลัก
#21. Terraform กับ Ansible ต่างกันอย่างไร
Terraform เหมาะกับการ Provision Infrastructure
เช่น
- VM
- VPC
- Load Balancer
- Database
- Kubernetes Cluster
- Storage
Ansible เหมาะกับ Configuration Management
เช่น
- ติดตั้ง Nginx
- ติดตั้ง Docker
- แก้ Config
- Deploy Application
- จัดการ Package ภายใน OS
Workflow ที่ใช้ร่วมกันได้:
Terraform
   |
   +--> สร้าง VM / Network / Security
                |
                v
             Ansible
                |
                +--> ติดตั้ง Docker
                +--> ตั้งค่า Nginx
                +--> Deploy App
#22. Terraform กับ Kubernetes
Terraform สามารถสร้าง Managed Kubernetes เช่น
- DigitalOcean Kubernetes (DOKS)
- Amazon EKS
- Google Kubernetes Engine (GKE)
- Azure Kubernetes Service (AKS)
หลังจาก Cluster พร้อมแล้ว อาจใช้
- Helm
- Argo CD
- Flux
- Kubernetes manifests
เพื่อ Deploy Application
แนวทางที่นิยมคือ
Terraform
   ↓
Cloud Infrastructure
   ↓
Kubernetes Cluster
   ↓
Argo CD / Flux
   ↓
Application Deployment
Terraform จัดการ Infrastructure ส่วน GitOps tool จัดการ Application Lifecycle
#23. Workflow สำหรับการฝึก
แนะนำให้ทดลองตามลำดับ
ขั้นที่ 1
ติดตั้ง Terraform
   ↓
ขั้นที่ 2
สร้าง Resource 1 ตัวใน DigitalOcean
   ↓
ขั้นที่ 3
ฝึก plan / apply / destroy
   ↓
ขั้นที่ 4
ทดลอง AWS EC2
   ↓
ขั้นที่ 5
ทดลอง GCP Compute Engine
   ↓
ขั้นที่ 6
ทดลอง Azure VM
   ↓
ขั้นที่ 7
แยก variables / outputs
   ↓
ขั้นที่ 8
สร้าง module
   ↓
ขั้นที่ 9
ย้าย state ไป remote backend
   ↓
ขั้นที่ 10
ทำ CI/CD
#24. สรุป
Terraform ช่วยให้การสร้าง Infrastructure บนหลาย Cloud ใช้ Workflow คล้ายกัน:
terraform init
terraform fmt
terraform validate
terraform plan
terraform apply
ความแตกต่างหลักอยู่ที่ Provider และ Resource ของแต่ละ Cloud
DigitalOcean → digitalocean_droplet
AWS          → aws_instance
Google Cloud → google_compute_instance
Azure        → azurerm_linux_virtual_machine
สำหรับการทดลอง สามารถเริ่มจากไฟล์ Terraform แยกตาม Cloud ได้ทันที แต่เมื่อใช้งานจริงควรให้ความสำคัญกับ
- Remote State
- State Locking
- Secret Management
- Least Privilege
- Provider Version Lock
- Reusable Modules
- Environment Separation
- CI/CD Plan Review
- Approval ก่อน Production Apply
Terraform จึงไม่ได้เป็นเพียงเครื่องมือสร้าง VM แต่เป็นพื้นฐานสำคัญของแนวคิด Infrastructure as Code และสามารถเป็นแกนกลางของ Workflow แบบ Multi-Cloud + DevOps + GitOps ได้อย่างมีประสิทธิภาพ
#แหล่งอ้างอิง
- HashiCorp Terraform Documentation: https://developer.hashicorp.com/terraform
- Terraform AWS Provider: https://registry.terraform.io/providers/hashicorp/aws/latest/docs
- Terraform Google Provider: https://registry.terraform.io/providers/hashicorp/google/latest/docs
- Terraform AzureRM Provider: https://registry.terraform.io/providers/hashicorp/azurerm/latest/docs
- DigitalOcean Terraform Provider: https://docs.digitalocean.com/reference/terraform/
- Google Cloud – Authentication for Terraform: https://cloud.google.com/docs/terraform/authentication
- Microsoft Learn – Terraform on Azure: https://learn.microsoft.com/azure/developer/terraform/