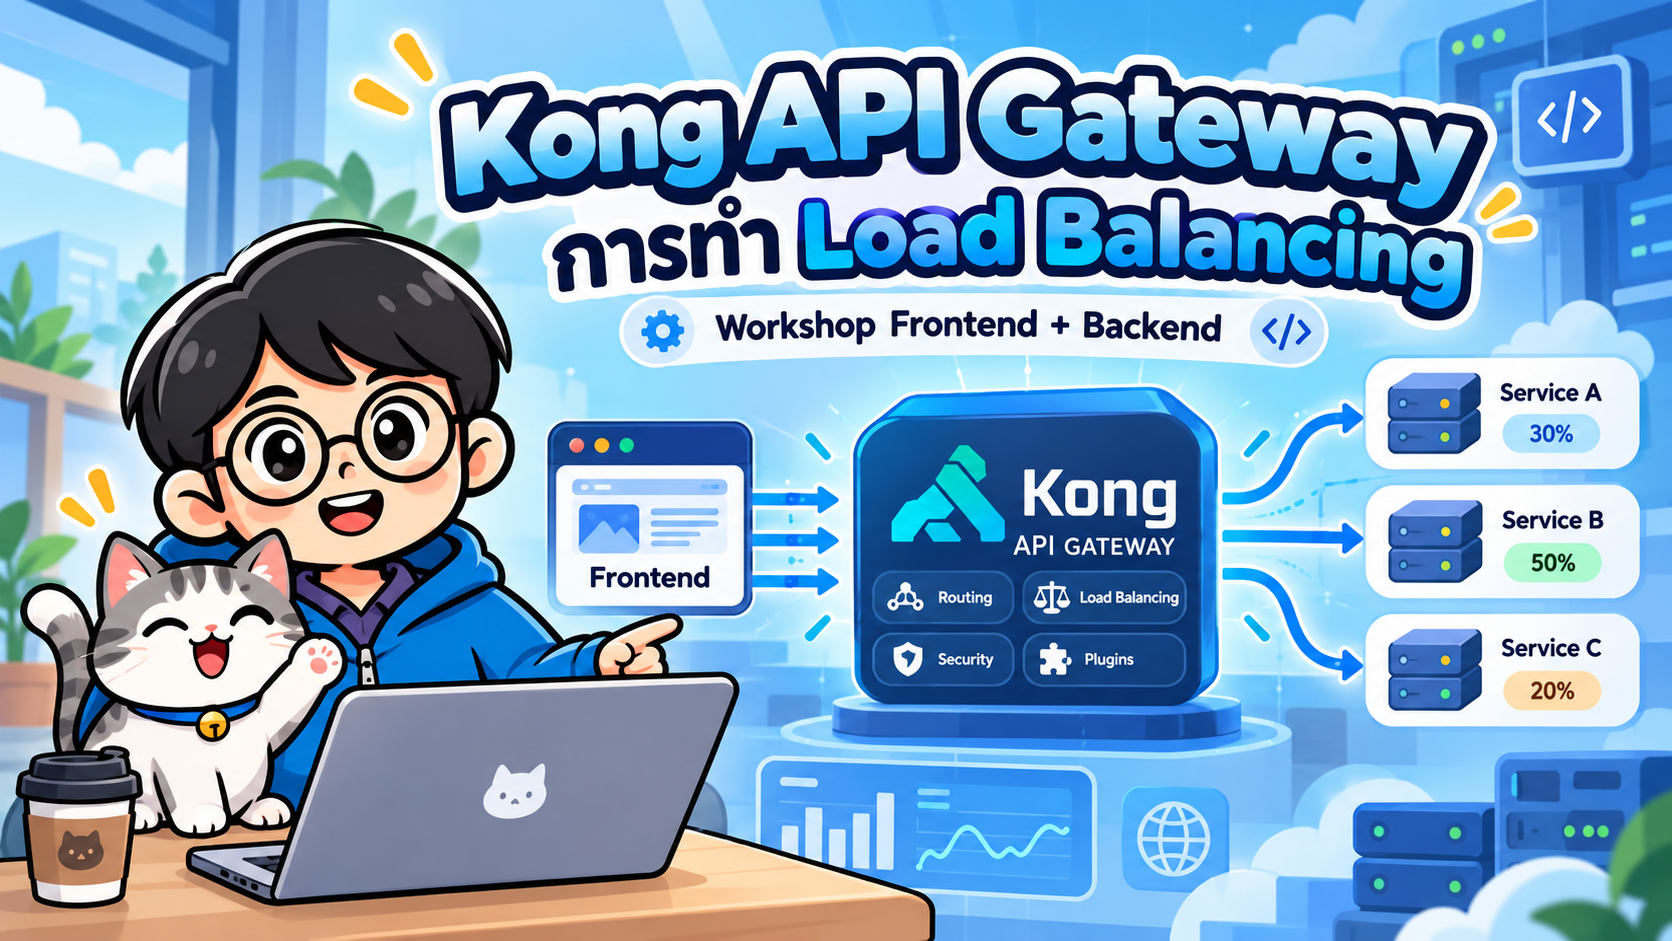
- Workshop Frontend + Backend ด้วย Docker Compose
- 1. แนวคิด Load Balancing ใน Kong
- 2. Architecture ของ Workshop
- 3. Folder Structure
- Workshop
- การรัน Workshop
- ทดลอง Failover
- ทดลอง Weighted Load Balancing
- ทดลอง Least Connections
- Round-robin vs Least-connections
- Service, Upstream และ Target ต่างกันอย่างไร
- Health Check และ Circuit Breaker
- Flow ของ Request ใน Workshop
- เหตุผลที่ใช้ Kong เป็น Load Balancer ระดับ API
- สิ่งที่ควรปรับเมื่อใช้ Production
- คำถามสำหรับ Workshop
- แบบฝึกหัดต่อยอด
- สรุป
- References
#Workshop Frontend + Backend ด้วย Docker Compose
Kong API Gateway ไม่ได้ทำหน้าที่เพียงรับ Request แล้ว Route ไปยัง API เท่านั้น แต่ยังสามารถทำ Load Balancing ระหว่าง Backend หลาย Instance ผ่านแนวคิด Upstream และ Target ได้ด้วย
Workshop นี้สร้างระบบขนาดเล็กที่ประกอบด้วย
- Frontend: Nginx + HTML/JavaScript
- API Gateway: Kong Gateway แบบ DB-less
- Backend: Node.js + Express จำนวน 3 Instances
- Load Balancer: Kong Upstream แบบ
round-robin - Health Check: Active + Passive Health Check
- Runtime: Docker Compose
เป้าหมายคือให้เห็น Request จากผู้ใช้วิ่งผ่าน Kong และถูกกระจายไปยัง backend-1, backend-2 และ backend-3
#1. แนวคิด Load Balancing ใน Kong
องค์ประกอบหลักมี 4 ส่วน
| องค์ประกอบ | หน้าที่ |
|---|---|
| Route | กำหนดว่า Request แบบใดจะเข้ามายัง Service |
| Service | ตัวแทนของ Backend Service ที่ Kong จะ Proxy ไปหา |
| Upstream | Virtual hostname และตัว Load Balancer |
| Target | Backend instance จริง เช่น backend1:3000 |
เส้นทางของ Request คือ
Client
  ↓
Route
  ↓
Service
  ↓
Upstream
  ↓
Targets
Kong รองรับ Load Balancing ผ่าน Upstream และ Targets โดย Target แต่ละตัวสามารถกำหนด weight ได้
อัลกอริทึมที่ Kong Gateway รองรับในเอกสารปัจจุบันประกอบด้วย Round-robin, Consistent-hashing, Least-connections, Latency และ Sticky sessions โดย Workshop นี้เลือก Round-robin เพราะเข้าใจง่ายและเหมาะสำหรับการสาธิตการกระจาย Request
หมายเหตุ: Sticky sessions ถูกระบุในเอกสาร Kong ว่าใช้ได้ตั้งแต่ Gateway 3.11+ ดังนั้น Workshop ที่ pin
kong:3.9.3จะเน้น Round-robin และฟีเจอร์ที่รองรับในรุ่นนี้
#2. Architecture ของ Workshop
flowchart LR
    U[Browser] --> F[Frontend Nginx<br/>localhost:8080]
    F -->|/api| K[Kong API Gateway<br/>:8000]

    K --> R[Route: /api]
    R --> S[Service: backend-service]
    S --> UP[Upstream: backend-upstream]

    UP --> B1[backend-1<br/>Node.js :3000]
    UP --> B2[backend-2<br/>Node.js :3000]
    UP --> B3[backend-3<br/>Node.js :3000]

    K -. Active Health Check .-> B1
    K -. Active Health Check .-> B2
    K -. Active Health Check .-> B3
Frontend ใช้ Nginx เป็น Web Server และ Reverse Proxy เฉพาะ /api ไปยัง Kong ทำให้ Browser เรียก API แบบ Same-Origin และไม่ต้องเพิ่ม CORS สำหรับ Workshop นี้
#3. Folder Structure
kong-load-balancing-workshop/
├── docker-compose.yml
├── kong/
│   └── kong.yml
├── backend/
│   ├── Dockerfile
│   ├── package.json
│   └── server.js
└── frontend/
    ├── Dockerfile
    ├── nginx.conf
    └── index.html
#Workshop
#4. สร้าง Backend
#backend/package.json
{
  "name": "kong-load-balancing-backend",
  "version": "1.0.0",
  "private": true,
  "description": "Simple backend for Kong API Gateway load balancing workshop",
  "main": "server.js",
  "scripts": {
    "start": "node server.js"
  },
  "dependencies": {
    "express": "^5.1.0"
  }
}
#backend/server.js
\
const express = require("express");
const os = require("os");

const app = express();
const port = process.env.PORT || 3000;
const instance = process.env.INSTANCE_NAME || os.hostname();

app.use(express.json());

app.get("/", (req, res) => {
  res.json({
    message: "Hello from backend",
    instance,
    hostname: os.hostname(),
    time: new Date().toISOString()
  });
});

app.get("/health", (req, res) => {
  res.status(200).json({
    status: "UP",
    instance
  });
});

app.get("/slow", async (req, res) => {
  const raw = Number(req.query.ms || 1500);
  const ms = Math.max(0, Math.min(raw, 10000));

  await new Promise(resolve => setTimeout(resolve, ms));

  res.json({
    message: "Slow response completed",
    instance,
    delay_ms: ms,
    time: new Date().toISOString()
  });
});

app.listen(port, "0.0.0.0", () => {
  console.log(`Backend ${instance} listening on port ${port}`);
});
จุดสำคัญคือ Backend ทุก Container ใช้ Source Code เดียวกัน แต่รับชื่อ Instance ผ่าน Environment Variable
INSTANCE_NAME=backend-1
INSTANCE_NAME=backend-2
INSTANCE_NAME=backend-3
Endpoint ที่ใช้คือ
| Endpoint | หน้าที่ |
|---|---|
/ |
ส่งชื่อ Backend instance กลับมา |
/health |
ใช้สำหรับ Kong Health Check |
/slow?ms=1500 |
ใช้ทดลอง Least-connections เพิ่มเติม |
#5. Backend Dockerfile
สร้าง backend/Dockerfile
FROM node:22-alpine

WORKDIR /app

COPY package*.json ./
RUN npm install --omit=dev

COPY server.js .

EXPOSE 3000

CMD ["npm", "start"]
#6. ตั้งค่า Kong Gateway
สร้าง kong/kong.yml
_format_version: "3.0"
_transform: true

services:
  - name: backend-service
    host: backend-upstream
    port: 3000
    protocol: http
    retries: 3
    connect_timeout: 5000
    read_timeout: 5000
    write_timeout: 5000
    routes:
      - name: backend-route
        paths:
          - /api
        strip_path: true

upstreams:
  - name: backend-upstream
    algorithm: round-robin
    healthchecks:
      threshold: 0
      active:
        type: http
        http_path: /health
        timeout: 1
        healthy:
          interval: 5
          successes: 1
          http_statuses:
            - 200
        unhealthy:
          interval: 5
          tcp_failures: 1
          timeouts: 1
          http_failures: 1
          http_statuses:
            - 429
            - 500
            - 502
            - 503
            - 504
      passive:
        type: http
        healthy:
          successes: 1
        unhealthy:
          tcp_failures: 1
          timeouts: 1
          http_failures: 1
          http_statuses:
            - 429
            - 500
            - 502
            - 503
            - 504
    targets:
      - target: backend1:3000
        weight: 100
      - target: backend2:3000
        weight: 100
      - target: backend3:3000
        weight: 100
#อธิบายค่าที่สำคัญ
services:
  - name: backend-service
    host: backend-upstream
backend-service ไม่ได้ชี้ไป Backend ตัวใดตัวหนึ่ง แต่ชี้ไปชื่อของ Upstream
upstreams:
  - name: backend-upstream
    algorithm: round-robin
Kong จึงใช้ backend-upstream เป็น Load Balancer
Targets คือ
targets:
  - target: backend1:3000
    weight: 100
  - target: backend2:3000
    weight: 100
  - target: backend3:3000
    weight: 100
เมื่อ Weight เท่ากัน Traffic ในระยะยาวควรถูกกระจายใกล้เคียงกัน
#7. Active Health Check
Workshop กำหนด
healthchecks:
  active:
    type: http
    http_path: /health
Kong จะ Probe Endpoint /health ของแต่ละ Target เป็นระยะ
เมื่อ Backend ไม่ตอบสนองตาม Threshold ที่ตั้งไว้ Target จะถูกมองว่า Unhealthy และ Kong จะข้าม Target นั้นในการเลือกปลายทาง
เมื่อ Target กลับมาตอบ /health สำเร็จ Active Health Check สามารถนำ Target กลับเข้าสู่ Load Balancer ได้อีกครั้ง
Workshop ใช้ค่าค่อนข้าง aggressive เช่น interval 5 วินาทีและ failure threshold 1 เพื่อให้เห็นผลเร็วในการทดลอง ไม่ใช่ค่าที่แนะนำแบบตายตัวสำหรับ Production
#8. สร้าง Frontend
#frontend/nginx.conf
server {
    listen 80;
    server_name _;

    root /usr/share/nginx/html;
    index index.html;

    location / {
        try_files $uri $uri/ /index.html;
    }

    location /api {
        proxy_pass http://kong:8000;
        proxy_http_version 1.1;
        proxy_set_header Host $host;
        proxy_set_header X-Real-IP $remote_addr;
        proxy_set_header X-Forwarded-For $proxy_add_x_forwarded_for;
        proxy_set_header X-Forwarded-Proto $scheme;
    }
}
เมื่อ Browser เรียก
http://localhost:8080/api
Nginx จะส่ง Request ไป
http://kong:8000/api
จากนั้น Kong Route /api จะ Match และ strip_path: true ทำให้ Backend ได้รับ Path /
#9. Frontend Dockerfile
สร้าง frontend/Dockerfile
FROM nginx:alpine
COPY nginx.conf /etc/nginx/conf.d/default.conf
COPY index.html /usr/share/nginx/html/index.html
EXPOSE 80
#10. Frontend UI
สร้าง frontend/index.html
\
<!doctype html>
<html lang="th">
<head>
  <meta charset="utf-8" />
  <meta name="viewport" content="width=device-width, initial-scale=1" />
  <title>Kong Load Balancing Workshop</title>
  <style>
    :root { font-family: Inter, system-ui, -apple-system, BlinkMacSystemFont, "Segoe UI", sans-serif; }
    body { margin: 0; background: #f6f7fb; color: #171923; }
    main { max-width: 980px; margin: 0 auto; padding: 32px 20px 64px; }
    h1 { margin-bottom: 8px; }
    .muted { color: #667085; }
    .panel { background: white; border-radius: 18px; padding: 20px; margin-top: 20px; box-shadow: 0 8px 28px rgba(0,0,0,.06); }
    button { border: 0; border-radius: 10px; padding: 11px 16px; margin: 4px 6px 4px 0; cursor: pointer; font-weight: 700; }
    button.primary { background: #111827; color: white; }
    button.secondary { background: #e5e7eb; color: #111827; }
    .cards { display: grid; grid-template-columns: repeat(3, 1fr); gap: 12px; margin-top: 16px; }
    .card { padding: 14px; border: 1px solid #e5e7eb; border-radius: 14px; }
    .count { font-size: 28px; font-weight: 800; margin-top: 6px; }
    table { width: 100%; border-collapse: collapse; margin-top: 16px; }
    th, td { text-align: left; padding: 10px; border-bottom: 1px solid #eaecf0; }
    code { background: #f2f4f7; padding: 2px 6px; border-radius: 6px; }
    @media (max-width: 700px) { .cards { grid-template-columns: 1fr; } }
  </style>
</head>
<body>
<main>
  <h1>Kong API Gateway — Load Balancing</h1>
  <p class="muted">Frontend → Kong Gateway → backend-1 / backend-2 / backend-3</p>

  <section class="panel">
    <button class="primary" id="one">ส่ง 1 Request</button>
    <button class="primary" id="twelve">ส่ง 12 Requests</button>
    <button class="secondary" id="reset">Reset</button>

    <div class="cards">
      <div class="card"><div>backend-1</div><div class="count" id="backend-1">0</div></div>
      <div class="card"><div>backend-2</div><div class="count" id="backend-2">0</div></div>
      <div class="card"><div>backend-3</div><div class="count" id="backend-3">0</div></div>
    </div>
  </section>

  <section class="panel">
    <strong>Request history</strong>
    <table>
      <thead><tr><th>#</th><th>Instance</th><th>Hostname</th><th>Time</th></tr></thead>
      <tbody id="history"></tbody>
    </table>
  </section>
</main>

<script>
  const counts = { "backend-1": 0, "backend-2": 0, "backend-3": 0 };
  let requestNo = 0;

  function renderCounts() {
    Object.entries(counts).forEach(([name, value]) => {
      document.getElementById(name).textContent = value;
    });
  }

  async function callApi() {
    const response = await fetch("/api", { cache: "no-store" });
    if (!response.ok) throw new Error(`HTTP ${response.status}`);
    const data = await response.json();

    requestNo += 1;
    if (counts[data.instance] !== undefined) {
      counts[data.instance] += 1;
    }
    renderCounts();

    const tr = document.createElement("tr");
    tr.innerHTML = `<td>${requestNo}</td><td>${data.instance}</td><td>${data.hostname}</td><td>${data.time}</td>`;
    document.getElementById("history").prepend(tr);
  }

  document.getElementById("one").addEventListener("click", async () => {
    try { await callApi(); } catch (e) { alert(e.message); }
  });

  document.getElementById("twelve").addEventListener("click", async () => {
    for (let i = 0; i < 12; i++) {
      try { await callApi(); } catch (e) { console.error(e); }
    }
  });

  document.getElementById("reset").addEventListener("click", () => {
    Object.keys(counts).forEach(k => counts[k] = 0);
    requestNo = 0;
    renderCounts();
    document.getElementById("history").innerHTML = "";
  });

  renderCounts();
</script>
</body>
</html>
หน้าเว็บมีปุ่ม
- ส่ง 1 Request
- ส่ง 12 Requests
- Reset
และแสดงจำนวน Request ที่แต่ละ Backend ได้รับ
#11. Docker Compose
สร้าง docker-compose.yml
services:
  backend1:
    build: ./backend
    environment:
      INSTANCE_NAME: backend-1
    networks:
      - kong-lab

  backend2:
    build: ./backend
    environment:
      INSTANCE_NAME: backend-2
    networks:
      - kong-lab

  backend3:
    build: ./backend
    environment:
      INSTANCE_NAME: backend-3
    networks:
      - kong-lab

  kong:
    image: kong:3.9.3
    environment:
      KONG_DATABASE: "off"
      KONG_DECLARATIVE_CONFIG: /kong/declarative/kong.yml
      KONG_PROXY_ACCESS_LOG: /dev/stdout
      KONG_PROXY_ERROR_LOG: /dev/stderr
      KONG_ADMIN_ACCESS_LOG: /dev/stdout
      KONG_ADMIN_ERROR_LOG: /dev/stderr
      KONG_ADMIN_LISTEN: 0.0.0.0:8001
    volumes:
      - ./kong/kong.yml:/kong/declarative/kong.yml:ro
    ports:
      - "8000:8000"
      - "127.0.0.1:8001:8001"
    depends_on:
      - backend1
      - backend2
      - backend3
    networks:
      - kong-lab

  frontend:
    build: ./frontend
    ports:
      - "8080:80"
    depends_on:
      - kong
    networks:
      - kong-lab

networks:
  kong-lab:
    driver: bridge
Architecture ภายใน Docker Network จะเป็น
frontend
   |
   v
kong:8000
   |
   v
backend-upstream
   |
   +---- backend1:3000
   +---- backend2:3000
   +---- backend3:3000
#การรัน Workshop
#12. Build และ Start
จาก Folder หลัก
docker compose up --build -d
ตรวจสอบสถานะ
docker compose ps
ดู Log ของ Kong
docker compose logs -f kong
#13. เปิด Frontend
เปิด Browser
http://localhost:8080
กด ส่ง 12 Requests
ควรเห็น Request ถูกแบ่งไปยัง Backend ทั้ง 3 ตัว เช่น
backend-1  4
backend-2  4
backend-3  4
จำนวนจริงในแต่ละช่วงอาจไม่จำเป็นต้องเรียงแบบ 1-2-3 ให้เห็นทุกครั้ง แต่เมื่อทดสอบจำนวนมาก การกระจายของ Equal-weight Round-robin ควรใกล้เคียงกัน
#14. ทดสอบผ่าน curl
สามารถเรียก Kong โดยตรง
curl http://localhost:8000/api
ผลลัพธ์ตัวอย่าง
{
  "message": "Hello from backend",
  "instance": "backend-2",
  "hostname": "xxxxxxxx",
  "time": "2026-09-24T00:00:00.000Z"
}
Linux/macOS สามารถยิงหลายครั้งได้ด้วย
for i in $(seq 1 12); do
  curl -s http://localhost:8000/api
  echo
done
ถ้ามี jq
for i in $(seq 1 12); do
  curl -s http://localhost:8000/api | jq -r '.instance'
done
PowerShell
1..12 | ForEach-Object {
  (Invoke-RestMethod http://localhost:8000/api).instance
}
#ทดลอง Failover
#15. ปิด backend-2
docker compose stop backend2
รอประมาณ 5–10 วินาที เพื่อให้ Active Health Check ตรวจพบ
แล้วกด ส่ง 12 Requests อีกครั้ง
ผลที่ควรสังเกต
backend-1
backend-3
backend-1
backend-3
...
Kong ควรหลีกเลี่ยง Target ที่ถูก Mark ว่า Unhealthy
ตรวจสอบ Health ของ Upstream ผ่าน Admin API
curl http://localhost:8001/upstreams/backend-upstream/health
Admin API ใน Workshop bind เฉพาะ
127.0.0.1เพื่อไม่เปิดออกนอกเครื่องโดยไม่จำเป็น
#16. เปิด backend-2 กลับมา
docker compose start backend2
รอ Active Health Check
แล้วทดสอบใหม่
curl http://localhost:8000/api
เมื่อ Kong ตรวจว่า /health กลับมา Healthy แล้ว backend-2 จะกลับเข้าวง Load Balancing
#ทดลอง Weighted Load Balancing
#17. เปลี่ยน Weight
แก้ kong/kong.yml
targets:
  - target: backend1:3000
    weight: 100

  - target: backend2:3000
    weight: 200

  - target: backend3:3000
    weight: 100
Restart Kong
docker compose restart kong
ยิง Request จำนวนมาก เช่น 40–100 ครั้ง
แนวโน้มโดยประมาณจะเป็น
backend-1 ≈ 25%
backend-2 ≈ 50%
backend-3 ≈ 25%
Weight คือสัดส่วนสัมพัทธ์ ไม่ใช่ Percentage ที่รับประกันจำนวน Request แบบเป๊ะใน sample เล็ก
#ทดลอง Least Connections
#18. เปลี่ยน Algorithm
แก้
algorithm: round-robin
เป็น
algorithm: least-connections
จากนั้น
docker compose restart kong
Backend มี Endpoint
/slow?ms=1500
จึงสามารถทดลองส่ง Concurrent Requests ไปที่
http://localhost:8000/api/slow?ms=1500
Least-connections จะพิจารณา In-flight connections และ Weight เพื่อเลือก Target ที่มี spare capacity มากกว่า
#Round-robin vs Least-connections
| Algorithm | หลักการ | เหมาะกับ |
|---|---|---|
| Round-robin | หมุนกระจาย Request ตาม Weight | Request ใช้เวลาประมวลผลใกล้เคียงกัน |
| Least-connections | เลือก Backend ที่มี In-flight load ต่ำกว่า | Request duration แตกต่างกันมาก |
| Consistent-hashing | Hash จากข้อมูล Client/Request | ต้องการให้ Client เดิมมีแนวโน้มไป Backend เดิม |
| Latency | เลือกจาก observed latency แบบ EWMA | Backend มี latency แตกต่างกัน |
| Sticky sessions | ใช้ Cookie เพื่อ session persistence | Web app ที่ต้องรักษา affinity และ Gateway รุ่นรองรับ |
#Service, Upstream และ Target ต่างกันอย่างไร
สมมติระบบ Order API มี 3 Instances
order-api-1
order-api-2
order-api-3
ใน Kong สามารถคิดเป็น
Route
/api/orders
      |
      v
Service
order-service
      |
      v
Upstream
order-upstream
      |
      +---- Target: order-api-1:3000
      +---- Target: order-api-2:3000
      +---- Target: order-api-3:3000
#Service
บอก Kong ว่า Request ที่ Match Route นี้เป็น Service อะไร
#Upstream
เป็น Logical Load Balancer หรือ Virtual hostname
#Target
เป็น Instance จริงที่รับ Traffic
#Health Check และ Circuit Breaker
Kong แบ่ง Health Check หลักเป็น
#Active Health Check
Kong สร้าง Request Probe ไปยัง Backend เอง
Kong
  |
  +--> GET backend-1/health
  +--> GET backend-2/health
  +--> GET backend-3/health
ข้อดีคือ Backend ที่ฟื้นกลับมาสามารถถูกตรวจพบและนำกลับมาใช้งานได้อัตโนมัติ
#Passive Health Check
Kong ใช้ผลจาก Traffic จริงที่กำลัง Proxy เพื่อดูว่า Target มี Error, Timeout หรือ Connection Failure หรือไม่
เอกสาร Kong ระบุว่า Passive check สามารถ Mark Target เป็น Unhealthy ได้ แต่ไม่ได้ทำหน้าที่ Probe เพื่อเปิด Target กลับมาเองแบบ Active check
ในระบบจริงจึงสามารถใช้ Active และ Passive ร่วมกันได้
#Flow ของ Request ใน Workshop
เมื่อผู้ใช้เรียก
GET http://localhost:8080/api
จะเกิดขั้นตอน
1. Browser
   ↓
2. Frontend Nginx
   ↓
3. Kong Proxy :8000
   ↓
4. Route /api
   ↓
5. backend-service
   ↓
6. backend-upstream
   ↓
7. Round-robin balancer
   ↓
8. backend-1 / backend-2 / backend-3
Backend ส่ง JSON กลับผ่านเส้นทางเดิม
Backend
  ↓
Kong
  ↓
Frontend Nginx
  ↓
Browser
#เหตุผลที่ใช้ Kong เป็น Load Balancer ระดับ API
ระบบ Production มักมี Load Balancing หลายชั้น เช่น
Internet
   |
Cloud Load Balancer
   |
Kong Gateway Cluster
   |
API-level Load Balancing
   |
Backend Services
Cloud Load Balancer สามารถกระจาย Traffic ไปหลาย Kong nodes ส่วน Kong จัดการ API Routing, Authentication, Rate Limiting, Observability และ Backend Upstream balancing
จึงไม่ควรมองว่า Kong ต้องแทนที่ Load Balancer ทุกชนิด แต่เป็น API Gateway ที่มีความสามารถ Load Balancing ในระดับ Upstream Service
#สิ่งที่ควรปรับเมื่อใช้ Production
Workshop นี้ตั้งใจให้เรียนรู้ได้ง่าย ดังนั้น Production ควรพิจารณาเพิ่มอย่างน้อย
- TLS/HTTPS
- Authentication เช่น Key Auth, JWT หรือ OIDC ตามสถาปัตยกรรม
- Rate Limiting
- Metrics และ Observability
- Health-check thresholds ที่เหมาะกับ SLO
- Timeout และ Retry Policy
- หลาย Kong Data Plane nodes เพื่อ High Availability
- Secret management
- CI/CD หรือ GitOps สำหรับ Kong configuration
- Kubernetes / Kong Ingress Controller หากระบบทำงานบน Kubernetes
#คำถามสำหรับ Workshop
#Q1: ทำไม Service ไม่ชี้ไป backend1 โดยตรง?
เพราะถ้าชี้ไป Backend ตัวเดียว Kong จะไม่มี collection ของ Targets สำหรับทำ Advanced Upstream Load Balancing
#Q2: Upstream คือ Backend จริงหรือไม่?
ไม่ใช่ Upstream เป็น Logical entity หรือ virtual hostname ที่รวม Targets หลายตัว
#Q3: Target คืออะไร?
Target คือ Backend instance จริง เช่น
backend1:3000
backend2:3000
backend3:3000
#Q4: ถ้า Backend หนึ่งตัวล่มจะเกิดอะไรขึ้น?
เมื่อ Health Check ตรวจว่า Target นั้น Unhealthy Kong จะข้าม Target นั้นและกระจาย Traffic ไปยัง Healthy Targets
#Q5: ถ้าต้องการให้ Backend-2 รับงานมากกว่าตัวอื่น?
เพิ่ม Weight ของ Target เช่น
- target: backend2:3000
  weight: 200
เมื่อเทียบกับตัวอื่นที่ Weight 100 Backend-2 จะมีสัดส่วนรับ Traffic สูงกว่า
#แบบฝึกหัดต่อยอด
- เพิ่ม
backend4 - ทดลอง Weight
100:100:300 - เปลี่ยนจาก Round-robin เป็น Least-connections
- ยิง Concurrent Requests ไป
/api/slow - Stop Backend หนึ่งตัวระหว่างยิง Request
- ตรวจ Upstream health ผ่าน Kong Admin API
- เพิ่ม Rate Limiting Plugin
- เพิ่ม Prometheus Plugin และ Grafana
- ย้าย Workshop ไป Kubernetes
- ใช้ Kong Ingress Controller และ Deployment replicas
#สรุป
หัวใจของ Load Balancing ใน Kong คือ
Route
  ↓
Service
  ↓
Upstream
  ↓
Targets
สำหรับ Workshop นี้
Frontend
  ↓
Kong API Gateway
  ↓
backend-upstream
  ↓
┌───────────┬───────────┬───────────┐
│ backend-1 │ backend-2 │ backend-3 │
└───────────┴───────────┴───────────┘
สิ่งที่ได้ทดลองจริงประกอบด้วย
- การสร้าง Service และ Route
- การสร้าง Upstream
- การกำหนดหลาย Targets
- Round-robin Load Balancing
- Weighted Load Balancing
- Active/Passive Health Check
- Backend failover
- Frontend UI สำหรับดูการกระจาย Request
- แนวทางต่อยอดไป Least-connections และ Production
#References
-
Kong Gateway — Load balancing
https://developer.konghq.com/gateway/load-balancing/ -
Kong Gateway — Load balancing reference
https://developer.konghq.com/gateway/traffic-control/load-balancing-reference/ -
Kong Gateway — Upstreams
https://developer.konghq.com/gateway/entities/upstream/ -
Kong Gateway — Targets
https://developer.konghq.com/gateway/entities/target/ -
Kong Gateway — Health checks and circuit breakers
https://developer.konghq.com/gateway/traffic-control/health-checks-circuit-breakers/ -
Kong Gateway — DB-less mode
https://developer.konghq.com/gateway/db-less-mode/ -
Docker Official Image — Kong
https://hub.docker.com/_/kong