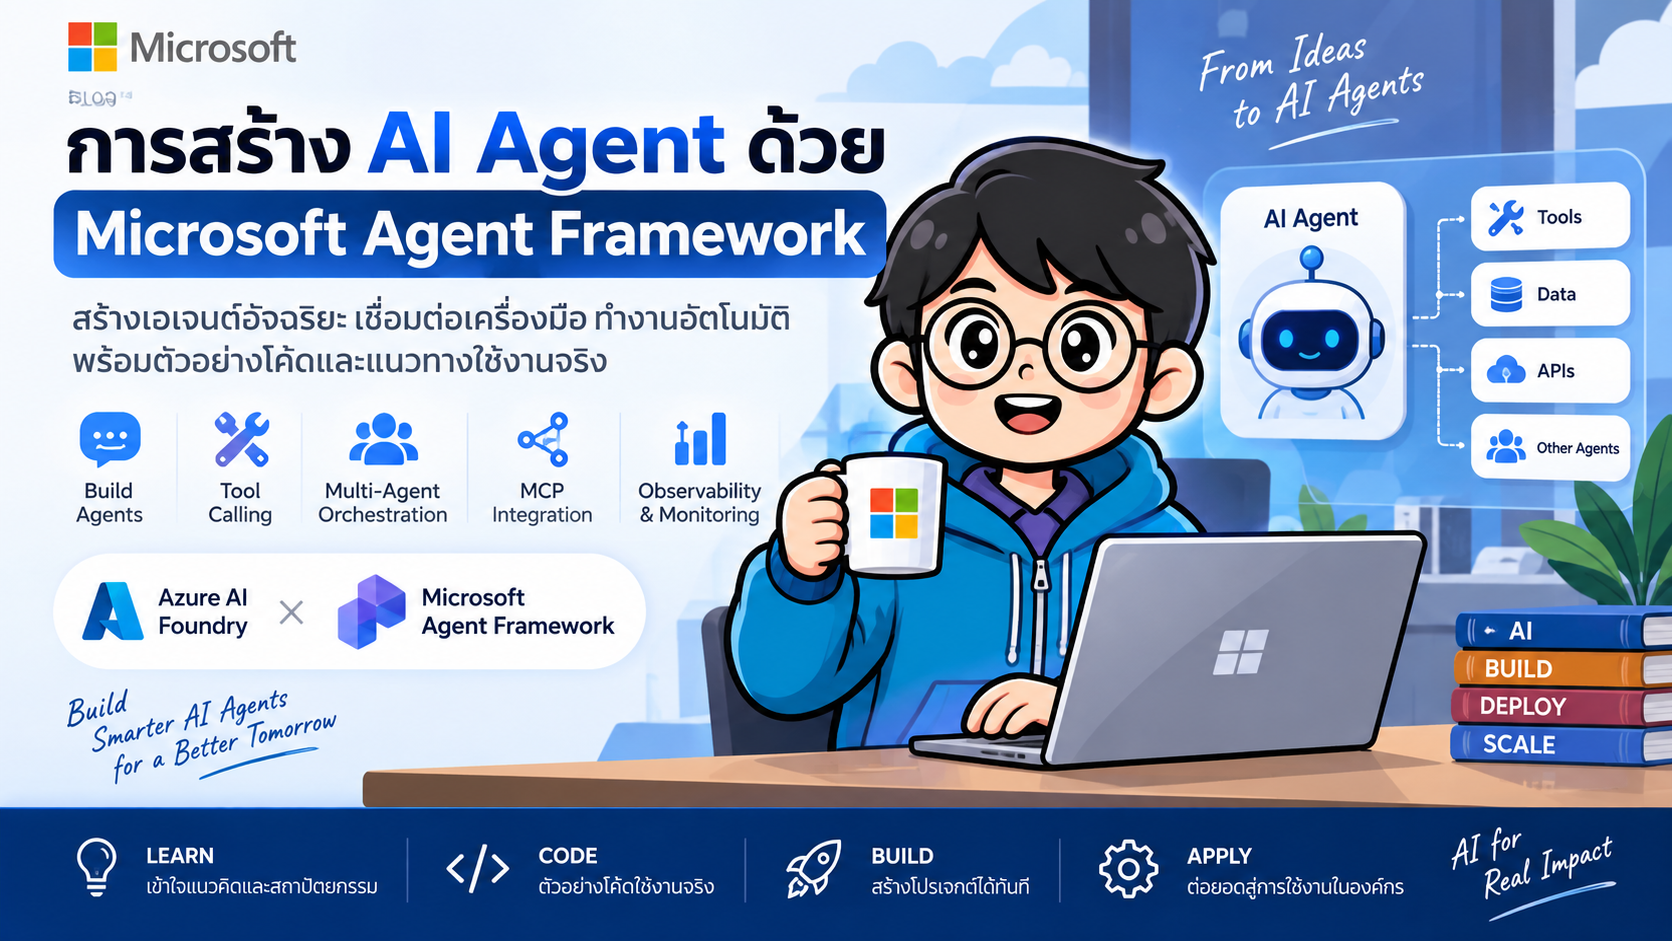
- การสร้าง AI Agent ด้วย Microsoft Agent Framework
- เตรียม Environment
- ตั้งค่า Microsoft Foundry
- สร้าง Agent ตัวแรก
- เพิ่ม Tool Calling
- Tool Approval
- เชื่อมต่อ REST API
- สร้าง Multi-turn Conversation ด้วย AgentSession
- AgentSession ไม่เท่ากับ Long-term Memory
- Streaming Response
- สร้าง Multi-Agent ด้วย Agent-as-Tool
- ตัวอย่าง Multi-Agent แบบสมบูรณ์
- Session Sharing ระหว่าง Agent
- Workflow และ Orchestration
- ควรใช้ Agent-as-Tool หรือ Workflow?
- Human-in-the-loop
- MCP
- Tool Types
- Memory และ Context
- Observability
- Middleware
- โครงสร้าง Project ที่แนะนำ
- ตัวอย่าง Use Case: Software Testing Multi-Agent
- ตัวอย่าง Use Case: University Assistant
- ตัวอย่าง Use Case: Research Assistant
- Agent Framework กับ Chatbot แบบเดิม
- แนวทางนำไปใช้จริง
- Development Roadmap
- Microsoft Agent Framework เหมาะกับงานแบบใด
- สรุป
#การสร้าง AI Agent ด้วย Microsoft Agent Framework
แนวทางการพัฒนา Generative AI ในระยะหลังไม่ได้หยุดอยู่เพียงการส่ง Prompt ไปยัง Large Language Model (LLM) แล้วรอรับคำตอบ แต่กำลังเปลี่ยนไปสู่แนวคิด AI Agent หรือระบบ AI ที่สามารถเลือกใช้เครื่องมือ เรียก API จดจำบริบท วางลำดับงาน และประสานงานกับ Agent ตัวอื่นได้
Microsoft Agent Framework เป็น Framework สำหรับสร้างระบบลักษณะดังกล่าว โดยออกแบบองค์ประกอบสำคัญ เช่น Agent, Tools, Session, Memory, Workflow และ Multi-Agent Orchestration ให้อยู่ภายใต้โครงสร้างเดียวกัน
บทความนี้จะพัฒนา Agent ด้วย Python แบบเป็นขั้นตอน ตั้งแต่ Agent ตัวแรก ไปจนถึงแนวคิด Multi-Agent ที่สามารถนำไปต่อยอดกับระบบจริงได้
#สารบัญ
- Microsoft Agent Framework คืออะไร
- Architecture โดยรวม
- เตรียม Environment
- สร้าง Agent ตัวแรก
- เพิ่ม Tool Calling
- เชื่อมต่อ REST API
- สร้าง Multi-turn Conversation ด้วย AgentSession
- สร้าง Multi-Agent ด้วย Agent-as-Tool
- Workflow และ Orchestration
- Human-in-the-loop
- MCP
- Observability
- โครงสร้าง Project ที่แนะนำ
- แนวทางนำไปใช้จริง
- สรุป
#Microsoft Agent Framework คืออะไร
Microsoft Agent Framework เป็น SDK สำหรับพัฒนา Agentic AI Application ซึ่งช่วยให้นักพัฒนาสามารถสร้าง Agent ที่มีความสามารถมากกว่า Chatbot แบบทั่วไป เช่น
- รับคำสั่งจากผู้ใช้
- ใช้ LLM ในการทำความเข้าใจงาน
- เรียก Function หรือ API
- ใช้ Tools หลายประเภท
- เก็บสถานะการสนทนา
- เพิ่ม Context และ Memory
- เชื่อมต่อ MCP Server
- ทำ Workflow หลายขั้นตอน
- ทำงานร่วมกับ Agent หลายตัว
- เพิ่ม Middleware
- เพิ่ม Observability
- เชื่อมต่อ Microsoft Foundry
แนวคิดพื้นฐานสามารถอธิบายได้ดังนี้
User
  |
  v
+----------------------+
|       AI Agent       |
| Instructions + Model |
+----------+-----------+
           |
     +-----+------+
     |            |
     v            v
   Tools        Session
     |            |
     v            v
API / DB / MCP   Context
                 Memory
ดังนั้น Agent จึงไม่ได้มีหน้าที่เพียงสร้างข้อความ แต่สามารถ ตัดสินใจว่าจะใช้ความสามารถใดเพื่อทำงานให้สำเร็จ
#Architecture โดยรวม
ระบบที่ใช้ Microsoft Agent Framework สามารถแบ่งองค์ประกอบหลักได้ดังนี้
Application
    |
    v
+-------------------------+
|          Agent          |
+-------------------------+
| Instructions            |
| Model Client            |
| Tools                   |
| Context Providers       |
| Middleware              |
+------------+------------+
             |
             v
        AgentSession
             |
      +------+------+
      |             |
      v             v
   Memory        State
      |
      v
External Systems
องค์ประกอบสำคัญได้แก่
#Agent
เป็นหน่วยหลักที่รับ Request และประสานงานระหว่าง Model, Tools และ Context
#Model Client
เป็นตัวเชื่อม Agent กับ Model เช่น Microsoft Foundry หรือ OpenAI-compatible provider
#Tool
คือ Function หรือระบบภายนอกที่ Agent สามารถเรียกใช้งาน
#AgentSession
ใช้เก็บสถานะของการสนทนาในหลายรอบ
#Context Provider / Memory
ใช้เพิ่มข้อมูลประกอบให้ Agent ก่อนเรียก Model
#Workflow
ใช้ควบคุมลำดับการทำงานที่มีหลายขั้นตอน
#เตรียม Environment
Microsoft Agent Framework สำหรับ Python รองรับ Python รุ่นใหม่ โดยสามารถตรวจสอบเวอร์ชันก่อนเริ่มต้นได้ด้วย
python --version
สร้าง Virtual Environment
python -m venv .venv
เปิดใช้งานบน macOS หรือ Linux
source .venv/bin/activate
บน Windows PowerShell
.venv\Scripts\Activate.ps1
#ติดตั้ง Microsoft Agent Framework
หากต้องการใช้ Microsoft Foundry เป็น Model Provider สามารถติดตั้ง
pip install -U agent-framework-foundry
และติดตั้ง Azure Identity
pip install -U azure-identity
สำหรับการเก็บ Environment Variable สามารถเพิ่ม
pip install -U python-dotenv
#ตั้งค่า Microsoft Foundry
ตัวอย่างในบทความจะใช้ FoundryChatClient
กำหนด Environment Variable
export FOUNDRY_PROJECT_ENDPOINT="https://YOUR-PROJECT.services.ai.azure.com"
export FOUNDRY_MODEL="gpt-4o-mini"
Windows PowerShell
$env:FOUNDRY_PROJECT_ENDPOINT="https://YOUR-PROJECT.services.ai.azure.com"
$env:FOUNDRY_MODEL="gpt-4o-mini"
จากนั้น Login Azure CLI
az login
#สร้าง Agent ตัวแรก
สร้างไฟล์
app.py
ตัวอย่าง
import asyncio
import os

from agent_framework import Agent
from agent_framework.foundry import FoundryChatClient
from azure.identity.aio import AzureCliCredential


async def main():
    async with AzureCliCredential() as credential:

        client = FoundryChatClient(
            project_endpoint=os.environ["FOUNDRY_PROJECT_ENDPOINT"],
            model=os.getenv("FOUNDRY_MODEL", "gpt-4o-mini"),
            credential=credential,
        )

        agent = Agent(
            client=client,
            name="software_engineering_tutor",
            instructions="""
            คุณเป็นอาจารย์ด้าน Software Engineering

            อธิบายเนื้อหาให้เข้าใจง่าย
            ใช้ภาษาไทย
            และยกตัวอย่างประกอบเมื่อเหมาะสม
            """,
        )

        result = await agent.run(
            "อธิบายความแตกต่างระหว่าง Unit Test และ Integration Test"
        )

        print(result)


if __name__ == "__main__":
    asyncio.run(main())
รัน
python app.py
Flow ของโปรแกรม
User Prompt
     |
     v
    Agent
     |
     v
FoundryChatClient
     |
     v
     LLM
     |
     v
Agent Response
จุดสำคัญอยู่ที่
agent = Agent(
    client=client,
    name="software_engineering_tutor",
    instructions="..."
)
โดย instructions ทำหน้าที่กำหนดบทบาทและพฤติกรรมหลักของ Agent
#เพิ่ม Tool Calling
ความแตกต่างสำคัญระหว่าง Chatbot และ Agent คือ Agent สามารถเรียก Tool เพื่อเข้าถึงข้อมูลหรือดำเนินการภายนอก LLM ได้
สมมติว่าต้องการสร้าง Agent สำหรับค้นหารายวิชา
from typing import Annotated

from agent_framework import tool
from pydantic import Field


@tool(approval_mode="never_require")
def get_course(
    course_code: Annotated[
        str,
        Field(description="รหัสรายวิชา เช่น SE101")
    ]
) -> str:
    """ค้นหาชื่อรายวิชาจากรหัสรายวิชา"""

    courses = {
        "SE101": "Introduction to Software Engineering",
        "SE202": "Software Testing",
        "SE303": "DevOps and CI/CD",
    }

    return courses.get(
        course_code.upper(),
        "ไม่พบข้อมูลรายวิชา"
    )
เพิ่ม Tool ให้ Agent
agent = Agent(
    client=client,
    name="course_agent",
    instructions="""
    คุณเป็นผู้ช่วยให้ข้อมูลรายวิชา

    เมื่อผู้ใช้ถามเกี่ยวกับรหัสรายวิชา
    ให้เรียก get_course เพื่อค้นหาข้อมูลก่อนตอบ
    """,
    tools=[get_course],
)
เรียกใช้งาน
result = await agent.run(
    "SE202 คือวิชาอะไร"
)

print(result)
การทำงานภายในมีลักษณะดังนี้
User
 |
 | "SE202 คือวิชาอะไร"
 v
Agent
 |
 | เลือก Tool
 v
get_course("SE202")
 |
 | "Software Testing"
 v
Agent
 |
 v
Final Response
สิ่งสำคัญคือเราไม่ได้เขียน if/else เพื่อเลือก Tool เองทุกกรณี แต่ Model สามารถใช้รายละเอียดของ Tool เพื่อพิจารณาว่าเมื่อใดควรเรียก
#Tool Approval
ตัวอย่างก่อนหน้าใช้
@tool(approval_mode="never_require")
หมายถึงไม่ต้องขออนุมัติจากผู้ใช้ก่อนเรียก Tool
เหมาะกับ Tool ที่มีความเสี่ยงต่ำ เช่น
- อ่านข้อมูล
- ค้นหารายวิชา
- เรียก API แบบ GET
- ดึงข้อมูลสภาพอากาศ
- Query ฐานข้อมูลแบบ read-only
แต่ Tool ที่สร้างผลกระทบจริง เช่น
- ลบข้อมูล
- ส่ง Email
- Deploy ระบบ
- สั่งซื้อสินค้า
- เปลี่ยนสิทธิ์ผู้ใช้
ควรออกแบบให้มี Human-in-the-loop หรือ Tool Approval
ตัวอย่างแนวคิด
Agent
  |
  v
Prepare Action
  |
  v
Request Approval
  |
  +------ Approve ------> Execute Tool
  |
  +------ Reject --------> Stop
#เชื่อมต่อ REST API
Tool สามารถทำหน้าที่เป็น Adapter เชื่อม Agent กับระบบ Backend ได้
ตัวอย่าง
import httpx
from agent_framework import tool


@tool(approval_mode="never_require")
async def get_student(student_id: str) -> dict:
    """ค้นหาข้อมูลนักศึกษาจาก Student API"""

    async with httpx.AsyncClient() as client:
        response = await client.get(
            f"https://api.example.com/students/{student_id}",
            timeout=10,
        )

        response.raise_for_status()

        return response.json()
เพิ่มเข้า Agent
agent = Agent(
    client=client,
    name="student_agent",
    instructions="""
    คุณเป็นผู้ช่วยข้อมูลนักศึกษา

    หากผู้ใช้ถามข้อมูลนักศึกษา
    ให้ใช้ get_student
    """,
    tools=[get_student],
)
Architecture จะกลายเป็น
User
 |
 v
Agent
 |
 v
Tool Calling
 |
 v
REST API
 |
 v
Database / Service
 |
 v
Tool Result
 |
 v
Agent
 |
 v
Natural Language Response
รูปแบบนี้เหมาะกับระบบองค์กร เพราะ Business Logic ยังคงอยู่ใน API เดิม ขณะที่ Agent ทำหน้าที่เป็น Natural Language Interface
#สร้าง Multi-turn Conversation ด้วย AgentSession
หากเรียก Agent ทีละ Request โดยไม่มี Session Agent อาจไม่มีบริบทต่อเนื่องระหว่างข้อความ
Microsoft Agent Framework มี AgentSession สำหรับจัดการ Conversation State
สร้าง Session
session = agent.create_session()
ตัวอย่าง
session = agent.create_session()

result1 = await agent.run(
    "ผมกำลังสร้างระบบ E2E Testing ด้วย Playwright",
    session=session,
)

print(result1)

result2 = await agent.run(
    "ระบบที่ผมพูดถึงควรเพิ่มการทดสอบอะไรอีก",
    session=session,
)

print(result2)
Agent สามารถใช้ Context จาก Turn ก่อนหน้าได้
AgentSession
 |
 +-- Turn 1
 |    User: ผมกำลังสร้างระบบ E2E Testing ด้วย Playwright
 |
 +-- Turn 2
 |    User: ควรเพิ่มการทดสอบอะไรอีก
 |
 +-- Turn 3
      ...
เหมาะกับ
- AI Tutor
- Customer Support
- Coding Assistant
- Research Assistant
- Chatbot
- Internal Knowledge Assistant
#AgentSession ไม่เท่ากับ Long-term Memory
ควรแยกแนวคิดสองอย่างนี้ออกจากกัน
AgentSession
    |
    +--> Conversation state
    +--> Current interaction context
ส่วน Long-term Memory
Memory
   |
   +--> User preference
   +--> Historical knowledge
   +--> Persistent facts
   +--> Retrieved information
ถ้าต้องการให้ข้อมูลอยู่ข้าม Session อาจต้องใช้ Context Provider หรือ Persistent Storage เพิ่มเติม
#Streaming Response
Application แบบ Chat มักต้องแสดงคำตอบทีละส่วน
สามารถใช้
async for update in agent.run(
    "อธิบาย CI/CD",
    stream=True,
):
    if update.text:
        print(update.text, end="")
Streaming ช่วยให้ผู้ใช้เห็นคำตอบเร็วขึ้นและเหมาะกับ
- Chat UI
- Web Application
- CLI Assistant
- IDE Assistant
#สร้าง Multi-Agent ด้วย Agent-as-Tool
ระบบที่ซับซ้อนมักไม่ควรให้ Agent ตัวเดียวทำทุกหน้าที่
ตัวอย่าง
                  Coordinator Agent
                         |
          +--------------+--------------+
          |                             |
          v                             v
   Research Agent                 Writer Agent
Agent แต่ละตัวมี Responsibility แยกกัน
#Research Agent
research_agent = Agent(
    client=client,
    name="research_agent",
    description="วิเคราะห์และสรุปข้อมูลทางเทคนิค",
    instructions="""
    คุณเป็น Research Agent

    วิเคราะห์หัวข้อที่ได้รับ
    แยกเป็น:
    - Concepts
    - Benefits
    - Limitations
    - Use Cases
    """,
)
#Writer Agent
writer_agent = Agent(
    client=client,
    name="writer_agent",
    description="เขียนบทความเชิงเทคนิค",
    instructions="""
    คุณเป็น Technical Writer

    เขียนบทความภาษาไทยให้อ่านง่าย
    มีหัวข้อ
    มีตัวอย่าง
    และสรุปท้ายบทความ
    """,
)
#เปลี่ยน Agent ให้เป็น Tool
Microsoft Agent Framework สามารถใช้
research_agent.as_tool()
เพื่อทำให้ Agent ตัวหนึ่งกลายเป็น Tool ของอีก Agent
ตัวอย่าง
research_tool = research_agent.as_tool()
writer_tool = writer_agent.as_tool()
#Coordinator Agent
coordinator = Agent(
    client=client,
    name="coordinator",
    instructions="""
    คุณเป็นหัวหน้าทีม AI

    เมื่อต้องสร้างบทความ:
    1. ใช้ research_agent วิเคราะห์เนื้อหา
    2. ใช้ writer_agent เรียบเรียงบทความ
    3. ตรวจสอบผลลัพธ์ก่อนตอบผู้ใช้
    """,
    tools=[
        research_tool,
        writer_tool,
    ],
)
เรียกใช้งาน
result = await coordinator.run(
    "เขียนบทความเรื่อง Continuous Testing"
)

print(result)
Flow
User
 |
 v
Coordinator
 |
 +------> Research Agent
 |            |
 |            v
 |       Research Result
 |
 +------> Writer Agent
              |
              v
          Blog Article
 |
 v
Final Result
ข้อดีของแนวทางนี้คือแต่ละ Agent สามารถมี
- Prompt ของตนเอง
- Tools ของตนเอง
- Model configuration ของตนเอง
- Responsibility ที่ชัดเจน
#ตัวอย่าง Multi-Agent แบบสมบูรณ์
import asyncio
import os

from agent_framework import Agent
from agent_framework.foundry import FoundryChatClient
from azure.identity.aio import AzureCliCredential


async def main():

    async with AzureCliCredential() as credential:

        client = FoundryChatClient(
            project_endpoint=os.environ["FOUNDRY_PROJECT_ENDPOINT"],
            model=os.getenv("FOUNDRY_MODEL", "gpt-4o-mini"),
            credential=credential,
        )

        research_agent = Agent(
            client=client,
            name="research_agent",
            description="วิเคราะห์ข้อมูลทาง Software Engineering",
            instructions="""
            วิเคราะห์หัวข้อที่ได้รับอย่างเป็นระบบ

            ส่งผลลัพธ์ประกอบด้วย:
            - แนวคิดหลัก
            - ประโยชน์
            - ข้อจำกัด
            - Use cases
            """,
        )

        writer_agent = Agent(
            client=client,
            name="writer_agent",
            description="เขียนบทความด้านเทคโนโลยี",
            instructions="""
            เขียนบทความภาษาไทย
            ใช้ Markdown
            อธิบายเป็นขั้นตอน
            และมีตัวอย่าง
            """,
        )

        coordinator = Agent(
            client=client,
            name="coordinator_agent",
            instructions="""
            คุณเป็น Coordinator Agent

            สำหรับงานเขียนบทความ:
            1. ส่งหัวข้อให้ research_agent
            2. นำผลไปให้ writer_agent
            3. ส่งบทความที่สมบูรณ์กลับผู้ใช้
            """,
            tools=[
                research_agent.as_tool(),
                writer_agent.as_tool(),
            ],
        )

        result = await coordinator.run(
            "สร้างบทความเรื่อง API Testing"
        )

        print(result)


if __name__ == "__main__":
    asyncio.run(main())
#Session Sharing ระหว่าง Agent
ในกรณี Agent-as-Tool สามารถกำหนดให้ Sub-agent ใช้ Session ร่วมกับ Parent Agent ได้
แนวคิด
research_tool = research_agent.as_tool(
    propagate_session=True
)
เหมาะกับสถานการณ์ที่ Sub-agent ต้องเห็นบริบทการสนทนาเดียวกับ Coordinator
อย่างไรก็ตาม ไม่ควรเปิด Session Sharing โดยอัตโนมัติทุก Agent เพราะอาจทำให้ Context ใหญ่เกินไปหรือเกิดการปะปนของข้อมูลที่แต่ละ Agent ไม่จำเป็นต้องใช้
#Workflow และ Orchestration
สำหรับงานที่มีโครงสร้างแน่นอน การใช้ Workflow จะช่วยควบคุม Flow ได้ดีกว่าการปล่อยให้ LLM เลือกทุกอย่างเอง
Microsoft Agent Framework มีแนวคิด Workflow สำหรับประกอบขั้นตอนหลายส่วนเข้าด้วยกัน
ตัวอย่าง
Input
  |
  v
Research
  |
  v
Analysis
  |
  v
Writing
  |
  v
Review
  |
  v
Output
#Sequential Pattern
Agent ทำงานต่อกัน
Agent A
   |
   v
Agent B
   |
   v
Agent C
เหมาะกับ
Requirement
   ↓
Test Scenario
   ↓
Test Case
   ↓
Test Script
#Concurrent Pattern
หลาย Agent ทำงานพร้อมกัน
             +--> Agent A
             |
Input -------+--> Agent B
             |
             +--> Agent C
                    |
                    v
                 Combine
เหมาะกับ
- วิเคราะห์หลาย Dataset
- วิเคราะห์หลายแหล่งข่าว
- Ensemble reasoning
- Independent review
#Handoff Pattern
Agent ส่งงานไปยัง Agent ที่เชี่ยวชาญ
               Router
                 |
       +---------+---------+
       |         |         |
       v         v         v
    Billing   Technical  Account
     Agent      Agent     Agent
เหมาะกับ Customer Support หรือระบบที่มี Domain หลายประเภท
#Group Chat / Collaborative Pattern
Agent หลายตัวสื่อสารร่วมกัน
Research Agent
      |
      v
Analysis Agent <----> Critic Agent
      |
      v
Writer Agent
เหมาะกับงานที่ต้องมีการตรวจสอบหรืออภิปรายหลายมุมมอง
#ควรใช้ Agent-as-Tool หรือ Workflow?
ใช้ Agent-as-Tool เมื่อ
- Coordinator ควรมีอิสระเลือก Agent
- จำนวนขั้นตอนไม่ตายตัว
- งานขึ้นอยู่กับ Intent ของผู้ใช้
- ต้องการ Hierarchical Agent
ใช้ Workflow เมื่อ
- ขั้นตอนทำงานค่อนข้างแน่นอน
- ต้องการควบคุมลำดับ
- ต้องการ deterministic flow มากขึ้น
- ต้องติดตาม State ระหว่างแต่ละขั้นตอน
- มี Human Approval ระหว่าง Workflow
#Human-in-the-loop
ระบบ Agent ที่ทำ Action จริงควรมี Approval Layer
ตัวอย่าง Use Case
User
 |
 v
Agent
 |
 v
"ต้องการ Deploy production"
 |
 v
Deployment Tool
 |
 v
Approval Required
 |
 +---- Approve ---> Deploy
 |
 +---- Reject ----> Cancel
งานที่ควรพิจารณา Approval ได้แก่
- ส่ง Email
- สร้าง Purchase Order
- Deploy Production
- ลบข้อมูล
- เปลี่ยน Configuration
- เปลี่ยน Permission
- ทำธุรกรรม
หลักการสำคัญคือ
ให้ Agent มีสิทธิ์อ่านข้อมูลได้มากกว่าสิทธิ์แก้ไขข้อมูล และเพิ่ม Human Approval สำหรับ Action ที่ไม่สามารถย้อนกลับได้ง่าย
#MCP
Microsoft Agent Framework รองรับแนวคิด Model Context Protocol (MCP) ซึ่งช่วยให้ Agent เชื่อมต่อ Tool จาก MCP Server ได้
Architecture
Agent
 |
 v
MCP Client
 |
 +--> GitHub MCP
 |
 +--> Database MCP
 |
 +--> Internal API MCP
 |
 +--> Documentation MCP
ข้อดีคือ Application ไม่จำเป็นต้องสร้าง Tool integration ทุกอย่างไว้ใน Source Code เดียว
สามารถแยก MCP Server ตาม Domain เช่น
Development Agent
 |
 +--> GitHub MCP
 +--> Issue Tracker MCP
 +--> Documentation MCP
 +--> Database MCP
#Tool Types
Agent Framework รองรับ Tool ได้หลายแนวทาง เช่น
Tools
 |
 +-- Function Tools
 |
 +-- Code Interpreter
 |
 +-- File Search
 |
 +-- Web Search
 |
 +-- Hosted MCP
 |
 +-- Local MCP
 |
 +-- Foundry Toolbox
ดังนั้น Agent สามารถเป็นทั้ง
- Natural Language Interface
- API Orchestrator
- Knowledge Assistant
- Coding Agent
- Data Analysis Agent
- Workflow Automation Agent
#Memory และ Context
ระบบ Agent ที่ดีไม่ควรส่งข้อมูลทั้งหมดไปยัง Model ทุกครั้ง
ควรเลือก Context ที่จำเป็น เช่น
User Request
     |
     v
Context Provider
     |
     +--> Profile
     +--> Relevant Memory
     +--> Retrieved Documents
     +--> Application State
     |
     v
    Agent
แนวทางนี้ช่วย
- ลด Token
- ลด Noise
- เพิ่มความแม่นยำ
- แยก Session State ออกจาก Long-term Memory
#Observability
ระบบ Agent ใน Production ควรมี Observability เพื่อดูว่า Agent ตัดสินใจอย่างไรในระดับระบบ
ตัวอย่างข้อมูลที่ควรเก็บ
request_id
session_id
agent_name
model_name
tool_name
tool_latency
tool_error
model_latency
token_usage
workflow_step
Agent Framework มี integration กับ OpenTelemetry ซึ่งช่วยนำ Trace ไปวิเคราะห์ต่อกับระบบ Observability ได้
Architecture
Agent Application
       |
       v
 OpenTelemetry
       |
   +---+---+
   |       |
   v       v
 Traces   Metrics
   |
   v
Observability Backend
#Middleware
Middleware ช่วยเพิ่ม Cross-cutting Concern โดยไม่ต้องใส่ Logic ไว้ใน Agent ทุกตัว
Use Case เช่น
- Logging
- Authentication
- Authorization
- Audit Log
- Input Validation
- Tool Filtering
- Rate Limiting
- Telemetry
ตัวอย่าง Architecture
Request
  |
  v
Logging Middleware
  |
  v
Security Middleware
  |
  v
Agent
  |
  v
Tool Middleware
  |
  v
External Service
#โครงสร้าง Project ที่แนะนำ
เมื่อ Agent Application เริ่มใหญ่ขึ้น ไม่ควรใส่ทุกอย่างไว้ในไฟล์เดียว
ตัวอย่าง
agent-app/
│
├── app.py
│
├── agents/
│   ├── coordinator.py
│   ├── research_agent.py
│   ├── writer_agent.py
│   └── reviewer_agent.py
│
├── tools/
│   ├── student_tools.py
│   ├── course_tools.py
│   ├── database_tools.py
│   └── api_tools.py
│
├── services/
│   ├── database.py
│   ├── rag.py
│   └── external_api.py
│
├── prompts/
│   ├── coordinator.md
│   ├── research.md
│   └── writer.md
│
├── workflows/
│   └── article_workflow.py
│
├── config/
│   └── settings.py
│
├── tests/
│   ├── test_agents.py
│   ├── test_tools.py
│   └── test_workflows.py
│
├── .env
├── .env.example
├── requirements.txt
└── README.md
ข้อดีคือ
- Agent มี Responsibility ชัดเจน
- Tools สามารถทำ Unit Test ได้
- Prompt แยกจาก Business Logic
- เพิ่ม Agent ใหม่ได้ง่าย
- จัดการ Configuration ง่ายขึ้น
- รองรับ CI/CD และ Automated Testing
#ตัวอย่าง Use Case: Software Testing Multi-Agent
Microsoft Agent Framework สามารถนำมาสร้างระบบช่วยทดสอบซอฟต์แวร์ได้
Requirement
    |
    v
Test Coordinator
    |
    +--> Requirement Analysis Agent
    |
    +--> Test Scenario Agent
    |
    +--> Test Case Agent
    |
    +--> Playwright Agent
    |
    +--> Review Agent
    |
    v
Test Artifacts
แต่ละ Agent สามารถรับผิดชอบงานเฉพาะด้าน
#Requirement Analysis Agent
วิเคราะห์ Requirement และ Acceptance Criteria
#Test Scenario Agent
สร้าง Test Scenario
#Test Case Agent
สร้าง Test Case พร้อม Expected Result
#Playwright Agent
สร้าง Automated Test Script
#Review Agent
ตรวจสอบ Coverage และความสมเหตุสมผล
#ตัวอย่าง Use Case: University Assistant
Student
 |
 v
Coordinator Agent
 |
 +--> Course Agent
 |
 +--> Lecturer Agent
 |
 +--> Regulation RAG Agent
 |
 +--> Schedule Agent
 |
 v
Answer
Tool ที่เกี่ยวข้องอาจเป็น
get_course()
get_lecturer()
get_curriculum()
search_regulation()
get_schedule()
ทำให้ผู้ใช้สามารถถามด้วยภาษาธรรมชาติแทนการค้นหาหลายระบบด้วยตนเอง
#ตัวอย่าง Use Case: Research Assistant
Research Question
       |
       v
Research Coordinator
       |
   +---+---+----------------+
   |       |                |
   v       v                v
Search   Analysis       Statistics
Agent     Agent           Agent
   |       |                |
   +-------+----------------+
           |
           v
       Writer Agent
           |
           v
       Final Report
เหมาะกับ Workflow เช่น
- ค้นหา Literature
- Extract Information
- วิเคราะห์ Dataset
- ตรวจสอบผล
- สรุปเป็นรายงาน
#Agent Framework กับ Chatbot แบบเดิม
| Chatbot | AI Agent |
|---|---|
| Prompt → LLM → Answer | Prompt → Decide → Tool → Observe → Answer |
| เน้น Text Generation | เน้น Goal Completion |
| มักไม่มี Tools | รองรับ Tools |
| ติดต่อระบบภายนอกจำกัด | เรียก API / DB / MCP ได้ |
| Conversation Logic ง่าย | รองรับ Workflow |
| Agent เดียว | รองรับ Multi-Agent |
Agent จึงมีวงจรการทำงานใกล้เคียง
Understand
    ↓
Plan
    ↓
Act
    ↓
Observe
    ↓
Decide
    ↓
Answer
#แนวทางนำไปใช้จริง
#1. ให้ Agent มี Responsibility เดียวเป็นหลัก
ไม่ควรสร้าง Agent แบบ
Super Agent
 |
 +-- Search
 +-- Database
 +-- Coding
 +-- Testing
 +-- Deployment
 +-- Writing
ควรแยกเป็น
Coordinator
 |
 +-- Search Agent
 +-- Data Agent
 +-- Coding Agent
 +-- Testing Agent
 +-- Deployment Agent
#2. Tool ควรมีขอบเขตชัดเจน
ดี
get_student_by_id()
get_course_by_code()
create_test_case()
search_documents()
ไม่แนะนำ
do_everything()
#3. Validate Input ก่อนเรียก External System
Tool ควรตรวจสอบ
- Data Type
- Required Field
- Permission
- Allowed Operation
- Input Range
ก่อนส่งไปยัง API หรือ Database
#4. อย่าใส่ Secret ลงใน Prompt
ควรจัดเก็บ Credential ผ่าน
- Environment Variable
- Managed Identity
- Secret Manager
- Key Vault
แทนการใส่ใน System Prompt หรือ Tool Description
#5. ใช้ Least Privilege
Agent สำหรับ Query Database ควรมีเฉพาะสิทธิ์ Read หากไม่จำเป็นต้องเขียนข้อมูล
Read Agent
   |
   +--> SELECT

Admin Action
   |
   +--> Human Approval
   |
   +--> UPDATE / DELETE
#6. เพิ่ม Timeout และ Error Handling
External Tool ทุกตัวควรคำนึงถึง
Timeout
Retry
Rate Limit
Fallback
Validation
Logging
#7. ทดสอบ Agent แยกจาก Tool
Tool เป็น Code ปกติ จึงควรมี Unit Test โดยไม่ต้องเรียก LLM
ตัวอย่าง
def test_get_course():

    result = get_course("SE202")

    assert "Software Testing" in result
จากนั้นค่อยทำ Integration Test ระหว่าง
Agent
 +
Model
 +
Tools
#Development Roadmap
ถ้าต้องการเรียน Microsoft Agent Framework เป็นลำดับ แนะนำ
1. Basic Agent
       ↓
2. Tool Calling
       ↓
3. AgentSession
       ↓
4. Streaming
       ↓
5. Context / Memory
       ↓
6. Agent-as-Tool
       ↓
7. Multi-Agent
       ↓
8. Workflow
       ↓
9. MCP
       ↓
10. Human Approval
       ↓
11. Observability
       ↓
12. Production Deployment
สำหรับผู้เริ่มต้น Agent + Tools + AgentSession เป็นสามส่วนที่ควรเข้าใจให้ชัดก่อน
#Microsoft Agent Framework เหมาะกับงานแบบใด
เหมาะกับระบบที่ต้องการให้ AI ทำมากกว่าการสร้างข้อความ เช่น
- AI Assistant
- AI Tutor
- Customer Support
- Research Agent
- Software Testing Agent
- Coding Agent
- DevOps Agent
- RAG Agent
- Data Analysis Agent
- Workflow Automation
- Multi-Agent System
ถ้าระบบเพียงต้องการ
Prompt
  ↓
LLM
  ↓
Text
อาจยังไม่จำเป็นต้องใช้ Agent Framework
แต่หากระบบต้องการ
Prompt
  ↓
Agent
  ↓
Plan
  ↓
Tools / API / MCP
  ↓
Observe
  ↓
Workflow / Other Agents
  ↓
Final Result
Agent Framework จะช่วยจัดโครงสร้าง Application ได้ชัดเจนกว่า
#สรุป
Microsoft Agent Framework เป็น Framework สำหรับพัฒนา Agentic AI ที่รวมแนวคิดสำคัญไว้ใน ecosystem เดียว
Microsoft Agent Framework
 |
 +-- Agent
 |
 +-- Model Client
 |
 +-- Tools
 |
 +-- AgentSession
 |
 +-- Context / Memory
 |
 +-- Agent-as-Tool
 |
 +-- Multi-Agent
 |
 +-- Workflow
 |
 +-- MCP
 |
 +-- Middleware
 |
 +-- Human Approval
 |
 +-- Observability
 |
 +-- Hosting
หากต้องการเริ่มสร้าง Agent แนะนำให้เริ่มจาก Agent ตัวเดียวที่มี Tool เพียงไม่กี่ตัวก่อน จากนั้นจึงเพิ่ม Session, Memory และ Multi-Agent ตามความซับซ้อนของโจทย์
แนวคิดสำคัญไม่ได้อยู่ที่การสร้าง Agent ให้มีจำนวนมากที่สุด แต่คือการกำหนด Responsibility, Tools, Context และ Workflow ให้ชัดเจน เพื่อให้ระบบสามารถควบคุม ทดสอบ ตรวจสอบ และนำขึ้น Production ได้อย่างปลอดภัย
#References
-
Microsoft Agent Framework
https://learn.microsoft.com/en-us/agent-framework/ -
Get started with Agent Framework
https://learn.microsoft.com/en-us/agent-framework/get-started/ -
Microsoft Foundry model provider
https://learn.microsoft.com/en-us/agent-framework/agents/providers/microsoft-foundry -
Tools overview
https://learn.microsoft.com/en-us/agent-framework/agents/tools/ -
Microsoft Agent Framework GitHub
https://github.com/microsoft/agent-framework