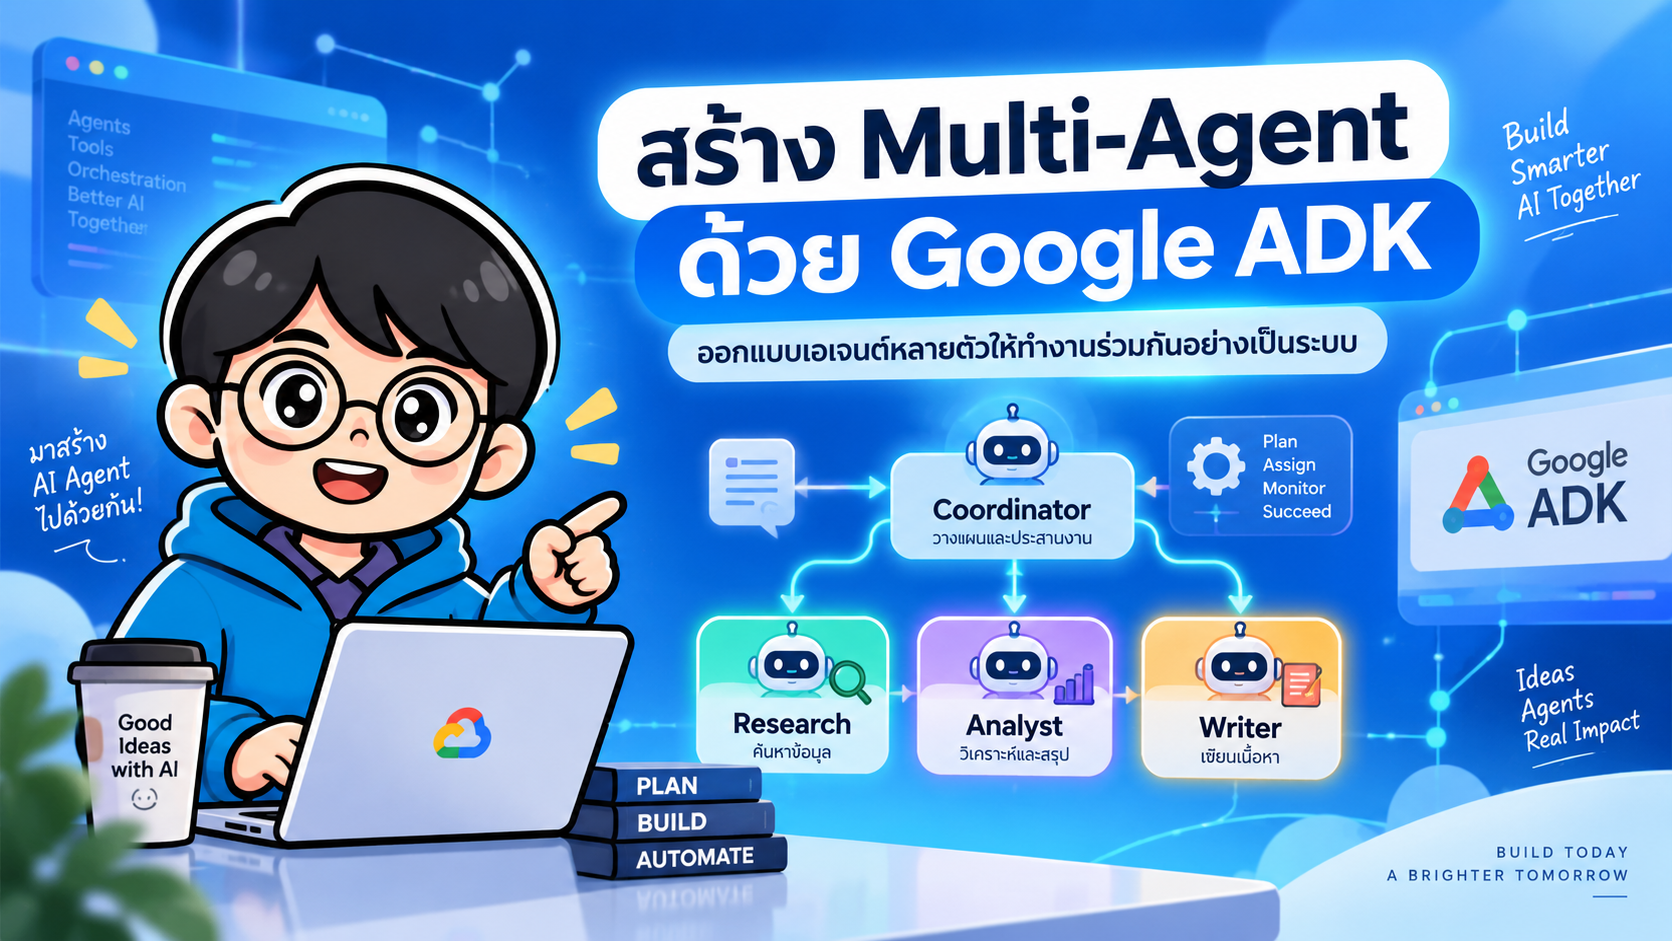
- สร้าง Multi-Agent ด้วย Google Agent Development Kit (ADK)
- 1. เตรียม Environment
- 2. สร้าง Project
- 3. ตั้งค่า Gemini API Key
- 4. สร้าง Multi-Agent
- 5. __init__.py
- 6. requirements.txt
- 7. รันผ่าน Terminal
- 8. รันผ่าน ADK Web
- 9. รันแบบ API Server
- 10. ตัวอย่าง Flow การทำงาน
- 11. เพิ่ม Tool ให้ Agent
- 12. Multi-Agent แบบ Sequential
- 13. เมื่อไรควรใช้ Coordinator
- 14. แนวทาง Production
- 15. Architecture ที่แนะนำ
- สรุป
- References
#สร้าง Multi-Agent ด้วย Google Agent Development Kit (ADK)
Google Agent Development Kit หรือ Google ADK เป็น framework สำหรับพัฒนา AI Agent แบบ code-first โดยรองรับทั้ง Agent เดี่ยว, Multi-Agent, Workflow, Tool Calling, Session, Evaluation และการ deploy ไปยังระบบต่าง ๆ
บทความนี้จะสร้างตัวอย่าง Multi-Agent Research Assistant ที่แบ่งงานให้ Agent หลายตัวทำงานร่วมกัน
User
  |
  v
+----------------------+
| Coordinator Agent    |
| วิเคราะห์และแจกงาน   |
+----------+-----------+
           |
     +-----+------+----------------+
     |            |                |
     v            v                v
+----------+  +----------+  +-------------+
|Researcher|  | Analyst  |  | Writer      |
|Search Web|  | วิเคราะห์ |  | สรุปคำตอบ   |
+----------+  +----------+  +-------------+
#แนวคิด Multi-Agent
แทนที่จะให้ LLM ตัวเดียวทำทุกอย่าง เราแบ่งความรับผิดชอบเป็น Agent เฉพาะทาง เช่น
| Agent | หน้าที่ |
|---|---|
| Coordinator | รับคำถาม วิเคราะห์งาน และเลือก Agent ที่เหมาะสม |
| Researcher | ค้นหาข้อมูลล่าสุดจากเว็บ |
| Analyst | วิเคราะห์และเปรียบเทียบข้อมูล |
| Writer | เรียบเรียงคำตอบให้อ่านง่าย |
ข้อดีคือแต่ละ Agent มี prompt และ tools เฉพาะงาน ทำให้ระบบแยกความรับผิดชอบได้ชัดเจน และขยายระบบได้ง่ายขึ้น
#1. เตรียม Environment
Google ADK Python ต้องใช้ Python 3.10 ขึ้นไป
สร้าง virtual environment
python -m venv .venv
macOS / Linux
source .venv/bin/activate
Windows
.venv\Scripts\activate
ติดตั้ง Google ADK
pip install google-adk
ตรวจสอบเวอร์ชัน
adk --version
หรือถ้าใช้ uv
uv venv --python 3.11
source .venv/bin/activate
uv pip install google-adk
#2. สร้าง Project
โครงสร้างที่ใช้ในตัวอย่าง
google-adk-multi-agent/
├── multi_agent/
│   ├── __init__.py
│   ├── agent.py
│   └── .env
├── .env.example
├── requirements.txt
└── README.md
สร้างโฟลเดอร์
mkdir google-adk-multi-agent
cd google-adk-multi-agent

mkdir multi_agent
touch multi_agent/__init__.py
touch multi_agent/agent.py
บน Windows สามารถสร้างไฟล์ด้วย File Explorer หรือ PowerShell แทน touch
#3. ตั้งค่า Gemini API Key
สร้าง API Key จาก Google AI Studio
จากนั้นสร้างไฟล์
multi_agent/.env
แล้วกำหนดค่า
GOOGLE_GENAI_USE_ENTERPRISE=FALSE
GOOGLE_API_KEY=YOUR_GOOGLE_API_KEY
ไม่ควร commit
.envขึ้น Git Repository
สามารถสร้าง .env.example
GOOGLE_GENAI_USE_ENTERPRISE=FALSE
GOOGLE_API_KEY=YOUR_GOOGLE_API_KEY
ถ้าใช้ Vertex AI สามารถเปลี่ยนเป็น
GOOGLE_GENAI_USE_ENTERPRISE=TRUE
GOOGLE_CLOUD_PROJECT=your-project-id
GOOGLE_CLOUD_LOCATION=us-central1
#4. สร้าง Multi-Agent
แก้ไขไฟล์
multi_agent/agent.py
ด้วยโค้ดดังนี้
from google.adk import Agent
from google.adk.tools import google_search


research_agent = Agent(
    name="research_agent",
    description=(
        "ค้นหาข้อมูลล่าสุด ข้อเท็จจริง ข่าว เอกสาร และแหล่งอ้างอิงจากเว็บ"
    ),
    instruction="""
คุณคือ Research Agent

หน้าที่:
1. ค้นหาข้อมูลที่เกี่ยวข้องกับคำถามของผู้ใช้
2. ใช้ Google Search เมื่อข้อมูลต้องเป็นปัจจุบัน
3. ตรวจสอบข้อมูลจากหลายแหล่งเมื่อเหมาะสม
4. ส่งสรุปข้อเท็จจริง แหล่งข้อมูล และประเด็นสำคัญกลับไปยัง Coordinator

อย่าเขียนบทความฉบับสมบูรณ์
ให้เน้นข้อมูลหลักฐานและข้อเท็จจริง
""",
    tools=[google_search],
)


analyst_agent = Agent(
    name="analyst_agent",
    description=(
        "วิเคราะห์ข้อมูล เปรียบเทียบทางเลือก หา trade-off ข้อดี ข้อเสีย "
        "และสังเคราะห์ข้อสรุปเชิงเหตุผล"
    ),
    instruction="""
คุณคือ Analyst Agent

หน้าที่:
1. วิเคราะห์ข้อมูลที่ได้รับ
2. เปรียบเทียบทางเลือก
3. แยกข้อดี ข้อเสีย ความเสี่ยง และข้อจำกัด
4. ตรวจสอบว่าข้อสรุปสอดคล้องกับหลักฐานหรือไม่
5. ส่งผลการวิเคราะห์กลับไปยัง Coordinator

ตอบอย่างมีโครงสร้าง กระชับ และอธิบายเหตุผล
""",
)


writer_agent = Agent(
    name="writer_agent",
    description=(
        "เรียบเรียงคำตอบ บทความ คู่มือ หรือรายงานจากข้อมูลและผลวิเคราะห์"
    ),
    instruction="""
คุณคือ Writer Agent

หน้าที่:
1. เรียบเรียงข้อมูลให้เข้าใจง่าย
2. จัดโครงสร้างหัวข้ออย่างเหมาะสม
3. รักษาความถูกต้องของข้อมูล
4. ไม่สร้างข้อเท็จจริงใหม่ที่ไม่มีในข้อมูลต้นทาง
5. ใช้ภาษาเดียวกับผู้ใช้เป็นหลัก

หากเป็นคำตอบภาษาไทย ให้เขียนภาษาไทยที่อ่านง่ายและเป็นธรรมชาติ
""",
)


root_agent = Agent(
    name="coordinator_agent",
    model="gemini-2.5-flash",
    description="Coordinator สำหรับระบบ Multi-Agent Research Assistant",
    instruction="""
คุณคือ Coordinator Agent ของระบบ Multi-Agent

Agent ที่คุณสามารถ delegate งานได้:
- research_agent: สำหรับค้นหาข้อมูลล่าสุดและหลักฐาน
- analyst_agent: สำหรับวิเคราะห์ เปรียบเทียบ และหา trade-off
- writer_agent: สำหรับเรียบเรียงคำตอบขั้นสุดท้าย

แนวทางทำงาน:
1. วิเคราะห์ความต้องการของผู้ใช้ก่อน
2. ถ้าคำถามต้องการข้อมูลล่าสุด ให้ใช้ research_agent
3. ถ้าต้องมีการเปรียบเทียบหรือวิเคราะห์ ให้ใช้ analyst_agent
4. เมื่อมีข้อมูลเพียงพอ ให้ใช้ writer_agent จัดทำคำตอบที่อ่านง่าย
5. ไม่จำเป็นต้องเรียกทุก Agent หากงานไม่ต้องการ
6. รักษาความถูกต้องและอย่าสร้างข้อมูลที่ไม่มีหลักฐาน

ตอบกลับผู้ใช้ด้วยผลลัพธ์สุดท้ายที่สมบูรณ์
""",
    sub_agents=[
        research_agent,
        analyst_agent,
        writer_agent,
    ],
)
#จุดสำคัญของโค้ด
#root_agent
ADK CLI จะค้นหา object ชื่อ
root_agent
เป็นจุดเริ่มต้นของ Agent Application
#sub_agents
sub_agents=[
    research_agent,
    analyst_agent,
    writer_agent,
]
เป็นการกำหนด Agent ลูกที่ Coordinator สามารถ delegate งานไปให้ได้
#description
description="วิเคราะห์ข้อมูล..."
มีความสำคัญ เพราะช่วยให้ Coordinator เข้าใจว่า Agent แต่ละตัวเหมาะกับงานประเภทใด
#Model Inheritance
ในระบบแบบ parent/sub-agent สามารถกำหนด model ที่ root agent แล้วให้ sub-agent ใช้ model ที่สืบทอดมาได้
ในตัวอย่างกำหนด
model="gemini-2.5-flash"
ไว้ที่ Coordinator
#5. __init__.py
ไฟล์
multi_agent/__init__.py
ใช้โค้ด
from . import agent
#6. requirements.txt
google-adk>=2.0.0,<3.0.0
ติดตั้ง
pip install -r requirements.txt
#7. รันผ่าน Terminal
จากโฟลเดอร์ parent ของ multi_agent
adk run multi_agent
ตัวอย่างคำถาม
เปรียบเทียบ Google ADK, LangGraph และ Microsoft Agent Framework
สำหรับสร้างระบบ Multi-Agent ในองค์กร
Coordinator สามารถตัดสินใจให้ Researcher ค้นข้อมูล จากนั้นให้ Analyst วิเคราะห์ และส่งต่อ Writer เพื่อเรียบเรียงคำตอบ
#8. รันผ่าน ADK Web
adk web .
หรือ
adk web
จากโฟลเดอร์ที่มี agent application
โดยทั่วไป development UI จะเปิดที่
http://localhost:8000
ADK Web เหมาะกับ
- ทดลอง prompt
- ดู conversation
- ตรวจสอบ tool call
- ตรวจสอบ agent transfer
- debug flow
- สร้าง evaluation case
#9. รันแบบ API Server
หากต้องการเชื่อม React, Next.js, Laravel หรือระบบอื่น
adk api_server .
จากนั้น frontend หรือ backend application สามารถเรียก ADK Runtime ผ่าน HTTP API
รูปแบบสถาปัตยกรรมจะเป็น
React / Next.js / Laravel
          |
          | HTTP
          v
+----------------------+
| ADK API Server       |
+----------+-----------+
           |
           v
+----------------------+
| Coordinator Agent    |
+----------+-----------+
           |
    +------+------+
    |      |      |
    v      v      v
 Research Analyst Writer
#10. ตัวอย่าง Flow การทำงาน
ผู้ใช้ถาม
วิเคราะห์ว่าองค์กรควรเลือก Kubernetes หรือ Docker Compose
สำหรับระบบที่มี 20 microservices
Coordinator วิเคราะห์ว่าเป็นคำถามเชิงเปรียบเทียบ
Flow ที่เป็นไปได้
User
 |
 v
Coordinator
 |
 +----> Research Agent
 |        |
 |        +-- ค้นข้อมูล Kubernetes
 |        +-- ค้นข้อมูล Docker Compose
 |
 +----> Analyst Agent
 |        |
 |        +-- Scale
 |        +-- Complexity
 |        +-- HA
 |        +-- Cost
 |        +-- Operations
 |
 +----> Writer Agent
          |
          +-- สรุปคำแนะนำ
ผลลัพธ์คือ Coordinator ทำหน้าที่เป็น Orchestrator โดยไม่ต้องเขียน if/else เพื่อเลือก Agent ทุกกรณี
#11. เพิ่ม Tool ให้ Agent
เราสามารถสร้าง Python Function Tool ได้ง่าย
def calculate_total(price: float, quantity: int) -> dict:
    """Calculate total price.

    Args:
        price: Price per item.
        quantity: Number of items.

    Returns:
        Dictionary containing the calculated total.
    """
    return {
        "price": price,
        "quantity": quantity,
        "total": price * quantity,
    }
แล้วเพิ่มใน Agent
calculation_agent = Agent(
    name="calculation_agent",
    description="คำนวณตัวเลขและข้อมูลเชิงปริมาณ",
    instruction="ใช้เครื่องมือคำนวณเมื่อจำเป็น",
    tools=[calculate_total],
)
จากนั้นเพิ่มเข้า Coordinator
sub_agents=[
    research_agent,
    analyst_agent,
    writer_agent,
    calculation_agent,
]
#12. Multi-Agent แบบ Sequential
กรณีต้องการบังคับลำดับ
Research
   |
   v
Analyze
   |
   v
Write
สามารถใช้ workflow แบบ deterministic เช่น SequentialAgent
from google.adk.agents import SequentialAgent

pipeline = SequentialAgent(
    name="research_pipeline",
    sub_agents=[
        research_agent,
        analyst_agent,
        writer_agent,
    ],
)

root_agent = pipeline
ข้อแตกต่างคือ
| แบบ | การเลือก Agent |
|---|---|
| Coordinator + sub_agents | LLM ตัดสินใจตามบริบท |
| SequentialAgent | ทำตามลำดับที่กำหนด |
| ParallelAgent | ทำหลายงานพร้อมกัน |
| LoopAgent | ทำซ้ำจนเงื่อนไขสำเร็จ |
| Graph Workflow | ควบคุม flow แบบ graph และ branching |
สำหรับ ADK 2.x หาก workflow ซับซ้อน ควรพิจารณา Graph-based Workflow
#13. เมื่อไรควรใช้ Coordinator
เหมาะกับงานที่เส้นทางทำงานเปลี่ยนตามคำถาม เช่น
User Request
   |
   v
Coordinator
   |
   +-- Coding ------> Coding Agent
   |
   +-- Research ----> Research Agent
   |
   +-- Analysis ----> Analyst Agent
   |
   +-- Writing -----> Writer Agent
เหมาะกับ
- AI Assistant
- Research Assistant
- Customer Support
- Software Engineering Assistant
- Data Analytics Agent
- Financial Analysis
- DevOps Assistant
- Education Assistant
#14. แนวทาง Production
ระบบจริงควรเพิ่ม
#Session
แยก conversation ของแต่ละผู้ใช้
#Memory
เก็บข้อมูลระยะยาวที่ Agent ต้องจำ
#Structured Output
ใช้ schema เพื่อควบคุม output ของ Agent
#Evaluation
สร้าง evaluation dataset แล้วรัน
adk eval
เพื่อวัด
- response quality
- tool usage
- agent routing
- correctness
- regressions
#Observability
เก็บ
- Agent execution
- Tool calls
- Latency
- Token usage
- Errors
- Trace
#Guardrails
ควรควบคุม
- tool permissions
- sensitive data
- destructive operations
- prompt injection
- external API access
#15. Architecture ที่แนะนำ
สำหรับระบบขนาดกลาง
                    User
                     |
                     v
            +----------------+
            |  Coordinator   |
            +--------+-------+
                     |
      +--------------+--------------+
      |              |              |
      v              v              v
+-----------+   +-----------+   +-----------+
| Research  |   | Analysis  |   | Domain    |
| Agent     |   | Agent     |   | Agent     |
+-----+-----+   +-----+-----+   +-----+-----+
      |               |               |
      v               v               v
 Search/API       Python Tool       DB / MCP
      |               |               |
      +---------------+---------------+
                      |
                      v
               +-------------+
               | Writer      |
               | Agent       |
               +------+------+
                      |
                      v
                   Answer
แนวทางนี้แยก
- Orchestration
- Retrieval
- Reasoning
- Domain logic
- Presentation
ออกจากกันอย่างชัดเจน
#สรุป
Google ADK ช่วยให้สร้างระบบ Multi-Agent ได้โดยประกอบ Agent หลายตัวเข้าด้วยกันผ่าน sub_agents
โครงสร้างพื้นฐานที่แนะนำคือ
Coordinator
 ├── Research Agent
 ├── Analyst Agent
 └── Writer Agent
ถ้าต้องการให้ LLM เลือกเส้นทางตามสถานการณ์ ใช้ Coordinator + sub_agents
ถ้าต้องการ workflow ที่แน่นอน ให้ใช้ Sequential / Parallel / Loop / Graph Workflow
แนวคิดสำคัญคือไม่ควรสร้าง Agent จำนวนมากโดยไม่มีเหตุผล แต่ควรแยก Agent เมื่อแต่ละบทบาทมี
- เป้าหมายต่างกัน
- Tools ต่างกัน
- Prompt ต่างกัน
- Permission ต่างกัน
- Evaluation criteria ต่างกัน
จึงจะได้ประโยชน์จาก Multi-Agent อย่างแท้จริง
#References
- Google Agent Development Kit Documentation: https://google.github.io/adk-docs/
- Google ADK Python: https://github.com/google/adk-python
- Google ADK Workflows: https://google.github.io/adk-docs/workflows/
- Google ADK Evaluation: https://google.github.io/adk-docs/evaluate/