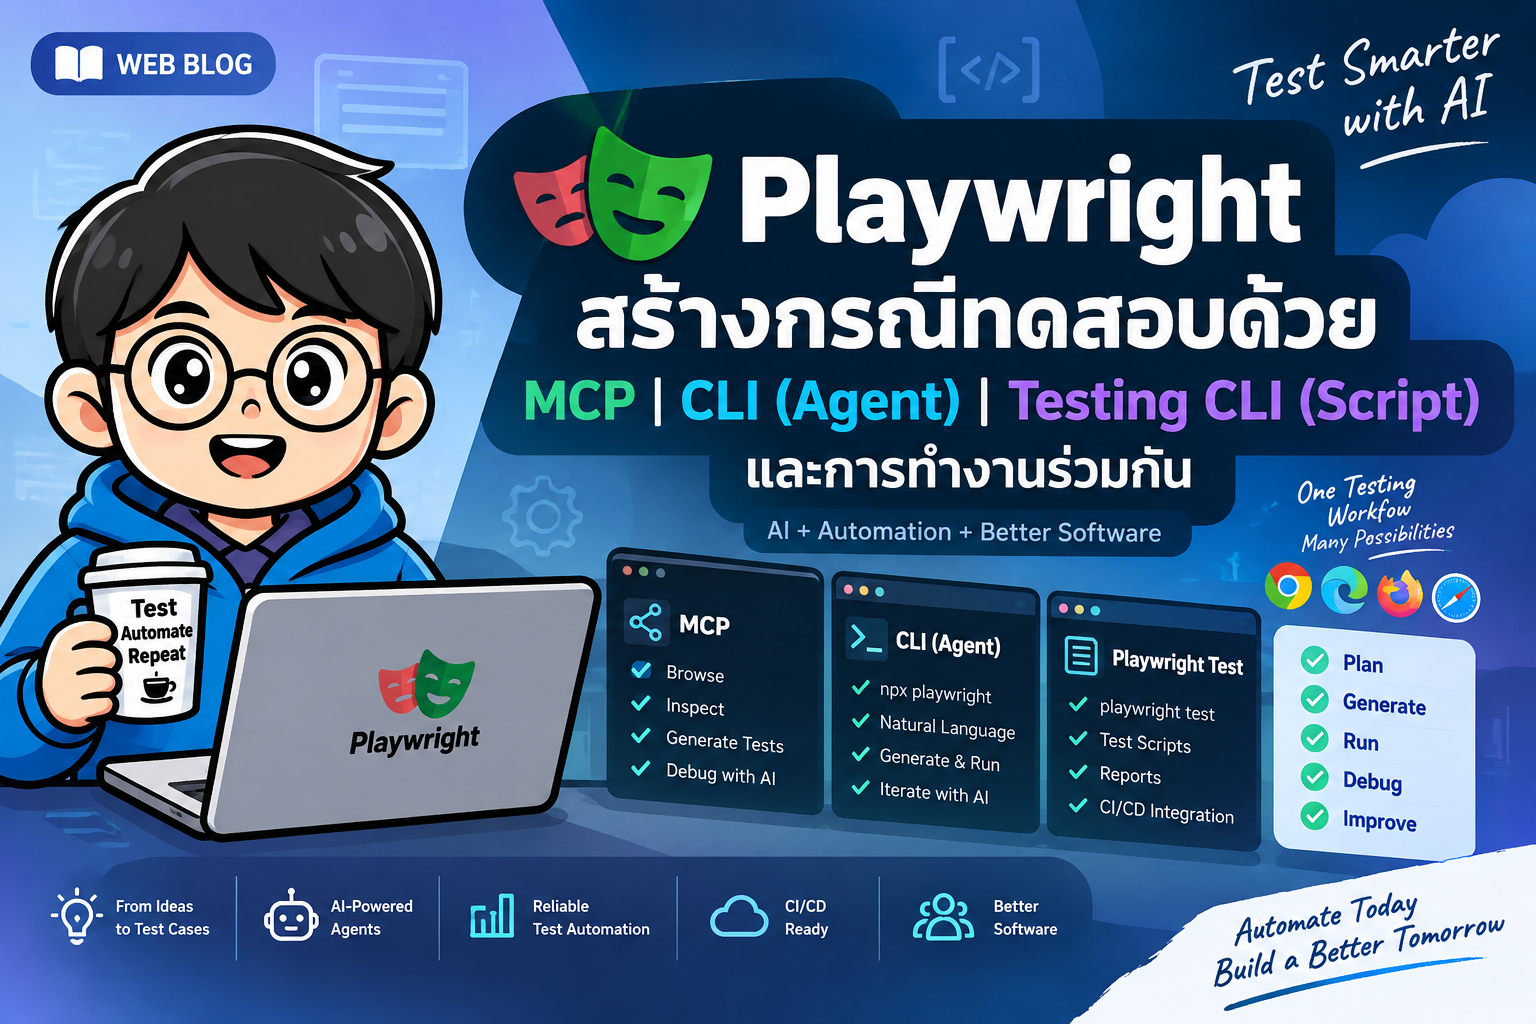
- การสร้างกรณีทดสอบด้วย Playwright MCP, Playwright CLI (Agent), Playwright Test Agents และ Playwright Test CLI
- 2. Playwright MCP คืออะไร
- 3. Playwright CLI สำหรับ Coding Agent
- 4. Playwright CLI + Skills
- 5. Playwright Test Agents
- 6. Generator Agent
- 7. Healer Agent
- 8. Playwright Test CLI: Script-based Testing
- 9. Playwright Codegen ต่างจาก Agent อย่างไร
- 10. Workflow ที่แนะนำ
- 11. ตัวอย่าง Workflow: ระบบ Login
- 12. ขั้นที่ 4: Generator สร้าง Test Script
- 13. ขั้นที่ 5: รัน Test Script
- 14. ขั้นที่ 6: Debug ด้วย Playwright CLI
- 15. การทำงานร่วมกันของ MCP และ CLI
- 16. รูปแบบการแบ่งหน้าที่ที่แนะนำ
- 17. Folder Structure ที่แนะนำ
- 18. การตั้งชื่อ Test Case
- 19. Prompt Template สำหรับสร้างกรณีทดสอบ
- 20. Prompt Template สำหรับสร้าง Automation
- 21. Prompt Template สำหรับ Healer
- 22. การนำเข้า CI/CD
- 23. หลักการสำคัญ: AI ช่วยสร้าง Test แต่ Assertion ต้องเชื่อถือได้
- 24. แนวทางที่แนะนำสำหรับโครงการจริง
- 25. สรุป
#การสร้างกรณีทดสอบด้วย Playwright MCP, Playwright CLI (Agent), Playwright Test Agents และ Playwright Test CLI
Playwright ในปัจจุบันไม่ได้มีเพียงการเขียนไฟล์ *.spec.ts แล้วรันด้วย npx playwright test เท่านั้น แต่มีเครื่องมือสำหรับ AI-assisted testing เพิ่มขึ้นหลายรูปแบบ เช่น Playwright MCP, Playwright CLI สำหรับ Coding Agent และ Playwright Test Agents ซึ่งสามารถนำมาทำงานร่วมกับ Playwright Test แบบปกติได้
แนวคิดสำคัญคือไม่ควรเลือกเพียงเครื่องมือเดียว แต่ควรแบ่งหน้าที่ตามวงจรการทดสอบ
Requirement / User Story
          │
          ▼
┌──────────────────────────────┐
│ Playwright MCP               │
│ สำรวจระบบและพฤติกรรมจริง      │
└─────────────┬────────────────┘
              │
              ▼
┌──────────────────────────────┐
│ Playwright CLI / Agent       │
│ สำรวจแบบ token-efficient     │
│ สร้าง test idea / locator    │
└─────────────┬────────────────┘
              │
              ▼
┌──────────────────────────────┐
│ Playwright Test Agents       │
│ Planner → Generator → Healer │
└─────────────┬────────────────┘
              │
              ▼
┌──────────────────────────────┐
│ Playwright Test              │
│ *.spec.ts                    │
│ npx playwright test          │
└─────────────┬────────────────┘
              │
              ▼
        CI/CD + Report
บทความนี้อธิบายบทบาทของแต่ละส่วน พร้อม workflow ที่เหมาะสำหรับการสร้างกรณีทดสอบแบบ AI-assisted แต่ยังคงได้ test script ที่ตรวจสอบย้อนหลังและรันซ้ำได้
#1. ภาพรวมเครื่องมือ
| เครื่องมือ | บทบาทหลัก | รูปแบบการทำงาน | เหมาะกับ |
|---|---|---|---|
| Playwright MCP | ให้ LLM ควบคุม Browser | MCP Tools + Accessibility Snapshot | Exploratory Testing, สำรวจ Flow |
| Playwright CLI | Browser automation สำหรับ Coding Agent | Shell Command + Snapshot + Skills | Agent ที่ทำงานร่วมกับ source code |
| Playwright Test Agents | วางแผน สร้าง และซ่อม test | Planner → Generator → Healer | AI-assisted test generation |
| Playwright Test CLI | รัน test script | npx playwright test |
Regression, CI/CD, Production test suite |
| Playwright Codegen | บันทึก interaction เป็นโค้ด | Browser Recorder | สร้าง script เริ่มต้นอย่างรวดเร็ว |
จุดสำคัญคือ MCP และ Agent CLI ไม่ควรถูกใช้แทน regression test suite โดยตรง เพราะเป้าหมายหลักของสองเครื่องมือนี้คือช่วยให้ AI เข้าใจและโต้ตอบกับระบบ ส่วนสิ่งที่ควรเก็บใน repository คือ Playwright Test ที่มี assertion และสามารถรันซ้ำแบบ deterministic ได้
#2. Playwright MCP คืออะไร
Playwright MCP เป็น MCP Server ที่เปิดความสามารถของ Playwright ให้ LLM หรือ AI Agent เรียกใช้ผ่าน Model Context Protocol
ตัวอย่างการติดตั้ง
{
  "mcpServers": {
    "playwright": {
      "command": "npx",
      "args": ["@playwright/mcp@latest"]
    }
  }
}
AI สามารถสั่ง Browser เช่น
เปิดหน้า /login
กรอก username
กรอก password
กด Login
ตรวจสอบว่าหลัง login แสดง Dashboard
เบื้องหลัง MCP จะส่งข้อมูลหน้าเว็บกลับมาในลักษณะ Accessibility Snapshot
ตัวอย่างแนวคิด
- heading "Login"
- textbox "Email" [ref=e4]
- textbox "Password" [ref=e7]
- button "Sign in" [ref=e9]
Agent จึงสามารถอ้างถึง element เช่น e4, e7 หรือ e9 โดยไม่จำเป็นต้องเดาพิกัดจากภาพ
#MCP เหมาะกับอะไร
เหมาะอย่างมากสำหรับ
- สำรวจระบบที่ยังไม่มี test
- วิเคราะห์ User Flow
- ตรวจสอบว่าหน้าเว็บทำงานอย่างไร
- Exploratory Testing
- สร้าง Test Scenario จากระบบจริง
- ตรวจสอบ selector หรือ locator
- สำรวจระบบที่มีหลาย state
- Agentic workflow ที่ต้องรักษา Browser session ต่อเนื่อง
ตัวอย่าง Prompt
ใช้ Playwright MCP สำรวจระบบ Login

URL:
http://localhost:3000/login

สร้างกรณีทดสอบอย่างน้อย 8 กรณี ครอบคลุม

- Login สำเร็จ
- Password ไม่ถูกต้อง
- Email ไม่ถูกต้อง
- ช่องว่าง
- Validation
- Session หลัง Login
- Logout
- Unauthorized access

สำหรับแต่ละกรณีให้ระบุ

- Test Case ID
- Preconditions
- Steps
- Test Data
- Expected Result
ผลลัพธ์ที่ต้องการในขั้นนี้คือ Test Design ไม่จำเป็นต้องเป็น source code ทันที
#3. Playwright CLI สำหรับ Coding Agent
Playwright มี playwright-cli ซึ่งออกแบบมาให้ coding agent ควบคุม Browser ผ่าน command line
ติดตั้ง
npm install -g @playwright/cli@latest
ตรวจสอบ
playwright-cli --help
หรือถ้ามี Playwright อยู่ใน project แล้ว สามารถใช้
npx playwright cli --help
ตัวอย่าง
playwright-cli open http://localhost:3000/login --headed
จากนั้น Agent สามารถใช้คำสั่ง
playwright-cli snapshot
playwright-cli find "Email"
playwright-cli fill e5 "student@example.com"
playwright-cli fill e8 "password123"
playwright-cli click e10
หลังแต่ละ action CLI จะสร้าง snapshot ของ page state เพื่อให้ agent วิเคราะห์ state ถัดไป
#จุดเด่นของ CLI
CLI ถูกออกแบบสำหรับ coding agent โดยเฉพาะ เช่น
- Claude Code
- GitHub Copilot
- Cursor
- agent ที่รองรับ local skills
CLI มีข้อได้เปรียบด้าน token efficiency เพราะ agent เรียก shell command ที่ค่อนข้างสั้น แทนการโหลด MCP tool schema จำนวนมากเข้า context
#4. Playwright CLI + Skills
สามารถติดตั้ง Playwright Skills ให้ coding agent เข้าใจ workflow ของ Playwright ได้ดีขึ้น
playwright-cli install --skills
หรือ
playwright-cli install --skills=claude
สำหรับ agent ecosystem ที่ใช้ .agents
playwright-cli install --skills=agents
Skills สามารถช่วย agent ในงาน เช่น
- Browser automation
- Test generation
- Locator generation
- Request mocking
- Storage state
- Trace
- Debugging
- Plan → Generate → Heal
ตัวอย่าง Prompt สำหรับ coding agent
Use Playwright CLI skills to inspect the login feature.

1. Explore the login page.
2. Identify positive, negative and boundary scenarios.
3. Create specs/login.md.
4. Generate Playwright tests under tests/auth/.
5. Run the tests.
6. Fix only test automation problems.
7. Do not modify application behavior to force tests to pass.
#5. Playwright Test Agents
Playwright มี Test Agents หลัก 3 ตัว
Planner
   │
   ▼
Generator
   │
   ▼
Healer
สามารถ initialize agent definitions ได้ เช่น
npx playwright init-agents --loop=vscode
หรือ
npx playwright init-agents --loop=claude
หรือ
npx playwright init-agents --loop=codex
#5.1 Planner Agent
Planner ทำหน้าที่สำรวจ application และสร้าง Test Plan ในรูปแบบ Markdown
ตัวอย่าง
Generate a test plan for the login feature.

Include:

- valid login
- invalid username
- invalid password
- empty form
- validation
- remember me
- logout
- protected route
Output อาจอยู่ใน
specs/
└── login.md
ตัวอย่างเนื้อหา
## TC-LOGIN-001 Valid Login

### Preconditions

User account exists.

### Steps

1. Navigate to `/login`
2. Enter valid email
3. Enter valid password
4. Click Login

### Expected Result

- User is redirected to `/dashboard`
- User name is displayed
- Logout button is visible
ข้อดีคือ test design ยังคงอยู่ในรูปแบบที่มนุษย์ review ได้ก่อนสร้าง source code
#6. Generator Agent
Generator อ่าน test plan แล้วสร้าง Playwright Test
เช่น
specs/login.md
        │
        ▼
Generator
        │
        ▼
tests/auth/login.spec.ts
ตัวอย่าง
import { test, expect } from '@playwright/test';

test.describe('Login', () => {

  test('TC-LOGIN-001 valid login', async ({ page }) => {

    await page.goto('/login');

    await page.getByLabel('Email')
      .fill('student@example.com');

    await page.getByLabel('Password')
      .fill('password123');

    await page.getByRole('button', {
      name: 'Login'
    }).click();

    await expect(page)
      .toHaveURL(/dashboard/);

    await expect(
      page.getByRole('button', {
        name: 'Logout'
      })
    ).toBeVisible();

  });

});
Generator ที่ดีไม่ควรเพียงสร้าง action แต่ต้องมี assertion ที่ตรวจ business behavior
ตัวอย่าง assertion
await expect(page).toHaveURL('/dashboard');

await expect(
  page.getByText('Welcome')
).toBeVisible();
#7. Healer Agent
เมื่อ test fail Healer สามารถช่วยวิเคราะห์ว่าเป็นปัญหาจาก test automation หรือไม่
ตัวอย่าง
เดิม
page.locator('#login-btn')
แต่หน้าเว็บเปลี่ยน DOM
Healer อาจสำรวจหน้าใหม่แล้วเปลี่ยนเป็น
page.getByRole('button', {
  name: 'Login'
})
Workflow
Run Test
   │
   ├── PASS ─────────► Done
   │
   └── FAIL
         │
         ▼
      Healer
         │
         ▼
 Inspect Current UI
         │
         ▼
 Propose Test Patch
         │
         ▼
      Re-run
อย่างไรก็ตามต้องมี guardrail สำคัญคือ
ห้ามแก้ assertion เพื่อทำให้ bug ของระบบกลายเป็น test ที่ผ่าน
ถ้า Expected Result คือ
Login สำเร็จต้องไป /dashboard
แต่ระบบไป
/error
Healer ไม่ควรแก้ test เป็น
await expect(page).toHaveURL('/error');
เพียงเพื่อให้ test ผ่าน
กรณีดังกล่าวควรจัดประเภทเป็น Product Defect
#8. Playwright Test CLI: Script-based Testing
ส่วนสุดท้ายคือ Playwright Test แบบปกติ
ไฟล์ตัวอย่าง
tests/
├── auth/
│   ├── login.spec.ts
│   └── logout.spec.ts
├── project/
│   ├── create.spec.ts
│   └── edit.spec.ts
└── admin/
    └── user-management.spec.ts
รันทั้งหมด
npx playwright test
รันไฟล์เดียว
npx playwright test tests/auth/login.spec.ts
รันเฉพาะชื่อ test
npx playwright test -g "valid login"
รัน Browser แบบมี UI
npx playwright test --headed
Debug
npx playwright test --debug
เปิด report
npx playwright show-report
นี่คือ layer ที่เหมาะสำหรับ
- Regression Testing
- Pull Request
- Continuous Integration
- Release Gate
- Scheduled Test
- Cross-browser Testing
#9. Playwright Codegen ต่างจาก Agent อย่างไร
Playwright Codegen เป็น recorder
npx playwright codegen http://localhost:3000
ผู้ทดสอบทำ action บน Browser แล้ว Playwright สร้าง source code ตาม interaction
ตัวอย่าง
await page.goto('http://localhost:3000/login');

await page.getByLabel('Email')
  .fill('user@example.com');

await page.getByLabel('Password')
  .fill('123456');

await page.getByRole('button', {
  name: 'Login'
}).click();
Codegen เหมาะสำหรับสร้าง starting point
แต่ Codegen ไม่ได้เข้าใจ requirement แบบเดียวกับ agent
ดังนั้น
Codegen = Record what I do

Agent = Reason about what should be tested
#10. Workflow ที่แนะนำ
แนวทางที่เหมาะสำหรับโครงการจริงคือ
1. Requirement
      ↓
2. MCP Explore
      ↓
3. Test Scenarios
      ↓
4. Planner
      ↓
5. Markdown Test Plan
      ↓
6. Generator
      ↓
7. Playwright Test
      ↓
8. npx playwright test
      ↓
9. FAIL ?
   ├─ Product Bug ──► Bug Report
   └─ Test Problem ─► Healer
      ↓
10. Regression Suite
      ↓
11. CI/CD
#11. ตัวอย่าง Workflow: ระบบ Login
สมมติระบบ
http://localhost:3000/login
#ขั้นที่ 1: ใช้ MCP สำรวจระบบ
Prompt
ใช้ Playwright MCP สำรวจ Login Page

ตรวจสอบ

- Input ทั้งหมด
- Validation message
- ปุ่ม
- Link
- Redirect
- Authentication state

จากนั้นเสนอ test scenario
อาจได้ scenario
TC01 Login สำเร็จ
TC02 Password ผิด
TC03 Email ไม่มีในระบบ
TC04 Email ว่าง
TC05 Password ว่าง
TC06 Email format ผิด
TC07 เข้าหน้า dashboard โดยไม่ได้ login
TC08 Logout
#ขั้นที่ 2: ให้ Planner สร้าง Test Plan
Prompt
Create a Playwright test plan for all login scenarios.

Store the plan in:

specs/login.md

Include:

- ID
- Preconditions
- Test Data
- Steps
- Expected Result
#ขั้นที่ 3: Human Review
ก่อนสร้าง script ควร review
specs/login.md
ตรวจว่า
- Requirement ถูกต้องหรือไม่
- Expected Result ถูกต้องหรือไม่
- มี negative case หรือไม่
- Test Data ถูกต้องหรือไม่
- มี scenario ซ้ำหรือไม่
ขั้นนี้สำคัญมากเพราะถ้า test plan ผิด Agent อาจสร้าง automation ที่ผิดได้อย่างเป็นระบบ
#12. ขั้นที่ 4: Generator สร้าง Test Script
Prompt
Generate Playwright tests from specs/login.md.

Store files under:

tests/auth/

Requirements:

- Prefer getByRole
- Prefer getByLabel
- Prefer getByTestId where appropriate
- Avoid brittle CSS selectors
- Use web-first assertions
- Keep each test independent
#13. ขั้นที่ 5: รัน Test Script
npx playwright test tests/auth
ถ้าต้องการดู browser
npx playwright test tests/auth --headed
ดู report
npx playwright show-report
#14. ขั้นที่ 6: Debug ด้วย Playwright CLI
กรณี test fail สามารถใช้ CLI ช่วย inspect state
ตัวอย่าง
PLAYWRIGHT_HTML_OPEN=never \
npx playwright test tests/auth/login.spec.ts --debug=cli
จากนั้น CLI สามารถ attach ไปยัง browser session ที่ pause อยู่
playwright-cli attach <session>
ตรวจหน้า
playwright-cli snapshot
ค้นหา element
playwright-cli find "Login"
ตรวจ error
playwright-cli console error
วิธีนี้ช่วยให้ coding agent วิเคราะห์ test failure บน browser state จริงได้
#15. การทำงานร่วมกันของ MCP และ CLI
แม้ MCP และ CLI จะทำ browser automation ได้คล้ายกัน แต่เหมาะกับบริบทต่างกัน
#MCP
เน้น
AI
 ↓
MCP Tools
 ↓
Playwright Browser
ข้อดี
- Agent tool call ชัดเจน
- เหมาะกับ exploratory automation
- เหมาะกับ long-running agent workflow
- เก็บ session ต่อเนื่องได้ดี
- Integrate กับ MCP ecosystem ได้ง่าย
#CLI
เน้น
Coding Agent
    ↓
Shell Command
    ↓
playwright-cli
    ↓
Browser
ข้อดี
- token-efficient
- ใช้ shell workflow ได้ง่าย
- เหมาะกับ agent ที่ต้องอ่าน source code จำนวนมาก
- ทำงานร่วมกับ Git ได้สะดวก
- ใช้ Skills เพื่อเพิ่ม context แบบ on demand
#16. รูปแบบการแบ่งหน้าที่ที่แนะนำ
| Stage | Tool | Output |
|---|---|---|
| Explore | MCP | ความเข้าใจระบบ |
| Discover | MCP / CLI | UI State + Flow |
| Design | Planner Agent | Markdown Test Plan |
| Review | Human | Approved Test Plan |
| Generate | Generator Agent | *.spec.ts |
| Execute | Playwright Test CLI | Pass/Fail |
| Diagnose | CLI / Trace | Failure Evidence |
| Repair automation | Healer | Updated Test |
| Report defect | Human/Agent | Bug Report |
| Regression | Playwright Test | Stable Test Suite |
| CI/CD | GitHub Actions / Jenkins | Quality Gate |
#17. Folder Structure ที่แนะนำ
project/
│
├── specs/
│   ├── auth/
│   │   ├── login.md
│   │   └── logout.md
│   │
│   └── project/
│       └── create-project.md
│
├── tests/
│   ├── seed.spec.ts
│   │
│   ├── auth/
│   │   ├── login.spec.ts
│   │   └── logout.spec.ts
│   │
│   └── project/
│       └── create-project.spec.ts
│
├── pages/
│   ├── LoginPage.ts
│   └── ProjectPage.ts
│
├── fixtures/
│   └── auth.fixture.ts
│
├── test-data/
│   └── users.json
│
├── playwright.config.ts
│
└── package.json
การแยก specs/ และ tests/ ช่วยให้เห็น traceability
Requirement
     ↓
Markdown Spec
     ↓
Automated Test
#18. การตั้งชื่อ Test Case
แนะนำรูปแบบ
<Feature>-<Number>
เช่น
LOGIN-001
LOGIN-002
PROJECT-001
USER-001
ใน Playwright
test(
  'LOGIN-001 User can login with valid credentials',
  async ({ page }) => {

  }
);
ช่วยให้ trace กับ
- Requirement
- Test Plan
- Defect
- CI Report
ได้ง่าย
#19. Prompt Template สำหรับสร้างกรณีทดสอบ
Use Playwright to explore the application.

Feature:
<FEATURE>

URL:
<URL>

Goal:
Create comprehensive test cases.

Cover:

1. Happy path
2. Negative cases
3. Boundary cases
4. Validation
5. Navigation
6. Authentication / Authorization
7. Error handling
8. Important state changes

For every test case provide:

- Test Case ID
- Title
- Preconditions
- Test Data
- Steps
- Expected Result

Do not generate Playwright code yet.
แนวคิดคือ Design ก่อน Code
#20. Prompt Template สำหรับสร้าง Automation
Generate Playwright Test scripts from the approved Markdown test plan.

Rules:

1. Use @playwright/test.
2. Prefer getByRole().
3. Prefer getByLabel().
4. Use getByTestId() where appropriate.
5. Avoid fragile CSS/XPath selectors.
6. Use web-first assertions.
7. Keep tests independent.
8. Do not use fixed timeout unless unavoidable.
9. Do not change expected behavior only to make tests pass.
10. Run the generated tests and report failures.
#21. Prompt Template สำหรับ Healer
Run the failing Playwright test.

Determine whether the failure is:

A. Test automation defect
B. Product defect
C. Test data problem
D. Environment problem

If it is a test automation defect:

- inspect the current UI
- repair the locator or synchronization
- preserve the original business assertion
- rerun the test

If it appears to be a product defect:

- do not weaken the assertion
- do not change expected behavior
- create a defect summary
การแยก failure classification ช่วยป้องกัน AI จากการแก้ test เพียงเพื่อให้สถานะกลายเป็นสีเขียว
#22. การนำเข้า CI/CD
เมื่อ test ถูก review แล้ว ให้ CI รัน Playwright Test CLI
ตัวอย่าง GitHub Actions
name: Playwright Tests

on:
  pull_request:
  push:
    branches:
      - main

jobs:

  test:

    runs-on: ubuntu-latest

    steps:

      - uses: actions/checkout@v4

      - uses: actions/setup-node@v4
        with:
          node-version: 20

      - run: npm ci

      - run: npx playwright install --with-deps

      - run: npx playwright test
ใน CI ไม่จำเป็นต้องให้ AI agent เป็นตัวตัดสิน Pass/Fail หลัก
Quality Gate ควรมาจาก
Playwright Assertion
        +
Process Exit Code
        +
Test Report
#23. หลักการสำคัญ: AI ช่วยสร้าง Test แต่ Assertion ต้องเชื่อถือได้
Architecture ที่ดีควรเป็น
AI = Discover + Design + Generate + Diagnose
                    │
                    ▼
          Deterministic Test Code
                    │
                    ▼
             Playwright Test
                    │
                    ▼
                CI/CD
ไม่ควรเป็น
AI ดูเว็บ
   ↓
AI บอกว่า "น่าจะผ่าน"
   ↓
PASS
เพราะผลลัพธ์จะไม่ reproducible และ audit ได้ยาก
#24. แนวทางที่แนะนำสำหรับโครงการจริง
การทำงานที่สมดุลที่สุดคือ
MCP
│
├─ Explore Feature
├─ Understand UI
└─ Find Test Scenarios
       │
       ▼
Planner Agent
       │
       ▼
Markdown Test Plan
       │
       ▼
Human Review
       │
       ▼
Generator Agent
       │
       ▼
Playwright Test
       │
       ▼
npx playwright test
       │
       ├─ PASS
       │
       └─ FAIL
            │
            ├─ Product Defect → Bug Report
            │
            └─ Test Defect
                    │
                    ▼
              CLI / Healer
                    │
                    ▼
                 Re-run
#25. สรุป
Playwright ecosystem สามารถแบ่งออกเป็น 4 ชั้น
#1. Playwright MCP
ใช้สำหรับ
Explore
Understand
Interact
Reason
#2. Playwright CLI
ใช้สำหรับ
Agent Browser Automation
Token-efficient Exploration
Debugging
Skills-based Workflow
#3. Playwright Test Agents
ใช้สำหรับ
Planner
   ↓
Generator
   ↓
Healer
#4. Playwright Test CLI
ใช้สำหรับ
Execute
Regression
Report
CI/CD
ดังนั้นแนวทางที่แนะนำคือ
MCP / CLI
    ↓
Explore Application
    ↓
Planner
    ↓
Test Plan
    ↓
Human Review
    ↓
Generator
    ↓
Playwright Test
    ↓
npx playwright test
    ↓
Healer / Debug
    ↓
Stable Regression Suite
    ↓
CI/CD
วิธีนี้ทำให้ได้ประโยชน์จาก AI ในช่วง การสำรวจ การคิดกรณีทดสอบ การสร้างสคริปต์ และการวิเคราะห์ปัญหา แต่ยังคงรักษาคุณสมบัติสำคัญของ Software Testing ได้แก่ ความสามารถในการรันซ้ำ, traceability, assertions ที่ตรวจสอบได้ และ CI quality gate ที่ deterministic
#เอกสารอ้างอิง
- Playwright MCP: https://playwright.dev/mcp/introduction
- Playwright CLI for coding agents: https://playwright.dev/agent-cli/introduction
- Playwright CLI Quick Start: https://playwright.dev/agent-cli/quick-start
- Playwright Test Agents: https://playwright.dev/docs/test-agents
- Playwright Test CLI: https://playwright.dev/docs/test-cli
- Playwright Codegen: https://playwright.dev/docs/codegen