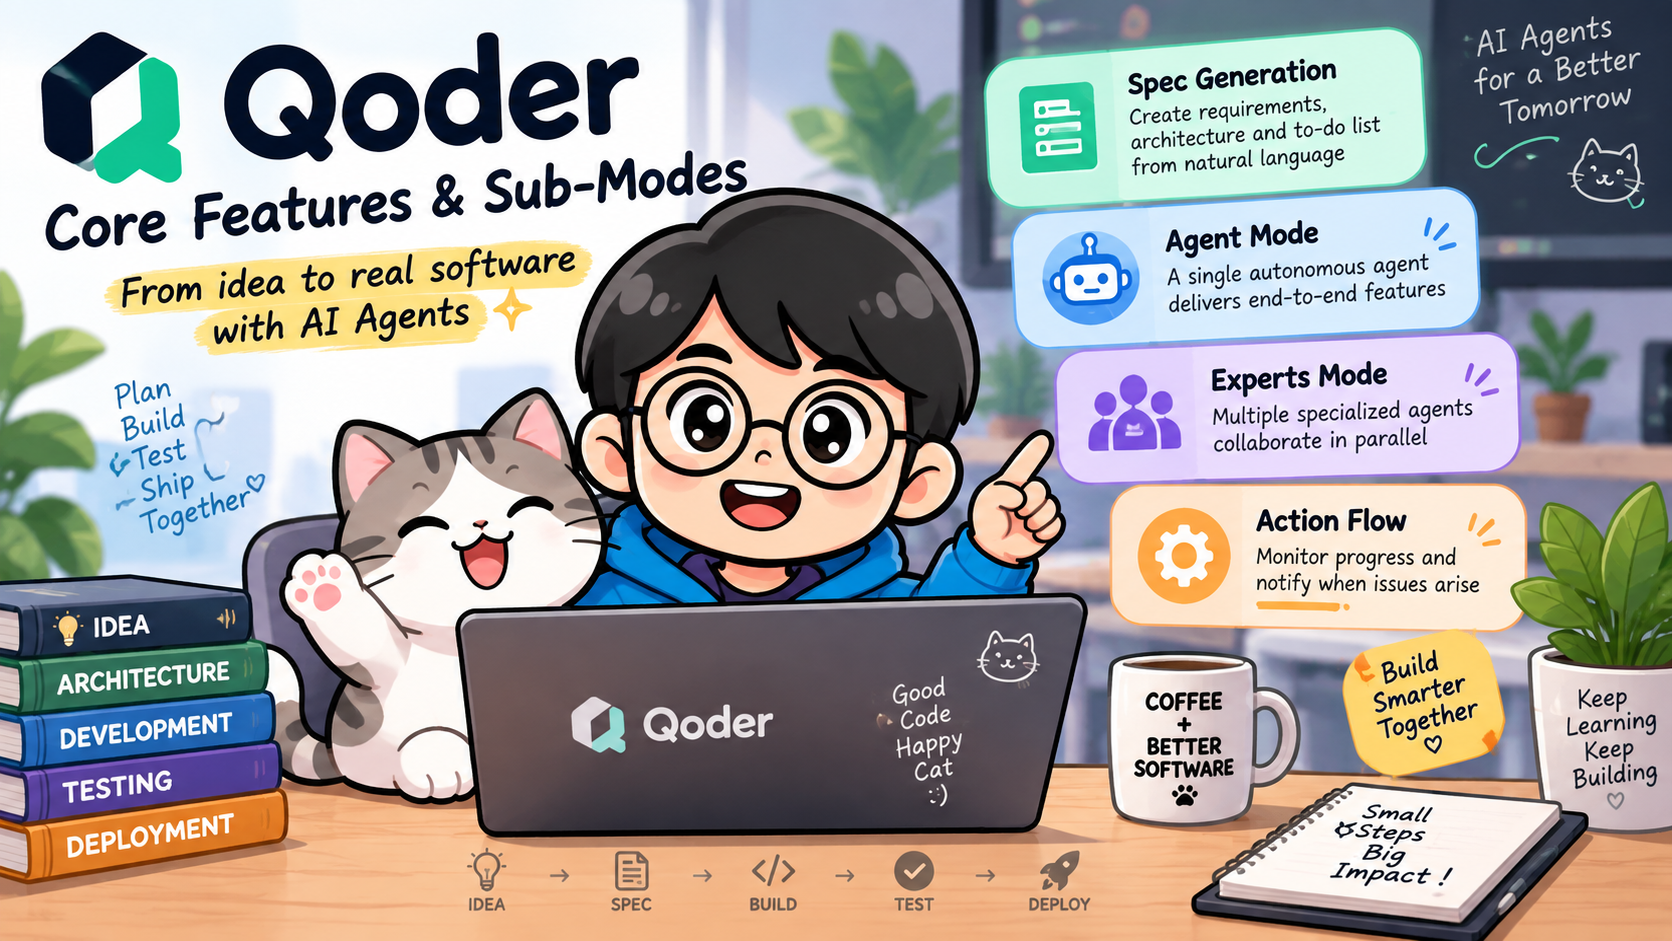
- Qoder Quest Mode: Core Features & Sub-Modes สำหรับ Agentic Software Development
- 1. Spec Generation และ Spec-driven Development
- 2. Agent Mode
- 3. Experts Mode
- 4. Experts Mode ทำงานแบบ Parallel
- 5. Agent Mode vs Experts Mode
- 6. Action Flow
- 7. Task Status ใน Quest
- 8. Spec-driven ไม่ใช่ Experts Mode
- 9. Workflow ที่แนะนำสำหรับงานจริง
- 10. ตัวอย่าง Prompt สำหรับ Agent Mode
- 11. ตัวอย่าง Prompt สำหรับ Experts Mode
- 12. ตัวอย่าง End-to-End Quest Workflow
- 13. Best Practices
- 14. แนวคิด Prompt Template สำหรับ Quest
- สรุป
- References
#Qoder Quest Mode: Core Features & Sub-Modes สำหรับ Agentic Software Development
การใช้ AI ช่วยพัฒนาซอฟต์แวร์กำลังเปลี่ยนจากการถาม–ตอบเพื่อให้ AI สร้างโค้ดทีละส่วน ไปสู่แนวคิด Agentic Software Development ที่ผู้พัฒนาระบุ “เป้าหมาย” แล้วมอบหมายให้ AI Agent วิเคราะห์ วางแผน ลงมือแก้ไขโค้ด ทดสอบ และส่งผลลัพธ์กลับมาให้ตรวจสอบ
หนึ่งในแนวทางของ Qoder คือ Quest Mode ซึ่งถูกออกแบบมาเพื่อรองรับ workflow แบบ delegation-first หรือการมอบหมายงานให้ AI Agent ทำงานแบบ end-to-end โดยมีแนวคิดหลักคือ
Define the goal → Let the Agent work → Review the result
Quest Mode รวมความสามารถด้านการวางแผน งานแบบ single-agent งานแบบ multi-agent การติดตามสถานะ และการ review ผลลัพธ์ไว้ใน workflow เดียว
บทความนี้จะอธิบายองค์ประกอบสำคัญของ Quest Mode ได้แก่
- Spec Generation / Spec-driven Development
- Agent Mode
- Experts Mode
- Action Flow
- Task Status
- แนวทางเลือก Mode
- Best Practices สำหรับใช้งานในโครงการจริง
#Quest Mode คืออะไร
Qoder อธิบาย Quest ว่าเป็นพื้นที่ทำงานสำหรับ agent-first workflows โดยผู้พัฒนาสามารถสร้างงานจาก natural language และให้ AI ดำเนินงานต่อเนื่องตั้งแต่การทำความเข้าใจ requirement ไปจนถึงการส่งมอบโค้ด
Quest มี sub-mode หลัก 2 รูปแบบคือ
- Agent Mode — ใช้ Agent เดียวทำงาน end-to-end
- Experts Mode — ใช้หลาย Agent ผู้เชี่ยวชาญร่วมกัน โดยมี Lead Agent ควบคุมและประสานงาน
ขณะเดียวกัน ผู้ใช้สามารถเปิด Spec-driven Development เพื่อให้ระบบสร้างข้อกำหนดและแผนก่อนเริ่ม coding
ภาพรวมสามารถมองได้ดังนี้
Natural Language Requirement
          |
          v
   Spec Generation
    (optional)
          |
          v
 +-------------------+
 | Execution Strategy|
 +---------+---------+
           |
     +-----+-----+
     |           |
     v           v
 Agent Mode   Experts Mode
     |           |
Single Agent  Multi-Agent
     |           |
     +-----+-----+
           |
           v
      Action Flow
           |
           v
       Validation
           |
           v
      Human Review
#1. Spec Generation และ Spec-driven Development
หัวใจสำคัญของงานที่ใช้ autonomous agent คือ คุณภาพของ requirement
ถ้าเราสั่งเพียงว่า
สร้างระบบ login ให้หน่อย
Agent จะต้องตั้งสมมติฐานจำนวนมาก เช่น
- ใช้ session หรือ token
- ใช้ framework อะไร
- ต้องมี role หรือไม่
- validation เป็นแบบใด
- ต้องเขียน test หรือไม่
- logout ต้อง invalidate token หรือไม่
เมื่อ requirement ไม่ชัดเจน ผลลัพธ์ที่ได้อาจทำงานได้ แต่ไม่ตรงกับสิ่งที่ทีมต้องการ
Qoder จึงรองรับ Spec-driven Development ซึ่งให้ Agent วิเคราะห์ requirement และบริบทของโครงการก่อนสร้างเอกสาร Spec
โดย Spec ที่ Qoder สร้างจะครอบคลุมองค์ประกอบสำคัญ เช่น
- Requirement Description
- Design Plan
- Task Breakdown
- Acceptance Criteria
เมื่อเปิด Spec-driven ระบบจะสร้าง Spec ก่อน และรอการยืนยันจากผู้ใช้ก่อนเริ่ม execution
#ตัวอย่าง Spec Generation
สมมติเราระบุ requirement ดังนี้
Implement authentication for a React + Laravel application.

Requirements:
- Login with email and password
- Use Laravel Sanctum
- Protect dashboard route
- Logout
- Form validation
- Feature tests
ระบบสามารถแตกออกเป็น Spec ในลักษณะนี้
Requirements
1. User can log in using email and password.
2. Authentication uses Laravel Sanctum.
3. Unauthenticated users cannot access /dashboard.
4. Logged-in users can logout.

Design
- React LoginPage
- Laravel AuthController
- Sanctum middleware
- Protected API routes

Tasks
1. Configure Sanctum.
2. Create login endpoint.
3. Build React login form.
4. Add protected route.
5. Implement logout.
6. Add feature tests.

Acceptance Criteria
- Valid credentials authenticate successfully.
- Invalid credentials return an authentication error.
- Dashboard rejects unauthenticated requests.
- Logout invalidates authentication.
- Automated tests pass.
ข้อดีคือ Developer สามารถตรวจ design และ scope ก่อนที่ Agent จะเปลี่ยน source code จริง
#Spec-driven เหมาะกับงานประเภทใด
เหมาะกับงานที่
- มีหลายไฟล์
- มี business logic
- กระทบหลาย module
- ต้องกำหนด architecture
- มี acceptance criteria
- ต้องการ review ก่อน coding
- มี dependency ระหว่างหลาย task
- มีความเสี่ยงจากการตีความ requirement ผิด
ตัวอย่างเช่น
Authentication
Payment
User Management
Order Workflow
Role-Based Access Control
Microservice Refactoring
Database Migration
#2. Agent Mode
Agent Mode คือการใช้ autonomous agent ตัวเดียวทำงานแบบ end-to-end
ตามเอกสาร Qoder Agent จะสามารถ
- ทำความเข้าใจ requirement
- ช่วย clarify สิ่งที่ไม่ชัดเจน
- วางแผน solution
- อ่านและแก้ไข source code
- ใช้ terminal
- รันคำสั่ง
- ทดสอบผลลัพธ์
- แก้ไข error
- verify งานก่อนส่งมอบ
Workflow โดยย่อคือ
Goal
 |
 v
Understand Requirement
 |
 v
Plan
 |
 v
Implement
 |
 v
Run / Test
 |
 v
Fix
 |
 v
Verify
 |
 v
Deliver
#Agent Mode เหมาะกับงานแบบใด
Agent Mode เหมาะกับงานที่มีขอบเขตค่อนข้างชัด เช่น
- เพิ่ม feature หนึ่งส่วน
- แก้ bug
- Refactor module
- สร้าง prototype
- สร้าง CLI
- Data processing script
- เพิ่ม unit test
- เพิ่ม API endpoint
- เปลี่ยน UI component
- เพิ่ม integration กับ external service
ตัวอย่าง:
Create a REST API endpoint for product search.

Stack:
- Laravel
- MySQL

Requirements:
- GET /api/products/search?q=
- Search by name and description
- Pagination 20 records per page
- Validate query parameter
- Add Laravel Feature Tests

Acceptance Criteria:
- Valid search returns HTTP 200.
- Missing q returns HTTP 422.
- Tests must pass.
Prompt แบบนี้มี scope ที่ชัดเจน จึงเหมาะกับ Agent Mode มากกว่าคำสั่งกว้าง ๆ เช่น
ทำ search API ให้หน่อย
#3. Experts Mode
เมื่อระบบมีความซับซ้อนสูงขึ้น Agent ตัวเดียวอาจต้องทำทั้ง
- Research
- Frontend
- Backend
- Database
- Testing
- Debugging
- Code Review
Qoder จึงมี Experts Mode ซึ่งเป็น workflow แบบ multi-agent collaboration
แนวคิดหลักคือมี Lead Agent ทำหน้าที่เป็นตัวกลางในการวิเคราะห์ requirement แตกงาน และประสาน Agent ผู้เชี่ยวชาญหลายตัว
ตัวอย่างโครงสร้าง
                 +----------------+
                 |   Lead Agent   |
                 +--------+-------+
                          |
        +-----------------+------------------+
        |                 |                  |
        v                 v                  v
   Researcher      Full-Stack Engineer       QA
        |                 |                  |
        +-----------------+------------------+
                          |
                          v
                    Code Reviewer
                          |
                          v
                   Integrated Result
Qoder ระบุ Expert Role ที่อาจถูกเรียกใช้ เช่น
- Lead Agent
- Researcher
- Full-Stack Engineer
- QA
- Code Reviewer
- UI Operator
- Debug Engineer
Lead Agent จะเลือกใช้ Agent ตามลักษณะงาน และ Agent หลายตัวสามารถทำงานแบบ parallel ได้
#ตัวอย่างงานสำหรับ Experts Mode
สมมติเราต้องการสร้าง
User Management Module
Requirement มีดังนี้
#Frontend
- User list
- Create user
- Edit user
- Delete user
- Search
- Pagination
- Form validation
#Backend
- Laravel REST API
- MySQL
- Validation
- Authorization
#Quality
- Feature tests
- Frontend component tests
- Error handling review
- Security review
งานนี้สามารถแบ่งออกได้เป็นหลาย workstream
Frontend Agent
      |
      +------ React UI

Backend Agent
      |
      +------ REST API

QA Agent
      |
      +------ Automated Tests

Code Review Agent
      |
      +------ Quality / Security
แล้ว Lead Agent ทำหน้าที่รวมผลลัพธ์
#4. Experts Mode ทำงานแบบ Parallel
จุดเด่นสำคัญของ Experts Mode คือหลาย Agent สามารถดำเนินงานได้พร้อมกัน
ตัวอย่าง
                Lead Agent
                    |
        +-----------+------------+
        |           |            |
        v           v            v
   Frontend      Backend        QA
     Task          Task         Task
        |           |            |
        +-----------+------------+
                    |
                    v
              Integration
ต่างจากการให้ Agent ตัวเดียวทำ
Frontend
   |
Backend
   |
Tests
   |
Review
การแบ่งงาน parallel จึงเหมาะกับ feature ที่มีหลาย subsystem และแต่ละส่วนสามารถดำเนินงานแยกจากกันได้บางส่วน
#5. Agent Mode vs Experts Mode
| ประเด็น | Agent Mode | Experts Mode |
|---|---|---|
| รูปแบบ | Single Agent | Multi-Agent |
| Task orchestration | Agent จัดการเอง | Lead Agent จัดสรรงาน |
| Parallel work | จำกัดกว่า | รองรับหลาย Expert พร้อมกัน |
| Complexity | เล็ก–กลาง | กลาง–ใหญ่ |
| Feature development | เหมาะ | เหมาะกับ feature ซับซ้อน |
| Prototype | เหมาะมาก | อาจเกินความจำเป็น |
| Script / CLI | เหมาะมาก | ไม่จำเป็นในหลายกรณี |
| Full-stack feature | ทำได้ | เหมาะกว่าเมื่อหลาย subsystem |
| Research + implementation | ทำได้ | เหมาะมาก |
| QA specialization | Agent เดียวรับผิดชอบ | แยก QA Agent ได้ |
| Code Review | ทำใน workflow เดียว | แยก Code Reviewer ได้ |
สามารถใช้หลักง่าย ๆ ว่า
One coherent task
      |
      v
 Agent Mode
และ
Multiple domains
Parallel workstreams
Complex integration
      |
      v
 Experts Mode
#6. Action Flow
เมื่อ Agent ทำงานแบบ autonomous ผู้พัฒนาไม่ควรต้องนั่งดูทุก command ที่ระบบรัน
Qoder จึงมีแนวคิด Action Flow สำหรับแสดง progression ของงาน
ผู้ใช้สามารถดูว่า Agent
- กำลังทำอะไร
- วางแผนอะไร
- เรียกใช้ tool ใด
- รันคำสั่งอะไร
- พบปัญหาอะไร
- แก้ปัญหาอย่างไร
- ต้องการ input เพิ่มเติมหรือไม่
แนวคิดคือ
Developer delegates task
        |
        v
Agent executes autonomously
        |
        +---- No problem ----> Continue
        |
        +---- Ambiguity ------+
        |                     |
        +---- Blocker --------+
                              |
                              v
                       Action Required
                              |
                              v
                         Human Input
                              |
                              v
                           Continue
นี่คือรูปแบบ Human-in-the-loop ที่ Developer ไม่ต้อง approve ทุก operation แต่ยังสามารถเข้ามาตัดสินใจเมื่อ AI เจอสถานการณ์ที่ต้องใช้ judgment
#7. Task Status ใน Quest
เอกสาร Qoder ระบุสถานะหลักของ Quest Task ไว้ 4 แบบ
| Status | ความหมาย |
|---|---|
Running |
Agent กำลังดำเนินงาน |
Action Required |
ต้องการข้อมูลหรือการยืนยันจากผู้ใช้ |
Ready |
งานเสร็จในรอบนั้นและพร้อม review/iterate |
Error |
เกิดข้อผิดพลาดระหว่าง execution |
ตัวอย่าง lifecycle
Running
   |
   +------> Action Required
   |              |
   |              v
   |          User Input
   |              |
   +--------------+
   |
   +------> Ready

or

Running
   |
   +------> Error
#8. Spec-driven ไม่ใช่ Experts Mode
จุดที่ควรแยกให้ชัดคือ
Spec-driven Development และ Experts Mode ไม่ใช่สิ่งเดียวกัน
ทั้งสองเป็นคนละมิติ
คำถามแรกคือ
ต้องการสร้าง Spec ก่อน execution หรือไม่?
คำถามที่สองคือ
ต้องการใช้ Agent เดียว หรือหลาย Agent?
ดังนั้นเราสามารถมี workflow ได้หลายรูปแบบ
#แบบที่ 1
Agent Mode
+
No Spec
เหมาะกับงานเล็กหรือ prototype
#แบบที่ 2
Spec-driven
+
Agent Mode
เหมาะกับ feature ที่มีหลายไฟล์แต่ยังสามารถให้ Agent เดียวดูแลได้
#แบบที่ 3
Experts Mode
+
Planning
เหมาะกับงานหลาย domain
#แบบที่ 4
Spec-driven
+
Experts Mode
เหมาะกับงานใหญ่ที่ต้องการ alignment เรื่อง architecture ก่อนให้หลาย Agent ลงมือ
#9. Workflow ที่แนะนำสำหรับงานจริง
#Step 1 — กำหนด Goal
ไม่ควรใช้
ช่วยแก้ระบบนี้
ควรใช้
Add JWT authentication to the Express TypeScript API.
Goal ที่ดีควรบอกว่า ระบบต้องเปลี่ยนไปอย่างไร
#Step 2 — ระบุ Context
บอก Agent ว่า project ใช้เทคโนโลยีอะไร
Stack:
- Node.js
- Express
- TypeScript
- Prisma
- PostgreSQL
- Vitest
รวมถึงข้อมูลอื่น เช่น
- Architecture
- Database
- Existing module
- Coding convention
- Testing framework
- Deployment environment
#Step 3 — ระบุ Constraints
ตัวอย่าง
Constraints:
- Do not change existing public API.
- Do not introduce new dependencies unless necessary.
- Keep backward compatibility.
- Follow existing service/repository architecture.
Constraints ช่วยลดการแก้โค้ดเกิน scope
#Step 4 — ระบุ Acceptance Criteria
ตัวอย่าง
Acceptance Criteria:
- POST /auth/login returns JWT for valid credentials.
- Invalid password returns HTTP 401.
- Protected endpoints require Bearer token.
- Expired tokens are rejected.
- Automated tests must pass.
Acceptance Criteria มีความสำคัญมาก เพราะช่วยให้ Agent รู้ว่า “งานเสร็จ” หมายถึงอะไร
#Step 5 — เปิด Spec-driven เมื่อ Task ซับซ้อน
ก่อน approve Spec ให้ตรวจ
Requirement
Architecture
Task Breakdown
Dependency
Validation Strategy
Acceptance Criteria
ถ้าพบจุดผิด ควรแก้ Spec ก่อน coding
#Step 6 — เลือก Execution Mode
ใช้ Agent Mode เมื่อ
Task มี scope เดียว
Dependency ไม่ซับซ้อน
ไม่ต้องแบ่งหลาย workstream
ใช้ Experts Mode เมื่อ
Task กระทบหลาย subsystem
ต้อง research
มี frontend + backend
มี QA
มี review
สามารถ parallelize งานได้
#Step 7 — Monitor ผ่าน Quest
ระหว่าง Agent ทำงาน ให้ติดตาม
Running
Execution Progress
Tests
Errors
Action Required
ไม่จำเป็นต้องเข้าไปแทรกแซงทุกขั้นตอน
#Step 8 — Review Result
แม้ AI จะ verify งานแล้ว Developer ยังควรตรวจ
- Git Diff
- Architecture
- Security
- Error Handling
- Database Migration
- Tests
- API Compatibility
- Dependency Changes
- Secrets
- Configuration
#10. ตัวอย่าง Prompt สำหรับ Agent Mode
Implement product search for the existing Laravel API.

Goal:
Allow users to search products by name and description.

Requirements:
- Endpoint: GET /api/products/search
- Query parameter: q
- Minimum query length: 2 characters
- Pagination: 20 items
- Search name and description
- Return existing ProductResource format

Testing:
- Add Laravel Feature Tests
- Test successful search
- Test empty result
- Test invalid query

Constraints:
- Do not change the existing products table.
- Do not add a new package.

Acceptance Criteria:
- Valid search returns HTTP 200.
- Missing q returns HTTP 422.
- Existing product endpoints remain unchanged.
- All tests pass.
งานนี้มี scope ชัด จึงเหมาะกับ Agent Mode
#11. ตัวอย่าง Prompt สำหรับ Experts Mode
Build a complete User Management module.

Stack:
- Laravel
- React
- MySQL
- React Hook Form
- Zod
- Vitest

Backend:
- User CRUD REST API
- Search
- Pagination
- Role: admin/user
- Form Request validation
- Policy authorization
- Feature tests

Frontend:
- User list
- Search
- Pagination
- Create/Edit form
- Delete confirmation
- Loading and error states
- Component tests

Quality:
- Review authorization security
- Review API error handling
- Run backend tests
- Run frontend tests

Acceptance Criteria:
- Only admins can create, edit, or delete users.
- Normal users cannot access admin management endpoints.
- Invalid input returns validation errors.
- UI displays API errors correctly.
- All automated tests pass.
- Existing authentication behavior must not break.
งานนี้มีหลาย workstream จึงเหมาะกับ Experts Mode
#12. ตัวอย่าง End-to-End Quest Workflow
Developer
   |
   | Natural Language Requirement
   v
Spec Generation
   |
   | Requirement
   | Architecture
   | Task Breakdown
   | Acceptance Criteria
   v
Human Review
   |
   v
Choose Mode
   |
   +--------------------+
   |                    |
   v                    v
Agent Mode         Experts Mode
   |                    |
Single Agent       Lead Agent
                        |
              +---------+---------+
              |         |         |
              v         v         v
            Dev        QA      Review
              |         |         |
              +---------+---------+
                        |
                        v
                   Integration
                        |
                        v
                   Action Flow
                        |
           +------------+------------+
           |                         |
           v                         v
      Continue                Action Required
                                     |
                                     v
                                Human Input
                                     |
                                     v
                                  Continue
                        |
                        v
                    Validation
                        |
                        v
                      Ready
                        |
                        v
                 Developer Review
                        |
                        v
                  Commit / Pull Request
#13. Best Practices
#13.1 เขียน Goal ให้ตรวจสอบได้
แทนที่จะเขียน
Improve authentication.
ใช้
Add refresh-token authentication and ensure expired access tokens return HTTP 401.
#13.2 กำหนด Scope
ระบุให้ชัดว่าอะไรอยู่ใน scope
In scope:
- API
- Validation
- Tests

Out of scope:
- UI redesign
- Database schema changes
#13.3 ระบุ Acceptance Criteria
Agent จะสามารถ self-verify งานได้ดีขึ้น
- npm test must pass
- API returns 401 for invalid token
- No breaking API changes
#13.4 ใช้ Spec-driven กับงานหลายไฟล์
ถ้างานกระทบหลาย module การ review Spec ก่อน execution มักปลอดภัยกว่าการให้ Agent เริ่มเปลี่ยน code ทันที
#13.5 ใช้ Agent Mode กับงาน cohesive
เช่น
Bug Fix
Feature
Refactor
API Endpoint
CLI
Script
Unit Test
#13.6 ใช้ Experts Mode เมื่อมี parallel workstreams
เช่น
Frontend
Backend
Database
QA
Security Review
Research
#13.7 ใช้ Worktree หรือ Branch แยกงาน
งาน Agentic Coding สามารถสร้างการเปลี่ยนแปลงจำนวนมาก
จึงควร isolate งานด้วย
Git Branch
หรือ
Git Worktree
โดยเฉพาะ task ขนาดใหญ่
#13.8 อย่า Merge โดยไม่ Review
Agent สามารถ
Generate
Run
Test
Fix
Verify
ได้ แต่ Production Quality ยังต้องมี human review
ตรวจอย่างน้อย
Diff
Tests
Security
Architecture
Dependencies
Configuration
Migration
Secrets
#14. แนวคิด Prompt Template สำหรับ Quest
สามารถใช้ Template นี้เป็นจุดเริ่มต้นได้
Goal:
<What should the final system do?>

Context:
- Tech stack:
- Architecture:
- Relevant modules:
- Database:
- Testing framework:

Requirements:
1.
2.
3.

Constraints:
-
-

Testing:
-
-

Acceptance Criteria:
-
-

Deliverables:
- Implementation
- Automated tests
- Summary of changed files
- Known limitations
Prompt รูปแบบนี้ช่วยให้ Agent เข้าใจทั้ง
WHAT
WHY
HOW
CONSTRAINTS
DONE CRITERIA
#สรุป
Qoder Quest Mode เป็น workflow สำหรับการมอบหมายงานพัฒนาซอฟต์แวร์ให้ AI Agent โดยเปลี่ยนจากการใช้ AI แบบ
Prompt -> Code -> Prompt -> Code
ไปเป็น
Goal
  |
  v
Spec / Plan
  |
  v
Agent Execution
  |
  v
Validation
  |
  v
Review
องค์ประกอบสำคัญคือ
#Spec-driven Development
ใช้สร้าง structured requirement, design plan, task breakdown และ acceptance criteria ก่อน coding
#Agent Mode
ใช้ autonomous agent ตัวเดียวทำงานตั้งแต่ planning จนถึง verification เหมาะกับงานที่มี scope ค่อนข้าง cohesive
#Experts Mode
ใช้ Lead Agent และ Agent ผู้เชี่ยวชาญหลายตัวทำงานแบบ parallel เหมาะกับ full-stack, complex debugging, technical research และงานขนาดกลางถึงใหญ่
#Action Flow
ช่วยให้ Developer ติดตามการทำงานของ Agent และเข้ามาแทรกแซงเฉพาะเมื่อเกิด Action Required
แนวทางสำคัญที่สุดคือ
ยิ่งมอบ autonomy ให้ Agent มากเท่าไร Requirement, Constraints และ Acceptance Criteria ยิ่งต้องชัดเจนมากขึ้นเท่านั้น
สำหรับงานจริง workflow ที่เหมาะสมจึงมักเป็น
Define Goal
   ↓
Provide Context
   ↓
Generate / Review Spec
   ↓
Choose Agent or Experts
   ↓
Execute
   ↓
Monitor Action Flow
   ↓
Validate
   ↓
Human Review
   ↓
Commit / Pull Request
ด้วยแนวทางนี้ Qoder Quest Mode ไม่ได้ทำหน้าที่เพียง “ช่วยเขียนโค้ด” แต่ทำหน้าที่เป็น Agentic Engineering Workflow สำหรับการ delegate งานพัฒนาซอฟต์แวร์ในระดับที่เป็นระบบมากขึ้น
#References
-
Qoder Docs — Quest Overview
https://docs.qoder.com/user-guide/quest/overview -
Qoder Docs — Task Management
https://docs.qoder.com/user-guide/quest/task-management -
Qoder Docs — Agent Mode
https://docs.qoder.com/user-guide/quest/agent-mode -
Qoder Docs — Experts Mode
https://docs.qoder.com/user-guide/quest/experts-mode -
Qoder — Quest Mode: Task Delegation to Agents
https://qoder.com/en/blog/quest-mode