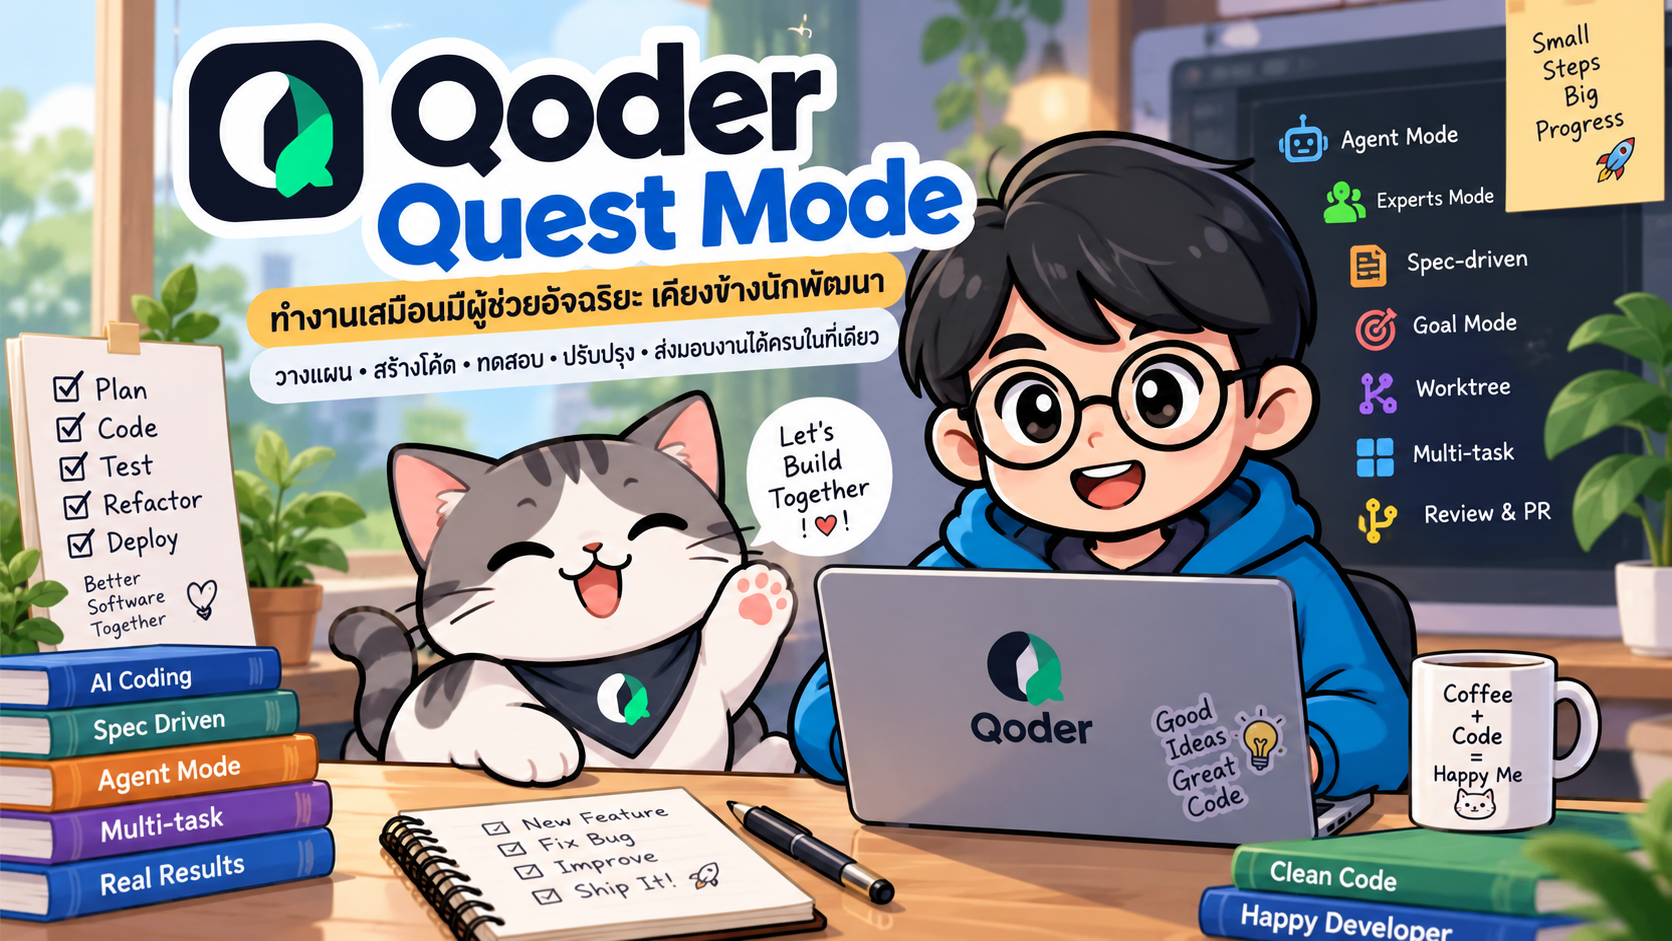
- Qoder Quest Mode: มอบหมายงานพัฒนาซอฟต์แวร์ให้ AI Agent ทำงานแบบ End-to-End
- แนวคิดการทำงานของ Quest
- โหมดสำคัญภายใน Quest
- 2. Experts Mode
- Agent Mode กับ Experts Mode ต่างกันอย่างไร
- Workflow การใช้งาน Quest
- ขั้นตอนที่ 2: เปิด Quest
- ขั้นตอนที่ 3: เขียน Task Description ให้ชัดเจน
- Spec-driven Development
- Goal Mode
- Local Environment และ Worktree
- Multi-task Parallel Workflow
- Terminal และ Sandbox
- Review Changes ก่อน Commit
- ตัวอย่างใช้งาน Quest กับ Laravel
- ตัวอย่าง Quest สำหรับ Playwright Testing
- ตัวอย่าง Quest สำหรับ Refactoring
- ตัวอย่าง Experts Mode สำหรับ Full-stack Feature
- Prompt Template สำหรับ Quest
- Best Practices
- Quest Mode ต่างจาก AI Chat ทั่วไปอย่างไร
- Quest Mode เหมาะกับใคร
- สิ่งที่ต้องระวัง
- สรุป
- References
#Qoder Quest Mode: มอบหมายงานพัฒนาซอฟต์แวร์ให้ AI Agent ทำงานแบบ End-to-End
การใช้ AI สำหรับพัฒนาซอฟต์แวร์กำลังเปลี่ยนจากแนวคิด “AI ช่วยเขียนโค้ด” ไปสู่ “AI รับผิดชอบงานพัฒนาเป็น Task” มากขึ้น
Qoder เป็นแพลตฟอร์มด้าน Agentic Coding ที่มีพื้นที่ทำงานชื่อ Quest สำหรับมอบหมายงานแบบหลายขั้นตอนให้ AI Agent ดำเนินการตั้งแต่ทำความเข้าใจ Requirement วางแผน แก้ไขโค้ด รันคำสั่ง ทดสอบ ตรวจสอบผลลัพธ์ และเตรียม Changes สำหรับให้นักพัฒนา Review
แนวคิดหลักของ Quest สรุปได้ง่าย ๆ ว่า
Define the goal. Review the result.
แทนที่นักพัฒนาจะต้องสั่ง AI ทีละขั้น เช่น “สร้าง Controller”, “เพิ่ม Route”, “สร้าง Test” และ “รัน Test” เราสามารถกำหนด เป้าหมาย ข้อจำกัด และ Acceptance Criteria แล้วให้ Quest ดำเนินงานต่อเนื่องจนได้ผลลัพธ์ที่พร้อมสำหรับการตรวจสอบ
#Quest Mode คืออะไร
Quest เป็น Workspace ภายใน Qoder IDE ที่ออกแบบมาสำหรับงานแบบ Agent-first Workflow โดยเฉพาะ
Qoder แยกแนวทางการทำงานออกเป็นสองลักษณะสำคัญ
Editor
  └─ Code with me

Quest
  └─ Run it for me
Editor เหมาะกับการทำงานร่วมกับ AI ขณะเขียนโค้ด เช่น
- Inline Chat
- Code Completion
- ถามคำถามเกี่ยวกับโค้ด
- แก้ไขโค้ดแบบรวดเร็ว
ส่วน Quest เหมาะกับงานที่มีหลายขั้นตอน เช่น
- เพิ่ม Feature ใหม่
- Refactor หลายไฟล์
- แก้ Bug ซับซ้อน
- สร้าง API พร้อม Test
- ทำ Full-stack Feature
- วิเคราะห์ Dependency
- รัน Build และ Test
- ตรวจสอบ Code Quality
- ทำงานหลาย Task พร้อมกัน
Quest จึงเปรียบเสมือนพื้นที่สำหรับ Delegation งาน Engineering ให้กับ AI Agent
#แนวคิดการทำงานของ Quest
การใช้ AI Coding Assistant แบบทั่วไปมักเป็นลักษณะนี้
Developer
   |
   v
Prompt
   |
   v
AI Generate Code
   |
   v
Developer Apply Code
   |
   v
Run / Test / Debug
แต่ Quest เปลี่ยน Workflow เป็น
Developer
   |
   v
Define Goal
   |
   v
Specify Constraints
   |
   v
Define Acceptance Criteria
   |
   v
Qoder Quest
   |
   +--> Understand Context
   +--> Plan
   +--> Modify Code
   +--> Run Commands
   +--> Test
   +--> Verify
   |
   v
Developer Review
   |
   v
Commit / Push
บทบาทของ Developer จึงเปลี่ยนจากผู้ควบคุมทุกคำสั่ง มาเป็นผู้กำหนด Requirement และตรวจสอบผลลัพธ์
#โหมดสำคัญภายใน Quest
Quest รองรับรูปแบบการทำงานหลักสองแบบ
- Agent Mode
- Experts Mode
#1. Agent Mode
Agent Mode คือการใช้ AI Agent ตัวหลักทำงานพัฒนาแบบ End-to-End
Agent สามารถดำเนินการ เช่น
- ทำความเข้าใจ Requirement
- สำรวจ Codebase
- วางแผน
- แก้ไขหลายไฟล์
- เรียก Terminal
- รัน Test
- วิเคราะห์ Error
- แก้ไขเพิ่มเติม
- ตรวจสอบผลลัพธ์
- สรุป Changes
ตัวอย่าง Task
เพิ่ม REST API สำหรับ Product

Requirements:
- GET /api/products
- GET /api/products/{id}
- POST /api/products
- PUT /api/products/{id}
- DELETE /api/products/{id}

Validation:
- name required
- price >= 0
- stock >= 0

Acceptance Criteria:
- automated tests ต้องผ่านทั้งหมด
- API response เป็น JSON
- ห้ามทำให้ API เดิมเสีย
Agent สามารถวิเคราะห์ Project แล้วดำเนินงานต่อเนื่องโดยไม่จำเป็นต้องให้ผู้ใช้สั่งทุกขั้นตอน
#Agent Mode เหมาะกับงานประเภทใด
- Feature ขนาดเล็กถึงกลาง
- Bug Fix
- Refactoring
- สร้าง Automated Test
- สร้าง CLI Tool
- Prototype
- Data Processing Script
- งานที่มี Scope ค่อนข้างชัดเจน
#2. Experts Mode
Experts Mode เป็นรูปแบบ Multi-Agent Collaboration
แทนที่จะให้ Agent ตัวเดียวทำทุกอย่าง Qoder สามารถใช้ Lead Agent เพื่อวิเคราะห์งานและประสาน Expert หลายบทบาทให้ทำงานร่วมกัน
โครงสร้างโดยแนวคิดสามารถมองได้ดังนี้
                     +----------------+
                     |   Lead Agent   |
                     +--------+-------+
                              |
          +-------------------+-------------------+
          |                   |                   |
          v                   v                   v
     Researcher        Full-Stack Engineer        QA
          |                   |                   |
          +-------------------+-------------------+
                              |
                   +----------+----------+
                   |                     |
                   v                     v
             Code Reviewer         UI / Debug
บทบาทที่พบใน Experts Mode เช่น
| Role | หน้าที่ |
|---|---|
| Lead Agent | เข้าใจ Requirement, แบ่งงาน และประสาน Agent |
| Researcher | วิเคราะห์ Codebase, Dependency และข้อมูลทางเทคนิค |
| Full-Stack Engineer | พัฒนา Frontend และ Backend |
| QA | รัน Test, Build และรวบรวมหลักฐาน |
| Code Reviewer | ตรวจสอบ Code Quality |
| UI Operator | ตรวจสอบการทำงานของ UI/Browser |
| Debug Engineer | วิเคราะห์และแก้ปัญหาที่ซับซ้อน |
Experts Mode เหมาะกับงานที่มีหลายมิติและสามารถทำบางส่วนแบบ Parallel ได้
#ตัวอย่างงาน
สร้าง User Management Module

Frontend:
- React
- Register
- Login
- Profile

Backend:
- Spring Boot
- REST API
- JWT Authentication

Database:
- PostgreSQL

Quality:
- Unit Test
- Integration Test
- E2E Test
- Code Review
งานลักษณะนี้อาจต้องใช้หลายความเชี่ยวชาญพร้อมกัน จึงเหมาะกับ Experts Mode มากกว่า Agent Mode
#Agent Mode กับ Experts Mode ต่างกันอย่างไร
| ประเด็น | Agent Mode | Experts Mode |
|---|---|---|
| จำนวน Agent | Agent หลักตัวเดียว | หลาย Agent |
| ความซับซ้อนของงาน | เล็กถึงกลาง | กลางถึงสูง |
| การแบ่งงาน | Agent จัดการเอง | Lead Agent แบ่งงาน |
| Parallel Work | จำกัดกว่า | รองรับโดยแนวคิดของ Multi-Agent |
| Full-stack Feature | ทำได้ | เหมาะมาก |
| Technical Research | ทำได้ | เหมาะมาก |
| Complex Debugging | ทำได้ | เหมาะกว่า |
| การแก้ไฟล์เล็ก ๆ | เหมาะ | อาจเกินความจำเป็น |
หลักง่าย ๆ คือ
Task ชัด + Scope ไม่ใหญ่
        ↓
    Agent Mode

Task ซับซ้อน + หลาย Domain
        ↓
   Experts Mode
#Workflow การใช้งาน Quest
Workflow ที่แนะนำสามารถแบ่งได้เป็น 7 ขั้นตอน
1. Open Project
       ↓
2. Open Quest
       ↓
3. Define Goal
       ↓
4. Choose Agent / Experts
       ↓
5. Plan / Spec
       ↓
6. Execute + Test
       ↓
7. Review → Commit → Push
#ขั้นตอนที่ 1: เปิด Project
เปิด Repository ที่ต้องการทำงานใน Qoder IDE
ก่อนเริ่ม Quest ควรตรวจสอบให้แน่ใจว่า
- Project Build ได้
- Dependency อยู่ในสถานะปกติ
- Git Working Tree ไม่ปะปนกับ Changes ที่ไม่เกี่ยวข้อง
- มี Test Baseline ถ้าเป็นไปได้
ตัวอย่าง
git status
npm test
npm run build
หรือ
mvn test
#ขั้นตอนที่ 2: เปิด Quest
Quest สามารถเปิดจาก Qoder IDE แล้วสร้าง New Quest
ก่อนเริ่ม Task ให้เลือก Mode
Agent
หรือ
Experts
Mode ที่เลือกจะกำหนด Execution Strategy ของ Task นั้น
#ขั้นตอนที่ 3: เขียน Task Description ให้ชัดเจน
Prompt ที่ดีสำหรับ Quest ไม่ควรมีเพียงคำสั่งสั้น ๆ เช่น
สร้าง login
แต่ควรประกอบด้วย
Goal
Context
Requirements
Constraints
Acceptance Criteria
Verification
Deliverables
ตัวอย่าง
Goal:
เพิ่มระบบ Login ด้วย JWT

Context:
- Backend: Spring Boot
- Database: PostgreSQL
- มี User entity และ UserRepository แล้ว

Requirements:
- POST /api/auth/login
- รับ email และ password
- ตรวจ password ด้วย BCrypt
- คืน access token เมื่อสำเร็จ
- credential ผิดให้ตอบ HTTP 401

Constraints:
- ห้ามแก้ users table
- ใช้ dependency ที่ Project มีอยู่ก่อน

Acceptance Criteria:
- login สำเร็จด้วยข้อมูลที่ถูกต้อง
- password ผิดได้ HTTP 401
- เพิ่ม automated tests
- mvn test ต้องผ่านทั้งหมด

Deliverables:
- implementation
- tests
- summary ของไฟล์ที่แก้ไข
Prompt แบบนี้ช่วยลดความกำกวม และทำให้ Agent มี Definition of Done ที่ชัดเจน
#Spec-driven Development
สำหรับงาน Feature ขนาดกลางหรือใหญ่ Quest รองรับแนวคิด Spec-driven Development
Workflow คือ
Requirement
    ↓
Clarification
    ↓
Generate Spec
    ↓
Review Spec
    ↓
Build
    ↓
Execute
    ↓
Verify
    ↓
Review Changes
Qoder ระบุว่า Spec สามารถประกอบด้วย
- Requirement Description
- Design Plan
- Task Breakdown
- Acceptance Criteria
ข้อดีคือ Developer สามารถตรวจสอบแนวทางก่อนที่ Agent จะเริ่มแก้ Code จำนวนมาก
#ตัวอย่างงานที่ควรใช้ Spec
สร้างระบบ Product Management

Features:
- CRUD Product
- Search
- Pagination
- Role-based Authorization
- Audit Log
- Unit Test
- API Test
ก่อน Build เราสามารถให้ Quest สร้าง Spec เพื่อพิจารณา
API Design
Database Design
Architecture
Task Breakdown
Testing Strategy
Acceptance Criteria
เมื่อ Spec ถูกต้องแล้วจึงเริ่ม Build
#Goal Mode
Quest รองรับแนวคิด Goal-driven Execution สำหรับงานที่ต้องการให้ Agent ทำงานต่อเนื่องจนกว่าจะบรรลุเป้าหมาย
ตัวอย่าง
Goal:
ทำให้ test suite ทั้งหมดผ่าน

Constraints:
- ห้ามลบ test
- ห้าม skip test
- แก้เฉพาะ production code ที่เกี่ยวข้อง
Agent อาจทำงานเป็นวงรอบ
Inspect
   ↓
Modify
   ↓
Run Test
   ↓
Analyze Failure
   ↓
Modify
   ↓
Run Test
   ↓
Verify
เหมาะกับ
- Fix Failing Tests
- Refactoring
- Dependency Migration
- Static Analysis Cleanup
- Build Failure
- Performance Improvement
#Local Environment และ Worktree
สำหรับการทำงานกับ Repository ควรพิจารณาว่า Agent จะทำงานใน Environment แบบใด
#Local
Agent แก้ Workspace ปัจจุบันโดยตรง
เหมาะกับ
- งานเล็ก
- ทดลองเร็ว
- Changes จำกัด
#Worktree
สร้าง Git Worktree แยกจาก Workspace หลัก
ตัวอย่าง
main
 |
 +-- worktree-auth
 |
 +-- worktree-payment
 |
 +-- worktree-refactor
ข้อดีคือ
- แยก Changes ของแต่ละ Task
- ลดความเสี่ยงต่อ Main Workspace
- เหมาะกับ Task ขนาดใหญ่
- เหมาะกับการรันหลาย Quest พร้อมกัน
สำหรับงานที่แก้หลายไฟล์ Qoder แนะนำให้ใช้ Worktree เพื่อแยกการเปลี่ยนแปลงออกจาก Workspace หลัก
#Multi-task Parallel Workflow
Quest สามารถจัดการหลาย Task พร้อมกันได้
ตัวอย่าง
Quest 1 → Authentication
Quest 2 → Product API
Quest 3 → Refactor Logging
Quest 4 → Integration Tests
แนวคิดนี้ทำให้ Developer สามารถบริหาร Agent หลายงานพร้อมกัน คล้ายกับการแบ่ง Task ให้ทีม Developer
+----------------------+----------------------+
| Authentication       | Product API          |
| Running              | Running              |
+----------------------+----------------------+
| Integration Tests    | Documentation        |
| Reviewing            | Completed            |
+----------------------+----------------------+
อย่างไรก็ตาม Task ที่แก้ไฟล์หรือ Module เดียวกันควรแยก Environment ให้เหมาะสมเพื่อลด Conflict
#Terminal และ Sandbox
Quest สามารถเรียก Terminal Command ระหว่างการทำงาน
เช่น
npm install
npm test
npm run build
mvn test
pytest
php artisan test
Qoder ใช้แนวทางแบ่งระดับความเสี่ยงของ Command โดยคำสั่งทั่วไปสามารถทำงานอัตโนมัติได้ ขณะที่คำสั่งที่อาจมีความเสี่ยงสามารถหยุดเพื่อขอการยืนยัน หรือใช้ Sandbox ตาม Execution Mode
ดังนั้นควรตรวจสอบ
- Command ที่ Agent ต้องการรัน
- File ที่ Agent ต้องการลบ
- Package ใหม่
- Script ที่เกี่ยวข้องกับ Deployment
- Credential
- Production Configuration
เสมอ
#Review Changes ก่อน Commit
เมื่อ Agent รายงานว่า Task เสร็จแล้ว ไม่ควร Commit ทันที
Workflow ที่แนะนำคือ
Agent Finished
      ↓
Read Summary
      ↓
Inspect Diff
      ↓
Run Tests
      ↓
Manual Verification
      ↓
Stage
      ↓
Commit
      ↓
Push / Pull Request
สิ่งที่ควรตรวจสอบใน Diff
- แก้ไฟล์เกิน Scope หรือไม่
- เพิ่ม Dependency โดยไม่จำเป็นหรือไม่
- มี Hard-coded Secret หรือไม่
- มี Breaking Change หรือไม่
- Error Handling ครบหรือไม่
- Test ครอบคลุม Requirement หรือไม่
- มี Test ที่ถูก Skip หรือ Delete หรือไม่
- Naming และ Architecture สอดคล้องกับ Project หรือไม่
#ตัวอย่างใช้งาน Quest กับ Laravel
สมมติว่าต้องการสร้าง Product REST API
Prompt
Goal:
สร้าง Product REST API ใน Laravel Project นี้

Endpoints:
- GET /api/products
- GET /api/products/{id}
- POST /api/products
- PUT /api/products/{id}
- DELETE /api/products/{id}

Fields:
- name
- description
- price
- stock

Validation:
- name required
- price numeric และ >= 0
- stock integer และ >= 0

Testing:
- สร้าง Feature Tests
- ครอบคลุม success cases
- ครอบคลุม validation errors
- ครอบคลุม not found

Constraints:
- ใช้ convention ของ project เดิม
- ห้ามเปลี่ยน API ที่ไม่เกี่ยวข้อง

Acceptance Criteria:
- php artisan test ผ่านทั้งหมด
- API คืน JSON response
- ไม่มี test.skip หรือ test ที่ถูกลบ

Deliverables:
- implementation
- automated tests
- summary ของ changes
Quest สามารถทำงานเป็น Workflow เช่น
Inspect Laravel Project
        ↓
Locate Existing Convention
        ↓
Plan
        ↓
Create / Update Model
        ↓
Create Controller
        ↓
Create Form Request
        ↓
Add Routes
        ↓
Create Feature Tests
        ↓
php artisan test
        ↓
Analyze Failure
        ↓
Fix
        ↓
Verify
Developer จึงทำหน้าที่ Review ผลลัพธ์แทนการสั่ง AI ทีละไฟล์
#ตัวอย่าง Quest สำหรับ Playwright Testing
Prompt
Goal:
เพิ่ม Playwright E2E Tests สำหรับ Login Flow

Scenarios:
1. Login success
2. Wrong password
3. Empty email
4. Empty password
5. Logout

Constraints:
- ใช้ Page Object Model ตามโครงสร้างเดิม
- ห้ามใช้ hard wait
- ใช้ locator ที่ stable
- ห้ามแก้ production code หากไม่จำเป็น

Acceptance Criteria:
- npx playwright test ผ่าน
- ทุก test รันแบบ headless ได้
- ไม่มี test.only
- ไม่มี test.skip
- สรุป test cases และไฟล์ที่สร้าง
Agent สามารถ
Analyze Existing Tests
      ↓
Identify Login Page
      ↓
Create / Update Page Object
      ↓
Generate Test Cases
      ↓
Run Playwright
      ↓
Analyze Failure
      ↓
Fix Tests
      ↓
Verify
#ตัวอย่าง Quest สำหรับ Refactoring
Goal:
Refactor OrderService เพื่อลดความซับซ้อน

Requirements:
- แยก validation logic
- แยก pricing calculation
- ลด duplicated code
- public API ต้องเหมือนเดิม

Constraints:
- ห้ามเปลี่ยน database schema
- ห้ามเปลี่ยน REST API contract
- ห้ามลบ test เดิม

Acceptance Criteria:
- unit tests เดิมผ่านทั้งหมด
- เพิ่ม test สำหรับ extracted components
- build ผ่าน
- behavior ก่อนและหลัง refactor ต้องเหมือนเดิม
งานลักษณะนี้เหมาะกับ Agent Mode หรือ Spec-driven Agent Mode
#ตัวอย่าง Experts Mode สำหรับ Full-stack Feature
Goal:
เพิ่ม User Profile Management

Frontend:
- React
- หน้า /profile
- แก้ไข display name
- upload avatar

Backend:
- Spring Boot
- GET /api/profile
- PUT /api/profile

Database:
- PostgreSQL

Quality:
- Backend unit/integration tests
- Frontend component tests
- E2E test
- Code review

Acceptance Criteria:
- build ทั้ง frontend/backend ผ่าน
- tests ผ่านทั้งหมด
- unauthorized request ต้องได้ 401
Experts Mode สามารถแบ่งงานในแนวคิดประมาณนี้
Lead Agent
   |
   +-- Researcher
   |     └─ Analyze Architecture
   |
   +-- Full-Stack Engineer
   |     ├─ Backend API
   |     └─ React UI
   |
   +-- QA
   |     └─ Test / Build
   |
   +-- UI Operator
   |     └─ Browser Verification
   |
   +-- Code Reviewer
         └─ Review Quality
จุดสำคัญคือเป้าหมายไม่ใช่เพียง Generate Code แต่เป็นการส่งมอบ Engineering Outcome
#Prompt Template สำหรับ Quest
สามารถใช้ Template ต่อไปนี้กับงานจริงได้
# Goal
อธิบายผลลัพธ์สุดท้ายที่ต้องการ

# Context
- Tech Stack:
- Architecture:
- Related Modules:
- Existing Conventions:

# Requirements
1.
2.
3.

# Constraints
- ห้าม...
- ต้องใช้...
- ต้องรักษา backward compatibility...

# Acceptance Criteria
- ...
- ...
- ...

# Verification
ให้รัน:
- ...
- ...

# Deliverables
- Implementation
- Tests
- Documentation
- Summary of Changes
#Best Practices
#1. ระบุ Goal ไม่ใช่เพียง Action
ไม่ควรเขียน
แก้ login
ควรเขียน
แก้ปัญหา login ที่คืน HTTP 500 เมื่อ password ไม่ถูกต้อง
ให้เปลี่ยนเป็น HTTP 401 พร้อม JSON error response
และเพิ่ม integration test เพื่อป้องกัน regression
#2. ให้ Acceptance Criteria เสมอ
ตัวอย่าง
Acceptance Criteria:
- npm test ผ่าน
- npm run build ผ่าน
- ไม่มี TypeScript Error
- API เดิมยังทำงาน
- เพิ่ม test สำหรับ behavior ใหม่
Acceptance Criteria ช่วยให้ Agent รู้ว่าเมื่อใดจึงถือว่างานเสร็จ
#3. ระบุ Constraint
เช่น
Constraints:
- ห้ามแก้ database schema
- ห้ามเพิ่ม dependency ใหม่
- ต้องใช้ Java 21
- ต้องใช้ coding convention เดิม
- ห้ามเปลี่ยน public API
#4. ใช้ Spec กับ Feature ใหญ่
โดยเฉพาะงานที่เกี่ยวข้องกับ
- Database
- API
- Frontend
- Authentication
- Migration
- Multi-service Architecture
การ Review Spec ก่อน Build ช่วยลด Rework
#5. ใช้ Worktree กับ Task ใหญ่
โดยเฉพาะเมื่อ
- Agent แก้หลายไฟล์
- รันหลาย Quest พร้อมกัน
- ต้องการรักษา Main Workspace ให้สะอาด
- Task มีความเสี่ยงสูง
#6. ตรวจ Diff จริง
อย่าใช้ข้อความว่า
All tests passed
จาก Agent เป็นหลักฐานเพียงอย่างเดียว
ควรตรวจ
Test Output
Build Output
Git Diff
Runtime Behavior
Browser / E2E Result
#7. แบ่ง Task ให้มีขนาดเหมาะสม
ถึงแม้ Quest จะทำ Task ขนาดใหญ่ได้ แต่ Task ที่ใหญ่เกินไปเพิ่มความเสี่ยงด้าน
- Context
- Architecture Drift
- Unnecessary Changes
- Test Coverage
- Review Complexity
หาก Feature ใหญ่มาก ควรแบ่งเป็น Milestone หรือใช้ Spec เพื่อควบคุม Scope
#Quest Mode ต่างจาก AI Chat ทั่วไปอย่างไร
| ความสามารถ | AI Chat ทั่วไป | Qoder Quest |
|---|---|---|
| ตอบคำถาม | ✓ | ✓ |
| Generate Code | ✓ | ✓ |
| อ่าน Project Context | ขึ้นกับเครื่องมือ | ✓ |
| แก้หลายไฟล์ | บางระบบ | ✓ |
| Run Terminal | บางระบบ | ✓ |
| Run Tests | บางระบบ | ✓ |
| Long-running Task | จำกัด | ออกแบบมาสำหรับงานลักษณะนี้ |
| Task Management | จำกัด | ✓ |
| Spec-driven Workflow | ไม่ใช่จุดหลัก | ✓ |
| Multi-Agent | ไม่เสมอ | Experts Mode |
| Review Changes | แยกส่วน | รวมใน Quest Workflow |
| Parallel Tasks | จำกัด | ✓ |
#Quest Mode เหมาะกับใคร
Quest เหมาะกับ
#Software Developer
ใช้มอบหมาย Feature, Refactoring และ Bug Fix
#QA / Software Tester
ใช้สร้างและปรับปรุง Automated Tests
#Tech Lead
ใช้สร้าง Spec และแบ่ง Task ที่มี Acceptance Criteria ชัดเจน
#DevOps Engineer
ใช้สร้าง Script, CI/CD Configuration และ Infrastructure Automation โดยยังต้อง Review คำสั่งที่มีความเสี่ยง
#Instructor / Student
ใช้ศึกษากระบวนการ Agentic Software Engineering ตั้งแต่ Requirement ไปจนถึง Verification
#สิ่งที่ต้องระวัง
Agentic Coding ไม่ได้หมายความว่าสามารถ Merge Code โดยไม่ตรวจสอบ
ควรคง Human-in-the-loop ในประเด็นต่อไปนี้
- Architecture
- Security
- Authentication / Authorization
- Database Migration
- Production Configuration
- Secrets
- Dependency
- Infrastructure
- Deployment
- Code Review
- Acceptance
โดยเฉพาะ Project Production ควรใช้ Pull Request, Automated Test, Static Analysis และ CI/CD เป็น Quality Gate เพิ่มเติม
#สรุป
Qoder Quest เปลี่ยนแนวคิดจาก
Prompt
   ↓
Generate Code
ไปเป็น
Goal
   ↓
AI Agent / Expert Team
   ↓
Plan / Spec
   ↓
Implementation
   ↓
Test
   ↓
Verification
   ↓
Human Review
   ↓
Commit / Push
จุดแข็งสำคัญของ Quest จึงไม่ใช่เพียงความสามารถในการเขียนโค้ด แต่คือการ มอบหมาย Software Engineering Task แบบ End-to-End
สำหรับงาน Scope ชัดเจนสามารถใช้ Agent Mode ส่วนงานซับซ้อนที่ต้องใช้หลายบทบาทสามารถเลือก Experts Mode และหากเป็น Feature ขนาดกลางหรือใหญ่ ควรใช้ Spec-driven Development เพื่อให้ Requirement, Design, Task Breakdown และ Acceptance Criteria ถูกตรวจสอบก่อนลงมือ Build
รูปแบบการทำงานที่เหมาะสมที่สุดจึงไม่ใช่การปล่อย AI ทำงานโดยไม่มีการกำกับ แต่เป็น
Developer กำหนด Goal และ Quality Bar — Agent ลงมือทำ — Developer ตรวจสอบและตัดสินใจ
นี่คือแนวคิดสำคัญของ Agentic Software Engineering ที่ Quest Mode ถูกออกแบบมาเพื่อรองรับ
#References
-
Qoder Docs — Quest Overview
https://docs.qoder.com/user-guide/quest/overview -
Qoder Docs — Agent Mode
https://docs.qoder.com/user-guide/quest/agent-mode -
Qoder Docs — Experts Mode
https://docs.qoder.com/user-guide/quest/experts-mode -
Qoder Docs — Spec-driven Development
https://docs.qoder.com/user-guide/quest/spec-driven -
Qoder Docs — Task Management
https://docs.qoder.com/user-guide/quest/task-management -
Qoder Docs — Terminal and Sandbox
https://docs.qoder.com/user-guide/quest/terminal-and-sandbox -
Qoder Docs — Qoder Overview
https://docs.qoder.com/qoder/overview
อัปเดตเนื้อหาจากเอกสาร Qoder ที่ตรวจสอบ ณ วันที่ 22 กันยายน 2026