- 1. Room Database คืออะไร
- 2. เลือกเวอร์ชันให้ตรงกับตัวอย่าง
- 3. องค์ประกอบหลักสามส่วน
- 4. เป้าหมายและการเตรียม Workshop
- 5. ตั้งค่า Gradle และ KSP
- 6. สร้าง Entity
- 7. สร้าง DAO สำหรับ CRUD
- 8. สร้าง Database แบบ Singleton
- 9. สร้าง Repository
- 10. สร้าง ViewModel
- 11. เชื่อมกับ Jetpack Compose
- 12. เข้าใจ Flow ผ่านการทดลอง
- 13. Workshop: เพิ่มคอลัมน์โดยไม่ทำข้อมูลเก่าหาย
- 14. ตรวจสอบและทดสอบ
- 15. ข้อผิดพลาดที่พบบ่อย
- เอกสารอ้างอิง
#1. Room Database คืออะไร
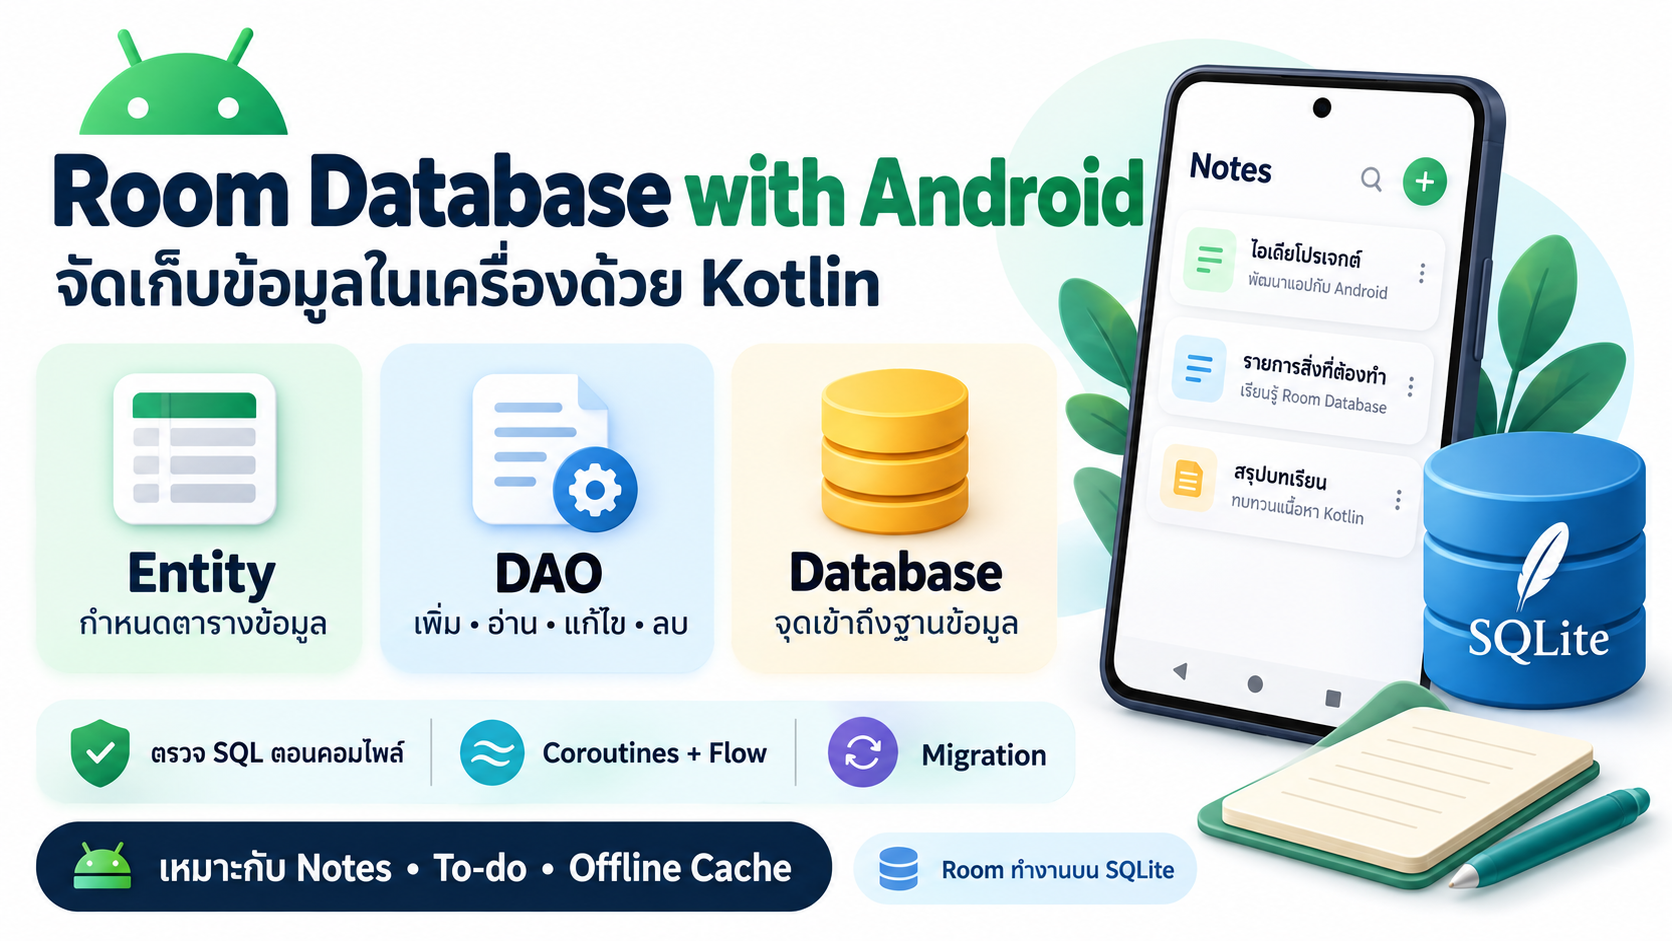
Room เป็นไลบรารีใน Android Jetpack สำหรับจัดเก็บข้อมูลแบบมีโครงสร้างในอุปกรณ์ โดยทำงานเป็นชั้น abstraction เหนือ SQLite เราจึงออกแบบตารางด้วย Kotlin data class และเรียกอ่านหรือเขียนข้อมูลผ่าน interface ได้ โดยยังเขียน SQL สำหรับเงื่อนไขที่ต้องการได้ [1]
ตัวอย่างแอปที่เหมาะกับ Room ได้แก่ แอปจดบันทึก รายรับรายจ่าย รายการงาน และแคชข้อมูลที่ดาวน์โหลดจาก API เพื่อเปิดดูระหว่างออฟไลน์
ประโยชน์หลักคือการตรวจสอบ SQL ที่ประกาศด้วย @Query ตอนคอมไพล์ การสร้างโค้ดเชื่อมต่อฐานข้อมูลให้ และเครื่องมือสำหรับเปลี่ยน schema เมื่ออัปเดตแอป อย่างไรก็ตาม SQL แบบ dynamic ผ่าน RawQuery มีข้อจำกัดในการตรวจสอบล่วงหน้า
ตัวอย่าง: ผู้ใช้เพิ่มบันทึก “เตรียมสอน Android” แล้วปิดแอป เมื่อเปิดใหม่ บันทึกยังอยู่เพราะถูกเขียนลงไฟล์ SQLite การเก็บไว้ในตัวแปรหรือ ViewModel อย่างเดียวไม่ทำให้ข้อมูลคงอยู่หลัง process ถูกปิด
Room ทำหน้าที่จัดเก็บในเครื่อง ส่วนการซิงก์ข้ามอุปกรณ์ต้องออกแบบเพิ่มเติม เช่น Repository ที่เชื่อม API และงานเบื้องหลัง [1]
#2. เลือกเวอร์ชันให้ตรงกับตัวอย่าง
เอกสารปัจจุบันมีสองสายที่ต้องแยกให้ชัดเจน [2][3]
| รายการ | Room 2.x | Room 3.x |
|---|---|---|
| Stable ที่ตรวจพบในวันที่ตรวจสอบ | 2.8.5 | 3.0.3 |
| Maven group | androidx.room |
androidx.room3 |
| Runtime artifact | room-runtime |
room3-runtime |
| Compiler artifact | room-compiler |
room3-compiler |
| Annotation imports | androidx.room.* |
androidx.room3.* |
| Gradle plugin | androidx.room |
androidx.room3 |
บทความนี้เลือก Room 2.x เพื่อสอนรูปแบบ Android ที่พบในโครงการเดิมจำนวนมาก และให้ตัวอย่าง SupportSQLiteDatabase ใน migration อยู่ใน API ชุดเดียวกัน ส่วน Room 3.x มีแนวทาง KMP และ API ที่เปลี่ยนไปบางส่วน จึงควรอ่านคู่มือของสายนั้นเมื่อเริ่มใช้งาน
ห้ามเปลี่ยนเฉพาะเลขเวอร์ชันจาก 2 เป็น 3: ต้องตรวจ artifact, imports, database builder, driver และ migration API ให้ครบ ไม่ควรคัดลอกตัวอย่างคนละสายมารวมกัน
#3. องค์ประกอบหลักสามส่วน
| ส่วน | หน้าที่ | ตัวอย่างใน Workshop |
|---|---|---|
| Entity | กำหนดตารางและคอลัมน์ | NoteEntity |
| DAO | กำหนดคำสั่งอ่าน เพิ่ม แก้ไข ลบ | NoteDao |
| Database | รวม Entity และเป็นจุดเข้าถึง DAO | NotesDatabase |
Entity หนึ่ง instance แทนข้อมูลหนึ่งแถว ส่วน Room compiler จะสร้าง implementation ของ DAO และ Database จาก annotation ที่เราประกาศ [1][4][5]
ในตัวอย่างนี้ UI เรียก ViewModel ซึ่งเรียก Repository เพื่อเข้าถึง DAO เราเลือกเพิ่ม Repository เพื่อรวมการตรวจข้อมูลก่อนบันทึกและเป็นจุดต่อขยายไปยัง API ในอนาคต Repository เป็นการตัดสินใจด้านสถาปัตยกรรมของ Workshop ไม่ใช่คลาสที่ Room บังคับให้สร้าง
#4. เป้าหมายและการเตรียม Workshop
ใช้เวลาประมาณ 2–3 ชั่วโมง ผู้เรียนควรรู้ Kotlin data class, interface, suspend function และ Compose เบื้องต้น
เมื่อทำเสร็จ แอปจะสามารถ:
- เพิ่มบันทึกที่มีหัวข้อและเนื้อหา
- แสดงรายการบันทึกจากฐานข้อมูล
- ปักหมุดหรือยกเลิกปักหมุด ซึ่งเป็นตัวอย่าง Update
- ลบบันทึก
- แสดงข้อมูลที่เปลี่ยนแปลงผ่าน Flow
- รักษาข้อมูลหลังปิดและเปิดแอป
เริ่มจาก Android Studio → New Project → Empty Activity ที่ใช้ Kotlin และ Jetpack Compose ตั้ง package เป็น com.example.roomnotes
Room 2.8.x ต้องการ Android API 23 ขึ้นไป แต่ dependency อื่นใน template อาจกำหนดสูงกว่า ให้ใช้ minSdk สูงสุดที่ dependency ทั้งโครงการต้องการ ตัวอย่างนี้เลือก API 24 ขึ้นไป สำหรับแล็บ [2]
ใช้ Android Gradle Plugin, Kotlin, Compose และ JDK ตาม template ที่เข้ากันได้ คง dependency ที่ template สร้างไว้ และเพิ่มเฉพาะรายการต่อไปนี้
โค้ดด้านล่างเป็นตัวอย่างสำหรับประกอบลงในโครงการ Android Studio ไม่ใช่ ZIP โครงการพร้อม Gradle wrapper และยังไม่ได้ build หรือรันบน emulator ในสภาพแวดล้อมที่จัดทำบทความ
#5. ตั้งค่า Gradle และ KSP
#5.1 เพิ่ม plugin ในระดับ Project
เพิ่มใน build.gradle.kts ระดับ Project โดยไม่ลบ plugin เดิม:
plugins {
    // เก็บ Android / Kotlin / Compose plugins ของ template ไว้
    id("com.google.devtools.ksp") version "2.3.10" apply false
    id("androidx.room") version "2.8.5" apply false
}
KSP ใช้ประมวลผล annotation และสร้างโค้ดของ Room ตัวอย่าง KSP 2.3.10 อ้างอิงหน้า Quickstart ที่ตรวจสอบ ควรตรวจความเข้ากันได้กับ Kotlin และ AGP ของโครงการก่อน Sync โดยเฉพาะเมื่อใช้ template เก่า [6]
#5.2 เพิ่มในระดับ App
ใน app/build.gradle.kts:
plugins {
    // เก็บ plugin เดิม
    id("com.google.devtools.ksp")
    id("androidx.room")
}

android {
    defaultConfig {
        minSdk = 24
    }
}

room {
    schemaDirectory("$projectDir/schemas")
}

dependencies {
    val roomVersion = "2.8.5"

    implementation("androidx.room:room-runtime:$roomVersion")
    implementation("androidx.room:room-ktx:$roomVersion")
    ksp("androidx.room:room-compiler:$roomVersion")

    // ใช้ version เดียวกับ Lifecycle artifacts ที่ template ใช้อยู่
    // แทน LIFECYCLE_VERSION ก่อน Sync
    implementation(
        "androidx.lifecycle:lifecycle-viewmodel-ktx:LIFECYCLE_VERSION"
    )
    implementation(
        "androidx.lifecycle:lifecycle-viewmodel-compose:LIFECYCLE_VERSION"
    )
    implementation(
        "androidx.lifecycle:lifecycle-runtime-compose:LIFECYCLE_VERSION"
    )
}
LIFECYCLE_VERSION เป็น placeholder ที่ต้องแทนด้วยเวอร์ชันจริงจาก version catalog ของโครงการ หาก template มี artifact เหล่านี้อยู่แล้วให้ใช้รายการเดิมแทนการเพิ่มซ้ำ ส่วน Compose Material 3 และ Activity Compose ใช้รายการจาก Empty Activity template
หากใช้ Version Catalog สามารถประกาศ version และ aliases ใน gradle/libs.versions.toml ตามรูปแบบเดิมของโครงการได้ ไม่ต้องประกาศ plugin ID เดียวกันทั้ง alias และแบบตรง
ตรวจว่า settings.gradle.kts มี google() และ mavenCentral() ใน dependency repositories รวมทั้ง repository สำหรับ resolve plugins ตาม template
กด Sync Project with Gradle Files และเก็บไฟล์ JSON ใน app/schemas/ เข้า Git เพื่อใช้ติดตาม schema และทดสอบ migration [2]
#6. สร้าง Entity
สร้าง NoteEntity.kt:
package com.example.roomnotes

import androidx.room.Entity
import androidx.room.PrimaryKey

@Entity(tableName = "notes")
data class NoteEntity(
    @PrimaryKey(autoGenerate = true)
    val id: Long = 0,
    val title: String,
    val content: String,
    val isPinned: Boolean = false
)
@Entity กำหนดตาราง notes และ @PrimaryKey กำหนดรหัสหลัก เมื่อเพิ่มรายการใหม่ใช้ id = 0 เพื่อให้ Room/SQLite สร้างรหัสให้ [4]
ตัวอย่างข้อมูลที่คาดหวัง:
| id | title | content | isPinned |
|---|---|---|---|
| 1 | เตรียมสอน Android | ทบทวน Room และ Flow | false |
| 2 | งานประจำสัปดาห์ | ตรวจแบบฝึกหัดนักศึกษา | true |
ค่าเริ่มต้นใน Kotlin เช่น isPinned = false เป็นค่าเริ่มต้นของ constructor หากต้องการ SQL DEFAULT สำหรับ schema หรือ migration ต้องกำหนดแยกด้วย @ColumnInfo(defaultValue = ...) ดังตัวอย่างภาค migration
#7. สร้าง DAO สำหรับ CRUD
สร้าง NoteDao.kt:
package com.example.roomnotes

import androidx.room.Dao
import androidx.room.Delete
import androidx.room.Insert
import androidx.room.Query
import androidx.room.Update
import kotlinx.coroutines.flow.Flow

@Dao
interface NoteDao {
    @Query(
        "SELECT * FROM notes ORDER BY isPinned DESC, id DESC"
    )
    fun observeAll(): Flow<List<NoteEntity>>

    @Query("SELECT * FROM notes WHERE id = :id LIMIT 1")
    suspend fun findById(id: Long): NoteEntity?

    @Insert
    suspend fun insert(note: NoteEntity): Long

    @Update
    suspend fun update(note: NoteEntity): Int

    @Delete
    suspend fun delete(note: NoteEntity): Int
}
| Operation | เมธอด | ผลลัพธ์ |
|---|---|---|
| Create | insert() |
row ID ของข้อมูลใหม่ |
| Read แบบต่อเนื่อง | observeAll() |
Flow ของรายการ |
| Read ครั้งเดียว | findById() |
ข้อมูลหรือ null |
| Update | update() |
จำนวนแถวที่แก้ไข |
| Delete | delete() |
จำนวนแถวที่ลบ |
@Update และ @Delete จับคู่แถวด้วย primary key หากไม่พบแถวจะไม่เกิดการเปลี่ยนแปลง ส่วน :id คือ parameter binding ไม่ต้องนำข้อความมาต่อเป็น SQL เอง [5]
ใช้ suspend สำหรับงานอ่านหรือเขียนครั้งเดียว และใช้ Flow สำหรับรายการที่ต้องติดตามการเปลี่ยนแปลง DAO ที่คืน Flow ไม่ต้องใส่ suspend เพียงเพราะต้องการรับค่าหลายครั้ง [7]
#8. สร้าง Database แบบ Singleton
สร้าง NotesDatabase.kt:
package com.example.roomnotes

import android.content.Context
import androidx.room.Database
import androidx.room.Room
import androidx.room.RoomDatabase

@Database(
    entities = [NoteEntity::class],
    version = 1,
    exportSchema = true
)
abstract class NotesDatabase : RoomDatabase() {
    abstract fun noteDao(): NoteDao

    companion object {
        @Volatile
        private var instance: NotesDatabase? = null

        fun getInstance(context: Context): NotesDatabase =
            instance ?: synchronized(this) {
                instance ?: Room.databaseBuilder(
                    context.applicationContext,
                    NotesDatabase::class.java,
                    "notes.db"
                ).build().also { instance = it }
            }
    }
}
โค้ดนี้ตั้งใจใช้ฐานข้อมูลหนึ่ง instance ต่อ process และใช้ applicationContext เพื่อให้ instance ที่มีอายุยาวไม่ถือ reference ของ Activity
version = 1 คือเวอร์ชัน schema ของแอป ไม่เกี่ยวกับเวอร์ชันไลบรารี Room 2.8.5 เมื่อเปลี่ยนโครงสร้างตารางจึงค่อยเพิ่มเลข schema และกำหนด migration
#9. สร้าง Repository
สร้าง NoteRepository.kt:
package com.example.roomnotes

class NoteRepository(private val dao: NoteDao) {
    val notes = dao.observeAll()

    suspend fun add(title: String, content: String) {
        val cleanTitle = title.trim()
        require(cleanTitle.isNotEmpty()) {
            "กรุณากรอกหัวข้อ"
        }
        dao.insert(
            NoteEntity(
                title = cleanTitle,
                content = content.trim()
            )
        )
    }

    suspend fun togglePinned(note: NoteEntity) {
        val count = dao.update(
            note.copy(isPinned = !note.isPinned)
        )
        check(count == 1) { "ไม่พบบันทึกที่ต้องการแก้ไข" }
    }

    suspend fun remove(note: NoteEntity) {
        val count = dao.delete(note)
        check(count == 1) { "ไม่พบบันทึกที่ต้องการลบ" }
    }
}
การส่ง entity ทั้งก้อนไป @Update เหมาะกับตัวอย่างเล็กนี้ หากระบบมีหลายจุดแก้ไขข้อมูลพร้อมกัน ควรออกแบบคำสั่งอัปเดตเฉพาะคอลัมน์หรือใช้ transaction ตามกฎของงาน เพื่อลดปัญหาการเขียนทับข้อมูลจาก snapshot เก่า
#10. สร้าง ViewModel
สร้าง NotesViewModel.kt:
package com.example.roomnotes

import androidx.lifecycle.ViewModel
import androidx.lifecycle.ViewModelProvider
import androidx.lifecycle.viewModelScope
import kotlinx.coroutines.CancellationException
import kotlinx.coroutines.flow.MutableStateFlow
import kotlinx.coroutines.flow.SharingStarted
import kotlinx.coroutines.flow.asStateFlow
import kotlinx.coroutines.flow.catch
import kotlinx.coroutines.flow.stateIn
import kotlinx.coroutines.launch

class NotesViewModel(
    private val repository: NoteRepository
) : ViewModel() {
    private val _message = MutableStateFlow<String?>(null)
    val message = _message.asStateFlow()

    val notes = repository.notes
        .catch { error ->
            if (error is CancellationException) throw error
            _message.value =
                "อ่านข้อมูลไม่สำเร็จ: ${error.message}"
            emit(emptyList())
        }
        .stateIn(
            scope = viewModelScope,
            started = SharingStarted.WhileSubscribed(5_000),
            initialValue = emptyList()
        )

    private fun execute(
        successMessage: String,
        action: suspend () -> Unit
    ) {
        viewModelScope.launch {
            try {
                action()
                _message.value = successMessage
            } catch (error: CancellationException) {
                throw error
            } catch (error: Exception) {
                _message.value =
                    error.message ?: "ทำรายการไม่สำเร็จ"
            }
        }
    }

    fun add(title: String, content: String) =
        execute("บันทึกข้อมูลแล้ว") {
            repository.add(title, content)
        }

    fun togglePinned(note: NoteEntity) =
        execute("แก้ไขการปักหมุดแล้ว") {
            repository.togglePinned(note)
        }

    fun remove(note: NoteEntity) =
        execute("ลบบันทึกแล้ว") {
            repository.remove(note)
        }

    companion object {
        fun factory(
            repository: NoteRepository
        ): ViewModelProvider.Factory =
            object : ViewModelProvider.Factory {
                override fun <T : ViewModel> create(
                    modelClass: Class<T>
                ): T {
                    require(
                        modelClass.isAssignableFrom(
                            NotesViewModel::class.java
                        )
                    )
                    @Suppress("UNCHECKED_CAST")
                    return NotesViewModel(repository) as T
                }
            }
    }
}
Room จัดการการรัน DAO แบบ suspend และ Flow บนกลไกทำงานเบื้องหลังของฐานข้อมูล จึงเรียกจาก coroutine ใน viewModelScope ได้ ไม่ต้องครอบทุก DAO ด้วย withContext(Dispatchers.IO) ซ้ำโดยอัตโนมัติ ส่วนการอ่านไฟล์แบบ blocking หรือประมวลผลงานหนักอื่นต้องเลือก dispatcher ให้เหมาะสม [7]
ตัวอย่างนี้แสดงข้อความผิดพลาดแบบง่าย สำหรับแอปจริงควรแยกสถานะ Loading / Data / Error และกำหนด retry สำหรับกรณี read stream ล้มเหลว เพราะ catch แล้ว emit ค่า fallback ไม่ได้หมายความว่าจะเชื่อมต่ออ่านใหม่เอง
#11. เชื่อมกับ Jetpack Compose
แทนที่ MainActivity.kt ด้วยโค้ดต่อไปนี้ โดยใช้ dependency Compose Material 3 จาก template:
package com.example.roomnotes

import android.os.Bundle
import androidx.activity.ComponentActivity
import androidx.activity.compose.setContent
import androidx.activity.viewModels
import androidx.compose.foundation.layout.*
import androidx.compose.foundation.lazy.LazyColumn
import androidx.compose.foundation.lazy.items
import androidx.compose.material3.*
import androidx.compose.runtime.*
import androidx.compose.runtime.saveable.rememberSaveable
import androidx.compose.ui.Modifier
import androidx.compose.ui.unit.dp
import androidx.lifecycle.compose.collectAsStateWithLifecycle

class MainActivity : ComponentActivity() {
    private val viewModel: NotesViewModel by viewModels {
        NotesViewModel.factory(
            NoteRepository(
                NotesDatabase.getInstance(
                    applicationContext
                ).noteDao()
            )
        )
    }

    override fun onCreate(savedInstanceState: Bundle?) {
        super.onCreate(savedInstanceState)
        setContent {
            MaterialTheme {
                Surface(
                    modifier = Modifier.fillMaxSize()
                ) {
                    NotesScreen(viewModel)
                }
            }
        }
    }
}

@Composable
fun NotesScreen(viewModel: NotesViewModel) {
    val notes by viewModel.notes
        .collectAsStateWithLifecycle()
    val message by viewModel.message
        .collectAsStateWithLifecycle()

    var title by rememberSaveable { mutableStateOf("") }
    var content by rememberSaveable { mutableStateOf("") }

    Column(
        modifier = Modifier
            .fillMaxSize()
            .safeDrawingPadding()
            .padding(16.dp),
        verticalArrangement = Arrangement.spacedBy(8.dp)
    ) {
        Text(
            text = "Room Notes",
            style = MaterialTheme.typography.headlineMedium
        )

        OutlinedTextField(
            value = title,
            onValueChange = { title = it },
            label = { Text("หัวข้อ") },
            modifier = Modifier.fillMaxWidth(),
            singleLine = true
        )

        OutlinedTextField(
            value = content,
            onValueChange = { content = it },
            label = { Text("เนื้อหา") },
            modifier = Modifier.fillMaxWidth()
        )

        Row(
            horizontalArrangement = Arrangement.spacedBy(8.dp)
        ) {
            Button(
                enabled = title.isNotBlank(),
                onClick = { viewModel.add(title, content) }
            ) {
                Text("เพิ่มบันทึก")
            }
            TextButton(
                onClick = {
                    title = ""
                    content = ""
                }
            ) {
                Text("ล้างช่องกรอก")
            }
        }

        message?.let { Text(it) }
        Text("บันทึกทั้งหมด ${notes.size} รายการ")

        LazyColumn(
            modifier = Modifier
                .fillMaxWidth()
                .weight(1f),
            verticalArrangement = Arrangement.spacedBy(8.dp)
        ) {
            items(
                items = notes,
                key = { note -> note.id }
            ) { note ->
                Card(modifier = Modifier.fillMaxWidth()) {
                    Column(
                        modifier = Modifier.padding(12.dp)
                    ) {
                        Text(
                            text = note.title,
                            style =
                                MaterialTheme.typography.titleMedium
                        )
                        Text(note.content)
                        Row {
                            TextButton(
                                onClick = {
                                    viewModel.togglePinned(note)
                                }
                            ) {
                                Text(
                                    if (note.isPinned)
                                        "ยกเลิกปักหมุด"
                                    else "ปักหมุด"
                                )
                            }
                            TextButton(
                                onClick = {
                                    viewModel.remove(note)
                                }
                            ) {
                                Text("ลบ")
                            }
                        }
                    }
                }
            }
        }
    }
}
collectAsStateWithLifecycle() ใช้รับ Flow เป็น Compose State โดยผูกการเก็บค่ากับ lifecycle ของหน้าจอ เมื่อข้อมูลใน State เปลี่ยน Compose จะอัปเดตส่วนที่อ่านค่านั้น [8]
ตัวอย่างเก็บข้อความในช่องกรอกไว้หลังเพิ่มบันทึก เพื่อไม่ทำให้ draft หายหากการเขียนล้มเหลว ผู้ใช้กด “ล้างช่องกรอก” เมื่อพร้อมเริ่มรายการถัดไป แอปจริงอาจล้างเฉพาะเมื่อได้รับผลสำเร็จ และปิดปุ่มชั่วคราวระหว่างกำลังบันทึกเพื่อป้องกันการกดซ้ำ
#12. เข้าใจ Flow ผ่านการทดลอง
ลองเพิ่มบันทึก “เรียน Room” แล้วกดปักหมุด:
- UI เรียก
togglePinned()ของ ViewModel - Repository ส่ง entity ที่แก้ค่าแล้วให้ DAO
- Room อัปเดตแถวใน SQLite
- Observable query ที่ติดตามตารางนั้นได้รับการแจ้งว่าข้อมูลเปลี่ยน และอ่านผลใหม่
- ViewModel รับรายการใหม่ แล้ว Compose วาดข้อมูลปัจจุบัน
การอัปเดตนี้เกิดภายในแอป ไม่ใช่การซิงก์แบบ real-time ผ่านอินเทอร์เน็ต
Room อาจรัน query ใหม่แม้แถวที่เปลี่ยนไม่อยู่ในผลลัพธ์ที่กรองไว้ จึงอาจใช้ distinctUntilChanged() กับ Flow ก่อนแปลงเป็น StateFlow เพื่อลดการส่งรายการที่มีค่าเท่าเดิม [7]
#13. Workshop: เพิ่มคอลัมน์โดยไม่ทำข้อมูลเก่าหาย
สมมติต้องการเพิ่ม createdAt ให้ฐานข้อมูลเวอร์ชัน 2
#ขั้นที่ 1: สร้างข้อมูลในเวอร์ชัน 1 ก่อน
รันแอปเวอร์ชัน 1 และเพิ่มบันทึกอย่างน้อยสองรายการ เก็บชื่อและเนื้อหาไว้ใช้ตรวจหลังอัปเกรด
#ขั้นที่ 2: เพิ่มฟิลด์ใน Entity
เพิ่ม import และ property ต่อไปนี้ใน NoteEntity เดิม:
import androidx.room.ColumnInfo

// เพิ่มเป็น property สุดท้าย โดยเติม comma ให้ property ก่อนหน้า
@ColumnInfo(defaultValue = "0")
val createdAt: Long = 0
ค่า 0 ในบทฝึกนี้หมายถึง “ยังไม่มีเวลาสร้าง” สำหรับข้อมูลเดิม ไม่ควรนำไปแสดงเป็นวันที่จริงโดยตรง
แก้ Repository ตอนสร้างข้อมูลใหม่ให้ส่งเวลา:
NoteEntity(
    title = cleanTitle,
    content = content.trim(),
    createdAt = System.currentTimeMillis()
)
#ขั้นที่ 3: กำหนด Migration สำหรับ Room 2.x
สร้าง Migrations.kt:
package com.example.roomnotes

import androidx.room.migration.Migration
import androidx.sqlite.db.SupportSQLiteDatabase

val MIGRATION_1_2 = object : Migration(1, 2) {
    override fun migrate(db: SupportSQLiteDatabase) {
        db.execSQL(
            "ALTER TABLE notes ADD COLUMN " +
                "createdAt INTEGER NOT NULL DEFAULT 0"
        )
    }
}
#ขั้นที่ 4: เพิ่ม version และลงทะเบียน migration
ใน annotation ของ NotesDatabase เปลี่ยนเป็น:
@Database(
    entities = [NoteEntity::class],
    version = 2,
    exportSchema = true
)
ใน builder เดิม เปลี่ยนช่วงท้ายเป็น:
Room.databaseBuilder(
    context.applicationContext,
    NotesDatabase::class.java,
    "notes.db"
)
    .addMigrations(MIGRATION_1_2)
    .build()
ติดตั้งแอปเวอร์ชันใหม่ทับแอปเดิม โดยไม่ถอนการติดตั้งและไม่ล้าง app data แล้วตรวจว่าบันทึกเดิมยังอยู่
เก็บ schema JSON ของทั้ง version 1 และ 2 ใน Git Room มีทั้ง manual migration และ auto migration สำหรับกรณีที่รองรับ การทดสอบต้องตรวจทั้ง schema และข้อมูลหลังเปลี่ยนเวอร์ชัน [9]
ไม่ควรใช้ fallbackToDestructiveMigration แทนการออกแบบ migration ของข้อมูลผู้ใช้ เพราะเส้นทาง fallback อาจสร้างตารางใหม่และทำข้อมูลเดิมหาย
#14. ตรวจสอบและทดสอบ
ใช้รายการตรวจรับต่อไปนี้:
| กรณีทดลอง | ผลที่คาดหวัง |
|---|---|
| เพิ่มบันทึกที่มีหัวข้อ | จำนวนรายการเพิ่มหนึ่ง |
| หัวข้อมีเฉพาะช่องว่าง | เพิ่มไม่ได้ |
| ปักหมุด | ค่าปักหมุดเปลี่ยนและรายการขึ้นกลุ่มบน |
| ลบบันทึก | รายการนั้นหายไป |
| หมุนหน้าจอ | รายการยังอยู่ |
| ปิด process แล้วเปิดใหม่ | ข้อมูลที่บันทึกสำเร็จยังอยู่ |
| อัปเกรด schema 1 → 2 | ข้อมูลเดิมยังอยู่และมีคอลัมน์ใหม่ |
สำหรับ automated test ของ DAO ให้ใช้ฐานข้อมูล in-memory บน emulator หรืออุปกรณ์จริง โดยเพิ่มข้อมูลแล้วอ่านกลับเพื่อตรวจ primary key, title และลำดับรายการ ปิดฐานข้อมูลใน teardown ส่วน migration ใช้ schema ที่ export ร่วมกับ MigrationTestHelper ของ Room 2.x และ androidx.room:room-testing:2.8.5 [10]
ข้อแตกต่าง: in-memory database ใช้ทดสอบพฤติกรรม DAO ได้ แต่ไม่พิสูจน์การเก็บข้อมูลข้ามการปิดแอป ต้องทดสอบฐานข้อมูลแบบไฟล์เพิ่มด้วย
เมื่อใช้ SQLite ที่มากับ Android ตาม Workshop นี้ สามารถเปิด Android Studio → App Inspection → Database Inspector เลือก process แล้วตรวจตาราง notes หรือรัน:
SELECT id, title, content, isPinned
FROM notes
ORDER BY isPinned DESC, id DESC;
ความสามารถของ Inspector ขึ้นอยู่กับ API level และ SQLite driver ที่ใช้ หากเปลี่ยนไปใช้ bundled driver ต้องตรวจข้อจำกัดของเครื่องมืออีกครั้ง [10]
#15. ข้อผิดพลาดที่พบบ่อย
| อาการ | สิ่งที่ควรตรวจ |
|---|---|
NotesDatabase_Impl does not exist |
ใช้ KSP plugin และ room-compiler ใน module ที่ประกาศ Database แล้วหรือไม่ |
Unresolved reference: ksp |
Plugin ถูกประกาศและ apply ที่ App แล้วหรือไม่ |
| SQL ระบุว่าไม่พบตารางหรือคอลัมน์ | ชื่อใน Query ตรงกับ Entity และ ColumnInfo หรือไม่ |
| เข้าฐานข้อมูลบน main thread | DAO เป็น suspend หรือ Flow หรือยัง และมีการเรียก blocking API ที่ไหน |
| เปิดฐานข้อมูลหลังเปลี่ยน Entity ไม่ได้ | เพิ่ม schema version และให้ migration ครบเส้นทางหรือยัง |
| ข้อมูลหายหลังติดตั้งใหม่ | ตรวจว่าถอนแอป ล้างข้อมูล หรือเปิด destructive migration หรือไม่ |
ใช้ import androidx.room กับ artifact androidx.room3 |
เลือก API สายเดียวให้ครบทั้งโครงการ |
| ไม่เห็นรายการเปลี่ยนทันที | Query คืน Flow หรือเป็นเพียง snapshot และ UI collect อยู่หรือไม่ |
ไม่ใช้ allowMainThreadQueries() เพื่อแก้ปัญหาใน UI ของแอป เพราะการอ่านเขียนฐานข้อมูลอาจทำให้หน้าจอค้าง [7]
#เอกสารอ้างอิง
เอกสาร Android Developers บางหน้าอัปเดตตัวอย่างเป็น Room 3.x แล้ว จึงต้องตรวจ namespace ของโค้ดก่อนนำมาใช้กับ Workshop นี้
- Save data in a local database using Room
- Room 2.x release notes และ dependencies
- Room 3.x release notes และ dependencies
- Define data using Room entities
- Access data using Room DAOs
- Kotlin: Getting started with KSP
- Write asynchronous DAO queries
- State and Jetpack Compose
- Migrate your Room database
- Test and debug your database
- Choose relationship types between objects