- 1. LiteLLM คืออะไร
- 2. จุดเด่นของ LiteLLM
- 3. Architecture ของ Workshop
- 4. สิ่งที่ต้องเตรียม
- 5. สร้าง Project
- 6. กำหนด Environment Variables
- 7. สร้าง LiteLLM Configuration
- 8. รัน LiteLLM ด้วย Docker Compose
- 9. ตรวจสอบรายการ Model
- 10. เรียก Chat Completion ผ่าน LiteLLM
- 11. เปลี่ยน Provider โดยไม่เปลี่ยน API Endpoint
- 12. เรียก LiteLLM จาก Python ด้วย OpenAI SDK
- 13. Load Balancing
- 14. Fallback
- 15. เชื่อมต่อ Local LLM ด้วย Ollama
- 16. Gateway + Database สำหรับ Production Features
- 17. Security Checklist
- 18. เหมาะกับ Multi-Agent System อย่างไร
- 19. แบบฝึกหัดท้าย Workshop
- 20. สรุป
- แนวทางต่อยอด
- แหล่งศึกษาเพิ่มเติม
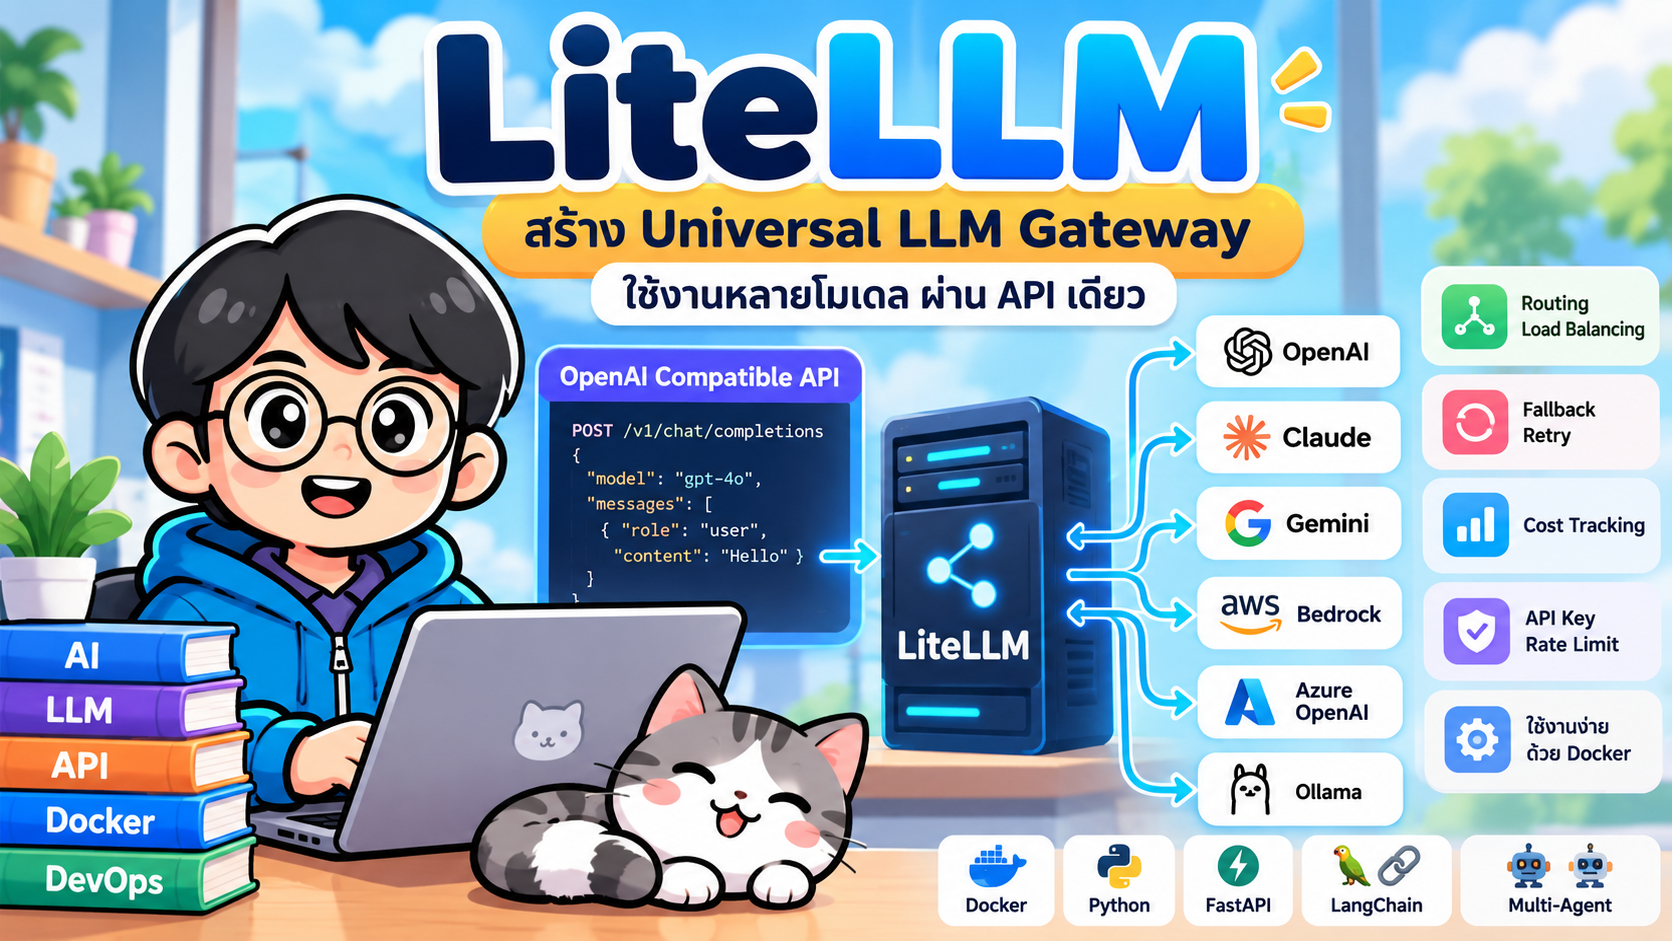
Workshop ภาษาไทยสำหรับเรียนรู้การใช้ LiteLLM เป็น AI/LLM Gateway เพื่อให้ Application เรียกใช้ LLM หลาย Provider ผ่าน OpenAI-compatible API เดียว
#1. LiteLLM คืออะไร
LiteLLM เป็น Open Source LLM Gateway และ Python SDK ที่ช่วยสร้าง abstraction layer ระหว่าง Application กับผู้ให้บริการ Large Language Model (LLM) หลายราย โดย Application สามารถใช้รูปแบบ API ที่สอดคล้องกับ OpenAI API แล้วให้ LiteLLM แปลงและส่งคำขอไปยัง Provider ที่กำหนด
ตัวอย่าง Provider ที่ LiteLLM รองรับ ได้แก่ OpenAI, Anthropic, Google/Vertex AI, AWS Bedrock, Azure OpenAI และโมเดลแบบ Self-hosted เช่น Ollama
แนวคิดพื้นฐาน:
                         +--> OpenAI
                         +--> Anthropic / Claude
Application --> LiteLLM +--> Gemini / Vertex AI
                         +--> AWS Bedrock
                         +--> Azure OpenAI
                         +--> Ollama / Local LLM
Application จึงไม่จำเป็นต้องผูกกับ SDK ของ Provider เพียงรายเดียว
#2. จุดเด่นของ LiteLLM
- Unified API สำหรับ LLM หลาย Provider
- OpenAI-compatible API
- รองรับ AI Gateway / Proxy
- Routing และ Load Balancing
- Retry และ Fallback
- Virtual API Keys
- Rate Limit และ Budget Control
- Cost/Usage Tracking
- Admin UI เมื่อใช้งาน Gateway พร้อมฐานข้อมูล
- เหมาะกับ Microservices, Multi-Agent และ Agentic AI
#3. Architecture ของ Workshop
                    +------------------+
                    | Python / Web App |
                    +--------+---------+
                             |
                    OpenAI-compatible API
                             |
                    http://localhost:4000
                             |
                    +--------v---------+
                    | LiteLLM Gateway  |
                    +--------+---------+
                             |
             +---------------+---------------+
             |               |               |
         OpenAI          Gemini/Vertex     Ollama
             |               |               |
          Cloud API       Cloud API       Local LLM
ใน Workshop นี้ LiteLLM ทำหน้าที่เป็น Single Entry Point ของระบบ AI
#4. สิ่งที่ต้องเตรียม
- Docker
- Docker Compose
- curl หรือ Postman
- API Key ของ Provider ที่ต้องการทดลอง
- Python 3.x (ถ้าต้องการทดสอบด้วย Python)
ตรวจสอบ Docker:
docker --version
docker compose version
#5. สร้าง Project
mkdir litellm-workshop
cd litellm-workshop
โครงสร้างไฟล์:
litellm-workshop/
├── docker-compose.yml
├── config.yaml
├── .env
└── .gitignore
#6. กำหนด Environment Variables
สร้าง .env
LITELLM_MASTER_KEY=sk-change-this-to-a-long-random-secret
OPENAI_API_KEY=your-openai-api-key
GEMINI_API_KEY=your-gemini-api-key
ห้าม commit .env ขึ้น Git repository
สร้าง .gitignore
.env
สำหรับ production ควรใช้ Secret Manager หรือระบบจัดการ secrets ของ platform แทนการเก็บ key ไว้ใน source code
#7. สร้าง LiteLLM Configuration
สร้าง config.yaml
model_list:
  - model_name: openai-model
    litellm_params:
      model: openai/<your-openai-model>
      api_key: os.environ/OPENAI_API_KEY

  - model_name: gemini-model
    litellm_params:
      model: gemini/<your-gemini-model>
      api_key: os.environ/GEMINI_API_KEY

router_settings:
  routing_strategy: simple-shuffle

general_settings:
  master_key: os.environ/LITELLM_MASTER_KEY
ชื่อและ availability ของโมเดลเปลี่ยนแปลงได้ ควรตรวจสอบชื่อโมเดลล่าสุดจาก Provider และ LiteLLM documentation ก่อนใช้งาน
model_name คือชื่อ alias ที่ Application จะเรียก ส่วน litellm_params.model ระบุ Provider และโมเดลจริง
ตัวอย่าง Application เรียก:
{
  "model": "openai-model"
}
แทนที่จะต้องรู้ชื่อ deployment/model ภายในทั้งหมด
#8. รัน LiteLLM ด้วย Docker Compose
สร้าง docker-compose.yml
services:
  litellm:
    image: docker.litellm.ai/berriai/litellm:latest
    container_name: litellm
    ports:
      - "4000:4000"
    env_file:
      - .env
    volumes:
      - ./config.yaml:/app/config.yaml:ro
    command: ["--config", "/app/config.yaml"]
    restart: unless-stopped
เริ่มระบบ:
docker compose up -d
ตรวจสอบ container:
docker compose ps
ดู log:
docker compose logs -f litellm
LiteLLM Gateway จะรับ request ที่:
http://localhost:4000
สำหรับ production ควร pin image เป็น release/stable version ที่ผ่านการทดสอบแล้ว แทนการใช้
latest
#9. ตรวจสอบรายการ Model
curl http://localhost:4000/v1/models \
  -H "Authorization: Bearer sk-change-this-to-a-long-random-secret"
หาก configuration ถูกต้อง จะเห็น model aliases ที่ Gateway เปิดให้ใช้งาน
#10. เรียก Chat Completion ผ่าน LiteLLM
curl http://localhost:4000/v1/chat/completions \
  -H "Authorization: Bearer sk-change-this-to-a-long-random-secret" \
  -H "Content-Type: application/json" \
  -d '{
    "model": "openai-model",
    "messages": [
      {
        "role": "user",
        "content": "อธิบาย Kubernetes แบบสั้นๆ"
      }
    ]
  }'
เส้นทางการทำงาน:
curl
  |
  v
LiteLLM :4000
  |
  v
model alias: openai-model
  |
  v
OpenAI Provider
  |
  v
Response
#11. เปลี่ยน Provider โดยไม่เปลี่ยน API Endpoint
เรียก Gemini ผ่าน Gateway เดิม:
curl http://localhost:4000/v1/chat/completions \
  -H "Authorization: Bearer sk-change-this-to-a-long-random-secret" \
  -H "Content-Type: application/json" \
  -d '{
    "model": "gemini-model",
    "messages": [
      {
        "role": "user",
        "content": "What is GitOps?"
      }
    ]
  }'
สิ่งที่เปลี่ยนหลัก ๆ คือ model ขณะที่ endpoint และ request structure ยังเป็นรูปแบบเดียวกัน
#12. เรียก LiteLLM จาก Python ด้วย OpenAI SDK
ติดตั้ง SDK:
pip install openai
สร้าง app.py
from openai import OpenAI

client = OpenAI(
    api_key="sk-change-this-to-a-long-random-secret",
    base_url="http://localhost:4000/v1"
)

response = client.chat.completions.create(
    model="openai-model",
    messages=[
        {
            "role": "user",
            "content": "Explain CI/CD in three sentences."
        }
    ]
)

print(response.choices[0].message.content)
รัน:
python app.py
ข้อดีของแนวทางนี้คือ Application ใช้ OpenAI SDK เป็น client แต่ backend สามารถถูก route ผ่าน LiteLLM ไปยัง Provider อื่นได้ตาม configuration
#13. Load Balancing
LiteLLM Router สามารถมีหลาย deployment ภายใต้ model_name เดียวกัน ตัวอย่างเชิงแนวคิด:
model_list:
  - model_name: production-llm
    litellm_params:
      model: openai/<deployment-a>
      api_key: os.environ/OPENAI_API_KEY

  - model_name: production-llm
    litellm_params:
      model: azure/<deployment-b>
      api_key: os.environ/AZURE_API_KEY
      api_base: os.environ/AZURE_API_BASE
      api_version: "<supported-api-version>"

router_settings:
  routing_strategy: simple-shuffle
Application เรียกเพียง:
{"model": "production-llm"}
Router จะเลือก deployment ตาม routing strategy ที่กำหนด
LiteLLM มี routing strategies หลายแบบ เช่น simple-shuffle, latency-based, rate-limit-aware และ cost-oriented strategies ทั้งนี้ควรเลือกตาม workload และข้อกำหนดของระบบ
#14. Fallback
แนวคิดของ Fallback คือ หาก model group หลักใช้งานไม่ได้ ให้ Router เปลี่ยนไปยัง model group สำรอง
Application
    |
    v
primary-model
    |
    +---- success ----> Response
    |
    +---- failure
            |
            v
       backup-model
            |
            v
         Response
ตัวอย่าง configuration เชิงแนวคิด:
router_settings:
  fallbacks:
    - primary-model:
        - backup-model
ก่อนใช้ใน production ควรตรวจสอบ schema ของ LiteLLM version ที่ติดตั้ง เนื่องจาก configuration options สามารถเปลี่ยนแปลงระหว่าง release ได้
#15. เชื่อมต่อ Local LLM ด้วย Ollama
หากมี Ollama ทำงานอยู่ สามารถเพิ่ม model เช่น:
model_list:
  - model_name: local-llm
    litellm_params:
      model: ollama/<your-local-model>
      api_base: http://host.docker.internal:11434
Application เรียก:
{
  "model": "local-llm"
}
Architecture:
Application
    |
    v
LiteLLM
    |
    +------> Cloud LLM
    |
    +------> Ollama
                |
                v
             Local LLM
บน Linux การเข้าถึง host จาก container อาจต้องเพิ่ม
extra_hostsหรือใช้ network configuration ที่เหมาะสม
#16. Gateway + Database สำหรับ Production Features
หากต้องการ Admin UI, Virtual Keys, spend tracking และ budget enforcement ควร deploy LiteLLM Gateway พร้อม database ตาม official quickstart/production deployment
แนวคิด:
Users / Applications
        |
        v
+------------------+
| LiteLLM Gateway  |
+--------+---------+
         |
   +-----+-----+
   |           |
   v           v
PostgreSQL   LLM Providers
   |
   +--> Keys / Models / Spend Data
เอกสาร LiteLLM ระบุว่า budget enforcement และ virtual-key features ต้องพึ่ง database ใน deployment path ที่เกี่ยวข้อง ดังนั้นหากต้องการควบคุมค่าใช้จ่ายจริง ไม่ควรพึ่ง proxy แบบไม่มีฐานข้อมูลเพียงอย่างเดียว
#17. Security Checklist
สำหรับ production ควรพิจารณาอย่างน้อย:
- ไม่ expose port
4000ตรงสู่ Internet หากไม่จำเป็น - วาง Reverse Proxy/API Gateway และ TLS/HTTPS ด้านหน้า
- เก็บ Provider API Keys ใน Secret Manager
- ใช้ Virtual Keys แยกตาม Application/Team
- กำหนด Rate Limit และ Budget
- เปิด logging/observability อย่างเหมาะสม แต่หลีกเลี่ยงการ log secrets หรือข้อมูลอ่อนไหว
- Pin container version และวางแผน upgrade
- จำกัด network access ระหว่าง Gateway, Database และ internal services
- Rotate master/provider keys ตามนโยบายองค์กร
- ทดสอบ retry/fallback failure scenarios ก่อน production
#18. เหมาะกับ Multi-Agent System อย่างไร
ตัวอย่างระบบ Agentic AI:
                    +----------------+
                    | Agent Manager  |
                    +-------+--------+
                            |
              +-------------+-------------+
              |             |             |
              v             v             v
         Research Agent  Coding Agent  Review Agent
              |             |             |
              +-------------+-------------+
                            |
                            v
                    +---------------+
                    | LiteLLM       |
                    | AI Gateway    |
                    +-------+-------+
                            |
               +------------+------------+
               |            |            |
             OpenAI       Gemini       Claude
แต่ละ Agent สามารถใช้ model alias ต่างกัน โดยไม่จำเป็นต้องจัดการ Provider API integration เองทุก Agent
ตัวอย่าง:
research-agent --> research-model
coding-agent   --> coding-model
review-agent   --> review-model
ทำให้สามารถเปลี่ยน provider, ทำ fallback หรือปรับ routing ที่ Gateway layer โดยลดผลกระทบต่อ business logic ของ Agent
#19. แบบฝึกหัดท้าย Workshop
#Exercise 1
สร้าง LiteLLM Gateway ที่เชื่อมต่อ Provider อย่างน้อย 2 ราย
#Exercise 2
เรียก /v1/chat/completions ผ่าน curl โดยเปลี่ยนเฉพาะ model alias
#Exercise 3
เขียน Python Application ที่ใช้ OpenAI SDK เชื่อมต่อ LiteLLM
#Exercise 4
เพิ่ม Local LLM จาก Ollama แล้วเปรียบเทียบผลลัพธ์กับ Cloud LLM
#Exercise 5
ออกแบบ model group สำหรับ production และทดลอง routing/load balancing
#Exercise 6
ออกแบบ fallback chain เช่น:
Primary Cloud Model
       |
       v
Secondary Cloud Model
       |
       v
Local Model
แล้วทดลองจำลอง provider failure เพื่อยืนยันว่า fallback ทำงานตามที่ออกแบบ
#20. สรุป
LiteLLM ช่วยแยก Application ออกจากรายละเอียดของ LLM Provider และสร้างชั้น AI Gateway กลางสำหรับระบบที่ต้องใช้หลายโมเดล
Without LiteLLM
Application --> Provider-specific SDK/API

With LiteLLM
Application --> LiteLLM --> Any supported LLM Provider
แนวทางนี้มีประโยชน์มากเมื่อระบบเริ่มมีหลาย Application, หลาย Agent หรือหลาย LLM Provider เพราะสามารถรวม routing, fallback, authentication, cost governance และ observability ไว้ที่ Gateway layer ได้
#แนวทางต่อยอด
- LiteLLM + PostgreSQL + Admin UI
- LiteLLM + Redis
- LiteLLM + Prometheus/Grafana
- LiteLLM + Kubernetes
- LiteLLM + LangGraph
- LiteLLM + Microsoft Agent Framework
- LiteLLM + Google ADK
- LiteLLM + Spring AI
- LiteLLM + Laravel AI SDK
- LiteLLM + Ollama สำหรับ Hybrid Cloud/Local AI
#แหล่งศึกษาเพิ่มเติม
- LiteLLM Documentation: https://docs.litellm.ai/docs/
- LiteLLM Docker Quickstart: https://docs.litellm.ai/docs/proxy/docker_quick_start
- LiteLLM Routing: https://docs.litellm.ai/docs/routing
- LiteLLM Architecture: https://docs.litellm.ai/docs/proxy/architecture
หมายเหตุ: LiteLLM และผู้ให้บริการ LLM มีการอัปเดตอย่างต่อเนื่อง ชื่อโมเดล, image tag, configuration schema และ API version ควรตรวจสอบจากเอกสารล่าสุดก่อนนำ Workshop ไปใช้จริง