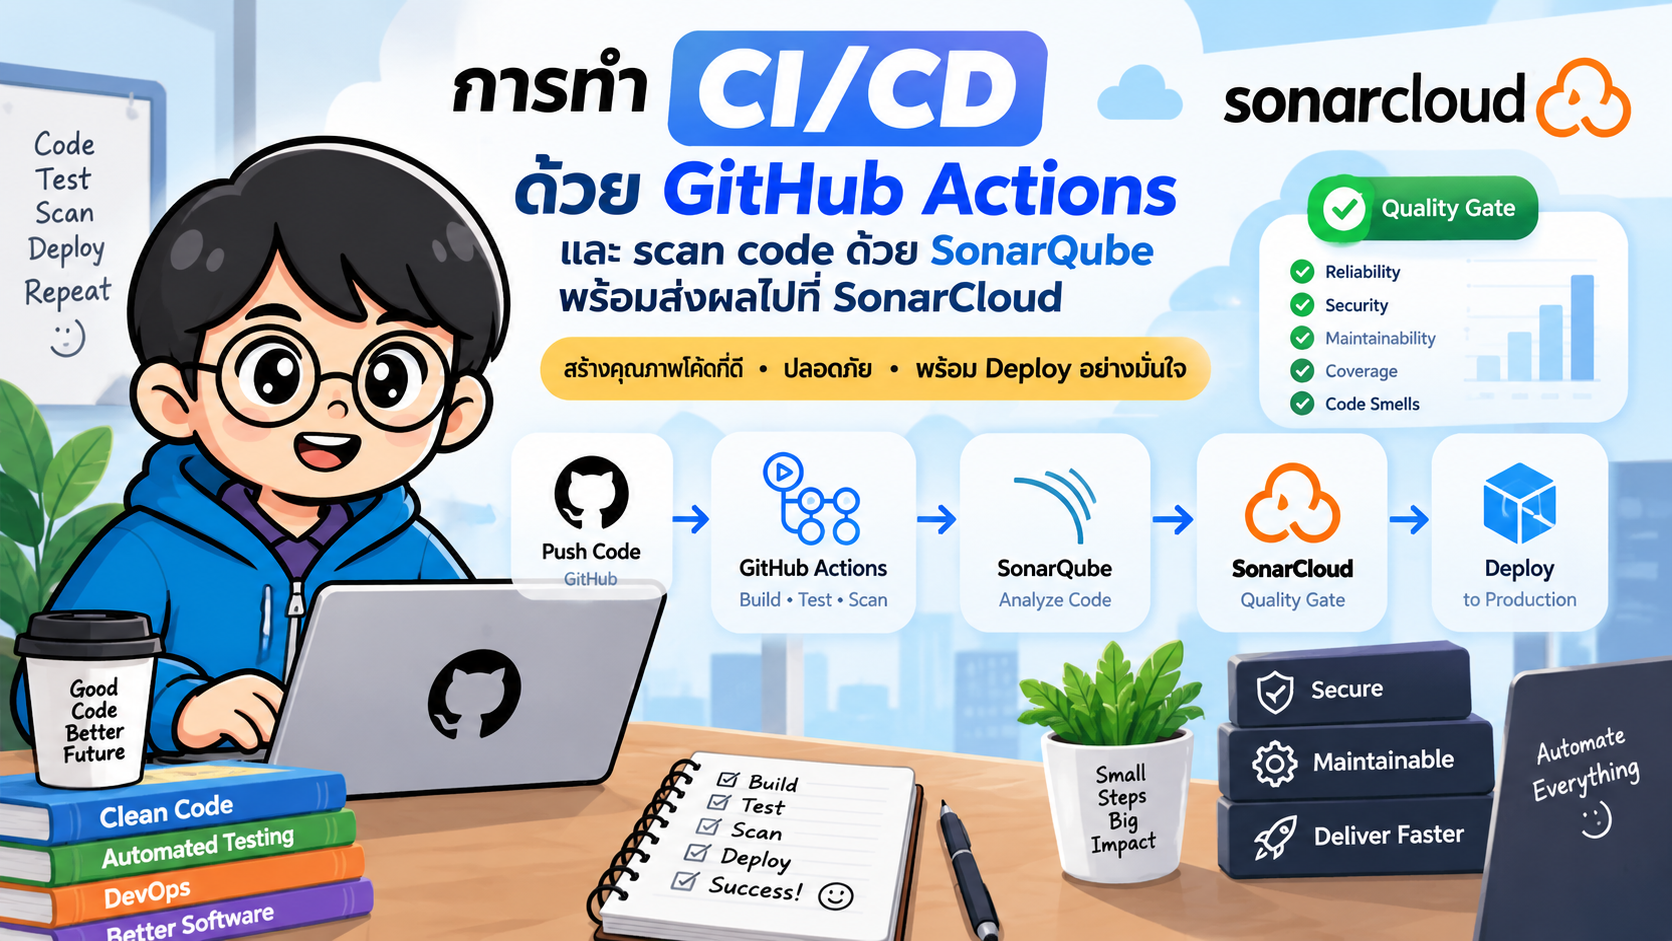
- ทำ CI/CD ด้วย GitHub Actions พร้อมตรวจสอบ Code Quality ด้วย SonarQube Cloud
- 1. Architecture ที่เราจะสร้าง
- 2. CI/CD คืออะไร
- 3. SonarQube Cloud ทำหน้าที่อะไร
- 4. สิ่งที่ต้องเตรียม
- 5. เชื่อม GitHub กับ SonarQube Cloud
- 6. สร้าง SONAR_TOKEN
- 7. โครงสร้าง Project ตัวอย่าง
- 8. Source Code ตัวอย่าง
- 9. Unit Test ด้วย Jest
- 10. สร้าง sonar-project.properties
- 11. สร้าง GitHub Actions Workflow
- 12. ทำไม Checkout ต้องใช้ fetch-depth: 0
- 13. Workflow ทำงานอย่างไร
- 14. ตรวจสอบผลบน SonarQube Cloud
- 15. Quality Gate
- 16. Pull Request + SonarQube Cloud
- 17. แยก CI และ CD
- 18. เพิ่ม Quality Gate Check ใน Pipeline
- 19. Pipeline ฉบับสมบูรณ์
- 20. เพิ่ม Docker เข้า CD
- 21. GitHub Environment สำหรับ Production
- 22. Security ของ Secrets
- 23. CI/CD กับ DevSecOps
- 24. Pipeline ที่แนะนำสำหรับ Production
- 25. Troubleshooting
- 26. Checklist ก่อนใช้งานจริง
- 27. สรุป
- เอกสารอ้างอิง
#ทำ CI/CD ด้วย GitHub Actions พร้อมตรวจสอบ Code Quality ด้วย SonarQube Cloud
การทำ CI/CD (Continuous Integration / Continuous Delivery) ช่วยให้ทีมพัฒนาซอฟต์แวร์สามารถตรวจสอบ Build, Test และ Deploy ระบบได้อัตโนมัติ แต่การที่โปรแกรม Build ผ่านหรือ Unit Test ผ่านไม่ได้หมายความว่า Source Code มีคุณภาพดีเสมอไป
บทความนี้จึงเพิ่ม SonarQube Cloud เข้าไปใน GitHub Actions Pipeline เพื่อวิเคราะห์คุณภาพและความปลอดภัยของ Source Code ก่อนอนุญาตให้เข้าสู่ขั้นตอน Deploy
หมายเหตุ: ผลิตภัณฑ์ Cloud ของ Sonar ปัจจุบันใช้ชื่อ SonarQube Cloud (เดิมรู้จักในชื่อ SonarCloud)
#1. Architecture ที่เราจะสร้าง
Developer
    │
    │ git push / Pull Request
    ▼
GitHub Repository
    │
    ▼
GitHub Actions
    │
    ├── Checkout Source Code
    │
    ├── Install Dependencies
    │
    ├── Build
    │
    ├── Unit Test
    │
    ├── Generate Test Coverage
    │
    └── SonarQube Scan
              │
              ▼
       SonarQube Cloud
              │
              ├── Reliability
              ├── Security
              ├── Maintainability
              ├── Coverage
              └── Duplications
              │
              ▼
         Quality Gate
          /       \
       PASS       FAIL
        │           │
        ▼           └── Stop
      Deploy
        │
        ▼
   Production
แนวคิดสำคัญคือ ไม่ควร Deploy เพียงเพราะ Build ผ่าน แต่ควรให้ Automated Test และ Quality Gate เป็นส่วนหนึ่งของเงื่อนไขก่อน Deploy
#2. CI/CD คืออะไร
#Continuous Integration (CI)
CI คือกระบวนการรวม Source Code และตรวจสอบโค้ดโดยอัตโนมัติ เช่น
Push Code
   ↓
Build
   ↓
Unit Test
   ↓
Coverage
   ↓
Static Analysis
GitHub Actions สามารถใช้เป็น CI Engine เพื่อรันขั้นตอนเหล่านี้ทุกครั้งที่เกิด push หรือ
pull_request
#Continuous Delivery / Deployment (CD)
หลังจาก CI ผ่านแล้ว Pipeline สามารถดำเนินการต่อ เช่น
Quality Gate PASS
       ↓
Build Docker Image
       ↓
Push Image
       ↓
Deploy Staging
       ↓
Deploy Production
ในระบบจริง Production Environment อาจเพิ่ม Manual Approval ก่อน Deploy ได้
#3. SonarQube Cloud ทำหน้าที่อะไร
SonarQube Cloud เป็นบริการวิเคราะห์ Source Code แบบ Static Analysis โดยนำผลการวิเคราะห์มาใช้ตรวจสอบประเด็นด้านคุณภาพและความปลอดภัย เช่น
- Reliability
- Security
- Maintainability
- Security Hotspots
- Test Coverage
- Duplicated Code
ผลลัพธ์จะถูกนำไปประเมินด้วย Quality Gate
ตัวอย่างแนวคิด:
Source Code
    │
    ▼
SonarQube Scanner
    │
    ▼
SonarQube Cloud
    │
    ▼
Quality Gate
    │
    ├── Passed  → Pipeline ไปต่อ
    └── Failed  → หยุด / ไม่อนุญาต Merge หรือ Deploy
#4. สิ่งที่ต้องเตรียม
Workshop นี้สมมติว่าใช้ Node.js เป็นตัวอย่าง แต่แนวคิดเดียวกันสามารถประยุกต์กับ Java, Spring Boot, React, Vue, Angular, Python, Go, PHP/Laravel และภาษาอื่นที่ SonarQube Cloud รองรับ
สิ่งที่ต้องมี:
- GitHub Account
- GitHub Repository
- SonarQube Cloud Account
- Project ที่มี Source Code
- Unit Test
- GitHub Actions
เว็บไซต์ที่เกี่ยวข้อง:
- GitHub: https://github.com/
- SonarQube Cloud: https://sonarcloud.io/
- GitHub Actions Documentation: https://docs.github.com/en/actions
- SonarQube Cloud Documentation: https://docs.sonarsource.com/sonarqube-cloud/
#5. เชื่อม GitHub กับ SonarQube Cloud
เข้า SonarQube Cloud และ Sign in ด้วย GitHub จากนั้นเชื่อม GitHub Organization/Repository ที่ต้องการวิเคราะห์
ขั้นตอนโดยภาพรวม:
SonarQube Cloud
      ↓
Analyze new project
      ↓
Connect GitHub
      ↓
เลือก Organization
      ↓
Import Repository
      ↓
สร้าง SonarQube Cloud Project
หลังสร้าง Project แล้ว ให้จดค่า:
Organization Key
Project Key
ตัวอย่าง:
Organization: senpru
Project Key: senpru_demo-api
ค่าจริงต้องใช้ค่าที่ SonarQube Cloud กำหนดให้ Project ของคุณ
#6. สร้าง SONAR_TOKEN
การให้ GitHub Actions ส่งผลการวิเคราะห์ไป SonarQube Cloud จำเป็นต้องมี Authentication Token
สร้าง Token จาก SonarQube Cloud แล้วนำค่าไปเก็บใน GitHub Repository Secret
ห้ามนำ Token เขียนลง
.github/workflows/*.yml,sonar-project.propertiesหรือ Commit ลง Repository
ไปที่ GitHub Repository:
Settings
  ↓
Secrets and variables
  ↓
Actions
  ↓
Secrets
  ↓
New repository secret
ตั้งชื่อ:
SONAR_TOKEN
แล้วใส่ Token เป็น Value
GitHub Actions จะเรียกใช้ด้วย:
${{ secrets.SONAR_TOKEN }}
#7. โครงสร้าง Project ตัวอย่าง
demo-project/
├── .github/
│   └── workflows/
│       └── ci.yml
├── src/
│   └── calculator.js
├── tests/
│   └── calculator.test.js
├── package.json
├── package-lock.json
└── sonar-project.properties
#8. Source Code ตัวอย่าง
ไฟล์:
src/calculator.js
function add(a, b) {
  return a + b;
}

function subtract(a, b) {
  return a - b;
}

module.exports = {
  add,
  subtract
};
#9. Unit Test ด้วย Jest
ไฟล์:
tests/calculator.test.js
const { add, subtract } = require("../src/calculator");

describe("Calculator", () => {

  test("2 + 3 = 5", () => {
    expect(add(2, 3)).toBe(5);
  });

  test("5 - 3 = 2", () => {
    expect(subtract(5, 3)).toBe(2);
  });

});
ติดตั้ง Jest:
npm install --save-dev jest
ตัวอย่าง package.json:
{
  "scripts": {
    "test": "jest",
    "test:coverage": "jest --coverage"
  },
  "devDependencies": {
    "jest": "^30.0.0"
  }
}
Version ในตัวอย่างเป็นเพียงแนวทาง ควรใช้ Version ที่เหมาะสมกับ Project จริงและ commit lock file ไว้เพื่อให้ CI ทำงานซ้ำได้อย่างสม่ำเสมอ
ทดลอง:
npm test
หรือสร้าง Coverage:
npm run test:coverage
จะได้ Directory ประมาณ:
coverage/
├── lcov-report/
└── lcov.info
ไฟล์สำคัญสำหรับ SonarQube คือ:
coverage/lcov.info
#10. สร้าง sonar-project.properties
สร้างไฟล์ที่ Root ของ Project:
sonar-project.properties
ตัวอย่าง:
sonar.projectKey=YOUR_PROJECT_KEY
sonar.organization=YOUR_ORGANIZATION_KEY

sonar.sources=src
sonar.tests=tests

sonar.javascript.lcov.reportPaths=coverage/lcov.info

sonar.sourceEncoding=UTF-8
เปลี่ยน:
YOUR_PROJECT_KEY
YOUR_ORGANIZATION_KEY
เป็นค่าจริงจาก SonarQube Cloud
#11. สร้าง GitHub Actions Workflow
สร้างไฟล์:
.github/workflows/ci.yml
ตัวอย่าง Pipeline:
name: CI with SonarQube Cloud

on:
  push:
    branches:
      - main

  pull_request:
    branches:
      - main

permissions:
  contents: read

jobs:
  test-and-scan:

    name: Build, Test and SonarQube Scan

    runs-on: ubuntu-latest

    steps:

      - name: Checkout source code
        uses: actions/checkout@v6
        with:
          fetch-depth: 0

      - name: Setup Node.js
        uses: actions/setup-node@v6
        with:
          node-version: 22
          cache: npm

      - name: Install dependencies
        run: npm ci

      - name: Run unit tests with coverage
        run: npm run test:coverage

      - name: SonarQube Scan
        uses: SonarSource/sonarqube-scan-action@v7
        env:
          SONAR_TOKEN: ${{ secrets.SONAR_TOKEN }}
Action versions เปลี่ยนได้ตามเวลา ควรตรวจสอบ Version ปัจจุบันจาก GitHub Marketplace หรือเอกสารของผู้พัฒนาก่อนนำไปใช้ใน Production
#12. ทำไม Checkout ต้องใช้ fetch-depth: 0
ตัวอย่าง:
- name: Checkout source code
  uses: actions/checkout@v6
  with:
    fetch-depth: 0
fetch-depth: 0 ทำให้ Runner ดึง Git History ทั้งหมด
ซึ่งเป็นค่าที่เหมาะกับการวิเคราะห์ของ SonarQube ในหลายกรณี เช่น branch/SCM
information และช่วยหลีกเลี่ยงปัญหาจาก shallow clone
#13. Workflow ทำงานอย่างไร
เมื่อ Developer:
git add .
git commit -m "Add calculator feature"
git push origin main
จะเกิด Pipeline:
Git Push
   │
   ▼
GitHub Actions
   │
   ├── Checkout
   │
   ├── Setup Node.js
   │
   ├── npm ci
   │
   ├── Jest
   │
   ├── Coverage
   │
   └── SonarQube Scan
             │
             ▼
       SonarQube Cloud
หาก Test ไม่ผ่าน Step จะล้มเหลวและ Scanner ที่อยู่ถัดไปจะไม่ทำงานตาม flow ปกติ
#14. ตรวจสอบผลบน SonarQube Cloud
หลัง Scan สำเร็จ เข้า Dashboard ของ Project
ข้อมูลที่ควรตรวจสอบ ได้แก่:
Reliability
Security
Maintainability
Security Hotspots
Coverage
Duplications
Dashboard ทำให้ทีมไม่ได้ดูเพียงว่า:
Test = PASS
แต่สามารถตรวจสอบภาพรวม:
Test              ✓
Coverage          ✓
Reliability       ✓
Security          ✓
Maintainability   ✓
Quality Gate      ✓
#15. Quality Gate
Quality Gate คือชุดเงื่อนไขสำหรับตัดสินว่า Code ที่วิเคราะห์มีคุณภาพตามเกณฑ์ที่กำหนดหรือไม่
แนวคิด:
              Analysis
                  │
                  ▼
             Quality Gate
               /      \
           Passed      Failed
             │            │
             ▼            ▼
          Merge/       Fix Code
          Deploy          │
                          └── Push ใหม่
แนวทางที่เหมาะสมคือเน้นคุณภาพของ New Code เพื่อไม่ให้ Technical Debt ใหม่เพิ่มเข้าสู่ระบบ
#16. Pull Request + SonarQube Cloud
Workflow กำหนด:
pull_request:
  branches:
    - main
ดังนั้นเมื่อ Developer สร้าง Pull Request:
feature/login
     │
     ▼
Pull Request → main
     │
     ▼
GitHub Actions
     │
     ├── Test
     ├── Coverage
     └── SonarQube Analysis
เมื่อ GitHub Integration ถูกตั้งค่าถูกต้อง SonarQube Cloud สามารถแสดงผล Quality Gate ในกระบวนการ Pull Request ได้
ทีมจึงสามารถใช้แนวคิด:
Pull Request
    │
    ├── Unit Test PASS
    ├── Build PASS
    ├── Sonar Analysis PASS
    └── Quality Gate PASS
            │
            ▼
        Allow Merge
ควรใช้ GitHub Branch Protection / Rulesets ร่วมด้วย เพื่อบังคับ Required Status Checks ตามนโยบายของทีม
#17. แยก CI และ CD
ระบบ Production ควรแยกความรับผิดชอบให้ชัดเจน
#CI
Checkout
   ↓
Install
   ↓
Build
   ↓
Test
   ↓
Coverage
   ↓
SonarQube Scan
   ↓
Quality Gate
#CD
CI PASS
   ↓
Build Docker Image
   ↓
Push Registry
   ↓
Deploy
ตัวอย่างแนวคิด Workflow:
jobs:

  ci:
    runs-on: ubuntu-latest

    steps:
      # Build
      # Test
      # SonarQube Scan

  deploy:
    needs: ci

    if: github.ref == 'refs/heads/main'

    runs-on: ubuntu-latest

    steps:

      - name: Deploy
        run: |
          echo "Deploy application"
needs: ci หมายถึง Job deploy จะขึ้นกับผลของ Job ci
#18. เพิ่ม Quality Gate Check ใน Pipeline
หากต้องการให้ Pipeline รอผล Quality Gate สามารถเพิ่ม Action ที่ SonarSource รองรับตามเอกสาร Version ปัจจุบัน
แนวคิด:
- name: SonarQube Scan
  uses: SonarSource/sonarqube-scan-action@v7
  env:
    SONAR_TOKEN: ${{ secrets.SONAR_TOKEN }}

- name: SonarQube Quality Gate
  uses: SonarSource/sonarqube-quality-gate-action@v1
  timeout-minutes: 5
  env:
    SONAR_TOKEN: ${{ secrets.SONAR_TOKEN }}
ก่อนใช้ควรตรวจสอบ Release/Version ล่าสุดของ Action อย่างเป็นทางการ เนื่องจาก Version ของ GitHub Action มีการเปลี่ยนแปลงได้
อีกแนวทางหนึ่งคือใช้ Quality Gate status ที่ SonarQube Cloud ส่งกลับไปยัง GitHub แล้วกำหนดเป็น Required Check ของ Branch/Ruleset
#19. Pipeline ฉบับสมบูรณ์
ภาพรวม:
Developer
   │
   ▼
GitHub
   │
   ▼
Push / Pull Request
   │
   ▼
GitHub Actions
   │
   ├── Checkout
   ├── Setup Runtime
   ├── Install Dependencies
   ├── Build
   ├── Unit Test
   ├── Coverage
   └── SonarQube Scan
             │
             ▼
      SonarQube Cloud
             │
             ▼
        Quality Gate
         /        \
      PASS        FAIL
       │            │
       ▼            └── Fix Code
 Build Artifact
       │
       ▼
 Docker Image
       │
       ▼
    Registry
       │
       ▼
    Deployment
#20. เพิ่ม Docker เข้า CD
หลัง CI ผ่าน สามารถ Build Docker Image:
- name: Build Docker image
  run: |
    docker build -t myapp:${{ github.sha }} .
ตัวอย่างการ Tag:
myapp:a83d95...
การใช้ Commit SHA ทำให้ Trace ได้ว่า Container Image ถูกสร้างจาก Source Code Revision ใด
จากนั้นจึง Push ไป Registry เช่น:
GitHub Container Registry
Docker Hub
Amazon ECR
Google Artifact Registry
Azure Container Registry
แล้ว Deploy ไปยัง:
Docker Server
Kubernetes
AWS ECS
Amazon EKS
Google Kubernetes Engine
Azure Kubernetes Service
DigitalOcean Kubernetes
#21. GitHub Environment สำหรับ Production
สำหรับ Production แนะนำให้ใช้ GitHub Environment:
deploy-production:

  needs: ci

  environment:
    name: production

  runs-on: ubuntu-latest
Environment สามารถใช้ร่วมกับ:
- Environment Secrets
- Deployment Protection
- Required Reviewers
- Environment-specific Variables
ทำให้สามารถออกแบบ flow เช่น:
CI PASS
   ↓
Quality Gate PASS
   ↓
Request Production Deployment
   ↓
Approval
   ↓
Access Production Secrets
   ↓
Deploy
#22. Security ของ Secrets
ข้อมูลลับ เช่น:
SONAR_TOKEN
DOCKER_PASSWORD
AWS_SECRET
DEPLOY_SSH_KEY
ไม่ควรอยู่ใน:
Source Code
Dockerfile
sonar-project.properties
Workflow แบบ Plain Text
Git Repository
ให้เก็บใน GitHub Secrets หรือระบบ Secret Management ที่เหมาะสม
ตัวอย่าง:
env:
  SONAR_TOKEN: ${{ secrets.SONAR_TOKEN }}
ควรใช้หลัก Least Privilege คือให้ Credential มี Permission เท่าที่ Pipeline จำเป็นต้องใช้
สำหรับ Cloud Provider ที่รองรับ OIDC ควรพิจารณาใช้ GitHub Actions OIDC แทน Long-lived Cloud Access Key
#23. CI/CD กับ DevSecOps
เมื่อเพิ่ม Static Code Analysis เข้า Pipeline เราจะเริ่มเปลี่ยนจาก:
CI/CD
ไปสู่แนวคิด:
CI/CD + Security
หรือ DevSecOps:
Code
 │
 ▼
Build
 │
 ▼
Test
 │
 ▼
SAST / Code Quality
 │
 ▼
Quality Gate
 │
 ▼
Container Build
 │
 ▼
Deploy
และยังสามารถเพิ่มเครื่องมืออื่น เช่น Dependency Scanning, Secret Scanning, Container Image Scanning และ DAST ได้
#24. Pipeline ที่แนะนำสำหรับ Production
Pull Request
     │
     ▼
Lint
     │
     ▼
Unit Test
     │
     ▼
Coverage
     │
     ▼
SonarQube Scan
     │
     ▼
Quality Gate
     │
     ▼
Code Review
     │
     ▼
Merge main
     │
     ▼
Build Docker Image
     │
     ▼
Container Scan
     │
     ▼
Push Registry
     │
     ▼
Deploy Staging
     │
     ▼
Integration / E2E Test
     │
     ▼
Approval
     │
     ▼
Production
#25. Troubleshooting
#ปัญหา SONAR_TOKEN ไม่ถูกต้อง
ตรวจสอบว่า GitHub มี Secret:
SONAR_TOKEN
และ Workflow ใช้:
env:
  SONAR_TOKEN: ${{ secrets.SONAR_TOKEN }}
#SonarQube ไม่พบ Coverage
ตรวจสอบว่า Test สร้าง:
coverage/lcov.info
และ Property ตรงกัน:
sonar.javascript.lcov.reportPaths=coverage/lcov.info
#npm ci ทำงานไม่ได้
npm ci ต้องการ lock file ที่สอดคล้องกับ package.json
ตรวจสอบว่ามี:
package-lock.json
และ Commit เข้า Repository แล้ว
#Workflow ไม่ทำงาน
ตรวจสอบ:
on:
  push:
    branches:
      - main
รวมถึงชื่อ Branch จริงของ Repository
#Pull Request จาก Fork ไม่มี SONAR_TOKEN
GitHub จำกัดการส่ง Repository Secrets ไปยัง Workflow ที่ถูก Trigger จาก Fork เพื่อป้องกันการขโมย Secret ดังนั้นควรออกแบบ PR workflow โดยคำนึงถึง Trust Boundary นี้
#26. Checklist ก่อนใช้งานจริง
- [ ] Repository เชื่อมกับ SonarQube Cloud แล้ว
- [ ] Project Key ถูกต้อง
- [ ] Organization Key ถูกต้อง
- [ ] สร้าง
SONAR_TOKEN - [ ] Token อยู่ใน GitHub Secrets
- [ ] Unit Test ทำงานได้
- [ ] Coverage ถูก Generate
- [ ] SonarQube อ่าน Coverage ได้
- [ ] GitHub Actions ทำงานทั้ง Push/PR
- [ ] Quality Gate ถูกกำหนดตามมาตรฐานทีม
- [ ] Branch Protection/Ruleset บังคับ Required Checks
- [ ] Production Secrets แยกจาก CI Secrets
- [ ] Deploy ทำงานหลัง CI/Quality Gate ผ่าน
- [ ] Production มี Approval หากระบบต้องการ
- [ ] Credential ใช้ Least Privilege
#27. สรุป
GitHub Actions และ SonarQube Cloud สามารถทำงานร่วมกันเพื่อสร้าง CI/CD Pipeline ที่ไม่ได้ตรวจสอบเพียงว่าโปรแกรม Build หรือ Test ผ่าน แต่เพิ่ม Automated Code Quality และ Security Analysis เข้าไปใน Software Delivery Process
Architecture ที่ควรจำคือ:
GitHub
   ↓
GitHub Actions
   ↓
Build
   ↓
Test + Coverage
   ↓
SonarQube Scan
   ↓
SonarQube Cloud
   ↓
Quality Gate
   ↓
Deploy
แนวทางนี้ช่วยสร้าง Quality Gate ก่อนส่ง Software ไปยัง Environment ถัดไป และเหมาะสำหรับการต่อยอดสู่ DevSecOps, Docker, Kubernetes และ GitOps
#เอกสารอ้างอิง
-
GitHub Actions Documentation
https://docs.github.com/en/actions -
GitHub Actions Secrets
https://docs.github.com/en/actions/how-tos/write-workflows/choose-what-workflows-do/use-secrets -
SonarQube Cloud Documentation
https://docs.sonarsource.com/sonarqube-cloud/ -
SonarQube Cloud -- Getting started with GitHub
https://docs.sonarsource.com/sonarqube-cloud/getting-started/github
Keywords: GitHub Actions, CI/CD, SonarQube, SonarQube Cloud, SonarCloud, DevOps, DevSecOps, Static Code Analysis, Quality Gate, Code Quality