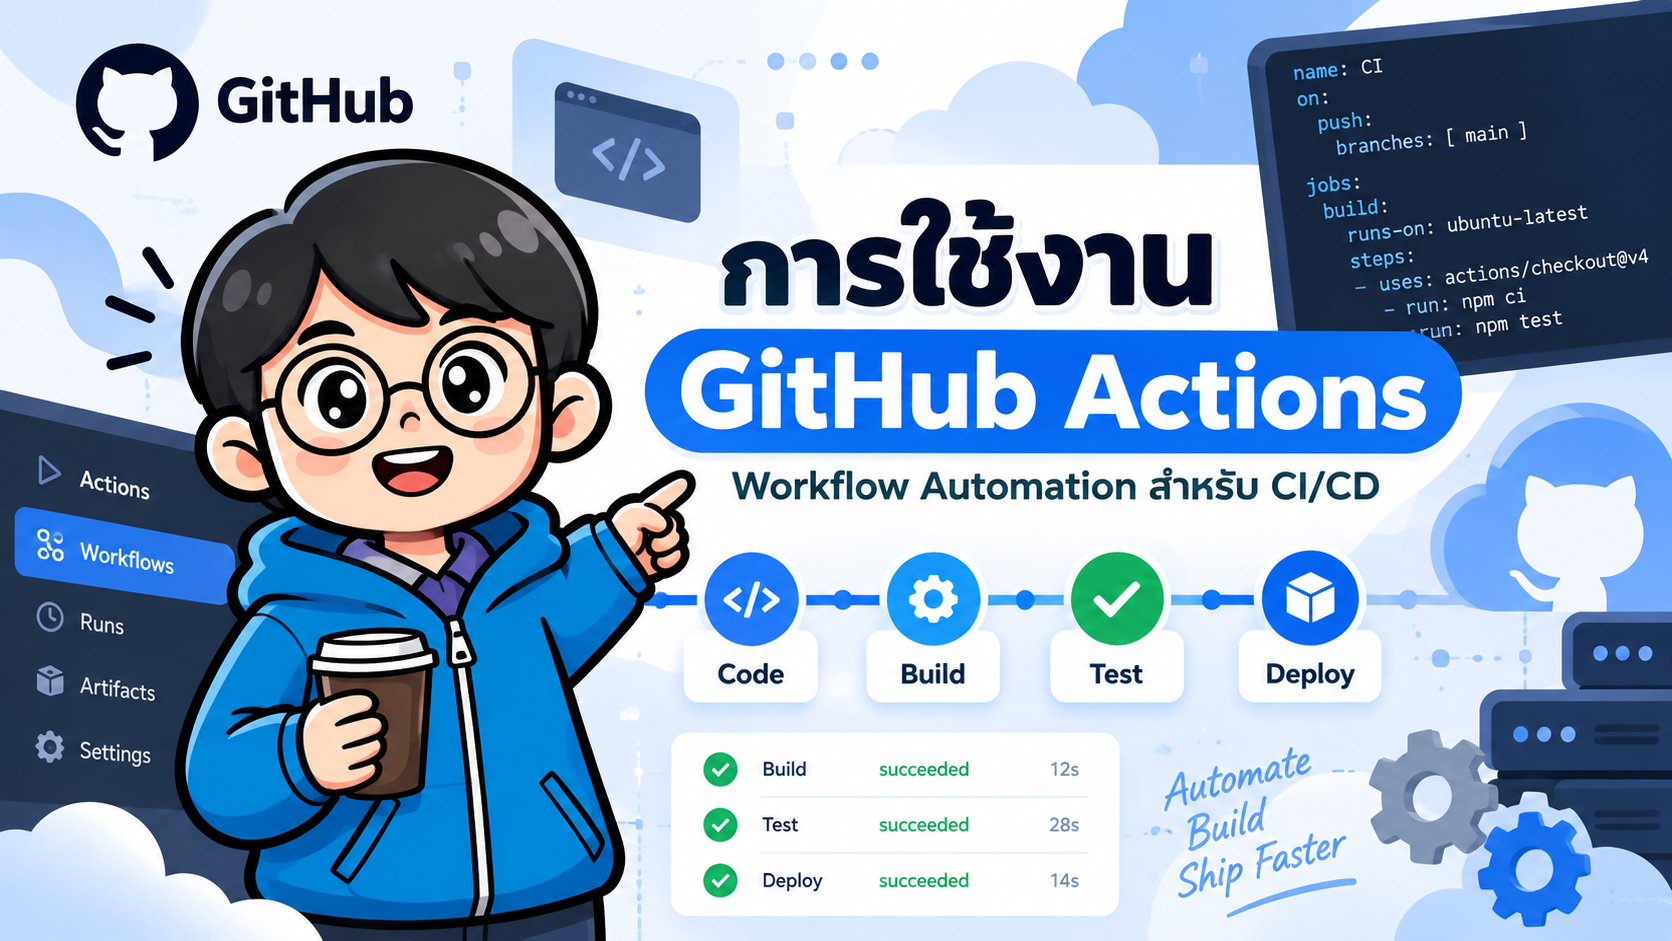
- การใช้งาน GitHub Actions สำหรับ CI/CD ตั้งแต่พื้นฐานจนถึงใช้งานจริง
- 3. ส่วนประกอบของ Workflow
- 4. Trigger ที่ใช้งานบ่อย
- 5. Job
- 6. Runner
- 7. Step
- 8. Workflow แรกสำหรับ Node.js
- 9. npm install กับ npm ci ต่างกันอย่างไร
- 10. Environment Variables
- 11. Secrets
- 12. GitHub Context
- 13. Condition
- 14. Dependency ระหว่าง Job
- 15. Matrix Strategy
- 16. Cache
- 17. Artifact
- 18. ตัวอย่าง CI พร้อม Test Report
- 19. Build Docker Image ด้วย GitHub Actions
- 20. Push Docker Image ไป GitHub Container Registry
- 21. Permission ของ GITHUB_TOKEN
- 22. Environment
- 23. Concurrency
- 24. Reusable Workflow
- 25. ตัวอย่าง CI/CD Pipeline ที่แนะนำ
- 26. แยก CI และ CD
- 27. แนวทาง Workflow สำหรับ Pull Request
- 28. ตัวอย่าง Workflow แบบครบ
- 29. Debug GitHub Actions
- 30. ข้อผิดพลาดที่พบบ่อย
- 31. Security Best Practices
- 32. GitHub-hosted Runner กับ Self-hosted Runner
- 33. GitHub Actions กับ OIDC
- 34. Workflow ที่ดีควรมีอะไรบ้าง
- 35. สรุป
- แหล่งอ้างอิง
#การใช้งาน GitHub Actions สำหรับ CI/CD ตั้งแต่พื้นฐานจนถึงใช้งานจริง
GitHub Actions คือระบบ Workflow Automation ที่ทำงานอยู่ภายใน GitHub Repository ช่วยให้เราสามารถทำงานซ้ำ ๆ ให้เป็นอัตโนมัติ เช่น
- Build โปรแกรม
- Run Unit Test / Integration Test
- ตรวจสอบคุณภาพโค้ด
- สร้าง Artifact
- Build Docker Image
- Push Docker Image ไปยัง Registry
- Deploy Application
- Run งานตามเวลา
- Trigger งานเมื่อมี Pull Request หรือ Release
ในงาน DevOps เรามักนำ GitHub Actions มาใช้เป็นส่วนหนึ่งของกระบวนการ CI/CD (Continuous Integration / Continuous Delivery)
#1. แนวคิดของ GitHub Actions
โครงสร้างการทำงานหลักสามารถมองได้ดังนี้
GitHub Event
     |
     v
Workflow
     |
     +------ Job: test
     |          |
     |          +-- Step: checkout
     |          +-- Step: install
     |          +-- Step: test
     |
     +------ Job: build
     |          |
     |          +-- Step: build
     |
     +------ Job: deploy
                |
                +-- Step: deploy
องค์ประกอบสำคัญมีดังนี้
| ส่วนประกอบ | หน้าที่ |
|---|---|
| Workflow | กระบวนการ Automation ทั้งชุด |
| Event | เหตุการณ์ที่ใช้ Trigger Workflow |
| Job | กลุ่มของงานที่ทำบน Runner |
| Step | ขั้นตอนย่อยภายใน Job |
| Action | Component สำเร็จรูปที่นำมาใช้ใน Step |
| Runner | เครื่องที่ใช้รัน Workflow |
| Artifact | ไฟล์ที่เกิดจาก Workflow เช่น build หรือ report |
| Secret | ข้อมูลสำคัญ เช่น Token หรือ Password |
#2. ตำแหน่งไฟล์ Workflow
GitHub Actions จะอ่านไฟล์ Workflow จาก directory
.github/workflows/
ตัวอย่างโครงสร้าง
my-project/
├── src/
├── tests/
├── package.json
└── .github/
    └── workflows/
        ├── ci.yml
        └── deploy.yml
ไฟล์ Workflow ใช้รูปแบบ YAML
ตัวอย่าง
name: CI

on:
  push:
    branches:
      - main

jobs:
  test:
    runs-on: ubuntu-latest

    steps:
      - name: Checkout source code
        uses: actions/checkout@v7

      - name: Run command
        run: echo "Hello GitHub Actions"
#3. ส่วนประกอบของ Workflow
#3.1 name
กำหนดชื่อ Workflow
name: Node.js CI
ชื่อจะปรากฏอยู่ในหน้า
Repository
  -> Actions
#3.2 on
กำหนดเหตุการณ์ที่ทำให้ Workflow เริ่มทำงาน
ตัวอย่าง
on:
  push:
    branches:
      - main
หมายถึงให้ Workflow ทำงานเมื่อมีการ push ไปยัง branch main
#4. Trigger ที่ใช้งานบ่อย
#Push
on:
  push:
หรือกำหนดเฉพาะ branch
on:
  push:
    branches:
      - main
      - develop
#Pull Request
on:
  pull_request:
    branches:
      - main
เหมาะสำหรับ
Developer
   |
   v
Pull Request
   |
   v
GitHub Actions
   |
   +-- Lint
   +-- Test
   +-- Build
ถ้า Test ไม่ผ่าน สามารถกำหนด Branch Protection ไม่ให้ Merge ได้
#Manual Trigger
ใช้ workflow_dispatch
on:
  workflow_dispatch:
จากนั้นสามารถกด
GitHub
-> Actions
-> Workflow
-> Run workflow
ได้ด้วยตนเอง
#Schedule
ใช้ syntax แบบ cron
on:
  schedule:
    - cron: "0 0 * * *"
ตัวอย่างนี้ทำงานทุกวันเวลา 00:00 UTC
ควรตรวจสอบ timezone ให้ดี เพราะ
scheduleของ GitHub Actions ใช้ UTC
#5. Job
Workflow สามารถมีหลาย Job
jobs:

  test:
    runs-on: ubuntu-latest

  build:
    runs-on: ubuntu-latest
โดยปกติ Job ที่ไม่มี dependency ต่อกันสามารถทำงานแบบขนานได้
#6. Runner
Runner คือเครื่องที่ใช้ Execute Job
ตัวอย่าง
runs-on: ubuntu-latest
Runner ที่พบบ่อย
ubuntu-latest
windows-latest
macos-latest
ตัวอย่าง
jobs:
  test:
    runs-on: ubuntu-latest
#7. Step
ภายใน Job ประกอบด้วยหลาย Step
steps:

  - name: Checkout source code
    uses: actions/checkout@v7

  - name: Install dependencies
    run: npm ci

  - name: Run test
    run: npm test
Step มีสองรูปแบบหลัก
#ใช้ Action
uses:
ตัวอย่าง
uses: actions/checkout@v7
#รันคำสั่ง
run:
ตัวอย่าง
run: npm test
#8. Workflow แรกสำหรับ Node.js
สร้างไฟล์
.github/workflows/ci.yml
name: Node.js CI

on:
  push:
    branches:
      - main

  pull_request:
    branches:
      - main

jobs:
  test:

    runs-on: ubuntu-latest

    steps:

      - name: Checkout
        uses: actions/checkout@v7

      - name: Setup Node.js
        uses: actions/setup-node@v7
        with:
          node-version: 24
          cache: npm

      - name: Install dependencies
        run: npm ci

      - name: Run lint
        run: npm run lint

      - name: Run tests
        run: npm test

      - name: Build
        run: npm run build
Flow
push / pull request
        |
        v
checkout
        |
        v
setup Node.js
        |
        v
npm ci
        |
        v
lint
        |
        v
test
        |
        v
build
#9. npm install กับ npm ci ต่างกันอย่างไร
ใน CI/CD แนะนำให้ใช้
npm ci
แทน
npm install
เพราะ npm ci
- ใช้
package-lock.json - ติดตั้ง dependency ตาม lock file
- ให้ผลที่ reproducible มากกว่า
- เหมาะสำหรับ CI
ดังนั้นควร commit
package-lock.json
ไว้ใน Git Repository ด้วย
#10. Environment Variables
สามารถกำหนดตัวแปรระดับ Workflow
env:
  NODE_ENV: test
ตัวอย่าง
name: CI

on:
  push:

env:
  NODE_ENV: test

jobs:

  test:
    runs-on: ubuntu-latest

    steps:

      - run: echo $NODE_ENV
หรือกำหนดเฉพาะ Job
jobs:

  test:

    env:
      APP_ENV: testing
หรือเฉพาะ Step
- name: Run application
  env:
    PORT: 3000
  run: npm start
#11. Secrets
ข้อมูลสำคัญไม่ควรเขียนตรง ๆ ใน Workflow เช่น
API_TOKEN
DATABASE_PASSWORD
SSH_PRIVATE_KEY
CLOUD_SECRET
ให้สร้างที่
Repository
-> Settings
-> Secrets and variables
-> Actions
ตัวอย่าง Secret
API_TOKEN
เรียกใช้ด้วย
${{ secrets.API_TOKEN }}
ตัวอย่าง
- name: Call API
  env:
    API_TOKEN: ${{ secrets.API_TOKEN }}
  run: |
    curl \
      -H "Authorization: Bearer $API_TOKEN" \
      https://example.com/api
ห้าม
echoค่า Secret ลง Log โดยไม่จำเป็น
#12. GitHub Context
GitHub Actions มี Context สำหรับเข้าถึงข้อมูลของ Workflow
ตัวอย่าง
${{ github.repository }}
${{ github.ref }}
${{ github.sha }}
${{ github.actor }}
${{ github.event_name }}
ตัวอย่าง
- name: Show information
  run: |
    echo "Repository: ${{ github.repository }}"
    echo "Branch: ${{ github.ref }}"
    echo "Commit: ${{ github.sha }}"
    echo "User: ${{ github.actor }}"
#13. Condition
ใช้ if เพื่อกำหนดเงื่อนไข
- name: Deploy
  if: github.ref == 'refs/heads/main'
  run: echo "Deploy production"
ตัวอย่าง Flow
develop branch
     |
     +-- test
     +-- build
     X-- deploy production

main branch
     |
     +-- test
     +-- build
     +-- deploy production
#14. Dependency ระหว่าง Job
สมมติว่าต้องการ
test
 |
 v
build
 |
 v
deploy
ใช้ needs
jobs:

  test:
    runs-on: ubuntu-latest

    steps:
      - run: echo "testing"

  build:
    needs: test
    runs-on: ubuntu-latest

    steps:
      - run: echo "building"

  deploy:
    needs: build
    runs-on: ubuntu-latest

    steps:
      - run: echo "deploying"
ถ้า test ไม่ผ่าน build และ deploy จะไม่ทำงานตาม dependency chain นี้
#15. Matrix Strategy
Matrix ช่วยให้ทดสอบหลาย Version พร้อมกัน
ตัวอย่าง
name: Matrix Test

on:
  pull_request:

jobs:

  test:

    strategy:
      matrix:
        node-version:
          - 20
          - 22
          - 24

    runs-on: ubuntu-latest

    steps:

      - uses: actions/checkout@v7

      - uses: actions/setup-node@v7
        with:
          node-version: ${{ matrix.node-version }}

      - run: npm ci

      - run: npm test
GitHub จะสร้าง Job
Node 20
Node 22
Node 24
และสามารถรันแบบขนานได้
#16. Cache
การติดตั้ง Dependency ทุกครั้งอาจใช้เวลานาน
สามารถใช้ cache ของ setup-node
- name: Setup Node.js
  uses: actions/setup-node@v7
  with:
    node-version: 24
    cache: npm
Cache เหมาะสำหรับข้อมูลที่สามารถสร้างใหม่ได้ เช่น
npm cache
Maven dependencies
Gradle dependencies
pip cache
ไม่ควรเก็บ Secret หรือข้อมูลสำคัญไว้ใน Cache
#17. Artifact
Artifact คือไฟล์ที่ Workflow สร้างขึ้นและต้องการเก็บไว้หลัง Job จบ เช่น
dist/
coverage/
test-report/
logs/
binary
ตัวอย่าง
- name: Upload build
  uses: actions/upload-artifact@v7
  with:
    name: web-build
    path: dist/
จากนั้นสามารถดาวน์โหลดได้จากหน้า Workflow Run
#18. ตัวอย่าง CI พร้อม Test Report
name: CI

on:
  push:
  pull_request:

jobs:

  test:

    runs-on: ubuntu-latest

    steps:

      - name: Checkout
        uses: actions/checkout@v7

      - name: Setup Node
        uses: actions/setup-node@v7
        with:
          node-version: 24
          cache: npm

      - name: Install
        run: npm ci

      - name: Test
        run: npm run test -- --coverage

      - name: Upload coverage report
        if: always()
        uses: actions/upload-artifact@v7
        with:
          name: coverage-report
          path: coverage/
if: always() ทำให้ขั้นตอน Upload Report ยังทำงานแม้ Step ก่อนหน้าจะ Fail
#19. Build Docker Image ด้วย GitHub Actions
ตัวอย่าง
name: Docker Build

on:
  push:
    branches:
      - main

jobs:

  docker:

    runs-on: ubuntu-latest

    steps:

      - name: Checkout
        uses: actions/checkout@v7

      - name: Build Docker image
        run: |
          docker build \
            -t myapp:${{ github.sha }} \
            .
#20. Push Docker Image ไป GitHub Container Registry
GitHub Container Registry ใช้ชื่อ
ghcr.io
ตัวอย่าง Workflow
name: Build and Push Docker Image

on:
  push:
    branches:
      - main

permissions:
  contents: read
  packages: write

jobs:

  docker:

    runs-on: ubuntu-latest

    steps:

      - name: Checkout
        uses: actions/checkout@v7

      - name: Login to GHCR
        run: |
          echo "${{ secrets.GITHUB_TOKEN }}" \
          | docker login ghcr.io \
            -u "${{ github.actor }}" \
            --password-stdin

      - name: Build image
        run: |
          docker build \
            -t ghcr.io/${{ github.repository }}:${{ github.sha }} \
            .

      - name: Push image
        run: |
          docker push \
            ghcr.io/${{ github.repository }}:${{ github.sha }}
Pipeline
GitHub Repository
       |
       v
GitHub Actions
       |
       v
docker build
       |
       v
GitHub Container Registry
       |
       v
ghcr.io
#21. Permission ของ GITHUB_TOKEN
ควรกำหนด Permission เท่าที่ Workflow จำเป็นต้องใช้
ตัวอย่าง Workflow ที่อ่าน Source Code อย่างเดียว
permissions:
  contents: read
Workflow ที่ Push Container Image
permissions:
  contents: read
  packages: write
แนวคิดคือ
Least Privilege
หรือให้สิทธิ์น้อยที่สุดเท่าที่จำเป็น
#22. Environment
สามารถแยก Environment เช่น
development
staging
production
ตัวอย่าง
jobs:

  deploy:

    environment: production

    runs-on: ubuntu-latest
Environment สามารถใช้ร่วมกับ
- Environment Secrets
- Deployment Protection Rules
- Required Reviewers
จึงเหมาะกับ Production Deployment
#23. Concurrency
บางครั้งไม่ต้องการให้ Deployment หลายตัวทำงานพร้อมกัน
concurrency:
  group: production
  cancel-in-progress: true
ตัวอย่าง
name: Deploy

on:
  push:
    branches:
      - main

concurrency:
  group: production
  cancel-in-progress: true

jobs:

  deploy:
    runs-on: ubuntu-latest

    steps:
      - run: echo "deploy"
ถ้ามี Commit ใหม่เข้ามาขณะ Deployment เก่ายังทำงาน สามารถยกเลิก Run เก่าได้
#24. Reusable Workflow
หากหลาย Repository ใช้ Workflow เหมือนกัน สามารถสร้าง Workflow ที่เรียกซ้ำได้
ตัวอย่าง
on:
  workflow_call:
จากนั้น Repository อื่นสามารถเรียกใช้ได้
jobs:

  ci:
    uses: my-org/workflows/.github/workflows/node-ci.yml@main
ช่วยลดการ Copy/Paste Workflow
#25. ตัวอย่าง CI/CD Pipeline ที่แนะนำ
Developer
    |
    v
git push
    |
    v
GitHub Repository
    |
    v
GitHub Actions
    |
    +---------------------+
    |                     |
    v                     v
  Lint                  Test
    |                     |
    +----------+----------+
               |
               v
             Build
               |
               v
        Build Docker Image
               |
               v
        Push Image Registry
               |
               v
           Deploy
               |
               v
         Production
#26. แยก CI และ CD
โครงสร้างที่ดูแลง่ายคือ
.github/
└── workflows/
    ├── ci.yml
    └── deploy.yml
#ci.yml
ใช้สำหรับ
lint
test
build
security scan
Trigger
on:
  pull_request:
  push:
#deploy.yml
ใช้สำหรับ
Docker Build
Push Registry
Deploy
Trigger เฉพาะ
on:
  push:
    branches:
      - main
#27. แนวทาง Workflow สำหรับ Pull Request
Pull Request
     |
     v
Lint
     |
     v
Unit Test
     |
     v
Integration Test
     |
     v
Build
     |
     v
Code Review
     |
     v
Merge
ควรใช้ร่วมกับ Branch Protection เพื่อกำหนดว่า Workflow ต้องผ่านก่อน Merge
#28. ตัวอย่าง Workflow แบบครบ
name: Application CI

on:

  push:
    branches:
      - main

  pull_request:
    branches:
      - main

permissions:
  contents: read

jobs:

  test:

    runs-on: ubuntu-latest

    strategy:
      matrix:
        node-version:
          - 22
          - 24

    steps:

      - name: Checkout
        uses: actions/checkout@v7

      - name: Setup Node
        uses: actions/setup-node@v7
        with:
          node-version: ${{ matrix.node-version }}
          cache: npm

      - name: Install dependencies
        run: npm ci

      - name: Lint
        run: npm run lint

      - name: Test
        run: npm test

      - name: Build
        run: npm run build

      - name: Upload build artifact
        if: matrix.node-version == 24
        uses: actions/upload-artifact@v7
        with:
          name: application-build
          path: dist/
#29. Debug GitHub Actions
ถ้า Workflow มีปัญหา ให้เปิด
Repository
-> Actions
-> Workflow Run
-> Job
-> Step
แล้วดู Log ของแต่ละ Step
สามารถเพิ่มคำสั่ง Debug
- name: Debug
  run: |
    pwd
    ls -la
    node --version
    npm --version
#30. ข้อผิดพลาดที่พบบ่อย
#Workflow ไม่ทำงาน
ตรวจสอบ
.github/workflows/
และตรวจสอบ on
on:
  push:
    branches:
      - main
#npm ci ใช้ไม่ได้
มักเกิดจากไม่มี
package-lock.json
แก้โดย
npm install
git add package-lock.json
git commit
#Secret เป็นค่าว่าง
ตรวจสอบชื่อ
${{ secrets.API_TOKEN }}
ว่าตรงกับ Secret ที่สร้างใน Repository หรือ Environment
#Permission denied
ตรวจสอบ
permissions:
ตัวอย่าง Push Package
permissions:
  contents: read
  packages: write
#Workflow ผ่านใน Local แต่ Fail บน GitHub
ตรวจสอบความแตกต่าง เช่น
OS
Environment Variables
Node Version
Database
File Path
Permission
Timezone
Case-sensitive filename
#31. Security Best Practices
GitHub Actions เป็นส่วนหนึ่งของ Supply Chain จึงควรให้ความสำคัญกับ Security
แนวทางสำคัญ
- อย่าเขียน Password หรือ Token ลง Workflow
- ใช้ GitHub Secrets
- จำกัด
GITHUB_TOKENด้วยpermissions - ระวัง Workflow ที่รันโค้ดจาก Pull Request ที่ไม่น่าเชื่อถือ
- อย่านำ Secret ไปเก็บใน Cache
- ตรวจสอบ Action จาก Third Party ก่อนใช้
- ใช้ Dependabot ช่วยติดตาม Version ของ Actions
- สำหรับงาน Security สูง ควรพิจารณา Pin Action ไปยัง full commit SHA
- ใช้ Environment Protection สำหรับ Production
- หลีกเลี่ยงการแสดงข้อมูลสำคัญลง Workflow Log
#32. GitHub-hosted Runner กับ Self-hosted Runner
#GitHub-hosted Runner
GitHub จัดเตรียมเครื่องให้
runs-on: ubuntu-latest
ข้อดี
- Setup ง่าย
- GitHub ดูแล Runner
- เหมาะกับ Project ทั่วไป
#Self-hosted Runner
ติดตั้ง Runner บน Server ของเราเอง
เหมาะกับกรณี
Private Network
On-premise
GPU
Special Hardware
Internal Service
Custom Software
แต่ต้องดูแล
Security
Patch
Runner Version
Disk
Network
Secrets
ด้วยตนเอง
#33. GitHub Actions กับ OIDC
Cloud Provider หลายรายรองรับ OpenID Connect (OIDC)
แนวคิดคือ
GitHub Actions
      |
      v
OIDC Token
      |
      v
Cloud Identity Provider
      |
      v
Temporary Credentials
ช่วยลดการเก็บ Long-lived Cloud Access Key เป็น GitHub Secret
เหมาะกับ
- AWS
- Azure
- Google Cloud
สำหรับ Production Pipeline ควรพิจารณา OIDC แทนการเก็บ Access Key ระยะยาวเมื่อ Cloud Provider รองรับ
#34. Workflow ที่ดีควรมีอะไรบ้าง
Workflow สำหรับ Production Project ควรพิจารณา
Checkout
   |
Setup Runtime
   |
Install Dependencies
   |
Lint
   |
Unit Test
   |
Integration Test
   |
Security Scan
   |
Build
   |
Artifact
   |
Docker Build
   |
Registry
   |
Deploy
   |
Smoke Test
#35. สรุป
GitHub Actions ช่วยเปลี่ยนกระบวนการพัฒนา Software จากงาน Manual ให้กลายเป็น Automation
แนวทางพื้นฐานคือ
Event
  |
  v
Workflow
  |
  v
Job
  |
  v
Step
  |
  v
Action / Command
เมื่อใช้งานร่วมกับ CI/CD จะได้ Pipeline เช่น
Code
 |
 v
GitHub
 |
 v
GitHub Actions
 |
 +-- Lint
 |
 +-- Test
 |
 +-- Build
 |
 +-- Docker
 |
 +-- Deploy
 |
 v
Production
สำหรับผู้เริ่มต้น แนะนำให้เริ่มจาก Workflow ง่าย ๆ
Checkout
   |
Install
   |
Test
   |
Build
จากนั้นค่อยเพิ่ม
Artifact
Docker
Registry
Environment
Secrets
Deployment
Security
จนกลายเป็น CI/CD Pipeline ที่สมบูรณ์
#ตัวอย่างโครงสร้างที่แนะนำ
.github/
└── workflows/
    ├── ci.yml
    ├── deploy-staging.yml
    └── deploy-production.yml
แยกความรับผิดชอบของ Workflow ให้ชัดเจน จะช่วยให้ดูแลระบบได้ง่ายและลดความเสี่ยงในการ Deploy
#แหล่งอ้างอิง
-
GitHub Actions Documentation
https://docs.github.com/actions -
Understanding GitHub Actions
https://docs.github.com/actions/get-started/understand-github-actions -
Workflow Syntax
https://docs.github.com/actions/reference/workflows-and-actions/workflow-syntax -
Secrets
https://docs.github.com/actions/concepts/security/secrets -
Dependency Caching
https://docs.github.com/actions/concepts/workflows-and-actions/dependency-caching -
actions/checkout
https://github.com/actions/checkout -
actions/setup-node
https://github.com/actions/setup-node -
actions/upload-artifact
https://github.com/actions/upload-artifact