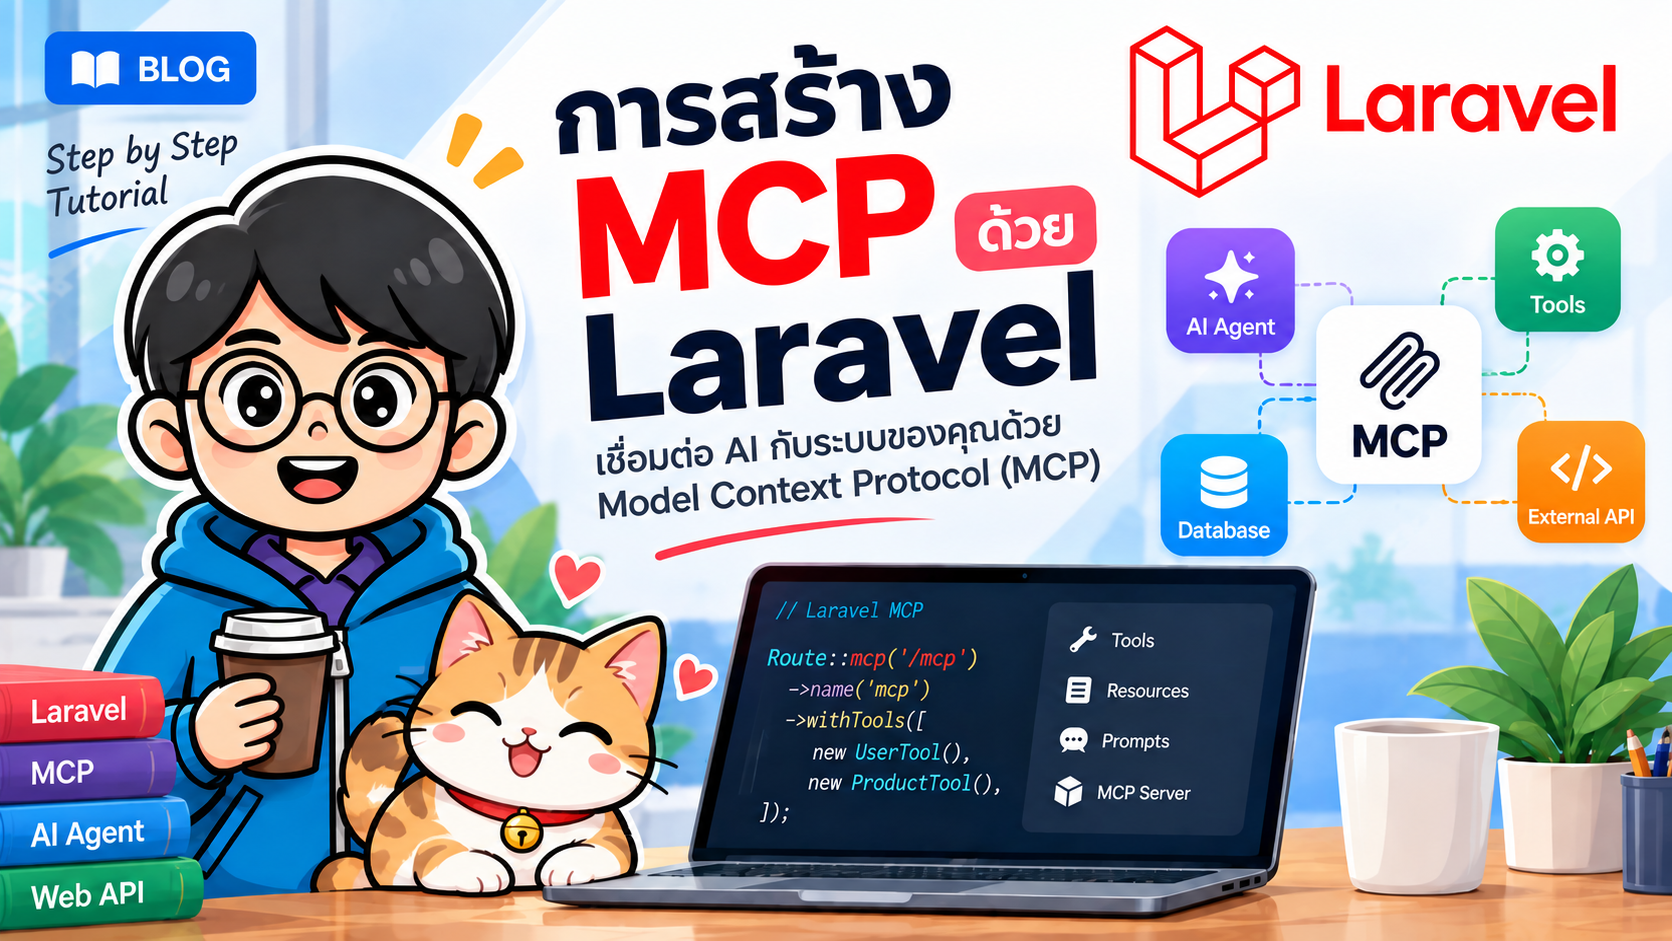
- การสร้าง MCP Server ด้วย Laravel 13: เชื่อม AI Agent เข้ากับระบบด้วย Laravel MCP
- 1. MCP คืออะไร
- 2. องค์ประกอบสำคัญของ MCP
- 3. Architecture ที่จะสร้าง
- 4. เตรียม Laravel Project
- 5. ติดตั้ง Laravel MCP
- 6. สร้าง Product Model สำหรับทดลอง
- 7. สร้าง MCP Server
- 8. สร้าง MCP Tool
- 9. Structured Response
- 10. สร้าง MCP Resource
- 11. สร้าง MCP Prompt
- 12. Register MCP Server
- 13. แบบที่ 1: Web MCP Server
- 14. แบบที่ 2: Local MCP Server
- 15. Web MCP กับ Local MCP ต่างกันอย่างไร
- 16. ทดสอบด้วย MCP Inspector
- 17. ทดลอง Tool
- 18. เพิ่ม Authentication ด้วย Sanctum
- 19. OAuth 2.1 และ Laravel Passport
- 20. Authorization ภายใน Tool
- 21. Tool ที่แก้ไขข้อมูลควรออกแบบอย่างระมัดระวัง
- 22. อย่าเปิด Eloquent Model ทั้งหมดให้ AI โดยตรง
- 23. ใช้ Service Layer แทน Business Logic ใน Tool
- 24. Laravel Dependency Injection ใช้กับ MCP ได้
- 25. ตัวอย่าง Unit Test สำหรับ MCP Tool
- 26. MCP ไม่เท่ากับ REST API
- 27. MCP เหมาะกับระบบ Laravel แบบใด
- 28. Security Checklist
- 29. Production Architecture ที่แนะนำ
- 30. ขั้นตอนการพัฒนาโดยสรุป
- 31. คำสั่งสำคัญที่ควรจำ
- 32. แนวคิดต่อยอด
- 33. สรุป
- References
- 34. หมายเหตุสำหรับ Laravel MCP 1.x
#การสร้าง MCP Server ด้วย Laravel 13: เชื่อม AI Agent เข้ากับระบบด้วย Laravel MCP
อัปเดต: 22 กันยายน 2026
บทความนี้อ้างอิง Laravel MCP รุ่นปัจจุบันในสาย 1.x และเอกสาร Laravel 13.x โดยเน้น Server, Tools, Resources, Prompts, Authentication และการทดสอบด้วย MCP Inspector
Model Context Protocol หรือ MCP เป็นมาตรฐานที่ช่วยให้ AI Client หรือ AI Agent สามารถเชื่อมต่อกับข้อมูลและความสามารถของระบบภายนอกได้ในรูปแบบที่เป็นมาตรฐาน เช่น การอ่านข้อมูลจากฐานข้อมูล การค้นหาสินค้า การตรวจสอบสถานะคำสั่งซื้อ หรือการเรียกใช้ Business Logic ภายในระบบ Laravel
สำหรับ Laravel ปัจจุบันสามารถใช้แพ็กเกจทางการ laravel/mcp เพื่อสร้าง MCP Server ได้โดยตรง โดยไม่จำเป็นต้องสร้าง JSON-RPC หรือ Transport Layer เองทั้งหมด
บทความนี้สาธิตการสร้าง MCP Server สำหรับระบบ Inventory โดยให้ AI สามารถ:
- ค้นหาสินค้าจากฐานข้อมูล
- อ่านข้อมูลประกอบเกี่ยวกับระบบ
- เรียก Prompt Template สำหรับวิเคราะห์สินค้า
- เชื่อมต่อผ่าน Web MCP หรือ Local MCP
- ทดสอบด้วย MCP Inspector
- ป้องกัน MCP Endpoint ด้วย Laravel Sanctum
#1. MCP คืออะไร
MCP ย่อมาจาก Model Context Protocol เป็นโปรโตคอลสำหรับเชื่อมต่อ AI Application กับข้อมูลหรือเครื่องมือภายนอก
แนวคิดสามารถมองได้ดังนี้
AI Client
   |
   | MCP
   v
Laravel MCP Server
   |
   +---- Tools
   |
   +---- Resources
   |
   +---- Prompts
   |
   +---- Laravel Services / Eloquent / Database / APIs
ตัวอย่าง AI Client ที่อาจเชื่อมต่อ MCP Server ได้แก่
- AI Coding Agent
- Desktop AI Client
- IDE Agent
- Custom AI Application
- Laravel Application ที่ทำหน้าที่เป็น MCP Client
MCP ทำให้ AI ไม่จำเป็นต้องทราบรายละเอียดภายในของระบบทั้งหมด แต่สามารถค้นพบความสามารถที่ Server เปิดให้ใช้งานได้อย่างเป็นระบบ
#2. องค์ประกอบสำคัญของ MCP
Laravel MCP แบ่งความสามารถหลักออกเป็นหลายประเภท โดย 3 ส่วนที่ควรรู้ก่อนคือ
#2.1 Tools
Tool คือฟังก์ชันที่ AI สามารถเรียกใช้งานได้
ตัวอย่าง:
search-products
get-order
create-ticket
check-inventory
calculate-shipping
Tool เหมาะกับงานที่ต้องมีการประมวลผลหรือมีการกระทำบางอย่าง
#2.2 Resources
Resource คือข้อมูลที่ AI สามารถอ่านเพื่อนำไปใช้เป็น Context
ตัวอย่าง:
inventory://resources/policy
inventory://resources/schema
docs://api-guideline
customer://profile/1001
Resource เหมาะกับข้อมูลประเภท:
- เอกสาร
- Configuration
- Schema
- Policy
- Reference Data
- Context จากระบบ
#2.3 Prompts
Prompt คือ Prompt Template ที่ MCP Server เตรียมไว้ให้ Client ใช้งาน
ตัวอย่าง:
analyze-low-stock
summarize-order
review-customer
ข้อดีคือสามารถกำหนดรูปแบบ Prompt ที่เป็นมาตรฐานสำหรับองค์กรหรือระบบได้
#3. Architecture ที่จะสร้าง
ในตัวอย่างนี้จะสร้างระบบดังนี้
flowchart LR
    A[AI Client] -->|MCP| B[Laravel MCP Server]

    B --> C[Tool: SearchProductsTool]
    B --> D[Resource: InventoryGuideResource]
    B --> E[Prompt: AnalyzeInventoryPrompt]

    C --> F[Eloquent Product Model]
    F --> G[(Database)]

    D --> H[Business Documentation]
    E --> I[Reusable Prompt Template]
โครงสร้างไฟล์โดยประมาณ:
app/
└── Mcp/
    ├── Servers/
    │   └── InventoryServer.php
    ├── Tools/
    │   └── SearchProductsTool.php
    ├── Resources/
    │   └── InventoryGuideResource.php
    └── Prompts/
        └── AnalyzeInventoryPrompt.php

routes/
└── ai.php
#4. เตรียม Laravel Project
หากยังไม่มี Laravel Project สามารถสร้างใหม่ได้ด้วย Composer
composer create-project laravel/laravel laravel-mcp-demo
cd laravel-mcp-demo
ตรวจสอบว่า Laravel ทำงานได้
php artisan serve
จากนั้นเปิด
http://127.0.0.1:8000
#5. ติดตั้ง Laravel MCP
ติดตั้งแพ็กเกจทางการด้วย Composer
composer require laravel/mcp
จากนั้น Publish Route สำหรับ AI
php artisan vendor:publish --tag=ai-routes
Laravel จะสร้างไฟล์
routes/ai.php
ไฟล์นี้ใช้สำหรับ Register MCP Server
#6. สร้าง Product Model สำหรับทดลอง
สร้าง Model และ Migration
php artisan make:model Product -m
แก้ไข Migration ตัวอย่าง
Schema::create('products', function (Blueprint $table) {
    $table->id();
    $table->string('name');
    $table->string('sku')->unique();
    $table->decimal('price', 10, 2);
    $table->unsignedInteger('stock')->default(0);
    $table->timestamps();
});
รัน Migration
php artisan migrate
แก้ไข app/Models/Product.php
<?php

namespace App\Models;

use Illuminate\Database\Eloquent\Model;

class Product extends Model
{
    protected $fillable = [
        'name',
        'sku',
        'price',
        'stock',
    ];
}
สามารถเพิ่มข้อมูลทดสอบผ่าน Tinker
php artisan tinker
use App\Models\Product;

Product::create([
    'name' => 'Mechanical Keyboard',
    'sku' => 'KB-001',
    'price' => 2490,
    'stock' => 12,
]);

Product::create([
    'name' => 'Wireless Mouse',
    'sku' => 'MS-001',
    'price' => 990,
    'stock' => 4,
]);
#7. สร้าง MCP Server
ใช้ Artisan Command
php artisan make:mcp-server InventoryServer
Laravel จะสร้างไฟล์ประมาณนี้
app/Mcp/Servers/InventoryServer.php
แก้ไขเป็น
<?php

namespace App\Mcp\Servers;

use App\Mcp\Prompts\AnalyzeInventoryPrompt;
use App\Mcp\Resources\InventoryGuideResource;
use App\Mcp\Tools\SearchProductsTool;
use Laravel\Mcp\Server;
use Laravel\Mcp\Server\Attributes\Instructions;
use Laravel\Mcp\Server\Attributes\Name;
use Laravel\Mcp\Server\Attributes\Version;

#[Name('Inventory Server')]
#[Version('1.0.0')]
#[Instructions('Provides product inventory information for AI clients.')]
class InventoryServer extends Server
{
    protected array $tools = [
        SearchProductsTool::class,
    ];

    protected array $resources = [
        InventoryGuideResource::class,
    ];

    protected array $prompts = [
        AnalyzeInventoryPrompt::class,
    ];
}
MCP Server ทำหน้าที่เป็นศูนย์กลางสำหรับประกาศว่า Server นี้มี Tool, Resource และ Prompt อะไรให้ AI ใช้งานได้บ้าง
#8. สร้าง MCP Tool
สร้าง Tool
php artisan make:mcp-tool SearchProductsTool
แก้ไขไฟล์
app/Mcp/Tools/SearchProductsTool.php
ตัวอย่าง:
<?php

namespace App\Mcp\Tools;

use App\Models\Product;
use Illuminate\Contracts\JsonSchema\JsonSchema;
use Laravel\Mcp\Request;
use Laravel\Mcp\Response;
use Laravel\Mcp\Server\Attributes\Description;
use Laravel\Mcp\Server\Tool;
use Laravel\Mcp\Server\Tools\Annotations\IsReadOnly;

#[Description('Search products by product name or SKU.')]
#[IsReadOnly]
class SearchProductsTool extends Tool
{
    public function handle(Request $request): Response
    {
        $validated = $request->validate([
            'keyword' => ['required', 'string', 'max:100'],
            'limit' => ['nullable', 'integer', 'min:1', 'max:20'],
        ]);

        $keyword = $validated['keyword'];
        $limit = $validated['limit'] ?? 10;

        $products = Product::query()
            ->where(function ($query) use ($keyword) {
                $query
                    ->where('name', 'like', "%{$keyword}%")
                    ->orWhere('sku', 'like', "%{$keyword}%");
            })
            ->limit($limit)
            ->get([
                'id',
                'name',
                'sku',
                'price',
                'stock',
            ]);

        return Response::structured([
            'count' => $products->count(),
            'products' => $products->map(fn ($product) => [
                'id' => $product->id,
                'name' => $product->name,
                'sku' => $product->sku,
                'price' => (float) $product->price,
                'stock' => $product->stock,
            ])->values()->all(),
        ]);
    }

    public function schema(JsonSchema $schema): array
    {
        return [
            'keyword' => $schema->string()
                ->description('Product name or SKU to search for.')
                ->required(),

            'limit' => $schema->integer()
                ->description('Maximum number of products to return.')
                ->default(10),
        ];
    }
}
จุดสำคัญของ Tool มี 3 ส่วน
#Description
#[Description('Search products by product name or SKU.')]
คำอธิบาย Tool มีความสำคัญ เพราะ AI ใช้ Metadata นี้เพื่อพิจารณาว่าควรเรียก Tool เมื่อใด
#Input Schema
public function schema(JsonSchema $schema): array
ใช้กำหนด Parameter ที่ Tool รองรับ
#Handle
public function handle(Request $request): Response
เป็น Business Logic ที่ทำงานจริง
#9. Structured Response
Laravel MCP สามารถส่งผลลัพธ์แบบ Structured Data ได้
return Response::structured([
    'count' => 2,
    'products' => [
        [
            'id' => 1,
            'name' => 'Mechanical Keyboard',
        ],
    ],
]);
Structured Response เหมาะกับ Agent มากกว่า Plain Text ในกรณีที่ Client ต้องนำข้อมูลไปประมวลผลต่อ
ตัวอย่างผลลัพธ์เชิงแนวคิด:
{
  "count": 2,
  "products": [
    {
      "id": 1,
      "name": "Mechanical Keyboard",
      "sku": "KB-001",
      "price": 2490,
      "stock": 12
    }
  ]
}
#10. สร้าง MCP Resource
สร้าง Resource
php artisan make:mcp-resource InventoryGuideResource
แก้ไขไฟล์
app/Mcp/Resources/InventoryGuideResource.php
ตัวอย่าง:
<?php

namespace App\Mcp\Resources;

use Laravel\Mcp\Request;
use Laravel\Mcp\Response;
use Laravel\Mcp\Server\Attributes\Description;
use Laravel\Mcp\Server\Attributes\MimeType;
use Laravel\Mcp\Server\Attributes\Uri;
use Laravel\Mcp\Server\Resource;

#[Description('Business rules and guidance for the inventory system.')]
#[Uri('inventory://resources/guide')]
#[MimeType('text/markdown')]
class InventoryGuideResource extends Resource
{
    public function handle(Request $request): Response
    {
        return Response::text(<<<'MARKDOWN'
# Inventory Guide

- stock = 0 หมายถึงสินค้าหมด
- stock <= 5 ถือว่าเป็นสินค้าที่ควรเฝ้าระวัง
- ห้ามให้ AI แก้ไข stock โดยตรงผ่าน Tool ที่เป็น read-only
- การเปลี่ยนแปลง stock ต้องผ่าน Business Service ของระบบ
MARKDOWN);
    }
}
Resource เหมาะกับการส่งข้อมูลที่ AI ควรอ่านเป็น Context ก่อนตัดสินใจ
#11. สร้าง MCP Prompt
สร้าง Prompt
php artisan make:mcp-prompt AnalyzeInventoryPrompt
แก้ไขไฟล์
app/Mcp/Prompts/AnalyzeInventoryPrompt.php
ตัวอย่าง:
<?php

namespace App\Mcp\Prompts;

use Laravel\Mcp\Request;
use Laravel\Mcp\Response;
use Laravel\Mcp\Server\Attributes\Description;
use Laravel\Mcp\Server\Prompt;
use Laravel\Mcp\Server\Prompts\Argument;

#[Description('Creates a reusable prompt for analyzing inventory conditions.')]
class AnalyzeInventoryPrompt extends Prompt
{
    public function arguments(): array
    {
        return [
            new Argument(
                name: 'objective',
                description: 'Inventory analysis objective.',
                required: true,
            ),
        ];
    }

    public function handle(Request $request): Response
    {
        $validated = $request->validate([
            'objective' => ['required', 'string', 'max:500'],
        ]);

        return Response::text(
            "Analyze the inventory system with the following objective: "
            .$validated['objective'].
            ". Use available inventory tools and resources before making conclusions."
        );
    }
}
Prompt ช่วยให้ทีมพัฒนาสามารถควบคุมรูปแบบคำสั่งที่ใช้กับ AI ได้ดีขึ้น
#12. Register MCP Server
เปิดไฟล์
routes/ai.php
Laravel MCP รองรับทั้ง Web Server และ Local Server
#13. แบบที่ 1: Web MCP Server
เพิ่ม
<?php

use App\Mcp\Servers\InventoryServer;
use Laravel\Mcp\Facades\Mcp;

Mcp::web('/mcp/inventory', InventoryServer::class);
จากนั้น MCP Server จะถูกเปิดผ่าน HTTP
แนวคิด Endpoint:
https://example.com/mcp/inventory
Web MCP เหมาะกับ
- Remote Agent
- Cloud AI Client
- SaaS Integration
- AI Application ที่อยู่นอกเครื่อง Laravel
#14. แบบที่ 2: Local MCP Server
สามารถ Register แบบ Local ได้
<?php

use App\Mcp\Servers\InventoryServer;
use Laravel\Mcp\Facades\Mcp;

Mcp::local('inventory', InventoryServer::class);
Local MCP เหมาะกับ
- Coding Agent
- Local AI Client
- Development Tool
- Agent ที่รันอยู่บนเครื่องเดียวกับ Laravel Project
โดยทั่วไป MCP Client จะเป็นผู้เรียก Artisan Command เพื่อเริ่ม Local Server
#15. Web MCP กับ Local MCP ต่างกันอย่างไร
| รูปแบบ | การเชื่อมต่อ | เหมาะกับ |
|---|---|---|
| Web MCP | HTTP | Remote AI Client |
| Local MCP | Process / Command | Local AI Agent |
| Web + Auth | HTTP + Token/OAuth | Production |
| Local + Inspector | Local Process | Development |
สำหรับ Production ที่มีผู้ใช้งานหลายราย มักเหมาะกับ Web MCP และเพิ่ม Authentication / Authorization
#16. ทดสอบด้วย MCP Inspector
Laravel MCP มีคำสั่งสำหรับเปิด MCP Inspector
กรณี Web Server:
php artisan mcp:inspector mcp/inventory
กรณี Local Server:
php artisan mcp:inspector inventory
Inspector ช่วยตรวจสอบ
- Server Information
- Tools
- Input Schema
- Resources
- Prompts
- Authentication
- Response
- Error
ถือเป็นเครื่องมือสำคัญก่อนเชื่อมต่อกับ AI Client จริง
#17. ทดลอง Tool
ใน MCP Inspector ให้เลือก Tool
search-products
ตัวอย่าง Input:
{
  "keyword": "keyboard",
  "limit": 5
}
ระบบจะเรียก
SearchProductsTool
        |
        v
Product::query()
        |
        v
Database
        |
        v
MCP Structured Response
AI Client จึงไม่จำเป็นต้องเข้าถึง Database โดยตรง
#18. เพิ่ม Authentication ด้วย Sanctum
Production MCP Server ไม่ควรเปิด Tool สำคัญแบบ Public โดยไม่มี Authentication
หากระบบใช้ Sanctum สามารถป้องกัน Route ได้ดังนี้
use App\Mcp\Servers\InventoryServer;
use Laravel\Mcp\Facades\Mcp;

Mcp::web('/mcp/inventory', InventoryServer::class)
    ->middleware('auth:sanctum');
Client ต้องส่ง Header
Authorization: Bearer YOUR_TOKEN
สามารถเพิ่ม Rate Limit ได้ด้วย
Mcp::web('/mcp/inventory', InventoryServer::class)
    ->middleware([
        'auth:sanctum',
        'throttle:60,1',
    ]);
#19. OAuth 2.1 และ Laravel Passport
หากต้องรองรับ MCP Client ที่ต้องการ OAuth สามารถใช้ Laravel Passport ได้
ใน routes/ai.php
use App\Mcp\Servers\InventoryServer;
use Laravel\Mcp\Facades\Mcp;

Mcp::oauthRoutes();

Mcp::web('/mcp/inventory', InventoryServer::class)
    ->middleware('auth:api');
แนวทางนี้เหมาะกับระบบที่ต้องการ OAuth Flow แบบมาตรฐานสำหรับ Remote MCP Client
#20. Authorization ภายใน Tool
Authentication บอกว่าใครกำลังเรียกใช้งาน แต่ Authorization ต้องตรวจสอบต่อว่าผู้ใช้นั้นมีสิทธิ์ทำอะไร
ตัวอย่าง:
public function handle(Request $request): Response
{
    if (! $request->user()?->can('view-inventory')) {
        return Response::error('Permission denied.');
    }

    // Business logic...
}
สำหรับ Tool ที่แก้ไขข้อมูล ควรใช้ Policy หรือ Gate ของ Laravel ร่วมด้วย
#21. Tool ที่แก้ไขข้อมูลควรออกแบบอย่างระมัดระวัง
Tool ประเภทอ่านข้อมูล เช่น
search-products
get-product
get-order
มีความเสี่ยงต่ำกว่า Tool ที่เปลี่ยนข้อมูล เช่น
delete-order
refund-payment
change-stock
create-user
ควรแยก Tool ให้ชัดเจนและใช้ Metadata Annotation ให้เหมาะสม
ตัวอย่าง Tool แบบ Read-only
use Laravel\Mcp\Server\Tools\Annotations\IsReadOnly;

#[IsReadOnly]
class SearchProductsTool extends Tool
{
}
สำหรับ Tool ที่มีผลกระทบต่อระบบ ควรออกแบบ Confirmation และ Authorization ที่เข้มงวดขึ้นในระดับ Application
#22. อย่าเปิด Eloquent Model ทั้งหมดให้ AI โดยตรง
แนวทางที่ไม่แนะนำ:
Product::whereRaw($request->get('sql'))->get();
หรือ Tool ที่เปิดให้ AI ส่ง SQL ได้โดยตรง
execute-sql
ถ้าไม่จำเป็นจริง ๆ ควรหลีกเลี่ยง เพราะเพิ่มความเสี่ยงต่อ
- SQL Injection
- Data Leakage
- Privilege Escalation
- Prompt Injection
- Unauthorized Data Access
แนวทางที่ดีกว่าคือสร้าง Tool เฉพาะงาน
search-products
get-low-stock-products
get-product-by-sku
แล้วกำหนด Input Schema และ Validation ให้ชัดเจน
#23. ใช้ Service Layer แทน Business Logic ใน Tool
ในระบบจริงไม่ควรเขียน Business Logic จำนวนมากไว้ใน Tool
โครงสร้างที่ดีกว่า:
MCP Tool
   |
   v
Application Service
   |
   v
Repository / Model
   |
   v
Database
ตัวอย่าง:
class SearchProductsTool extends Tool
{
    public function __construct(
        protected ProductSearchService $service,
    ) {}

    public function handle(Request $request): Response
    {
        $products = $this->service->search(
            $request->string('keyword')
        );

        return Response::structured([
            'products' => $products,
        ]);
    }
}
ข้อดีคือ Tool จะบาง ทดสอบง่าย และนำ Business Logic ไปใช้กับ Controller, Job หรือ API ได้ด้วย
#24. Laravel Dependency Injection ใช้กับ MCP ได้
Laravel MCP ใช้ Service Container ของ Laravel จึงสามารถ Inject Service ได้ตามปกติ
public function __construct(
    protected ProductSearchService $service,
) {}
หรือ Inject ใน handle()
public function handle(
    Request $request,
    ProductSearchService $service,
): Response {
    // ...
}
จึงสามารถใช้ Architecture เดิมของ Laravel ต่อได้โดยไม่ต้องสร้างระบบ Dependency Injection ใหม่
#25. ตัวอย่าง Unit Test สำหรับ MCP Tool
สามารถทดสอบ Tool ได้โดยตรง
ตัวอย่าง Pest:
<?php

use App\Mcp\Servers\InventoryServer;
use App\Mcp\Tools\SearchProductsTool;
use App\Models\Product;

test('search products through MCP tool', function () {
    Product::create([
        'name' => 'Mechanical Keyboard',
        'sku' => 'KB-001',
        'price' => 2490,
        'stock' => 12,
    ]);

    $response = InventoryServer::tool(
        SearchProductsTool::class,
        [
            'keyword' => 'Keyboard',
            'limit' => 10,
        ]
    );

    $response
        ->assertOk()
        ->assertSee('Mechanical Keyboard');
});
ข้อดีของการทดสอบระดับนี้คือไม่จำเป็นต้องเชื่อมต่อ AI Model จริง
#26. MCP ไม่เท่ากับ REST API
REST API และ MCP มีเป้าหมายต่างกัน
| REST API | MCP |
|---|---|
| ออกแบบสำหรับ Application | ออกแบบเพื่อให้ AI/Agent ค้นพบและใช้ความสามารถ |
| Endpoint เป็นศูนย์กลาง | Tool/Resource/Prompt เป็นศูนย์กลาง |
| OpenAPI ใช้อธิบาย API | MCP Metadata และ Schema ใช้อธิบาย Capability |
| Client ต้องรู้ Endpoint | AI Client สามารถ Discover Capability |
| มักคืน JSON | คืน Text, Structured Content, Resource และรูปแบบ MCP |
ระบบหนึ่งสามารถมีทั้ง REST API และ MCP ได้พร้อมกัน
ตัวอย่าง:
React App ------ REST API ------> Laravel

AI Agent ------- MCP -----------> Laravel
ทั้งสองฝั่งสามารถใช้ Service Layer เดียวกันได้
#27. MCP เหมาะกับระบบ Laravel แบบใด
ตัวอย่างที่เหมาะ:
#E-Commerce
search-products
get-order-status
check-stock
recommend-products
#ERP
get-purchase-order
get-inventory
get-sales-summary
#LMS
get-course
search-lessons
get-student-progress
#Help Desk
search-ticket
create-ticket
get-customer-history
#Data Platform
get-dataset
run-approved-query
get-metric
#28. Security Checklist
ก่อน Deploy MCP Server ขึ้น Production ควรตรวจสอบอย่างน้อย:
- ใช้ HTTPS
- เพิ่ม Authentication
- เพิ่ม Authorization
- กำหนด Rate Limit
- Validate Input ทุก Tool
- จำกัด Data Scope ตามผู้ใช้
- ไม่เปิด Raw SQL โดยไม่จำเป็น
- แยก Read Tool และ Write Tool
- Log การเรียก Tool สำคัญ
- ไม่ส่ง Secret หรือ Credential กลับให้ AI
- ใช้ Laravel Policy หรือ Gate กับข้อมูลสำคัญ
- ป้องกัน Mass Assignment
- จำกัดจำนวน Record ที่ Tool สามารถคืนได้
- เพิ่ม Timeout ให้ External API
- ตรวจสอบ Tool ที่มีผลกระทบก่อนเปิดใช้งานจริง
#29. Production Architecture ที่แนะนำ
ตัวอย่าง Architecture:
flowchart LR
    A[AI Client] --> B[HTTPS]
    B --> C[Reverse Proxy]
    C --> D[Laravel MCP Endpoint]
    D --> E[Authentication]
    E --> F[Authorization]
    F --> G[MCP Tool]
    G --> H[Application Service]
    H --> I[(Database)]
    H --> J[External API]

    D --> K[Logging]
    D --> L[Rate Limiting]
ใน Production ควรให้ MCP Tool เรียก Application Service แทนการเข้าถึงฐานข้อมูลโดยตรง
#30. ขั้นตอนการพัฒนาโดยสรุป
ลำดับการสร้าง MCP ด้วย Laravel สามารถสรุปได้ดังนี้
1. สร้าง Laravel Project
        ↓
2. composer require laravel/mcp
        ↓
3. publish routes/ai.php
        ↓
4. make:mcp-server
        ↓
5. make:mcp-tool
        ↓
6. make:mcp-resource
        ↓
7. make:mcp-prompt
        ↓
8. Register ใน InventoryServer
        ↓
9. Register Server ใน routes/ai.php
        ↓
10. ทดสอบด้วย mcp:inspector
        ↓
11. เพิ่ม Authentication / Authorization
        ↓
12. เชื่อมต่อ AI Client
#31. คำสั่งสำคัญที่ควรจำ
composer require laravel/mcp
php artisan vendor:publish --tag=ai-routes
php artisan make:mcp-server InventoryServer
php artisan make:mcp-tool SearchProductsTool
php artisan make:mcp-resource InventoryGuideResource
php artisan make:mcp-prompt AnalyzeInventoryPrompt
php artisan mcp:inspector inventory
หรือสำหรับ Web MCP
php artisan mcp:inspector mcp/inventory
#32. แนวคิดต่อยอด
เมื่อเข้าใจพื้นฐานแล้วสามารถต่อยอดได้อีกหลายรูปแบบ
#MCP + RAG
AI
 |
MCP Tool
 |
RAG Service
 |
Vector Database
#MCP + Laravel Queue
Tool รับ Request แล้วส่งงานหนักไปที่ Queue
MCP Tool
   |
   v
Laravel Job
   |
   v
Queue Worker
#MCP + Microservices
Laravel MCP Server ทำหน้าที่เป็น Gateway ให้ AI
AI Agent
   |
Laravel MCP
   |
   +--> User Service
   +--> Order Service
   +--> Inventory Service
#MCP + Data Analytics
AI Agent
   |
MCP
   |
Analytics Service
   |
Database / Data Warehouse
#33. สรุป
Laravel MCP ทำให้การเพิ่ม AI Agent Interface ให้กับ Laravel Application ทำได้ง่ายขึ้นอย่างมาก โดยเราสามารถนำ Business Logic เดิมของ Laravel มาเปิดเป็น MCP Capability ในรูปแบบมาตรฐานได้
องค์ประกอบที่สำคัญคือ
Server
 ├── Tools
 ├── Resources
 └── Prompts
จุดเด่นของ Laravel คือ MCP สามารถทำงานร่วมกับระบบเดิมได้ทันที เช่น
- Eloquent
- Validation
- Service Container
- Middleware
- Sanctum
- Passport
- Policy / Gate
- Pest / PHPUnit
- Queue
- Cache
- Logging
สำหรับระบบจริง ควรเริ่มจาก Read-only Tool ที่มีขอบเขตชัดเจน ก่อน จากนั้นจึงเพิ่ม Tool ที่เปลี่ยนแปลงข้อมูล พร้อม Authentication, Authorization และ Audit Logging ที่เหมาะสม
#References
- Laravel MCP Documentation: https://laravel.com/docs/mcp
- Laravel MCP: https://laravel.com/ai/mcp
- Laravel MCP GitHub: https://github.com/laravel/mcp
- Laravel MCP Complete Guide: https://laravel.com/blog/laravel-mcp-a-complete-guide
- Model Context Protocol: https://modelcontextprotocol.io/
#34. หมายเหตุสำหรับ Laravel MCP 1.x
Laravel MCP 1.x มีการพัฒนาสำหรับระบบที่มี Tool จำนวนมาก โดยสามารถใช้แนวคิด searchable tool catalogs เพื่อลดการโหลดรายการ Tool ทั้งหมดในทุก Request และช่วยลด Context/Payload ของ Agent
หากพัฒนา MCP Client เอง ควรตรวจสอบ MCP Protocol รุ่นที่แพ็กเกจรองรับอยู่เสมอ เนื่องจากรายละเอียดระดับ handshake และ metadata อาจเปลี่ยนตาม Protocol revision ส่วนการใช้งานผ่าน API ระดับสูงของ laravel/mcp จะช่วยซ่อนรายละเอียด Transport และ Protocol จำนวนมากไว้ให้
ก่อนอัปเกรดรุ่นใหญ่ ควรตรวจสอบ Upgrade Guide และทดสอบ MCP Client, Authentication และ Tool discovery อีกครั้งในสภาพแวดล้อม staging