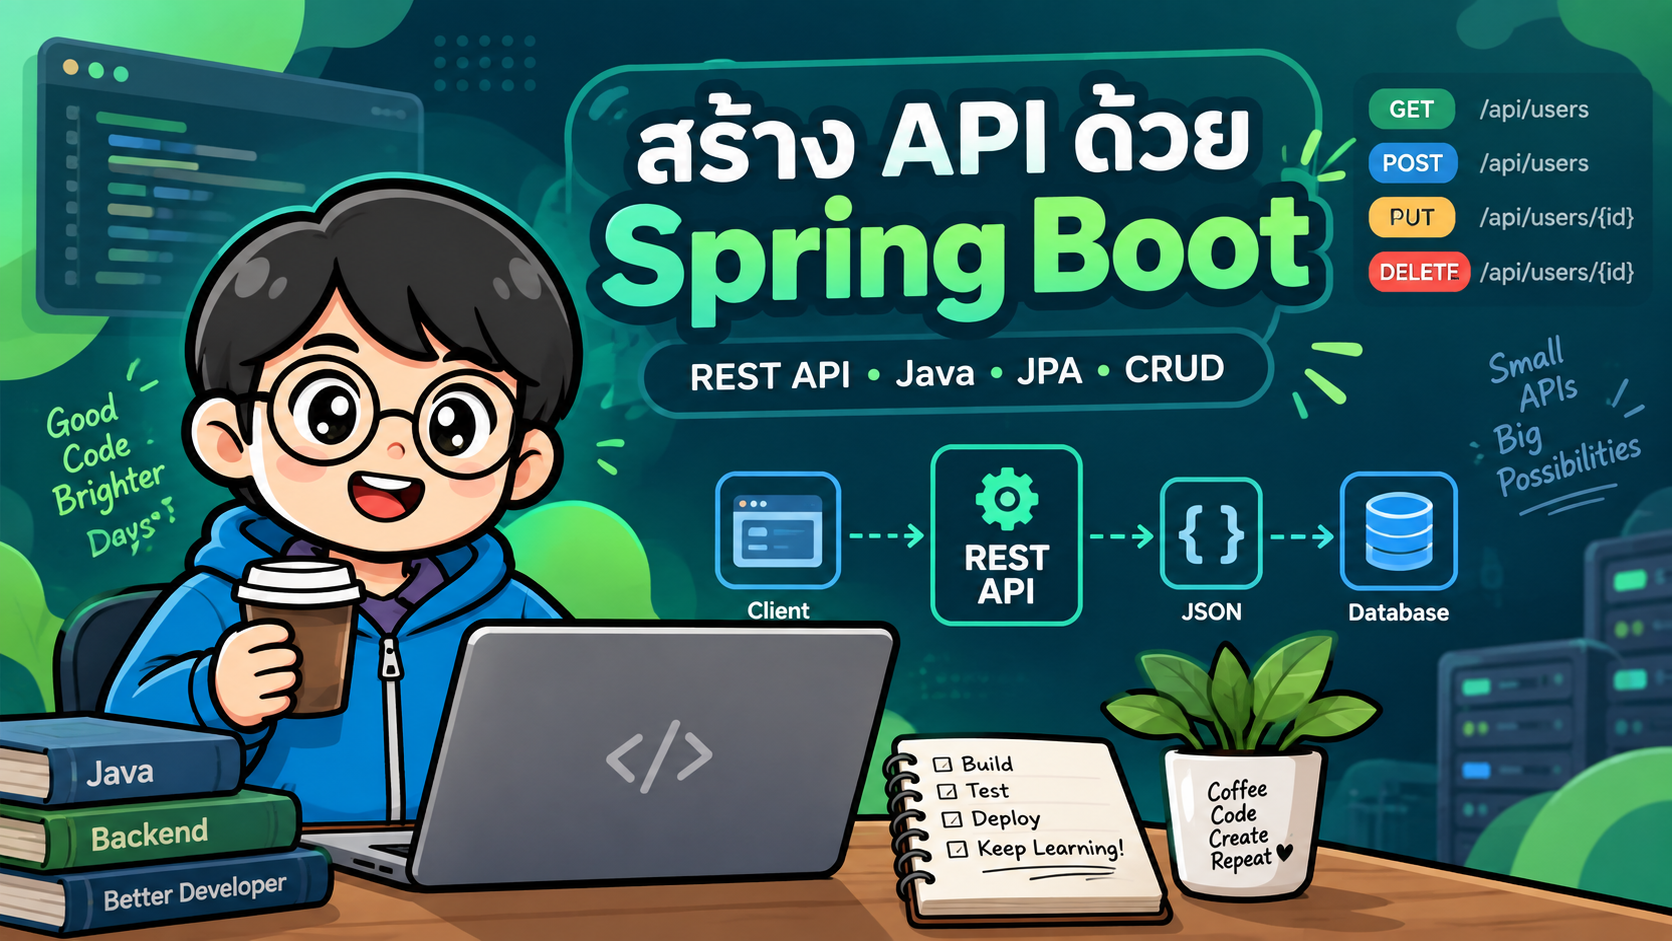
- สร้าง REST API ด้วย Spring Boot 4 ตั้งแต่เริ่มต้นจนใช้งานได้จริง
- 3. สร้างโครงการด้วย Spring Initializr
- 4. โครงสร้างโครงการ
- 5. Main Application
- 6. ตั้งค่า H2 Database
- 7. สร้าง Entity
- 8. สร้าง DTO สำหรับรับ Request
- 9. สร้าง DTO สำหรับ Response
- 10. สร้าง Repository
- 11. สร้าง Exception เมื่อไม่พบข้อมูล
- 12. สร้าง Service Layer
- 13. สร้าง REST Controller
- 14. จัดการ Error แบบรวมศูนย์
- 15. รัน Spring Boot
- 16. ทดสอบ API ด้วย cURL
- 17. เปิด H2 Console
- 18. ทดสอบด้วย Postman
- 19. เปลี่ยนจาก H2 เป็น PostgreSQL
- 20. เพิ่ม Pagination
- 21. เพิ่ม API Documentation ด้วย OpenAPI
- 22. แนวทางออกแบบ API ที่ควรใช้
- 23. HTTP Status Code ที่ควรรู้
- 24. สิ่งที่ควรเพิ่มก่อนนำขึ้น Production
- 25. ภาพรวม Flow การทำงาน
- 26. สรุป
#สร้าง REST API ด้วย Spring Boot 4 ตั้งแต่เริ่มต้นจนใช้งานได้จริง
Spring Boot เป็นเฟรมเวิร์กยอดนิยมสำหรับพัฒนา Backend และ REST API ด้วยภาษา Java โดยช่วยลดขั้นตอนการตั้งค่า Spring แบบเดิม ๆ ผ่านแนวคิด Auto-Configuration, Starter Dependencies และ Embedded Web Server ทำให้เราสามารถสร้าง API ที่พร้อมรันได้ด้วยโครงสร้างโครงการที่ค่อนข้างกระชับ
บทความนี้จะพาสร้าง Product REST API แบบ CRUD ตั้งแต่เริ่มต้น โดยใช้แนวทางแยก Layer เป็น
Client
  ↓
Controller
  ↓
Service
  ↓
Repository
  ↓
Database
ตัวอย่างนี้ใช้ Spring Boot 4.1.1, Java 21, Spring MVC, Spring Data JPA, Bean Validation และ H2 Database เพื่อให้ทดลองได้ทันทีโดยไม่ต้องติดตั้งฐานข้อมูลเพิ่มเติม
Spring Boot 4.1.1 ต้องการ Java 17 ขึ้นไป และเอกสารปัจจุบันของ Spring Boot แนะนำ
spring-boot-starter-webmvcสำหรับงาน Spring MVC โดยspring-boot-starter-webเดิมถูกระบุว่า deprecated ใน Spring Boot 4
#1. เทคโนโลยีที่ใช้
| เทคโนโลยี | หน้าที่ |
|---|---|
| Java 21 | ภาษาหลักสำหรับพัฒนา |
| Spring Boot 4.1.1 | Framework หลัก |
| Spring MVC | สร้าง REST Endpoint |
| Spring Data JPA | ติดต่อฐานข้อมูลผ่าน Repository |
| Hibernate | ORM สำหรับ JPA |
| Bean Validation | ตรวจสอบข้อมูล Request |
| H2 Database | ฐานข้อมูลสำหรับทดลอง |
| Maven | Dependency และ Build Tool |
| Postman / cURL | ทดสอบ API |
#2. REST API ที่จะสร้าง
เราจะสร้าง API สำหรับจัดการสินค้า โดยมี Endpoint ดังนี้
| Method | Endpoint | รายละเอียด |
|---|---|---|
GET |
/api/products |
ดูสินค้าทั้งหมด |
GET |
/api/products/{id} |
ดูสินค้าตาม ID |
POST |
/api/products |
เพิ่มสินค้า |
PUT |
/api/products/{id} |
แก้ไขสินค้า |
DELETE |
/api/products/{id} |
ลบสินค้า |
ตัวอย่างข้อมูลสินค้า
{
  "name": "Mechanical Keyboard",
  "price": 2590.00,
  "stock": 20
}
#3. สร้างโครงการด้วย Spring Initializr
สามารถสร้างโครงการจาก Spring Initializr แล้วเลือกค่าประมาณนี้
Project: Maven
Language: Java
Spring Boot: 4.1.1
Group: com.example
Artifact: product-api
Packaging: Jar
Java: 21
Dependencies ที่ใช้
Spring Web / Spring MVC
Spring Data JPA
Validation
H2 Database
หากสร้าง pom.xml เอง สามารถใช้ตัวอย่างต่อไปนี้ได้
<?xml version="1.0" encoding="UTF-8"?>
<project xmlns="http://maven.apache.org/POM/4.0.0"
         xmlns:xsi="http://www.w3.org/2001/XMLSchema-instance"
         xsi:schemaLocation="http://maven.apache.org/POM/4.0.0
         https://maven.apache.org/xsd/maven-4.0.0.xsd">

    <modelVersion>4.0.0</modelVersion>

    <parent>
        <groupId>org.springframework.boot</groupId>
        <artifactId>spring-boot-starter-parent</artifactId>
        <version>4.1.1</version>
        <relativePath/>
    </parent>

    <groupId>com.example</groupId>
    <artifactId>product-api</artifactId>
    <version>0.0.1-SNAPSHOT</version>
    <name>product-api</name>

    <properties>
        <java.version>21</java.version>
    </properties>

    <dependencies>

        <dependency>
            <groupId>org.springframework.boot</groupId>
            <artifactId>spring-boot-starter-webmvc</artifactId>
        </dependency>

        <dependency>
            <groupId>org.springframework.boot</groupId>
            <artifactId>spring-boot-starter-data-jpa</artifactId>
        </dependency>

        <dependency>
            <groupId>org.springframework.boot</groupId>
            <artifactId>spring-boot-starter-validation</artifactId>
        </dependency>

        <dependency>
            <groupId>com.h2database</groupId>
            <artifactId>h2</artifactId>
            <scope>runtime</scope>
        </dependency>

        <dependency>
            <groupId>org.springframework.boot</groupId>
            <artifactId>spring-boot-starter-test</artifactId>
            <scope>test</scope>
        </dependency>

    </dependencies>

    <build>
        <plugins>
            <plugin>
                <groupId>org.springframework.boot</groupId>
                <artifactId>spring-boot-maven-plugin</artifactId>
            </plugin>
        </plugins>
    </build>

</project>
#4. โครงสร้างโครงการ
ตัวอย่างโครงสร้างที่แนะนำ
src
└── main
    ├── java
    │   └── com
    │       └── example
    │           └── productapi
    │               ├── ProductApiApplication.java
    │               ├── product
    │               │   ├── Product.java
    │               │   ├── ProductController.java
    │               │   ├── ProductRepository.java
    │               │   ├── ProductRequest.java
    │               │   ├── ProductResponse.java
    │               │   └── ProductService.java
    │               └── exception
    │                   ├── GlobalExceptionHandler.java
    │                   └── ResourceNotFoundException.java
    └── resources
        └── application.properties
การแยก package ตาม feature เช่น product ช่วยให้ไฟล์ที่เกี่ยวข้องกับงานเดียวกันอยู่ใกล้กัน และขยายระบบได้ง่ายกว่าเมื่อโครงการใหญ่ขึ้น
#5. Main Application
สร้างไฟล์
ProductApiApplication.java
package com.example.productapi;

import org.springframework.boot.SpringApplication;
import org.springframework.boot.autoconfigure.SpringBootApplication;

@SpringBootApplication
public class ProductApiApplication {

    public static void main(String[] args) {
        SpringApplication.run(ProductApiApplication.class, args);
    }
}
@SpringBootApplication เป็น annotation หลักที่รวมความสามารถสำคัญ เช่น configuration, component scanning และ auto-configuration
#6. ตั้งค่า H2 Database
เปิดไฟล์
src/main/resources/application.properties
เพิ่ม
spring.application.name=product-api

spring.datasource.url=jdbc:h2:mem:productdb
spring.datasource.driver-class-name=org.h2.Driver
spring.datasource.username=sa
spring.datasource.password=

spring.jpa.hibernate.ddl-auto=update
spring.jpa.open-in-view=false
spring.jpa.show-sql=true

spring.h2.console.enabled=true
spring.h2.console.path=/h2-console
เมื่อรันระบบ H2 จะทำงานแบบ In-Memory ดังนั้นข้อมูลจะหายเมื่อหยุด Application เหมาะสำหรับการทดลองหรือ Test
Production ไม่ควรใช้
ddl-auto=updateเป็นกลไกหลักในการจัดการ Schema ควรพิจารณา Flyway หรือ Liquibase เพื่อควบคุม Database Migration
#7. สร้าง Entity
สร้างไฟล์
product/Product.java
package com.example.productapi.product;

import jakarta.persistence.*;

import java.math.BigDecimal;

@Entity
@Table(name = "products")
public class Product {

    @Id
    @GeneratedValue(strategy = GenerationType.IDENTITY)
    private Long id;

    @Column(nullable = false, length = 150)
    private String name;

    @Column(nullable = false, precision = 12, scale = 2)
    private BigDecimal price;

    @Column(nullable = false)
    private Integer stock;

    public Product() {
    }

    public Product(String name, BigDecimal price, Integer stock) {
        this.name = name;
        this.price = price;
        this.stock = stock;
    }

    public Long getId() {
        return id;
    }

    public String getName() {
        return name;
    }

    public BigDecimal getPrice() {
        return price;
    }

    public Integer getStock() {
        return stock;
    }

    public void setName(String name) {
        this.name = name;
    }

    public void setPrice(BigDecimal price) {
        this.price = price;
    }

    public void setStock(Integer stock) {
        this.stock = stock;
    }
}
สิ่งสำคัญคือ Spring Boot 3 ขึ้นไป รวมถึง Spring Boot 4 ใช้ namespace ของ Jakarta ดังนั้น annotation ของ JPA จะอยู่ใน
import jakarta.persistence.*;
ไม่ใช่ javax.persistence.*
#8. สร้าง DTO สำหรับรับ Request
ไม่ควรผูก JSON จากผู้ใช้เข้ากับ Entity โดยตรงในทุกกรณี เพราะ Entity คือ model ของฐานข้อมูล ขณะที่ Request DTO คือ contract ของ API
สร้างไฟล์
product/ProductRequest.java
package com.example.productapi.product;

import jakarta.validation.constraints.Min;
import jakarta.validation.constraints.NotBlank;
import jakarta.validation.constraints.NotNull;
import jakarta.validation.constraints.Positive;

import java.math.BigDecimal;

public record ProductRequest(

        @NotBlank(message = "name is required")
        String name,

        @NotNull(message = "price is required")
        @Positive(message = "price must be greater than 0")
        BigDecimal price,

        @NotNull(message = "stock is required")
        @Min(value = 0, message = "stock must be 0 or greater")
        Integer stock

) {
}
Java record เหมาะกับ DTO เพราะช่วยลด boilerplate code และทำให้ object มีลักษณะ immutable โดยธรรมชาติ
#9. สร้าง DTO สำหรับ Response
สร้าง
product/ProductResponse.java
package com.example.productapi.product;

import java.math.BigDecimal;

public record ProductResponse(
        Long id,
        String name,
        BigDecimal price,
        Integer stock
) {
}
การใช้ Response DTO ทำให้เราควบคุมข้อมูลที่ส่งออกได้ ไม่จำเป็นต้อง expose ทุก field ของ Entity
#10. สร้าง Repository
สร้างไฟล์
product/ProductRepository.java
package com.example.productapi.product;

import org.springframework.data.jpa.repository.JpaRepository;

public interface ProductRepository extends JpaRepository<Product, Long> {
}
Spring Data JPA จะสร้าง implementation ของ Repository ให้โดยอัตโนมัติ เราจึงได้ method พื้นฐานทันที เช่น
findAll()
findById()
save()
delete()
existsById()
count()
หากต้องการค้นหาตามชื่อ ยังสามารถประกาศ method เพิ่มได้ เช่น
List<Product> findByNameContainingIgnoreCase(String keyword);
#11. สร้าง Exception เมื่อไม่พบข้อมูล
สร้างไฟล์
exception/ResourceNotFoundException.java
package com.example.productapi.exception;

public class ResourceNotFoundException extends RuntimeException {

    public ResourceNotFoundException(String message) {
        super(message);
    }
}
#12. สร้าง Service Layer
สร้างไฟล์
product/ProductService.java
package com.example.productapi.product;

import com.example.productapi.exception.ResourceNotFoundException;
import org.springframework.stereotype.Service;
import org.springframework.transaction.annotation.Transactional;

import java.util.List;

@Service
public class ProductService {

    private final ProductRepository repository;

    public ProductService(ProductRepository repository) {
        this.repository = repository;
    }

    @Transactional(readOnly = true)
    public List<ProductResponse> findAll() {
        return repository.findAll()
                .stream()
                .map(this::toResponse)
                .toList();
    }

    @Transactional(readOnly = true)
    public ProductResponse findById(Long id) {
        Product product = getProduct(id);
        return toResponse(product);
    }

    @Transactional
    public ProductResponse create(ProductRequest request) {
        Product product = new Product(
                request.name(),
                request.price(),
                request.stock()
        );

        return toResponse(repository.save(product));
    }

    @Transactional
    public ProductResponse update(Long id, ProductRequest request) {
        Product product = getProduct(id);

        product.setName(request.name());
        product.setPrice(request.price());
        product.setStock(request.stock());

        return toResponse(repository.save(product));
    }

    @Transactional
    public void delete(Long id) {
        Product product = getProduct(id);
        repository.delete(product);
    }

    private Product getProduct(Long id) {
        return repository.findById(id)
                .orElseThrow(() ->
                        new ResourceNotFoundException(
                                "Product id " + id + " not found"
                        )
                );
    }

    private ProductResponse toResponse(Product product) {
        return new ProductResponse(
                product.getId(),
                product.getName(),
                product.getPrice(),
                product.getStock()
        );
    }
}
Service Layer เหมาะสำหรับเก็บ Business Logic เช่น
- ตรวจสอบข้อมูลเชิงธุรกิจ
- คำนวณราคา
- ตรวจสอบ Stock
- จัดการ Transaction
- เรียก Repository หลายตัว
- ติดต่อ External API
Controller จึงไม่ควรมี Business Logic จำนวนมาก
#13. สร้าง REST Controller
สร้างไฟล์
product/ProductController.java
package com.example.productapi.product;

import jakarta.validation.Valid;
import org.springframework.http.ResponseEntity;
import org.springframework.web.bind.annotation.*;

import java.net.URI;
import java.util.List;

@RestController
@RequestMapping("/api/products")
public class ProductController {

    private final ProductService service;

    public ProductController(ProductService service) {
        this.service = service;
    }

    @GetMapping
    public List<ProductResponse> findAll() {
        return service.findAll();
    }

    @GetMapping("/{id}")
    public ProductResponse findById(@PathVariable Long id) {
        return service.findById(id);
    }

    @PostMapping
    public ResponseEntity<ProductResponse> create(
            @Valid @RequestBody ProductRequest request
    ) {
        ProductResponse created = service.create(request);

        return ResponseEntity
                .created(URI.create("/api/products/" + created.id()))
                .body(created);
    }

    @PutMapping("/{id}")
    public ProductResponse update(
            @PathVariable Long id,
            @Valid @RequestBody ProductRequest request
    ) {
        return service.update(id, request);
    }

    @DeleteMapping("/{id}")
    public ResponseEntity<Void> delete(@PathVariable Long id) {
        service.delete(id);
        return ResponseEntity.noContent().build();
    }
}
Annotation ที่ใช้บ่อยในการสร้าง REST API ได้แก่
| Annotation | หน้าที่ |
|---|---|
@RestController |
ระบุว่า class นี้ให้บริการ REST API |
@RequestMapping |
กำหนด Base URL |
@GetMapping |
รับ HTTP GET |
@PostMapping |
รับ HTTP POST |
@PutMapping |
รับ HTTP PUT |
@DeleteMapping |
รับ HTTP DELETE |
@PathVariable |
รับค่าจาก URL |
@RequestBody |
รับ JSON Body |
@Valid |
สั่งให้ตรวจสอบ Bean Validation |
#14. จัดการ Error แบบรวมศูนย์
สร้างไฟล์
exception/GlobalExceptionHandler.java
package com.example.productapi.exception;

import org.springframework.http.HttpStatus;
import org.springframework.http.ResponseEntity;
import org.springframework.web.bind.MethodArgumentNotValidException;
import org.springframework.web.bind.annotation.ExceptionHandler;
import org.springframework.web.bind.annotation.RestControllerAdvice;

import java.time.Instant;
import java.util.LinkedHashMap;
import java.util.Map;

@RestControllerAdvice
public class GlobalExceptionHandler {

    @ExceptionHandler(ResourceNotFoundException.class)
    public ResponseEntity<Map<String, Object>> handleNotFound(
            ResourceNotFoundException ex
    ) {
        Map<String, Object> body = new LinkedHashMap<>();
        body.put("timestamp", Instant.now());
        body.put("status", 404);
        body.put("error", "Not Found");
        body.put("message", ex.getMessage());

        return ResponseEntity
                .status(HttpStatus.NOT_FOUND)
                .body(body);
    }

    @ExceptionHandler(MethodArgumentNotValidException.class)
    public ResponseEntity<Map<String, Object>> handleValidation(
            MethodArgumentNotValidException ex
    ) {
        Map<String, String> fields = new LinkedHashMap<>();

        ex.getBindingResult()
                .getFieldErrors()
                .forEach(error ->
                        fields.put(
                                error.getField(),
                                error.getDefaultMessage()
                        )
                );

        Map<String, Object> body = new LinkedHashMap<>();
        body.put("timestamp", Instant.now());
        body.put("status", 400);
        body.put("error", "Validation Failed");
        body.put("fields", fields);

        return ResponseEntity
                .badRequest()
                .body(body);
    }
}
เมื่อข้อมูล Request ไม่ผ่าน validation เช่น
{
  "name": "",
  "price": -50,
  "stock": -1
}
API จะตอบกลับ HTTP 400 Bad Request พร้อมรายละเอียด field ที่ผิด แทนที่จะปล่อย exception ดิบ ๆ กลับไปยัง Client
#15. รัน Spring Boot
หากโครงการมี Maven Wrapper
./mvnw spring-boot:run
Windows
mvnw.cmd spring-boot:run
หรือถ้าติดตั้ง Maven แล้ว
mvn spring-boot:run
เมื่อ Application ทำงานแล้ว API จะอยู่ที่
http://localhost:8080
#16. ทดสอบ API ด้วย cURL
#เพิ่มสินค้า
curl -X POST http://localhost:8080/api/products \
  -H "Content-Type: application/json" \
  -d '{
    "name": "Mechanical Keyboard",
    "price": 2590.00,
    "stock": 20
  }'
Response
{
  "id": 1,
  "name": "Mechanical Keyboard",
  "price": 2590.00,
  "stock": 20
}
HTTP Status ที่เหมาะสมคือ
201 Created
#ดูสินค้าทั้งหมด
curl http://localhost:8080/api/products
ตัวอย่าง Response
[
  {
    "id": 1,
    "name": "Mechanical Keyboard",
    "price": 2590.00,
    "stock": 20
  }
]
#ดูสินค้าตาม ID
curl http://localhost:8080/api/products/1
#แก้ไขสินค้า
curl -X PUT http://localhost:8080/api/products/1 \
  -H "Content-Type: application/json" \
  -d '{
    "name": "Mechanical Keyboard Pro",
    "price": 3190.00,
    "stock": 15
  }'
#ลบสินค้า
curl -X DELETE http://localhost:8080/api/products/1
Response ควรเป็น
204 No Content
#17. เปิด H2 Console
หากเปิด H2 Console ตาม configuration ด้านบน สามารถเข้า
http://localhost:8080/h2-console
ตั้งค่า
JDBC URL: jdbc:h2:mem:productdb
User Name: sa
Password:
จากนั้นสามารถตรวจสอบตาราง PRODUCTS ได้
#18. ทดสอบด้วย Postman
สร้าง Request ใน Postman ตามตัวอย่าง
#POST
POST http://localhost:8080/api/products
Headers
Content-Type: application/json
Body
{
  "name": "Wireless Mouse",
  "price": 990,
  "stock": 50
}
จากนั้นทดลอง
GET    /api/products
GET    /api/products/1
POST   /api/products
PUT    /api/products/1
DELETE /api/products/1
#19. เปลี่ยนจาก H2 เป็น PostgreSQL
เมื่อต้องการใช้งานจริงสามารถเปลี่ยนฐานข้อมูลเป็น PostgreSQL ได้
เพิ่ม Dependency
<dependency>
    <groupId>org.postgresql</groupId>
    <artifactId>postgresql</artifactId>
    <scope>runtime</scope>
</dependency>
แล้วแก้ application.properties
spring.datasource.url=jdbc:postgresql://localhost:5432/productdb
spring.datasource.username=postgres
spring.datasource.password=your_password

spring.jpa.hibernate.ddl-auto=validate
spring.jpa.open-in-view=false
สำหรับ Production แนะนำให้เก็บ Username และ Password ผ่าน Environment Variable
spring.datasource.username=${DB_USERNAME}
spring.datasource.password=${DB_PASSWORD}
แล้วกำหนดค่าใน Environment เช่น
export DB_USERNAME=postgres
export DB_PASSWORD=secret
#20. เพิ่ม Pagination
เมื่อข้อมูลจำนวนมาก ไม่ควรให้ GET /api/products คืนข้อมูลทั้งหมดในครั้งเดียว
Repository ที่ extends JpaRepository รองรับ Pageable อยู่แล้ว
ตัวอย่าง Service
@Transactional(readOnly = true)
public Page<ProductResponse> findAll(Pageable pageable) {
    return repository.findAll(pageable)
            .map(this::toResponse);
}
Controller
@GetMapping
public Page<ProductResponse> findAll(Pageable pageable) {
    return service.findAll(pageable);
}
เรียกใช้งาน
GET /api/products?page=0&size=10&sort=name,asc
แนวทางนี้เหมาะกับ API ที่มีข้อมูลหลักพัน หลักหมื่น หรือมากกว่านั้น
#21. เพิ่ม API Documentation ด้วย OpenAPI
ในงานจริงควรมีเอกสาร API เพื่อให้ Frontend, Mobile App และระบบอื่นเข้าใจ Contract เดียวกัน
แนวทางยอดนิยมคือใช้ OpenAPI/Swagger เช่น springdoc-openapi
หลังตั้งค่าแล้วสามารถมีหน้าเอกสารสำหรับ
GET /api/products
POST /api/products
GET /api/products/{id}
PUT /api/products/{id}
DELETE /api/products/{id}
พร้อม Request/Response Schema และทดลองเรียก API จากหน้า Browser ได้
ควรตรวจสอบเวอร์ชันของ springdoc-openapi ที่รองรับ Spring Boot 4 ก่อนเลือกใช้ในโครงการจริง เพราะเป็น third-party dependency ที่มีรอบการรองรับแยกจาก Spring Boot
#22. แนวทางออกแบบ API ที่ควรใช้
#ใช้ HTTP Method ให้ตรงความหมาย
GET     อ่านข้อมูล
POST    สร้างข้อมูล
PUT     แทนที่/แก้ไข resource
PATCH   แก้ไขบางส่วน
DELETE  ลบข้อมูล
#ใช้คำนามใน URL
ควรใช้
/api/products
/api/orders
/api/customers
หลีกเลี่ยง
/api/getProducts
/api/createProduct
/api/deleteProduct
เพราะ HTTP Method ได้บอก action อยู่แล้ว
#23. HTTP Status Code ที่ควรรู้
| Status | ความหมาย |
|---|---|
200 OK |
สำเร็จ |
201 Created |
สร้างข้อมูลสำเร็จ |
204 No Content |
สำเร็จและไม่มี Body |
400 Bad Request |
Request ไม่ถูกต้อง |
401 Unauthorized |
ยังไม่ยืนยันตัวตน |
403 Forbidden |
ไม่มีสิทธิ์ |
404 Not Found |
ไม่พบ Resource |
409 Conflict |
ข้อมูลขัดแย้ง |
500 Internal Server Error |
Error ฝั่ง Server |
#24. สิ่งที่ควรเพิ่มก่อนนำขึ้น Production
ตัวอย่างในบทความเป็นโครงสร้างพื้นฐาน หากจะใช้จริงควรเพิ่มอย่างน้อย
- Authentication และ Authorization ด้วย Spring Security
- JWT หรือ OAuth 2.0 / OpenID Connect
- PostgreSQL หรือ MySQL
- Database Migration ด้วย Flyway/Liquibase
- Pagination, Filter และ Sort
- OpenAPI Documentation
- Structured Logging
- Unit Test และ Integration Test
- Spring Boot Actuator
- Metrics และ Observability
- Rate Limiting ที่ API Gateway หรือ Infrastructure Layer
- Docker / Container Image
- CI/CD Pipeline
- HTTPS และ Secret Management
#25. ภาพรวม Flow การทำงาน
เมื่อ Client เรียก
POST /api/products
พร้อม JSON
{
  "name": "USB-C Hub",
  "price": 1490,
  "stock": 30
}
Flow จะเป็น
Client
  │
  ▼
ProductController
  │
  │ @Valid
  ▼
ProductService
  │
  │ Business Logic / Transaction
  ▼
ProductRepository
  │
  │ JPA / Hibernate
  ▼
Database
หลังบันทึกสำเร็จ ข้อมูลจะถูกแปลงเป็น ProductResponse และคืนกลับเป็น JSON
#26. สรุป
Spring Boot ช่วยให้การสร้าง REST API ด้วย Java ทำได้รวดเร็วขึ้นอย่างมาก โดยองค์ประกอบหลักที่ควรเข้าใจคือ
@RestController
      ↓
@Service
      ↓
JpaRepository
      ↓
Database
สำหรับ API ที่ใช้งานจริง ควรแยก Entity ออกจาก Request/Response DTO, ใช้ Bean Validation, จัดการ Exception แบบรวมศูนย์ และควบคุม Transaction ใน Service Layer
เมื่อเข้าใจ CRUD API ชุดนี้แล้ว สามารถต่อยอดไปสู่ระบบที่ซับซ้อนขึ้น เช่น
- Authentication ด้วย Spring Security + JWT
- REST API + PostgreSQL
- Microservices
- API Gateway
- Kafka / RabbitMQ
- Redis Cache
- Docker และ Kubernetes
- Observability ด้วย Micrometer, OpenTelemetry และ Prometheus
- AI API ด้วย Spring AI
#เอกสารอ้างอิง
- Spring Boot: https://spring.io/projects/spring-boot/
- Spring Boot Reference Documentation: https://docs.spring.io/spring-boot/
- Spring Boot System Requirements: https://docs.spring.io/spring-boot/system-requirements.html
- Spring Boot Build Systems / Starters: https://docs.spring.io/spring-boot/reference/using/build-systems.html
- Spring Boot SQL Databases / Spring Data JPA: https://docs.spring.io/spring-boot/reference/data/sql.html
- Spring Initializr: https://start.spring.io/