- ภาพรวม
- วัตถุประสงค์
- สิ่งที่ต้องเตรียม
- 1. สร้าง Workspace
- 2. ติดตั้ง Playwright MCP
- 3. ตรวจสอบ MCP Tools
- 4. ทดลอง Browser Automation
- 5. ทดลองกับ Web Application
- 6. ให้ Copilot ทดสอบ Login
- 7. สร้าง Playwright Test Project
- 8. รัน Automated Test
- 9. ใช้ Copilot ช่วย Debug
- 10. Workshop: AI-assisted Test Generation
- 11. ตัวอย่าง Prompt สำหรับ Exploratory Testing
- 12. ตัวอย่าง Prompt สำหรับสร้าง Regression Test
- 13. Configuration เพิ่มเติม
- 14. แนวปฏิบัติที่แนะนำ
- 15. Playwright MCP ต่างจาก Playwright Test อย่างไร
- 16. สรุป
- อ้างอิง
อัปเดตแนวทาง: ตุลาคม 2026
#ภาพรวม
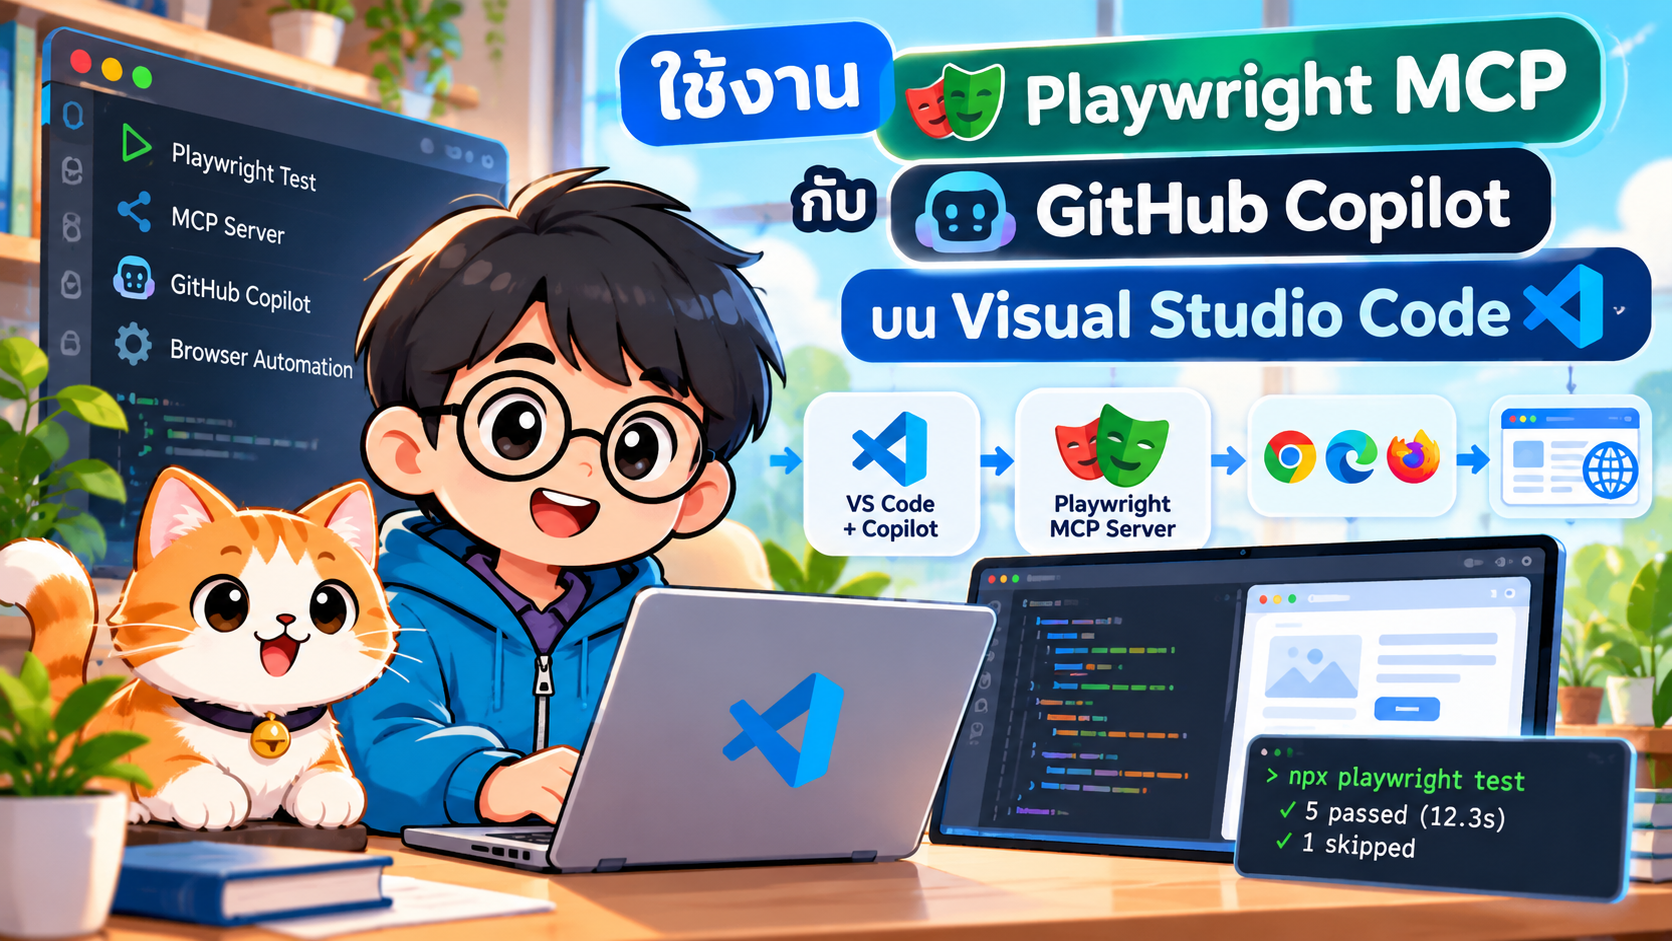
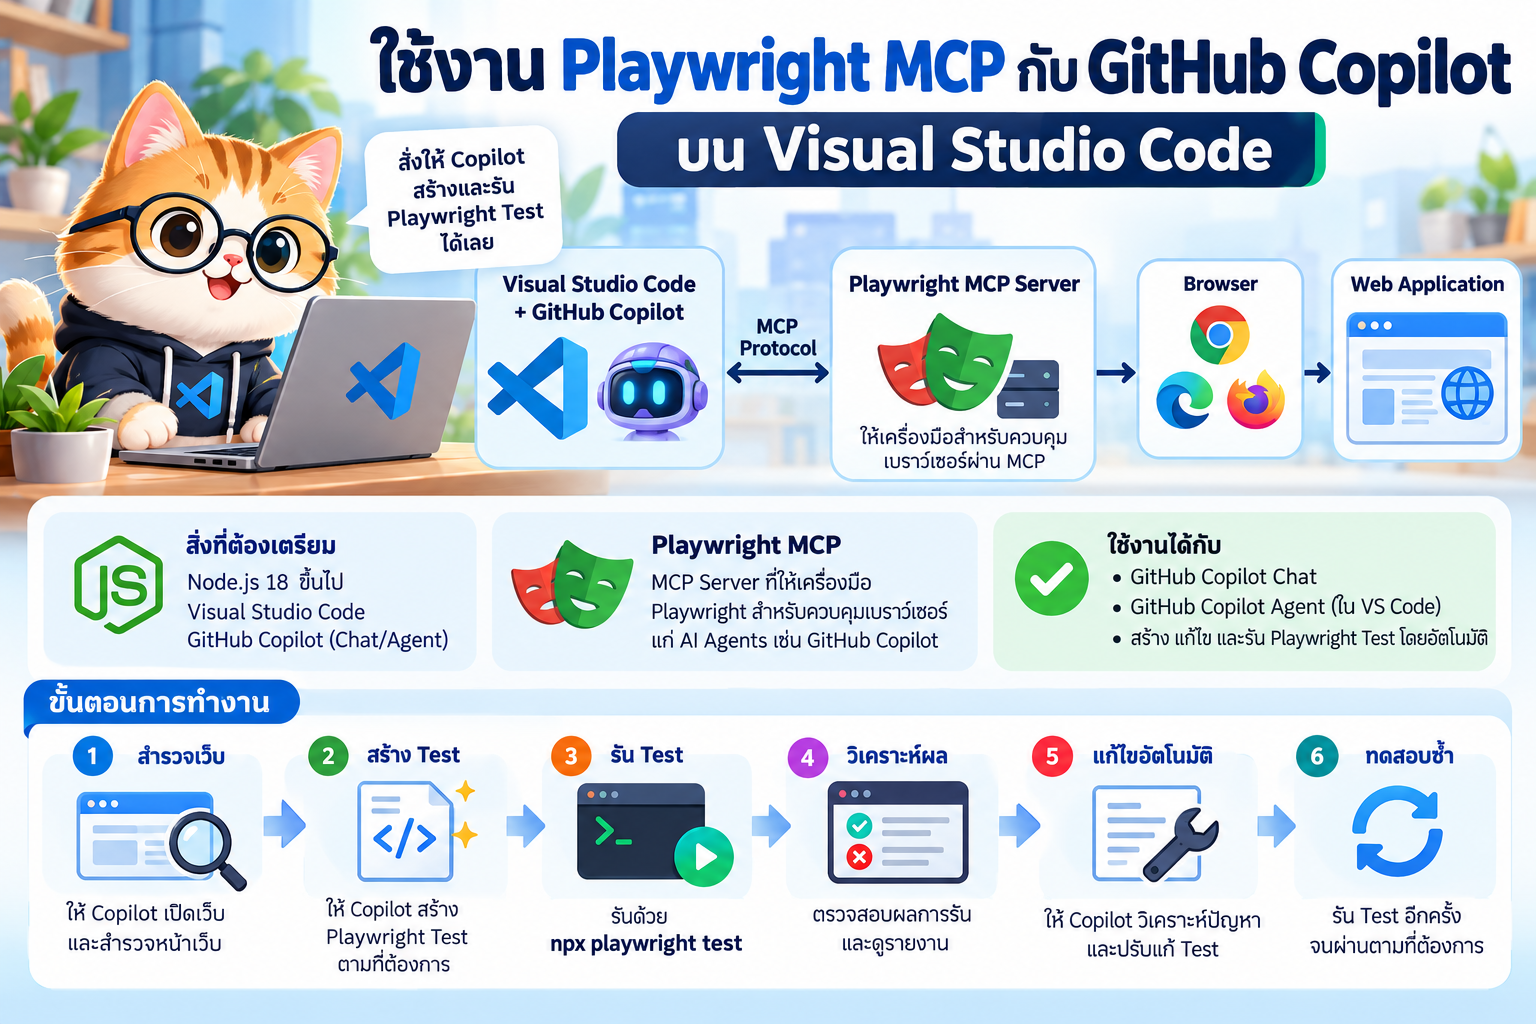
Playwright MCP คือ MCP Server ที่เปิดความสามารถของ Playwright ให้ AI Agent เช่น GitHub Copilot ใน Visual Studio Code สามารถควบคุม Browser ผ่านเครื่องมือแบบมีโครงสร้างได้ เช่น เปิด URL, อ่านโครงสร้างหน้าเว็บ, คลิก, กรอกฟอร์ม และตรวจสอบผลลัพธ์
สถาปัตยกรรมโดยย่อ:
Developer
   ↓ Prompt
GitHub Copilot (Agent)
   ↓ MCP
Playwright MCP Server
   ↓ Playwright
Browser
   ↓
Web Application
จุดเด่นคือ Playwright MCP ใช้ข้อมูลเชิงโครงสร้างของหน้าเว็บ เช่น accessibility tree ทำให้ Agent เข้าใจ element และโต้ตอบกับเว็บได้โดยไม่ต้องพึ่งการวิเคราะห์ screenshot เป็นหลัก
#วัตถุประสงค์
หลังจบ Workshop ผู้เรียนจะสามารถ:
- ติดตั้งและตั้งค่า Playwright MCP ใน VS Code
- เชื่อม GitHub Copilot Agent กับ Playwright MCP
- สั่ง Copilot เปิดและสำรวจ Web Application
- ให้ Agent ทำ browser automation จากภาษาธรรมชาติ
- สร้าง Playwright automated test จาก scenario
- รันและปรับปรุง test ด้วย Copilot
#สิ่งที่ต้องเตรียม
- Visual Studio Code รุ่นปัจจุบัน
- GitHub Copilot ที่รองรับ Agent/Tools
- Node.js 18 ขึ้นไป
- npm/npx
- Git
ตรวจสอบ Node.js:
node --version
npm --version
npx --version
#1. สร้าง Workspace
mkdir playwright-mcp-workshop
cd playwright-mcp-workshop
code .
#2. ติดตั้ง Playwright MCP
วิธีที่สะดวกคือใช้ VS Code CLI:
code --add-mcp '{"name":"playwright","command":"npx","args":["@playwright/mcp@latest"]}'
หรือเพิ่ม MCP Server ผ่าน VS Code แล้วใช้ configuration หลักดังนี้:
{
  "mcpServers": {
    "playwright": {
      "command": "npx",
      "args": ["@playwright/mcp@latest"]
    }
  }
}
ใน VS Code รุ่นใหม่ สามารถค้นหา MCP server จาก Extensions ด้วยคำค้น:
@mcp playwright
จากนั้นติดตั้ง Playwright MCP และยืนยัน Trust เมื่อ VS Code ขออนุญาตเริ่ม server
#3. ตรวจสอบ MCP Tools
เปิด GitHub Copilot Chat แล้วเลือก Agent mode จากนั้นเปิด Configure Tools
ควรพบกลุ่มเครื่องมือจาก Playwright MCP สำหรับงานลักษณะต่อไปนี้:
- navigation
- browser interaction
- form input
- page inspection
- screenshot/snapshot
- console/network inspection ตาม capability ที่เปิดใช้
ชื่อ tool จริงอาจเปลี่ยนตามเวอร์ชันของ Playwright MCP จึงควรตรวจสอบจาก Configure Tools แทนการผูก workflow กับชื่อ tool แบบตายตัว
#4. ทดลอง Browser Automation
เปิด Copilot Chat ใน Agent mode แล้วใช้ prompt เช่น:
Use Playwright MCP to open https://example.com.
Inspect the page and summarize its main content.
ลำดับการทำงาน:
Prompt
  ↓
Copilot Agent
  ↓
เลือก Playwright MCP Tool
  ↓
MCP Server
  ↓
Browser
  ↓
อ่านผลลัพธ์
  ↓
Copilot ตอบกลับ
#5. ทดลองกับ Web Application
ตัวอย่าง prompt:
Use Playwright MCP to open my application at http://localhost:3000.
Explore the page and identify the important interactive elements.
Do not modify any data yet.
แนวทางนี้เหมาะกับ exploratory testing เพราะ Agent สามารถสำรวจหน้าเว็บก่อนสร้าง test scenario
#6. ให้ Copilot ทดสอบ Login
สมมติระบบมีหน้า Login:
Use Playwright MCP to test the login page at http://localhost:3000/login.

Test scenario:
1. Open the login page.
2. Enter the test username.
3. Enter the test password.
4. Click Login.
5. Verify that the user reaches the dashboard.

Report each step and the final result.
สำหรับระบบจริง ไม่ควรใส่ password/token production ลงใน prompt หรือ commit ลง repository ให้ใช้ test account และ secret/environment mechanism ที่เหมาะสม
#7. สร้าง Playwright Test Project
npm init playwright@latest
จากนั้นสามารถสร้าง test ด้วย Copilot โดยให้ Agent สำรวจ UI ก่อน:
Use Playwright MCP to inspect http://localhost:3000/login.
Then create a Playwright TypeScript test for a successful login.
Prefer role, label, placeholder, or test-id locators that are stable.
Add meaningful assertions.
Save the test under tests/login.spec.ts.
ตัวอย่างโครงสร้าง test ที่คาดหวัง:
import { test, expect } from '@playwright/test';

test('user can login successfully', async ({ page }) => {
  await page.goto('http://localhost:3000/login');

  await page.getByLabel('Email').fill('tester@example.com');
  await page.getByLabel('Password').fill('test-password');
  await page.getByRole('button', { name: 'Login' }).click();

  await expect(page).toHaveURL(/dashboard/);
});
Locator ต้องปรับตาม DOM/accessibility structure ของระบบจริง
#8. รัน Automated Test
npx playwright test
รันแบบเห็น Browser:
npx playwright test --headed
เปิด UI Mode:
npx playwright test --ui
ดู HTML Report:
npx playwright show-report
#9. ใช้ Copilot ช่วย Debug
เมื่อ test ล้มเหลว สามารถให้ Copilot วิเคราะห์ทั้ง source code และหน้าเว็บผ่าน MCP:
Run the Playwright test tests/login.spec.ts.
If it fails, use Playwright MCP to inspect the current page.
Determine whether the failure is caused by a locator, navigation, timing, or an application defect.
Propose the smallest reliable fix and explain the cause before editing the test.
นี่เป็นรูปแบบ feedback loop:
Generate Test
    ↓
Run Test
    ↓
Failure?
  ↙     ↘
No       Yes
↓         ↓
Done   Inspect UI with MCP
          ↓
      Analyze Cause
          ↓
      Repair Test
          ↓
        Re-run
#10. Workshop: AI-assisted Test Generation
ให้ผู้เรียนสร้าง test จาก requirement:
Requirement:
A registered user should be able to login with a valid email and password.
Invalid credentials must show an error and must not navigate to the dashboard.

Use Playwright MCP to inspect the application first.
Create Playwright tests covering:
- successful login
- incorrect password
- empty email
- empty password

Use stable locators and meaningful assertions.
Do not invent UI elements that you cannot verify from the page.
ประเด็นสำคัญคือ ให้ Agent inspect ระบบจริงก่อน generate code เพื่อลด locator ที่ AI เดาขึ้นเอง
#11. ตัวอย่าง Prompt สำหรับ Exploratory Testing
Use Playwright MCP to explore http://localhost:3000.
Identify the main user flows and interactive elements.
Look for obvious usability, navigation, validation, and functional problems.
Do not perform destructive operations.
Return a concise test report with reproduction steps for each issue.
#12. ตัวอย่าง Prompt สำหรับสร้าง Regression Test
Use Playwright MCP to reproduce the reported bug on the application.
Once reproduced, create the smallest Playwright regression test that fails before the fix and passes after the fix.
Use stable semantic locators and clear assertions.
#13. Configuration เพิ่มเติม
Playwright MCP รองรับ options เช่น browser, headless, device และ code generation language ตัวอย่าง:
{
  "mcpServers": {
    "playwright": {
      "command": "npx",
      "args": [
        "@playwright/mcp@latest",
        "--browser",
        "chrome",
        "--codegen",
        "typescript"
      ]
    }
  }
}
ตัวอย่าง headless:
{
  "mcpServers": {
    "playwright": {
      "command": "npx",
      "args": ["@playwright/mcp@latest", "--headless"]
    }
  }
}
#14. แนวปฏิบัติที่แนะนำ
- ให้ Agent สำรวจหน้าเว็บก่อนสร้าง test
- ใช้ semantic locator เช่น role, label และ test id แทน CSS selector ที่เปราะบาง
- กำหนด assertion ให้ชัดเจน ไม่ใช่เพียงสั่ง click แล้วถือว่าผ่าน
- แยก test data ออกจาก test logic
- ใช้ test account และ environment สำหรับการทดสอบ
- หลีกเลี่ยง destructive action บน production
- ตรวจสอบ code ที่ Agent สร้างก่อน commit
- รัน generated tests ซ้ำเพื่อพิสูจน์ว่า deterministic เพียงพอ
- ใช้ CI เป็น final verification ไม่ควรถือผลจาก Agent session เพียงอย่างเดียว
#15. Playwright MCP ต่างจาก Playwright Test อย่างไร
| Playwright MCP | Playwright Test |
|---|---|
| เชื่อม AI Agent กับ Browser | Automated testing framework |
| เหมาะกับ exploration และ agentic workflow | เหมาะกับ test suite ที่ทำซ้ำได้ |
| รับคำสั่งจาก natural language ผ่าน Agent | ทำงานจาก test code |
| ช่วยค้นหา element และ workflow | ใช้ assertion, fixture, retry, report |
แนวทางที่เหมาะสมคือใช้ทั้งสองร่วมกัน:
Requirement
   ↓
Copilot Agent
   ↓
Playwright MCP
   ↓
Explore Real UI
   ↓
Generate Playwright Test
   ↓
Playwright Test Runner
   ↓
CI/CD
#16. สรุป
Playwright MCP ไม่ได้มาแทน Playwright Test แต่ทำหน้าที่เป็นสะพานระหว่าง AI Agent และ Browser ทำให้ GitHub Copilot สามารถสำรวจ Web Application, ทดลอง user flow และใช้ข้อมูลจาก UI จริงมาช่วยสร้างหรือซ่อม automated tests ได้
เมื่อใช้ร่วมกับ Playwright Test จะเกิด workflow แบบ AI-assisted software testing ที่สำคัญ ได้แก่ Explore → Generate → Execute → Diagnose → Repair → Re-test ซึ่งสามารถต่อยอดไปยัง regression testing, exploratory testing และ self-healing test research ได้
#อ้างอิง
- Microsoft Playwright MCP repository: https://github.com/microsoft/playwright-mcp
- Visual Studio Code MCP documentation: https://code.visualstudio.com/docs/copilot/chat/mcp-servers
- Playwright documentation: https://playwright.dev/