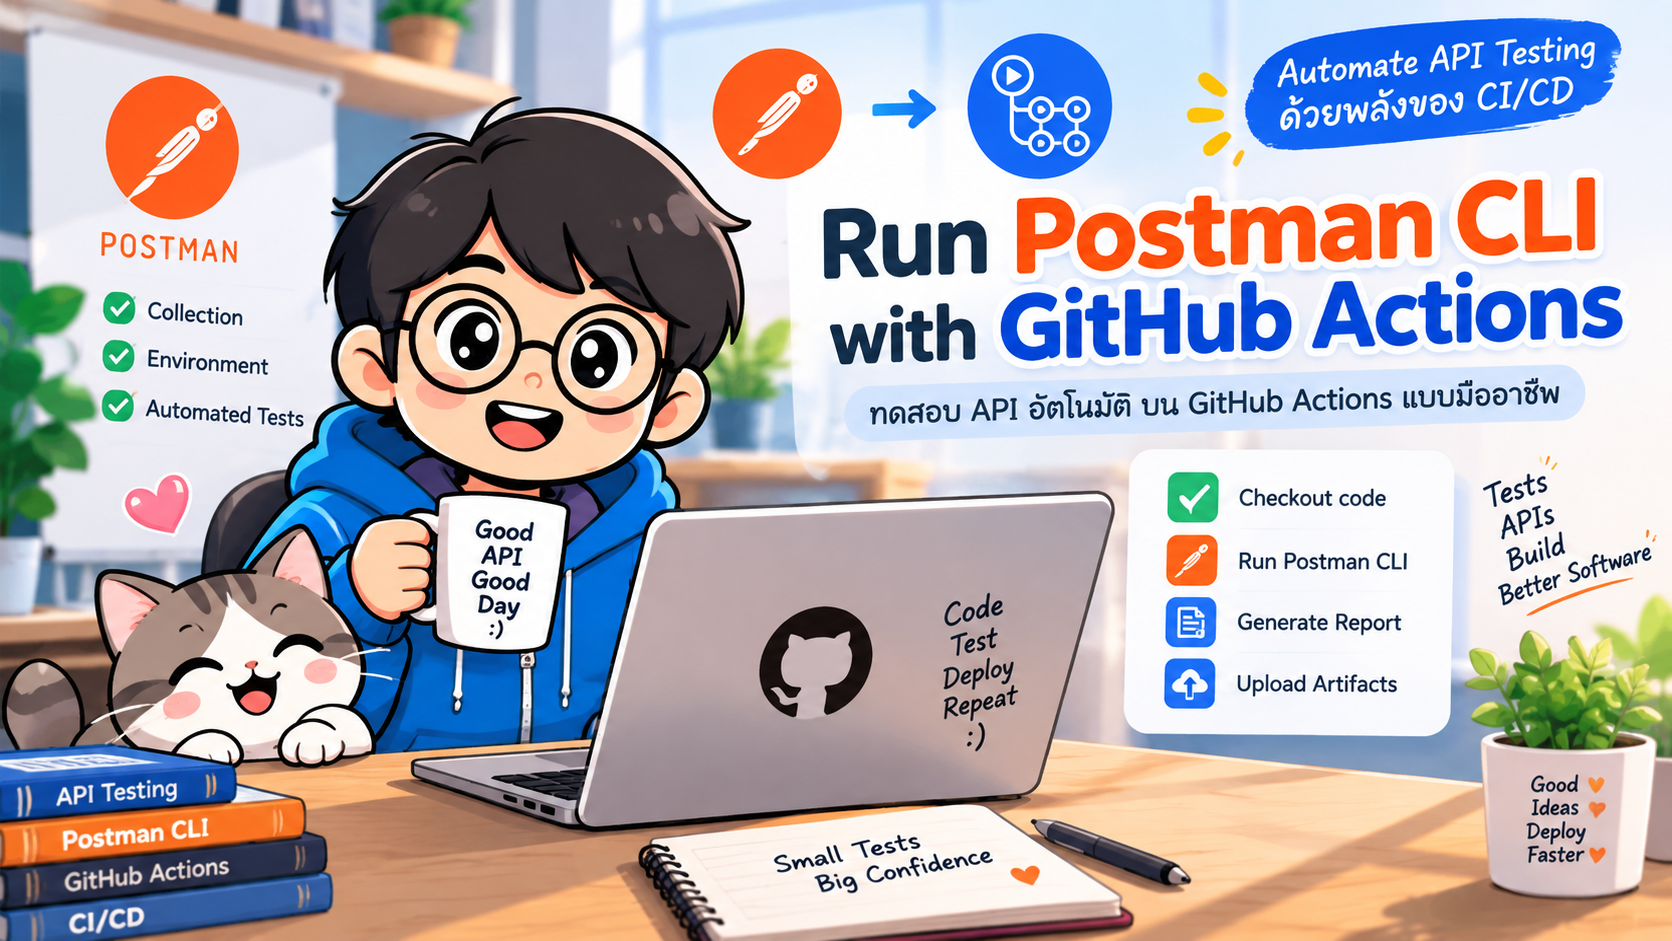
- GitHub Actions รัน API Testing ด้วย Postman CLI
- Architecture
- สิ่งที่ต้องเตรียม
- สร้าง Test ใน Postman
- วิธีที่ 1: เก็บ Postman Collection ใน GitHub Repository
- Local Collection ไม่จำเป็นต้องใช้ Postman API Key
- การใช้ Postman Environment
- อย่าเก็บ Secret ลง Postman Environment ที่ Commit เข้า Git
- การสร้าง GitHub Secrets
- ส่ง GitHub Secret เข้า Postman Collection
- Workflow ฉบับใช้งานจริง
- การสร้าง Test Report
- JUnit Report
- HTML Report
- สร้างหลาย Report พร้อมกัน
- Upload Report เป็น GitHub Artifact
- Workflow พร้อม Report
- วิธีที่ 2: รัน Collection จาก Postman Cloud
- Postman Cloud Environment
- Local Collection หรือ Postman Cloud แบบไหนดี
- Integration Test ด้วย Docker Compose
- ตัวอย่าง Workflow Docker Compose + Postman CLI
- ทำไมต้องมี Health Check
- ใช้ API Test เป็น Quality Gate ก่อน Deploy
- กำหนด Timeout
- หยุดเมื่อพบ Failure
- ระวัง --suppress-exit-code
- Pin Postman CLI Version
- Data Driven Testing
- Best Practices
- ตัวอย่าง Production-ready Workflow
- Workflow ที่แนะนำสำหรับ Software Testing
- Postman CLI กับ Newman ต่างกันอย่างไร
- สรุป
- References
#GitHub Actions รัน API Testing ด้วย Postman CLI
การทดสอบ API ไม่ควรเป็นขั้นตอนที่นักพัฒนาต้องเปิด Postman แล้วกด Run Collection ด้วยตนเองทุกครั้งที่แก้ไข source code เพราะเมื่อระบบเริ่มมีหลาย service หรือมีการ deploy บ่อย การทดสอบแบบ manual จะกลายเป็นคอขวดของ CI/CD ได้อย่างรวดเร็ว
แนวทางที่เหมาะสมคือการนำ Postman CLI มารันบน GitHub Actions เพื่อให้ API Test ทำงานอัตโนมัติเมื่อเกิดเหตุการณ์ เช่น
- Push code
- เปิด Pull Request
- Merge เข้า
main - Deploy ไปยัง Staging
- ก่อน Deploy Production
- รันตาม Schedule
บทความนี้อธิบายตั้งแต่แนวคิดพื้นฐาน ไปจนถึง workflow ที่สามารถนำไปใช้จริงได้
#Postman CLI คืออะไร
Postman CLI คือเครื่องมือ Command Line ของ Postman สำหรับใช้งาน Postman จาก Terminal และระบบ CI/CD
ตัวอย่างคำสั่งพื้นฐานคือ
postman collection run postman/api-test.postman_collection.json
คำสั่งนี้จะ
- อ่าน Postman Collection
- ส่ง HTTP Request ตาม Collection
- รัน Post-response Script
- ตรวจสอบ Assertions
- สรุปผลการทดสอบ
- ส่ง Exit Code กลับให้ระบบ CI/CD
หาก Test ผ่าน Exit Code จะเป็น 0
หากเกิด failure จะได้ Non-zero Exit Code ซึ่ง GitHub Actions สามารถนำไปใช้เป็น Quality Gate เพื่อหยุด Pipeline ได้
#Architecture
ภาพรวมการทำงานสามารถอธิบายได้ดังนี้
Developer
    |
    | git push / pull request
    v
GitHub Repository
    |
    v
GitHub Actions
    |
    +--------------------------+
    |                          |
    v                          v
Checkout Code             GitHub Secrets
    |                          |
    +------------+-------------+
                 |
                 v
           Postman CLI
                 |
        +--------+--------+
        |                 |
        v                 v
  Collection          Environment
        |
        v
    API Requests
        |
        v
   Assertions/Test
        |
   +----+----+
   |         |
 PASS       FAIL
   |         |
   v         v
Deploy     Stop Pipeline
#สิ่งที่ต้องเตรียม
ตัวอย่าง project structure
my-api-project/
├── .github/
│   └── workflows/
│       └── postman-api-test.yml
│
├── postman/
│   ├── api-test.postman_collection.json
│   └── test.postman_environment.json
│
├── src/
│
├── docker-compose.yml
└── README.md
สิ่งที่ควรมี
- GitHub Repository
- Postman Collection
- API สำหรับทดสอบ
- Postman Tests / Assertions
- GitHub Actions Workflow
- GitHub Secrets สำหรับข้อมูลสำคัญ
#สร้าง Test ใน Postman
สมมติ API
GET /api/users/1
คาดหวังว่า API ต้องตอบ HTTP Status 200
ใน Postman สามารถเขียน Post-response Script ได้ดังนี้
pm.test("Status code is 200", function () {
    pm.response.to.have.status(200);
});
ตรวจสอบ Response Time
pm.test("Response time is less than 1000 ms", function () {
    pm.expect(pm.response.responseTime).to.be.below(1000);
});
ตรวจสอบ JSON Response
pm.test("Response contains id", function () {
    const json = pm.response.json();

    pm.expect(json).to.have.property("id");
});
ตรวจสอบ Content-Type
pm.test("Content-Type is application/json", function () {
    pm.expect(
        pm.response.headers.get("Content-Type")
    ).to.include("application/json");
});
เมื่อรัน Collection ด้วย Postman CLI Tests เหล่านี้จะถูกรันอัตโนมัติ
#วิธีที่ 1: เก็บ Postman Collection ใน GitHub Repository
แนวทางที่ง่ายที่สุดคือ Export Collection จาก Postman แล้วเก็บไว้ใน repository
ตัวอย่าง
postman/api-test.postman_collection.json
จากนั้นสร้าง GitHub Actions Workflow
.github/workflows/postman-api-test.yml
#Workflow แบบง่ายที่สุด
name: Postman API Test

on:
  push:
    branches:
      - main

  pull_request:
    branches:
      - main

permissions:
  contents: read

jobs:
  api-test:
    runs-on: ubuntu-latest

    steps:

      - name: Checkout repository
        uses: actions/checkout@v4

      - name: Run Postman Collection
        uses: postmanlabs/postman-cli-action@v1
        with:
          command: >
            collection run
            postman/api-test.postman_collection.json
ส่วนสำคัญคือ
uses: postmanlabs/postman-cli-action@v1
GitHub Action ตัวนี้จะติดตั้งและเรียก Postman CLI ให้โดยอัตโนมัติ
ดังนั้นไม่จำเป็นต้องเขียน script สำหรับดาวน์โหลด Postman CLI เอง
#Local Collection ไม่จำเป็นต้องใช้ Postman API Key
ถ้า Collection อยู่ใน GitHub Repository เช่น
postman/api-test.postman_collection.json
สามารถรันได้โดยไม่ต้องกำหนด
POSTMAN_API_KEY
ตัวอย่าง
- name: Run API Test
  uses: postmanlabs/postman-cli-action@v1
  with:
    command: >
      collection run postman/api-test.postman_collection.json
API Key จะจำเป็นเมื่อ workflow ต้องเข้าถึง Resource ที่อยู่บน Postman Cloud
#การใช้ Postman Environment
สามารถ Export Environment จาก Postman เช่น
postman/test.postman_environment.json
จากนั้นรัน
- name: Run Postman API Test
  uses: postmanlabs/postman-cli-action@v1
  with:
    command: >
      collection run postman/api-test.postman_collection.json
      --environment postman/test.postman_environment.json
หรือใช้ alias
command: >
  collection run postman/api-test.postman_collection.json
  -e postman/test.postman_environment.json
#อย่าเก็บ Secret ลง Postman Environment ที่ Commit เข้า Git
ตัวอย่างที่ไม่ควรทำ
{
  "key": "token",
  "value": "real-production-token"
}
เพราะ Secret จะถูกเก็บใน Git History
ข้อมูลที่ไม่ควร Commit เช่น
API_TOKEN
JWT_TOKEN
CLIENT_SECRET
DATABASE_PASSWORD
POSTMAN_API_KEY
AWS_SECRET_ACCESS_KEY
ควรใช้ GitHub Actions Secrets
#การสร้าง GitHub Secrets
เปิด GitHub Repository
Settings
   |
   +-- Secrets and variables
         |
         +-- Actions
               |
               +-- New repository secret
ตัวอย่าง Secrets
API_BASE_URL
API_TOKEN
#ส่ง GitHub Secret เข้า Postman Collection
สมมติใน Collection ใช้ตัวแปร
{{baseUrl}}
URL
{{baseUrl}}/api/users
Authorization
Bearer {{token}}
สามารถส่งค่าจาก GitHub Secrets ได้ดังนี้
- name: Run Postman API Test
  uses: postmanlabs/postman-cli-action@v1
  with:
    command: >
      collection run postman/api-test.postman_collection.json
      --env-var "baseUrl=${{ secrets.API_BASE_URL }}"
      --env-var "token=${{ secrets.API_TOKEN }}"
ข้อดีคือ
Secret
  |
  v
GitHub Secrets
  |
  v
GitHub Actions
  |
  v
Postman CLI
โดยไม่จำเป็นต้องเขียน Secret จริงลงใน Git Repository
#Workflow ฉบับใช้งานจริง
ตัวอย่างที่เหมาะกับ project ทั่วไป
name: API Test - Postman CLI

on:

  push:
    branches:
      - main
      - develop

  pull_request:
    branches:
      - main
      - develop

  workflow_dispatch:

permissions:
  contents: read

jobs:

  postman-test:

    name: Postman API Test

    runs-on: ubuntu-latest

    steps:

      - name: Checkout repository
        uses: actions/checkout@v4

      - name: Run Postman Collection
        uses: postmanlabs/postman-cli-action@v1

        with:

          command: >
            collection run
            postman/api-test.postman_collection.json
            --env-var "baseUrl=${{ secrets.API_BASE_URL }}"
            --env-var "token=${{ secrets.API_TOKEN }}"
#การสร้าง Test Report
Postman CLI รองรับ Reporter หลัก ได้แก่
CLI
JSON
JUnit
HTML
สำหรับ GitHub Actions แนะนำอย่างน้อย
CLI + JUnit
เพราะ
- CLI ดูผลได้จาก GitHub Actions Log
- JUnit นำไปประมวลผลต่อใน CI/CD ได้ง่าย
#JUnit Report
ตัวอย่าง
- name: Run Postman API Test
  uses: postmanlabs/postman-cli-action@v1

  with:

    command: >
      collection run postman/api-test.postman_collection.json
      -r cli,junit
      --reporter-junit-export reports/postman-junit.xml
หลังจบรอบการทดสอบจะได้
reports/postman-junit.xml
#HTML Report
- name: Run Postman API Test
  uses: postmanlabs/postman-cli-action@v1

  with:

    command: >
      collection run postman/api-test.postman_collection.json
      -r cli,html
      --reporter-html-export reports/postman-report.html
#สร้างหลาย Report พร้อมกัน
- name: Run Postman API Test
  uses: postmanlabs/postman-cli-action@v1

  with:

    command: >
      collection run postman/api-test.postman_collection.json
      -r cli,json,junit,html
      --reporter-json-export reports/postman-report.json
      --reporter-junit-export reports/postman-junit.xml
      --reporter-html-export reports/postman-report.html
#Upload Report เป็น GitHub Artifact
หลังรัน Test สามารถ Upload Report ได้ด้วย
- name: Upload Postman Reports

  if: always()

  uses: actions/upload-artifact@v4

  with:

    name: postman-test-reports

    path: reports/
ส่วนสำคัญคือ
if: always()
เพราะถ้า API Test Fail ขั้นตอน Upload Report ยังคงทำงาน
นักพัฒนาจึงสามารถเปิด Report เพื่อวิเคราะห์ปัญหาได้
#Workflow พร้อม Report
name: API Test - Postman CLI

on:

  push:
    branches:
      - main
      - develop

  pull_request:
    branches:
      - main
      - develop

  workflow_dispatch:

permissions:
  contents: read

jobs:

  postman-test:

    runs-on: ubuntu-latest

    steps:

      - name: Checkout repository
        uses: actions/checkout@v4

      - name: Run Postman Collection

        uses: postmanlabs/postman-cli-action@v1

        with:

          command: >
            collection run
            postman/api-test.postman_collection.json
            --env-var "baseUrl=${{ secrets.API_BASE_URL }}"
            --env-var "token=${{ secrets.API_TOKEN }}"
            -r cli,junit,html
            --reporter-junit-export reports/postman-junit.xml
            --reporter-html-export reports/postman-report.html

      - name: Upload Postman Reports

        if: always()

        uses: actions/upload-artifact@v4

        with:

          name: postman-test-reports

          path: reports/

          if-no-files-found: warn
#วิธีที่ 2: รัน Collection จาก Postman Cloud
ถ้าองค์กรเก็บ Collection บน Postman Workspace และไม่ต้องการ Export JSON ลง GitHub สามารถใช้ Collection ID ได้
ตัวอย่าง
- name: Run Postman Cloud Collection

  uses: postmanlabs/postman-cli-action@v1

  with:

    api-key: ${{ secrets.POSTMAN_API_KEY }}

    command: >
      collection run
      12345678-12345678-abcd-abcd-abcd-123456789abc
กรณีนี้ต้องสร้าง GitHub Secret
POSTMAN_API_KEY
#Postman Cloud Environment
สามารถใช้ Environment ID ได้
- name: Run Postman Cloud Collection

  uses: postmanlabs/postman-cli-action@v1

  with:

    api-key: ${{ secrets.POSTMAN_API_KEY }}

    command: >
      collection run
      12345678-collection-id
      --environment
      87654321-environment-id
แนวทางนี้เหมาะกับทีมที่ใช้ Postman Workspace เป็นแหล่งกลางในการดูแล API Tests
#Local Collection หรือ Postman Cloud แบบไหนดี
| ประเด็น | Local Collection | Postman Cloud |
|---|---|---|
| Collection | JSON ใน Git | Collection ID |
| API Key | ไม่จำเป็น | ต้องใช้เมื่อเข้าถึง Cloud |
| Version Control | Git | Postman Workspace |
| ใช้งานง่ายใน Workshop | ดีมาก | ปานกลาง |
| Git-centric Team | เหมาะ | ขึ้นอยู่กับ Workflow |
| Postman-centric Team | ใช้ได้ | เหมาะมาก |
ถ้าต้องการเริ่มต้นง่ายที่สุด แนะนำ
Collection JSON
      |
      v
Git Repository
      |
      v
GitHub Actions
      |
      v
Postman CLI
#Integration Test ด้วย Docker Compose
ในหลาย project API ยังไม่ได้ Deploy ไป Staging
เราสามารถให้ GitHub Actions เปิด Application ด้วย Docker Compose ก่อน แล้วค่อยรัน Postman CLI
Architecture
GitHub Actions
      |
      v
docker compose up
      |
      v
API Container
      |
      v
Health Check
      |
      v
Postman CLI
      |
      v
API Integration Test
#ตัวอย่าง Workflow Docker Compose + Postman CLI
name: Integration API Test

on:

  push:

  pull_request:

permissions:
  contents: read

jobs:

  integration-test:

    runs-on: ubuntu-latest

    steps:

      - name: Checkout repository
        uses: actions/checkout@v4

      - name: Start application
        run: docker compose up -d --build

      - name: Wait for API

        run: |

          for i in {1..30}
          do

            if curl -f http://localhost:8080/health
            then

              echo "API is ready"

              exit 0

            fi

            echo "Waiting for API..."

            sleep 2

          done

          echo "API did not become ready"

          docker compose logs

          exit 1

      - name: Run Postman API Test

        uses: postmanlabs/postman-cli-action@v1

        with:

          command: >
            collection run
            postman/api-test.postman_collection.json
            --env-var "baseUrl=http://localhost:8080"
            -r cli,junit
            --reporter-junit-export
            reports/postman-junit.xml

      - name: Show container logs

        if: failure()

        run: docker compose logs

      - name: Upload test report

        if: always()

        uses: actions/upload-artifact@v4

        with:

          name: postman-test-report

          path: reports/

      - name: Stop application

        if: always()

        run: docker compose down
#ทำไมต้องมี Health Check
ไม่ควรทำแบบนี้
- run: sleep 10
เพราะเราไม่รู้ว่า API ใช้เวลานานเท่าไรในการ Start
ควรตรวจสอบ endpoint
/health
เช่น
curl -f http://localhost:8080/health
ถ้า API พร้อมแล้วจึงค่อยเริ่ม Postman Test
#ใช้ API Test เป็น Quality Gate ก่อน Deploy
ตัวอย่าง Pipeline
Build
 |
 v
Unit Test
 |
 v
Deploy Test Environment
 |
 v
Postman API Test
 |
 +---------+
 |         |
Fail      Pass
 |         |
 v         v
Stop     Deploy
GitHub Actions สามารถกำหนด dependency ระหว่าง Job ได้
jobs:

  api-test:

    runs-on: ubuntu-latest

    steps:

      - uses: actions/checkout@v4

      - name: Run Postman API Test

        uses: postmanlabs/postman-cli-action@v1

        with:

          command: >
            collection run
            postman/api-test.postman_collection.json
            --env-var "baseUrl=${{ secrets.STAGING_URL }}"

  deploy:

    needs: api-test

    runs-on: ubuntu-latest

    steps:

      - name: Deploy Application

        run: echo "Deploy production..."
ส่วนสำคัญคือ
needs: api-test
หาก api-test Fail
deploy
จะไม่เริ่มทำงาน
#กำหนด Timeout
หาก API อาจตอบช้า สามารถกำหนด Timeout ได้
command: >
  collection run postman/api-test.postman_collection.json
  --timeout-request 10000
ค่าที่ใช้เป็น Milliseconds
10000 ms
=
10 seconds
#หยุดเมื่อพบ Failure
สามารถใช้
--bail
ตัวอย่าง
command: >
  collection run postman/api-test.postman_collection.json
  --bail
เหมาะกับ Pipeline ที่ไม่ต้องการรัน Test ที่เหลือต่อเมื่อเจอปัญหาสำคัญ
#ระวัง --suppress-exit-code
Postman CLI รองรับ Option
--suppress-exit-code
หรือ
-x
Option นี้เปลี่ยนพฤติกรรม Exit Code
ดังนั้นถ้าต้องการใช้ Postman Test เป็น Quality Gate ใน CI/CD ไม่ควรใช้ Option นี้โดยไม่มีเหตุผล
เพราะอาจทำให้ Test Fail แต่ Pipeline ไม่หยุดตามที่คาดหวัง
#Pin Postman CLI Version
โดยค่าเริ่มต้น Action สามารถใช้ CLI รุ่นล่าสุด
แต่สำหรับ Production CI/CD อาจต้องการ Reproducibility
สามารถ Pin Version ได้
- name: Run Postman API Test

  uses: postmanlabs/postman-cli-action@v1

  with:

    postman-cli-version: "1.27.0"

    command: >
      collection run
      postman/api-test.postman_collection.json
ควรเลือก Version ที่ทีมได้ทดสอบแล้ว
ข้อดีคือ
- ลดความเสี่ยงจาก Breaking Change
- ทำให้ Pipeline ทำงานสม่ำเสมอ
- Debug ปัญหาได้ง่ายขึ้น
- Reproduce Build เดิมได้ง่าย
#Data Driven Testing
Postman CLI สามารถรัน Collection หลาย Iteration และใช้ไฟล์ข้อมูลได้
ตัวอย่าง
- name: Run Data Driven API Test

  uses: postmanlabs/postman-cli-action@v1

  with:

    command: >
      collection run
      postman/api-test.postman_collection.json
      --iteration-count 5
      --iteration-data postman/data.csv
ตัวอย่าง data.csv
username,password
user01,password01
user02,password02
user03,password03
ใน Postman สามารถเรียก
pm.iterationData.get("username")
ได้
#Best Practices
#1. อย่า Commit Secret
ไม่ควรมี
password
token
API key
client secret
private key
อยู่ในไฟล์ JSON ที่ Commit เข้า Repository
ควรใช้
GitHub Secrets
แทน
#2. ใช้ Least Privilege
Token สำหรับ Test ควรมี Permission เท่าที่จำเป็น
ตัวอย่าง API Test อ่านข้อมูลอย่างเดียว ไม่ควรใช้ Account ที่มี Administrator Permission
#3. แยก Environment
ควรแยก
Development
Testing
Staging
Production
อย่างชัดเจน
CI API Test ส่วนใหญ่ควรทำงานบน
Testing
หรือ
Staging
#4. หลีกเลี่ยงการยิง Test ไป Production โดยไม่ตั้งใจ
ตั้งชื่อ GitHub Secrets ให้ชัดเจน เช่น
TEST_API_BASE_URL
STAGING_API_BASE_URL
ดีกว่า
API_URL
เพราะลดโอกาส Configuration ผิด
#5. แยก Test Data ออกจาก Production Data
API Test มักสร้าง แก้ไข หรือลบข้อมูล
ควรมี
Test Database
หรือ
Isolated Test Environment
#6. ทำ Cleanup หลัง Test
ตัวอย่าง
POST /users
GET /users/{id}
PUT /users/{id}
DELETE /users/{id}
หลัง Test ควรทำ Cleanup Test Data
เพื่อให้ Test Run ครั้งต่อไปไม่ถูกผลกระทบจากข้อมูลเดิม
#7. ใช้ Unique Test Data
เช่น
const email =
    `test-${Date.now()}@example.com`;

pm.variables.set("email", email);
ช่วยลดปัญหา Duplicate Data
#8. สร้าง Report เสมอ
แนะนำ
CLI
+
JUnit
+
HTML
สำหรับ CI/CD ที่ต้องการวิเคราะห์ Failure ได้สะดวก
#9. ใช้ Pull Request เป็น Quality Gate
Workflow ควรรันเมื่อ
pull_request:
เพื่อให้ API Regression ถูกตรวจพบก่อน Merge เข้า Main Branch
#ตัวอย่าง Production-ready Workflow
name: API Quality Gate

on:

  pull_request:
    branches:
      - main

  push:
    branches:
      - main

  workflow_dispatch:

permissions:
  contents: read

jobs:

  api-test:

    name: Postman API Integration Test

    runs-on: ubuntu-latest

    steps:

      - name: Checkout repository
        uses: actions/checkout@v4

      - name: Start services

        run: docker compose up -d --build

      - name: Wait for API

        run: |

          for i in {1..30}
          do

            if curl -fsS http://localhost:8080/health
            then

              echo "API ready"

              exit 0

            fi

            sleep 2

          done

          docker compose logs

          exit 1

      - name: Run Postman API Tests

        uses: postmanlabs/postman-cli-action@v1

        with:

          command: >
            collection run
            postman/api-test.postman_collection.json
            --env-var "baseUrl=http://localhost:8080"
            --env-var "token=${{ secrets.API_TOKEN }}"
            --timeout-request 10000
            -r cli,junit,html
            --reporter-junit-export reports/postman-junit.xml
            --reporter-html-export reports/postman-report.html

      - name: Upload API Test Reports

        if: always()

        uses: actions/upload-artifact@v4

        with:

          name: postman-api-test-reports

          path: reports/

          if-no-files-found: warn

      - name: Show application logs

        if: failure()

        run: docker compose logs

      - name: Stop services

        if: always()

        run: docker compose down
#Workflow ที่แนะนำสำหรับ Software Testing
สำหรับระบบจริงอาจออกแบบ Pipeline เป็น
Pull Request
     |
     v
Static Analysis
     |
     v
Unit Test
     |
     v
Build
     |
     v
Start Test Environment
     |
     v
Postman API Integration Test
     |
     v
Security Test
     |
     v
Quality Gate
     |
     v
Merge / Deploy
ดังนั้น Postman CLI ไม่ได้มาแทน Unit Test
แต่ทำหน้าที่ในระดับ
API Test
Integration Test
Regression Test
#Postman CLI กับ Newman ต่างกันอย่างไร
ทั้งสองเครื่องมือสามารถใช้รัน Postman Collection ใน CI/CD ได้
แต่ Postman CLI เป็น CLI หลักของ Postman รุ่นปัจจุบัน และรองรับความสามารถที่ผูกกับ Postman Platform มากขึ้น เช่น
Collection Run
Monitor
Specification Validation
Governance
Postman Cloud
ขณะที่ Newman ยังคงเหมาะกับงานที่ต้องการ Node.js CLI แบบเรียบง่ายและมี ecosystem ของ reporter เดิม
สำหรับ Workflow ใหม่ที่ใช้งาน Postman Platform อยู่แล้ว การใช้
Postman CLI
เป็นตัวเลือกที่เหมาะสม
#สรุป
การนำ Postman CLI มาใช้กับ GitHub Actions ช่วยเปลี่ยน API Testing จากงาน Manual ให้เป็น Automated Quality Gate
Workflow หลักคือ
Developer
   |
   v
Git Push / Pull Request
   |
   v
GitHub Actions
   |
   v
Postman CLI
   |
   +-- Collection
   |
   +-- Environment
   |
   +-- GitHub Secrets
   |
   v
API Test
   |
   +----------+
   |          |
 Fail        Pass
   |          |
   v          v
Stop       Deploy
Pipeline
สำหรับการเริ่มต้นสามารถใช้ Workflow สั้น ๆ เพียง
- uses: postmanlabs/postman-cli-action@v1

  with:

    command: >
      collection run
      postman/api-test.postman_collection.json
จากนั้นจึงเพิ่ม
Environment
GitHub Secrets
JUnit Report
HTML Report
Docker Compose
Quality Gate
Deployment
ตามความซับซ้อนของระบบ
แนวทางนี้ทำให้ API Test กลายเป็นส่วนหนึ่งของ DevOps Pipeline และช่วยตรวจจับ Regression ก่อนที่ระบบจะถูก Deploy ไปยัง Environment ถัดไป
#References
Postman Documentation
https://learning.postman.com/docs/postman-cli/postman-cli-github-actions
Postman CLI Collection Run
https://learning.postman.com/docs/postman-cli/postman-cli-run-collection
Postman CLI Reporters
https://learning.postman.com/docs/postman-cli/postman-cli-reporters
Postman CLI GitHub Action
https://github.com/postmanlabs/postman-cli-action
GitHub Actions Documentation
https://docs.github.com/actions