- สารบัญ
- 1. GitOps คืออะไร
- 2. Argo CD คืออะไร
- 3. สถาปัตยกรรม
- 4. สิ่งที่ต้องเตรียม
- 5. Workshop Overview
- 6. ขั้นตอนที่ 1: ติดตั้งและตั้งค่า doctl
- 7. ขั้นตอนที่ 2: สร้าง DOKS Cluster
- 8. ขั้นตอนที่ 3: ติดตั้ง Argo CD
- 9. ขั้นตอนที่ 4: เข้าใช้งาน Argo CD
- 10. ขั้นตอนที่ 5: สร้าง GitOps Repository
- 11. ขั้นตอนที่ 6: สร้าง Kubernetes Manifests
- 12. ขั้นตอนที่ 7: สร้าง Argo CD Application
- 13. ขั้นตอนที่ 8: ทดสอบ GitOps Deployment
- 14. ขั้นตอนที่ 9: ทดสอบ Self-Healing
- 15. ขั้นตอนที่ 10: ทดสอบ Rollback ด้วย Git
- 16. Expose Application ออก Internet
- 17. แนวทาง Production
- 18. Troubleshooting
- 19. ลบ Resource หลังจบ Workshop
- 20. สรุป
- ตัวอย่าง GitOps Workflow ที่แนะนำ
- แนวทางต่อยอด
- เอกสารอ้างอิง
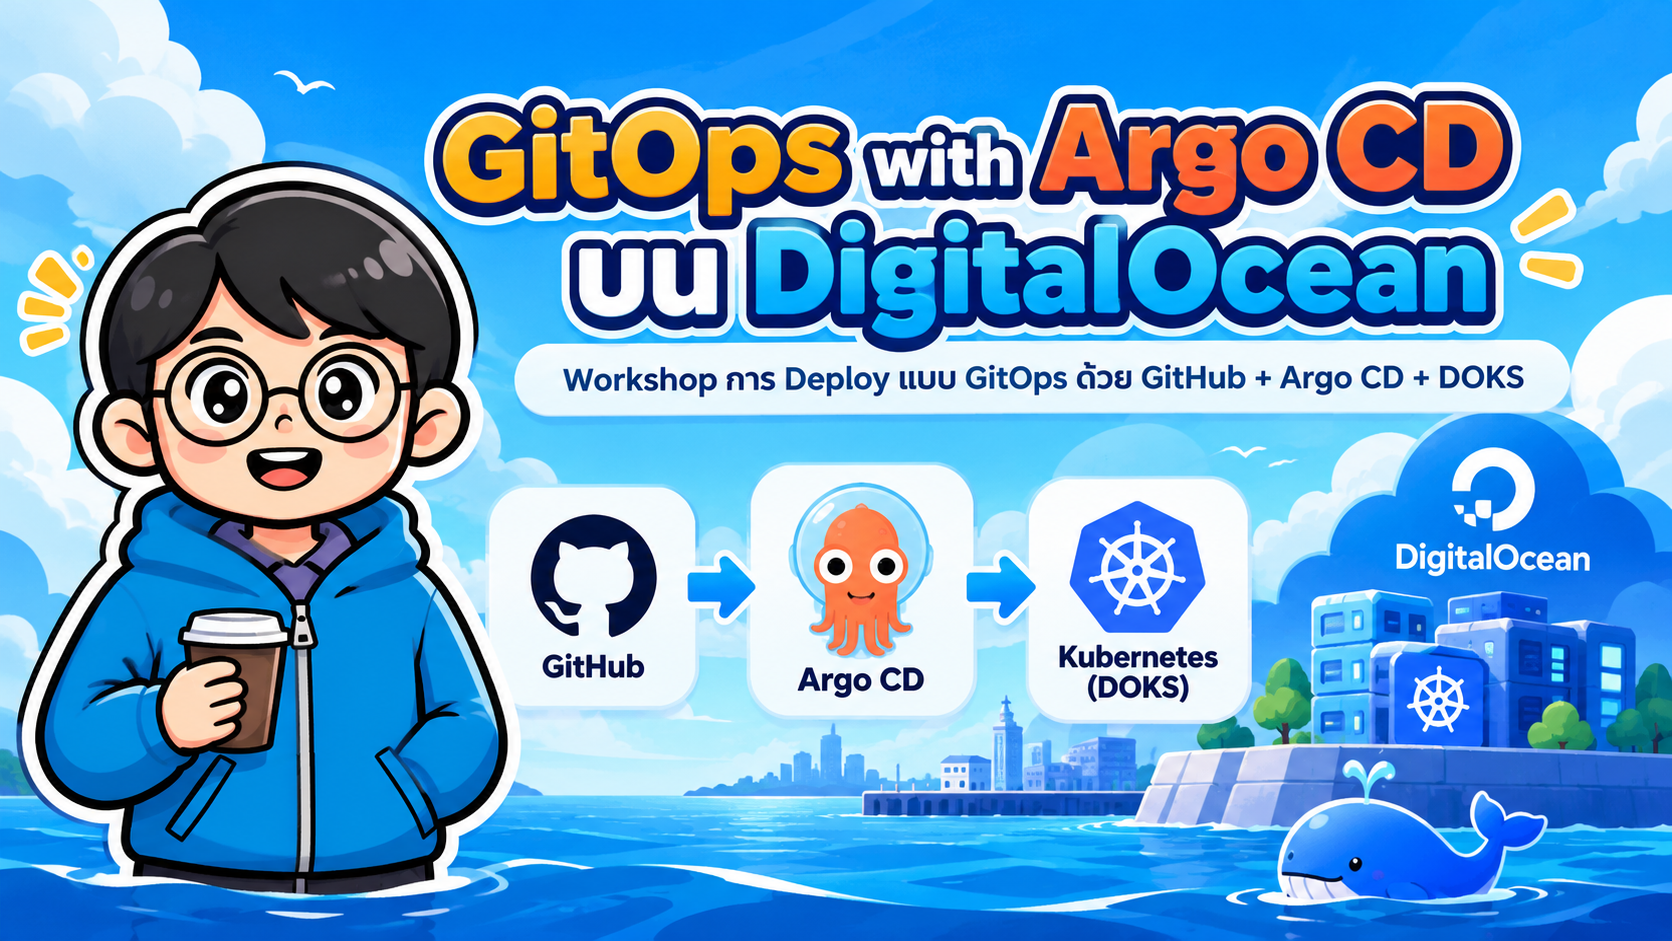
Workshop ภาษาไทยสำหรับเรียนรู้การ Deploy Application แบบ GitOps โดยใช้ GitHub + Argo CD + DigitalOcean Kubernetes (DOKS)
แนวคิดหลักคือให้ Git Repository เป็น Single Source of Truth และให้ Argo CD ตรวจสอบ/ปรับสถานะของ Kubernetes ให้ตรงกับ Git โดยอัตโนมัติ
#สารบัญ
- GitOps คืออะไร
- Argo CD คืออะไร
- สถาปัตยกรรม
- สิ่งที่ต้องเตรียม
- Workshop Overview
- ขั้นตอนที่ 1: ติดตั้งและตั้งค่า doctl
- ขั้นตอนที่ 2: สร้าง DOKS Cluster
- ขั้นตอนที่ 3: ติดตั้ง Argo CD
- ขั้นตอนที่ 4: เข้าใช้งาน Argo CD
- ขั้นตอนที่ 5: สร้าง GitOps Repository
- ขั้นตอนที่ 6: สร้าง Kubernetes Manifests
- ขั้นตอนที่ 7: สร้าง Argo CD Application
- ขั้นตอนที่ 8: ทดสอบ GitOps Deployment
- ขั้นตอนที่ 9: ทดสอบ Self-Healing
- ขั้นตอนที่ 10: ทดสอบ Rollback ด้วย Git
- Expose Application ออก Internet
- แนวทาง Production
- Troubleshooting
- สรุป
#1. GitOps คืออะไร
GitOps คือแนวทางจัดการ Infrastructure และ Application Deployment โดยเก็บสถานะที่ต้องการของระบบ หรือ Desired State ไว้ใน Git Repository
แทนที่จะ Deploy ด้วยคำสั่งลักษณะนี้โดยตรง
kubectl apply -f deployment.yaml
ทีมจะทำงานผ่าน Git เช่น
Developer
   |
   | git push
   v
Git Repository
   |
   | Argo CD watches
   v
Kubernetes Cluster
เมื่อไฟล์ Manifest ใน Git เปลี่ยน Argo CD จะตรวจพบความแตกต่างระหว่าง
- Desired State — สถานะที่ประกาศไว้ใน Git
- Live State — สถานะจริงใน Kubernetes
จากนั้น Argo CD สามารถ Sync ให้ Live State กลับมาตรงกับ Git ได้
#หลักสำคัญของ GitOps
- Git เป็น Single Source of Truth
- การเปลี่ยนระบบทำผ่าน Commit / Pull Request
- มีประวัติย้อนหลังและตรวจสอบได้
- สามารถ Rollback ด้วย Git
- ลด Configuration Drift
- รองรับ Automated Deployment
- แยกสิทธิ์การ Push Code ออกจากสิทธิ์เข้าถึง Kubernetes Cluster ได้ดีขึ้น
#2. Argo CD คืออะไร
Argo CD เป็น Continuous Delivery Controller สำหรับ Kubernetes ที่ออกแบบตามแนวทาง GitOps
Argo CD ทำงานแบบ Pull-based Deployment กล่าวคือ Argo CD ที่ทำงานอยู่ในหรือเชื่อมต่อกับ Kubernetes จะตรวจ Git Repository และดึง Desired State มาปรับใช้กับ Cluster
สถานะที่พบได้บ่อยใน Argo CD ได้แก่
| สถานะ | ความหมาย |
|---|---|
Synced |
Live State ตรงกับ Git |
OutOfSync |
Live State แตกต่างจาก Git |
Healthy |
Application ทำงานตาม Health Check |
Degraded |
Resource บางส่วนมีปัญหา |
Progressing |
Kubernetes กำลัง Rollout |
#3. สถาปัตยกรรม
flowchart LR
    DEV[Developer] -->|git push / pull request| GIT[GitHub Repository]
    GIT -->|Watch / Pull| ARGO[Argo CD]
    ARGO -->|Apply Desired State| K8S[DigitalOcean Kubernetes]
    K8S --> APP[Application Pods]
    K8S --> SVC[Kubernetes Service]
    USER[User] --> LB[DigitalOcean Load Balancer / Ingress]
    LB --> SVC
    SVC --> APP
    ARGO -->|Detect Drift| K8S
#Deployment Flow
1. Developer แก้ Kubernetes Manifest
2. Commit และ Push ไปยัง GitHub
3. Argo CD ตรวจพบ Commit ใหม่
4. Argo CD เปรียบเทียบ Git กับ Kubernetes
5. Argo CD Sync Resource
6. Kubernetes ทำ Rolling Update
7. Argo CD ตรวจ Health และแสดงสถานะ
#4. สิ่งที่ต้องเตรียม
ควรมีเครื่องมือดังต่อไปนี้
- DigitalOcean Account
- DigitalOcean API Token
- GitHub Account
- Git
kubectldoctl- Argo CD CLI — แนะนำ แต่ไม่จำเป็นสำหรับการสร้าง Application แบบ YAML
- Docker — ถ้าจะ Build Application Image เอง
ตรวจสอบเครื่องมือ
git --version
kubectl version --client
doctl version
ก่อนสร้าง Cluster สามารถตรวจ Region และ Size ที่ DigitalOcean รองรับได้ด้วย
doctl kubernetes options regions
doctl kubernetes options sizes
doctl kubernetes options versions
หมายเหตุ: Resource บน DigitalOcean มีค่าใช้จ่าย ควรลบ Cluster และ Load Balancer เมื่อจบ Workshop ถ้าไม่ใช้งานต่อ
#5. Workshop Overview
Workshop นี้จะสร้างระบบตัวอย่างดังนี้
GitHub Repository
      |
      v
Argo CD
      |
      v
DigitalOcean Kubernetes
      |
      +--> Deployment
      |
      +--> Service
      |
      +--> DigitalOcean Load Balancer
ชื่อที่ใช้ในตัวอย่าง
Cluster     : gitops-doks
Namespace   : demo
Application : demo-web
Repository  : https://github.com/<YOUR_GITHUB_USERNAME>/gitops-doks-demo.git
#6. ขั้นตอนที่ 1: ติดตั้งและตั้งค่า doctl
doctl คือ CLI อย่างเป็นทางการของ DigitalOcean
หลังติดตั้งแล้วให้สร้าง DigitalOcean API Token จาก Control Panel จากนั้น Authenticate
doctl auth init
ระบบจะให้ใส่ Token
ตรวจสอบ
doctl account get
#7. ขั้นตอนที่ 2: สร้าง DOKS Cluster
ดู Region ที่รองรับก่อน
doctl kubernetes options regions
ตัวอย่างสร้าง Cluster ใน Singapore
doctl kubernetes cluster create gitops-doks \
  --region sgp1 \
  --size s-2vcpu-4gb \
  --count 3 \
  --auto-upgrade=true \
  --wait
หาก Size ในตัวอย่างไม่รองรับใน Region/Account ให้เลือกค่าจาก
doctl kubernetes options sizes
เมื่อสร้างสำเร็จ doctl สามารถเพิ่ม Kubernetes Context ให้ kubectl ได้
ตรวจสอบ
kubectl config current-context
kubectl get nodes
ผลลัพธ์ควรเห็น Worker Node อยู่ในสถานะ
Ready
หากต้องดึง kubeconfig ภายหลัง
doctl kubernetes cluster kubeconfig save gitops-doks
#8. ขั้นตอนที่ 3: ติดตั้ง Argo CD
สร้าง Namespace
kubectl create namespace argocd
ติดตั้ง Argo CD ด้วย Manifest ทางการ
kubectl apply -n argocd \
  --server-side \
  --force-conflicts \
  -f https://raw.githubusercontent.com/argoproj/argo-cd/stable/manifests/install.yaml
ตรวจสอบ Pod
kubectl get pods -n argocd
ตรวจสอบ Service
kubectl get svc -n argocd
รอจน Component หลักพร้อม เช่น
argocd-server
argocd-repo-server
argocd-application-controller
argocd-applicationset-controller
ตรวจ Deployment
kubectl get deployment -n argocd
#Production Note
สำหรับระบบ Production ไม่ควรอ้าง stable แบบลอยตลอดเวลา แต่ควร Pin Argo CD Version ที่ผ่านการทดสอบของทีม เช่น
https://raw.githubusercontent.com/argoproj/argo-cd/<VERSION>/manifests/install.yaml
แล้วทำ Upgrade ผ่านกระบวนการ Change Management ขององค์กร
#9. ขั้นตอนที่ 4: เข้าใช้งาน Argo CD
สำหรับ Lab ใช้ Port Forward ซึ่งปลอดภัยกว่าการเปิด Argo CD Server สู่ Internet โดยตรง
kubectl port-forward svc/argocd-server -n argocd 8080:443
เปิด Browser
https://localhost:8080
Username เริ่มต้น
admin
ถ้าติดตั้ง Argo CD CLI แล้ว สามารถดู Initial Password ได้ด้วย
argocd admin initial-password -n argocd
Login ผ่าน CLI
argocd login localhost:8080 --username admin --insecure
จากนั้นควรเปลี่ยน Password
argocd account update-password
#10. ขั้นตอนที่ 5: สร้าง GitOps Repository
สร้าง Repository ใหม่บน GitHub
gitops-doks-demo
Clone
git clone https://github.com/<YOUR_GITHUB_USERNAME>/gitops-doks-demo.git
cd gitops-doks-demo
สร้างโครงสร้าง
gitops-doks-demo/
├── README.md
├── k8s/
│   └── base/
│       ├── deployment.yaml
│       └── service.yaml
└── argocd/
    └── application.yaml
สร้าง Directory
mkdir -p k8s/base
mkdir -p argocd
#11. ขั้นตอนที่ 6: สร้าง Kubernetes Manifests
#11.1 Deployment
สร้างไฟล์
k8s/base/deployment.yaml
apiVersion: apps/v1
kind: Deployment
metadata:
  name: demo-web
  labels:
    app: demo-web
spec:
  replicas: 2
  selector:
    matchLabels:
      app: demo-web
  template:
    metadata:
      labels:
        app: demo-web
    spec:
      containers:
        - name: nginx
          image: nginx:1.28-alpine
          ports:
            - containerPort: 80
          resources:
            requests:
              cpu: "50m"
              memory: "64Mi"
            limits:
              cpu: "250m"
              memory: "128Mi"
          readinessProbe:
            httpGet:
              path: /
              port: 80
            initialDelaySeconds: 3
            periodSeconds: 5
          livenessProbe:
            httpGet:
              path: /
              port: 80
            initialDelaySeconds: 10
            periodSeconds: 10
#11.2 Service
สร้างไฟล์
k8s/base/service.yaml
apiVersion: v1
kind: Service
metadata:
  name: demo-web
spec:
  selector:
    app: demo-web
  ports:
    - name: http
      port: 80
      targetPort: 80
  type: ClusterIP
Commit
git add .
git commit -m "feat: add demo Kubernetes manifests"
git push origin main
#12. ขั้นตอนที่ 7: สร้าง Argo CD Application
สร้างไฟล์
argocd/application.yaml
apiVersion: argoproj.io/v1alpha1
kind: Application
metadata:
  name: demo-web
  namespace: argocd
spec:
  project: default

  source:
    repoURL: https://github.com/<YOUR_GITHUB_USERNAME>/gitops-doks-demo.git
    targetRevision: main
    path: k8s/base

  destination:
    server: https://kubernetes.default.svc
    namespace: demo

  syncPolicy:
    automated:
      prune: true
      selfHeal: true
    syncOptions:
      - CreateNamespace=true
แก้
<YOUR_GITHUB_USERNAME>
ให้เป็น GitHub Username จริง
Commit
git add argocd/application.yaml
git commit -m "feat: add Argo CD application"
git push origin main
จากนั้น Bootstrap Application เข้า Cluster
kubectl apply -f argocd/application.yaml
ตรวจสอบ
kubectl get applications -n argocd
ตรวจ Resource ใน Namespace demo
kubectl get all -n demo
Argo CD UI ควรแสดงประมาณ
Sync Status   : Synced
Health Status : Healthy
#13. ขั้นตอนที่ 8: ทดสอบ GitOps Deployment
แก้ไฟล์
k8s/base/deployment.yaml
เปลี่ยน
replicas: 2
เป็น
replicas: 3
Commit และ Push
git add .
git commit -m "scale: increase demo-web replicas to 3"
git push origin main
ตรวจ
kubectl get pods -n demo -w
เมื่อ Argo CD ตรวจพบ Commit ใหม่ ระบบจะ Sync ตาม Policy
ตรวจจำนวน Replica
kubectl get deployment demo-web -n demo
ควรได้ Desired/Available ใกล้เคียง
3/3
#14. ขั้นตอนที่ 9: ทดสอบ Self-Healing
ปัจจุบัน Git กำหนด
replicas: 3
ลองเปลี่ยน Live State โดยตรง
kubectl scale deployment demo-web \
  --replicas=1 \
  -n demo
ตรวจ
kubectl get deployment demo-web -n demo
ช่วงแรกอาจเห็น
1/1
แต่เนื่องจากกำหนด
selfHeal: true
Argo CD จะตรวจพบ Drift และพยายามคืนค่าเป็น Desired State จาก Git
3 replicas
ตรวจซ้ำ
kubectl get deployment demo-web -n demo
นี่คือหัวใจสำคัญของ GitOps
Git = Desired State
Cluster = Live State
Argo CD = Reconciliation Controller
#15. ขั้นตอนที่ 10: ทดสอบ Rollback ด้วย Git
สมมติว่า Commit ล่าสุดทำให้ระบบมีปัญหา
ดู History
git log --oneline
ตัวอย่าง
98ac120 scale: increase demo-web replicas to 3
31a0ef2 feat: add Argo CD application
63dfe88 feat: add demo Kubernetes manifests
Rollback แบบ GitOps ที่แนะนำคือสร้าง Commit ย้อนการเปลี่ยนแปลง
git revert 98ac120
git push origin main
Argo CD จะเห็น Commit ใหม่และทำให้ Cluster กลับไปตรงกับสถานะที่ประกาศไว้ใน Git
#ทำไมไม่ควรแก้ Kubernetes โดยตรง
ตัวอย่าง
kubectl edit deployment demo-web -n demo
แม้แก้ได้ แต่เมื่อเปิด selfHeal Argo CD จะเปลี่ยนกลับให้ตรง Git
ดังนั้นในการทำ GitOps
อย่าแก้ Live State เป็นวิธีหลัก
ให้แก้ Desired State ใน Git
#16. Expose Application ออก Internet
สำหรับ Workshop แบบง่าย สามารถเปลี่ยน Service เป็น LoadBalancer
แก้
k8s/base/service.yaml
เป็น
apiVersion: v1
kind: Service
metadata:
  name: demo-web
spec:
  selector:
    app: demo-web
  ports:
    - name: http
      port: 80
      targetPort: 80
  type: LoadBalancer
Commit
git add .
git commit -m "feat: expose demo-web with LoadBalancer"
git push origin main
DigitalOcean Kubernetes จะ Provision DigitalOcean Load Balancer ให้ Service
ตรวจ
kubectl get svc -n demo
รอ EXTERNAL-IP
NAME       TYPE           CLUSTER-IP      EXTERNAL-IP
demo-web   LoadBalancer   10.x.x.x        xxx.xxx.xxx.xxx
เปิด
http://<EXTERNAL-IP>
#Production: ใช้ Ingress หรือ Gateway API
ใน Production ไม่ควรสร้าง Load Balancer แยกให้ทุก Service
แนวทางที่เหมาะกว่า
Internet
   |
DigitalOcean Load Balancer
   |
Ingress Controller / Gateway API
   |
+----------+-----------+
|                      |
Service A          Service B
|                      |
Pods               Pods
ข้อดี
- ใช้ Load Balancer ร่วมกัน
- Routing ตาม Host / Path
- รองรับ TLS
- ลดค่าใช้จ่าย
- บริหาร Domain ได้ง่ายขึ้น
#17. แนวทาง Production
#17.1 ใช้ Git Branch / Pull Request
ตัวอย่าง Workflow
feature/*
   |
Pull Request
   |
Code Review
   |
main
   |
Argo CD
   |
Production
ไม่ควรให้ Developer ทุกคน Push ตรงเข้า main
#17.2 แยก Application Source และ GitOps Configuration
ตัวอย่าง
Application Repository
----------------------
src/
Dockerfile
tests/

GitOps Repository
-----------------
apps/
  dev/
  staging/
  production/
CI ทำหน้าที่
Build -> Test -> Push Image
Argo CD ทำหน้าที่
Git Desired State -> Kubernetes Deployment
จึงเกิดการแยก
CI = Build Artifact
CD = Reconcile Desired State
#17.3 ไม่เก็บ Secret แบบ Plain Text
ไม่ควร Commit
apiVersion: v1
kind: Secret
stringData:
  DB_PASSWORD: super-secret-password
ลง Git ตรง ๆ
ทางเลือก เช่น
- External Secrets Operator
- Sealed Secrets
- SOPS
- Cloud Secret Manager / Vault
Git อาจเก็บเฉพาะ Reference ไปยัง Secret ภายนอกแทน
#17.4 ใช้ Private Repository อย่างเหมาะสม
ถ้า GitOps Repository เป็น Private Repository ต้องกำหนด Credential ให้ Argo CD
ตัวเลือก
- SSH Deploy Key
- GitHub App
- HTTPS Credential
- Repository Credential Template
ใช้ Least Privilege และหลีกเลี่ยง Personal Access Token ที่ให้สิทธิ์กว้างเกินจำเป็น
#17.5 เปิด TLS และ SSO สำหรับ Argo CD
สำหรับ Production
- ไม่ควรเปิด Argo CD ด้วย Public LoadBalancer แบบไม่จำกัดสิทธิ์
- ใช้ HTTPS
- ใช้ Ingress / Gateway
- ใช้ SSO/OIDC
- จำกัด Network Access
- ใช้ Argo CD RBAC
- ปิด/ควบคุม Local Admin ตาม Policy
- หมุนเวียน Credential
- เปิด Audit/Observability ที่เหมาะสม
#17.6 Pin Version
ควร Pin
- Argo CD Version
- Helm Chart Version
- Container Image Tag หรือ Digest
- Kubernetes Add-on Version
หลีกเลี่ยง
image: myapp:latest
ควรใช้
image: myapp:1.4.2
หรือ Digest
image: registry.example.com/myapp@sha256:<DIGEST>
เพื่อให้ Deployment ทำซ้ำได้และ Audit ได้ชัดเจน
#17.7 Resource Requests / Limits
Deployment ควรกำหนด Resource
resources:
  requests:
    cpu: "100m"
    memory: "128Mi"
  limits:
    cpu: "500m"
    memory: "512Mi"
ช่วยให้ Kubernetes Scheduler ตัดสินใจได้ดีและลดปัญหา Resource Contention
#17.8 Readiness และ Liveness Probe
ตัวอย่าง
readinessProbe:
  httpGet:
    path: /health/ready
    port: 8080

livenessProbe:
  httpGet:
    path: /health/live
    port: 8080
Readiness ใช้พิจารณาว่า Pod พร้อมรับ Traffic หรือไม่
Liveness ใช้ตรวจว่ากระบวนการยังมีชีวิตและควรถูก Restart หรือไม่
#18. Troubleshooting
#ตรวจ Argo CD Pods
kubectl get pods -n argocd
#ดู Log ของ Argo CD Server
kubectl logs -n argocd deployment/argocd-server
#ดู Log ของ Application Controller
kubectl logs -n argocd statefulset/argocd-application-controller
ชื่อ Resource อาจแตกต่างตาม Argo CD Version ให้ตรวจด้วย
kubectl get all -n argocd
#ตรวจ Application
kubectl get application demo-web -n argocd -o yaml
#ตรวจ Event
kubectl get events -n demo \
  --sort-by=.metadata.creationTimestamp
#ตรวจ Pod
kubectl get pods -n demo
kubectl describe pod <POD_NAME> -n demo
#ดู Log Application
kubectl logs <POD_NAME> -n demo
#ตรวจ Deployment
kubectl rollout status deployment/demo-web -n demo
#ตรวจ Service
kubectl get svc -n demo
#19. ลบ Resource หลังจบ Workshop
ลบ Application ก่อนเพื่อหยุดการ Reconcile แล้วลบ Namespace ของ Workshop
kubectl delete -f argocd/application.yaml
kubectl delete namespace demo
ข้อควรระวัง: การลบ
Applicationไม่ได้การันตีว่า Kubernetes Resource ที่เกี่ยวข้องจะถูกลบตามเสมอไป ขึ้นอยู่กับการตั้งค่า Finalizer / Cascading Deletion; จึงตรวจสอบkubectl get all -n demoและลบ Namespace ของตัวอย่างให้เรียบร้อยก่อนปิด Cluster
ลบ Cluster เมื่อไม่ใช้งาน
doctl kubernetes cluster delete gitops-doks
ตรวจ Resource บน DigitalOcean Control Panel เพิ่มเติม เช่น
- Load Balancer
- Volumes
- Container Registry
- Reserved IP
- Database
- DNS Resource
เพื่อป้องกันค่าใช้จ่ายที่ไม่จำเป็น
#20. สรุป
GitOps with Argo CD บน DigitalOcean ช่วยเปลี่ยน Deployment Workflow จาก
Developer
   |
kubectl apply
   |
Kubernetes
เป็น
Developer
   |
Git Commit / Pull Request
   |
Git Repository
   |
Argo CD
   |
DigitalOcean Kubernetes
ประโยชน์หลัก
- Git เป็น Single Source of Truth
- มี Deployment History ผ่าน Commit
- รองรับ Automated Sync
- ตรวจจับ Configuration Drift
- Self-Healing ได้
- Rollback ผ่าน Git ได้
- ลดการเข้าถึง Cluster โดยตรง
- เหมาะกับ Dev / Staging / Production
- เชื่อมกับ CI/CD Pipeline ได้ง่าย
- รองรับแนวทาง Platform Engineering และ Cloud Native
แนวคิดสำคัญที่สุดคือ
CI สร้าง Artifact
Git ประกาศ Desired State
Argo CD ทำ Continuous Delivery
Kubernetes รักษา Runtime State
#ตัวอย่าง GitOps Workflow ที่แนะนำ
sequenceDiagram
    participant Dev as Developer
    participant Git as GitHub
    participant CI as CI Pipeline
    participant Reg as Container Registry
    participant Argo as Argo CD
    participant K8s as DOKS

    Dev->>Git: Push application code
    Git->>CI: Trigger CI
    CI->>CI: Test + Build
    CI->>Reg: Push image
    CI->>Git: Update image tag/digest in GitOps repo
    Argo->>Git: Detect desired-state change
    Argo->>K8s: Sync manifests
    K8s->>K8s: Rolling update
    Argo->>K8s: Health / drift reconciliation
#แนวทางต่อยอด
หลังทำ Workshop นี้แล้ว สามารถต่อยอดเป็น
- Argo CD + Helm
- Argo CD + Kustomize
- Argo CD + ApplicationSet
- Argo Rollouts สำหรับ Blue/Green หรือ Canary
- GitHub Actions + DigitalOcean Container Registry
- External Secrets Operator
- Prometheus + Grafana
- Loki + Grafana
- Cert-Manager + HTTPS
- Multi-Environment GitOps
- Multi-Cluster GitOps
- Progressive Delivery
#เอกสารอ้างอิง
-
DigitalOcean Kubernetes Quickstart
https://docs.digitalocean.com/products/kubernetes/getting-started/quickstart/ -
DigitalOcean
doctl kubernetes cluster create
https://docs.digitalocean.com/reference/doctl/reference/kubernetes/cluster/create/ -
DigitalOcean DOKS Operational Readiness / Ingress
https://docs.digitalocean.com/products/kubernetes/getting-started/operational-readiness/ -
Argo CD Getting Started
https://argo-cd.readthedocs.io/en/latest/getting_started/ -
Argo CD Sync Options
https://argo-cd.readthedocs.io/en/latest/user-guide/sync-options/
เอกสารนี้ออกแบบเป็น Workshop สำหรับการเรียนการสอนและการทดลอง GitOps ควรทบทวน Security, Cost, Backup, RBAC, TLS, Secret Management และ Version Pinning ก่อนนำไปใช้กับ Production