- 1. จาก DevOps สู่ GitOps
- 2. หลักสำคัญของ GitOps
- 3. GitOps กับ CI/CD ต่างกันอย่างไร
- 4. โครงสร้าง Repository
- 5. Workshop: GitOps ด้วย Kubernetes + Argo CD
- 6. Step 1 --- สร้าง Kubernetes Cluster
- 7. Step 2 --- สร้าง GitOps Repository
- 8. Step 3 --- ติดตั้ง Argo CD
- 9. Step 4 --- เข้า Argo CD UI
- 10. Step 5 --- สร้าง Argo CD Application
- 11. Step 6 --- ทดลอง GitOps Deployment
- 12. Step 7 --- ทดลอง Configuration Drift และ Self-Healing
- 13. Step 8 --- ทดลอง Prune
- 14. Rollback ในแนวคิด GitOps
- 15. GitOps Workflow สำหรับ Production
- 16. จาก GitOps ไปสู่ Progressive Delivery
- 17. แนวทางปฏิบัติที่ดี
- 18. แบบฝึกหัดท้าย Workshop
- 19. สรุป
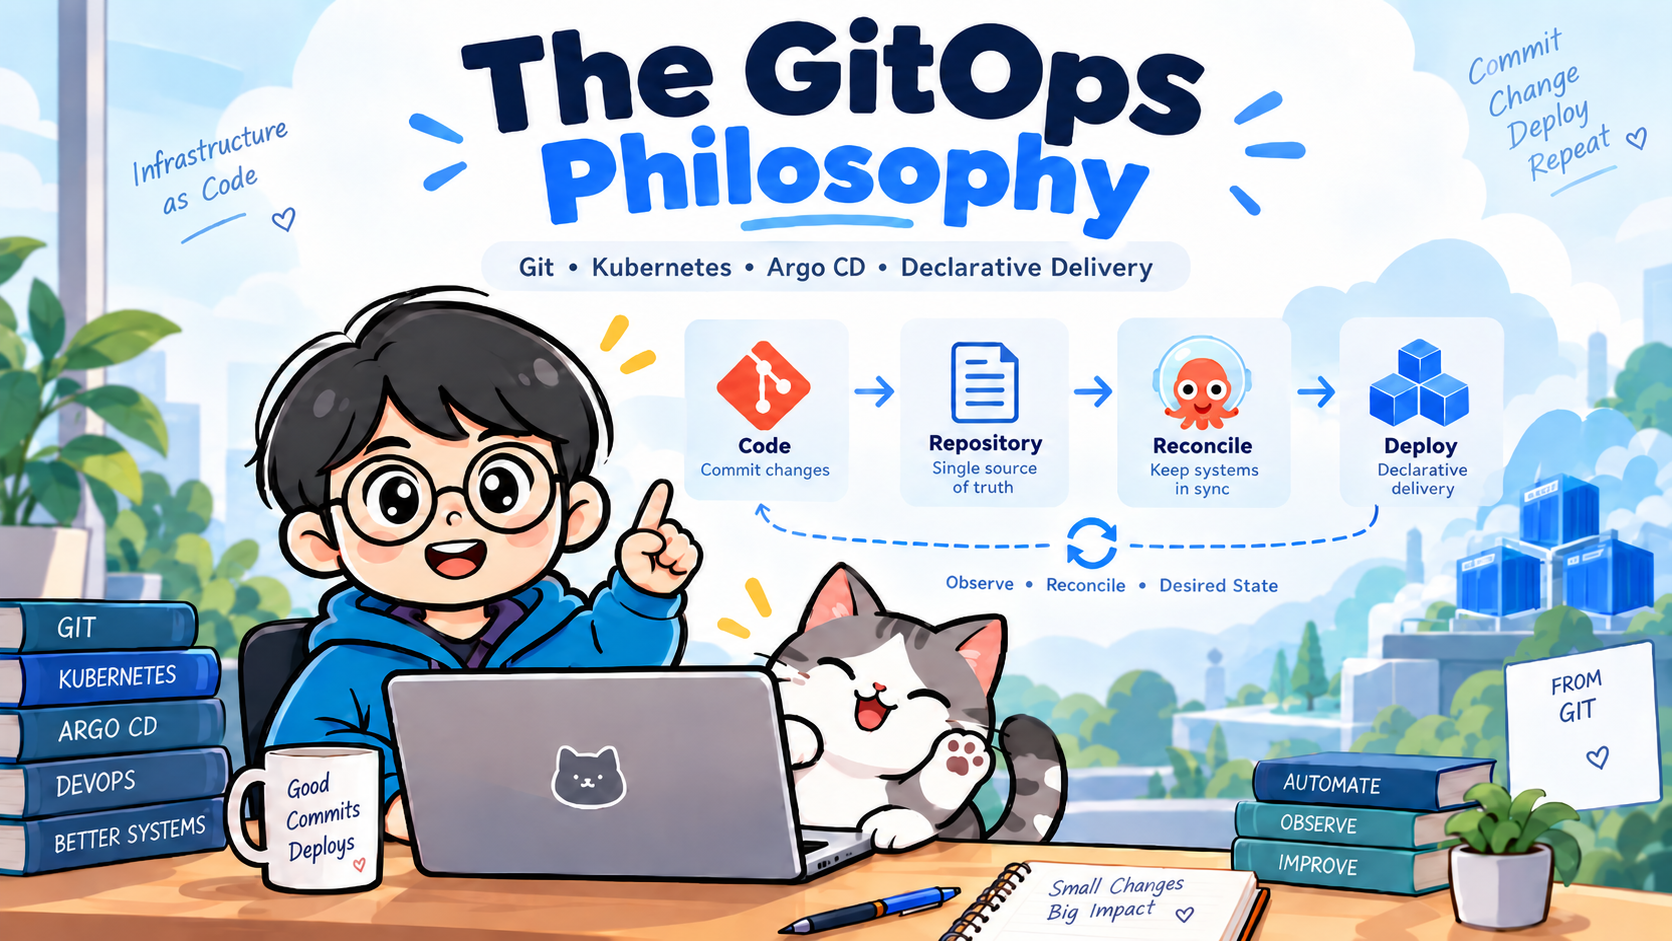
GitOps คือแนวคิดในการบริหาร Infrastructure และ Application Delivery โดยใช้ Git เป็น Source of Truth สำหรับสถานะที่ระบบควรเป็น (Desired State) แล้วให้ซอฟต์แวร์ประเภท GitOps Controller เช่น Argo CD หรือ Flux ตรวจสอบและทำให้ระบบจริง (Actual State) สอดคล้องกับสิ่งที่ประกาศไว้ใน Git
แนวคิดสำคัญจึงไม่ใช่เพียง "เก็บไฟล์ Kubernetes YAML ไว้ใน Git" แต่คือการทำให้การเปลี่ยนแปลงระบบเกิดผ่านกระบวนการที่ Declarative, Versioned, Reviewable, Auditable และ Automatically Reconciled
#1. จาก DevOps สู่ GitOps
การ Deploy แบบทั่วไปอาจมีลักษณะดังนี้
Developer
   |
   v
CI/CD Pipeline
   |
   | kubectl apply
   v
Kubernetes Cluster
Pipeline มีสิทธิ์เข้าถึง Cluster และทำหน้าที่ Push การเปลี่ยนแปลงเข้าสู่ระบบโดยตรง
GitOps เปลี่ยนแนวคิดเป็น
Developer
   |
   v
Git Repository
(Desired State)
   |
   v
GitOps Controller
(Argo CD / Flux)
   |
   v
Kubernetes Cluster
(Actual State)
Controller จะตรวจสอบ Desired State จาก Git และเปรียบเทียบกับ Actual State ของ Cluster อย่างต่อเนื่อง
#2. หลักสำคัญของ GitOps
#2.1 Declarative
ระบบถูกอธิบายด้วยสถานะที่ต้องการ แทนการเขียนขั้นตอนเพื่อสร้างสถานะนั้น
ตัวอย่าง Kubernetes Deployment:
apiVersion: apps/v1
kind: Deployment
metadata:
  name: web-app
spec:
  replicas: 3
สิ่งที่เราประกาศคือ
web-app ควรมี 3 replicas
ไม่ใช่รายการคำสั่งสำหรับสร้าง Pod ทีละตัว
#2.2 Versioned
Configuration ถูกเก็บใน Git จึงสามารถใช้ความสามารถของ Git ได้ เช่น
- Commit history
- Branch
- Pull Request
- Code Review
- Tag
- Rollback
- Audit trail
Git จึงเป็นทั้ง Source of Truth และประวัติการเปลี่ยนแปลงระบบ
#2.3 Pull-based Deployment
แทนที่ CI server จะ Push configuration เข้า Cluster ตัว GitOps Controller ซึ่งทำงานฝั่งระบบปลายทางจะอ่าน Desired State จาก Git แล้วนำมาปรับใช้
Git Repository
      |
      | Pull
      v
GitOps Controller
      |
      v
Kubernetes
ข้อดีคือสามารถลดความจำเป็นในการเก็บ Kubernetes credentials ที่มีสิทธิ์สูงไว้ใน CI pipeline
#2.4 Continuous Reconciliation
หัวใจสำคัญอีกประการคือ Reconciliation Loop
Desired State (Git)
        |
        v
     Compare
        |
        v
Actual State (Cluster)
        |
   +----+----+
   |         |
 Same      Different
   |         |
   |       Reconcile
   |         |
   +----<----+
หากมีคนแก้ระบบโดยตรงจนเกิด Configuration Drift ตัว Controller สามารถตรวจพบความแตกต่าง และหากเปิด automated self-heal ก็สามารถปรับระบบกลับไปยังสถานะใน Git
#3. GitOps กับ CI/CD ต่างกันอย่างไร
GitOps ไม่ได้มาแทน CI แต่สามารถแบ่งหน้าที่ได้ชัดเจนขึ้น
ส่วน หน้าที่
CI Test, Build, Scan และสร้าง Artifact Container Registry เก็บ Container Image GitOps Repository เก็บ Desired State Argo CD / Flux Reconcile Desired State Kubernetes Runtime Environment
Workflow ตัวอย่าง:
Source Code
    |
    v
CI
    |
    +--> Test
    +--> Build
    +--> Security Scan
    |
    v
Container Image
    |
    v
Container Registry

Update Image Tag
    |
    v
GitOps Repository
    |
    v
Argo CD
    |
    v
Kubernetes
แนวคิดนี้สามารถสรุปได้ว่า
CI builds artifacts; GitOps manages desired state and delivery.
#4. โครงสร้าง Repository
ในระบบจริงอาจแยก Application Repository และ GitOps Repository
#Application Repository
web-app/
├── src/
├── tests/
├── Dockerfile
└── .github/
    └── workflows/
        └── ci.yml
ใช้สำหรับ Source Code และ CI
#GitOps Repository
web-app-gitops/
├── manifests/
│   ├── deployment.yaml
│   └── service.yaml
└── argocd/
    └── application.yaml
ใช้สำหรับ Deployment Configuration
ระบบที่ซับซ้อนขึ้นอาจใช้ Helm หรือ Kustomize และแยก environment:
gitops/
├── base/
│   ├── deployment.yaml
│   └── service.yaml
└── overlays/
    ├── dev/
    ├── staging/
    └── production/
#5. Workshop: GitOps ด้วย Kubernetes + Argo CD
Workshop นี้สร้าง Kubernetes Cluster บนเครื่องด้วย kind และใช้ Argo CD เป็น GitOps Controller
#Architecture
GitHub Repository
       |
       | desired state
       v
    Argo CD
       |
       | reconcile
       v
Kubernetes Cluster
       |
       v
    Web App
#สิ่งที่ต้องเตรียม
ติดตั้งเครื่องมือต่อไปนี้
- Git
- Docker
- kubectl
- kind
- Argo CD CLI (แนะนำ แต่ไม่จำเป็นสำหรับทุกขั้นตอน)
- GitHub account หรือ Git repository ที่ Argo CD เข้าถึงได้
ตรวจสอบ:
docker --version
kubectl version --client
kind version
git --version
argocd version --client
#6. Step 1 --- สร้าง Kubernetes Cluster
สร้างไฟล์ kind-config.yaml
kind: Cluster
apiVersion: kind.x-k8s.io/v1alpha4
nodes:
  - role: control-plane
  - role: worker
สร้าง Cluster:
kind create cluster \
  --name gitops-lab \
  --config kind-config.yaml
ตรวจสอบ:
kubectl get nodes
ควรเห็น control-plane และ worker อยู่ในสถานะ Ready
#7. Step 2 --- สร้าง GitOps Repository
สร้าง repository เช่น
gitops-demo
โครงสร้าง:
gitops-demo/
└── manifests/
    ├── deployment.yaml
    └── service.yaml
สร้าง manifests/deployment.yaml
apiVersion: apps/v1
kind: Deployment
metadata:
  name: nginx-demo
spec:
  replicas: 2
  selector:
    matchLabels:
      app: nginx-demo
  template:
    metadata:
      labels:
        app: nginx-demo
    spec:
      containers:
        - name: nginx
          image: nginx:1.27
          ports:
            - containerPort: 80
สร้าง manifests/service.yaml
apiVersion: v1
kind: Service
metadata:
  name: nginx-demo
spec:
  selector:
    app: nginx-demo
  ports:
    - port: 80
      targetPort: 80
Commit และ Push:
git add .
git commit -m "add initial Kubernetes manifests"
git push
Repository ต้องสามารถเข้าถึงจาก Argo CD ได้ หากเป็น Private Repository ต้องกำหนด credentials ให้ Argo CD เพิ่มเติม
#8. Step 3 --- ติดตั้ง Argo CD
สร้าง Namespace:
kubectl create namespace argocd
ติดตั้ง Argo CD ด้วย manifest จากเอกสารทางการ:
kubectl apply -n argocd \
  -f https://raw.githubusercontent.com/argoproj/argo-cd/stable/manifests/install.yaml
รอให้ Pod พร้อม:
kubectl get pods -n argocd
ตรวจสอบต่อเนื่องได้ด้วย:
kubectl get pods -n argocd -w
#9. Step 4 --- เข้า Argo CD UI
สำหรับ Workshop บน Localhost สามารถใช้ Port Forward:
kubectl port-forward svc/argocd-server \
  -n argocd 8080:443
เปิด Browser:
https://localhost:8080
Username เริ่มต้น:
admin
อ่าน Initial Admin Password:
argocd admin initial-password -n argocd
หรืออ่าน Secret ด้วย kubectl:
kubectl -n argocd get secret argocd-initial-admin-secret \
  -o jsonpath="{.data.password}" | base64 -d
echo
คำสั่ง
base64 -dเหมาะกับ Linux/macOS; Windows อาจต้องใช้วิธี decode ที่เหมาะกับ shell ที่ใช้งาน
#10. Step 5 --- สร้าง Argo CD Application
สร้างไฟล์ argocd/application.yaml
apiVersion: argoproj.io/v1alpha1
kind: Application
metadata:
  name: nginx-demo
  namespace: argocd
spec:
  project: default

  source:
    repoURL: https://github.com/YOUR_USERNAME/gitops-demo.git
    targetRevision: HEAD
    path: manifests

  destination:
    server: https://kubernetes.default.svc
    namespace: default

  syncPolicy:
    automated:
      prune: true
      selfHeal: true
แก้ YOUR_USERNAME ให้เป็น repository ของผู้เรียน จากนั้น:
kubectl apply -f argocd/application.yaml
ตรวจสอบ:
kubectl get applications -n argocd
และ:
kubectl get pods
เมื่อ Sync สำเร็จควรมี nginx-demo จำนวน 2 Pods
#11. Step 6 --- ทดลอง GitOps Deployment
เปลี่ยน:
replicas: 2
เป็น:
replicas: 4
Commit:
git add .
git commit -m "scale nginx to 4 replicas"
git push
จากนั้นสังเกต Argo CD
Git
replicas = 4
     |
     v
Argo CD detects change
     |
     v
Kubernetes
     |
     v
4 Pods
ตรวจสอบ:
kubectl get pods
นี่คือหลักการสำคัญของ GitOps: เราเปลี่ยน Desired State ผ่าน Git แทนการเข้าไปแก้ Cluster โดยตรง
#12. Step 7 --- ทดลอง Configuration Drift และ Self-Healing
ใน Git กำหนดไว้:
replicas = 4
ทดลองแก้ Cluster โดยตรง:
kubectl scale deployment nginx-demo --replicas=1
ตรวจสอบ:
kubectl get deployment nginx-demo
เนื่องจาก Application เปิด:
selfHeal: true
Argo CD จะตรวจพบว่า Actual State ไม่ตรงกับ Desired State และ reconcile ระบบกลับไปยังสถานะใน Git
Git                     Cluster
4 replicas              1 replica
    |                       |
    +------ compare --------+
              |
              v
            Drift
              |
              v
           Argo CD
              |
              v
        Cluster = 4
นี่คือหนึ่งในการทดลองที่แสดง GitOps Philosophy ได้ชัดที่สุด
#13. Step 8 --- ทดลอง Prune
เพิ่ม resource ใหม่ใน Git แล้ว Sync ให้เรียบร้อย จากนั้นลบ resource นั้นออกจาก Git และ Push
เมื่อกำหนด:
automated:
  prune: true
Argo CD สามารถลบ resource ที่ไม่อยู่ใน Desired State แล้วได้
แนวคิดคือ
Resource exists in Cluster
        +
Resource removed from Git
        |
        v
Argo CD detects difference
        |
        v
Prune Resource
ดังนั้น Git ไม่ได้บอกเฉพาะสิ่งที่ "ต้องสร้าง" แต่เป็นตัวแทนของสถานะที่ระบบ "ควรมี"
#14. Rollback ในแนวคิด GitOps
เมื่อ Deployment ใหม่มีปัญหา วิธีที่สอดคล้องกับ GitOps คือแก้ Desired State ใน Git
เช่นใช้ git revert
git log --oneline
git revert <commit-id>
git push
Argo CD ตรวจพบ commit ใหม่ แล้ว reconcile Cluster ตาม Desired State ที่ถูกย้อนกลับ
Bad Deployment
      |
      v
git revert
      |
      v
Git Desired State
      |
      v
Argo CD
      |
      v
Previous Configuration
ข้อสำคัญคือ Git ยังคงมีประวัติว่าเกิดอะไรขึ้นและใครเปลี่ยนอะไร
#15. GitOps Workflow สำหรับ Production
ระบบ Production สามารถพัฒนา workflow เป็น
Developer
   |
   v
Pull Request
   |
   v
Code Review
   |
   v
Merge
   |
   v
CI Pipeline
   |
   +--> Test
   +--> Security Scan
   +--> Build Image
   |
   v
Container Registry
   |
   v
Update GitOps Repository
   |
   v
Pull Request
   |
   v
Approve
   |
   v
Argo CD
   |
   v
Kubernetes
Pull Request จึงกลายเป็น Change Management mechanism ของ Infrastructure และ Application Deployment
#16. จาก GitOps ไปสู่ Progressive Delivery
GitOps สามารถต่อยอดกับ
- Helm
- Kustomize
- Argo Rollouts
- Prometheus
- Grafana
เพื่อสร้าง Progressive Delivery เช่น
Git
 |
 v
Argo CD
 |
 v
Argo Rollouts
 |
 +--> Stable 90%
 |
 +--> Canary 10%
          |
          v
      Metrics
          |
     +----+----+
     |         |
   Good       Bad
     |         |
 Promote    Rollback
รองรับกลยุทธ์อย่าง
- Canary Deployment
- Blue-Green Deployment
- Automated Promotion
- Metric-based Analysis
#17. แนวทางปฏิบัติที่ดี
- ให้ Git เป็น Source of Truth สำหรับ configuration ที่ GitOps ดูแล
- ลดการแก้ Production Cluster ด้วย
kubectl editโดยตรง - ใช้ Pull Request และ Code Review สำหรับการเปลี่ยนแปลงสำคัญ
- แยก secrets ออกจาก Git หรือใช้ระบบจัดการ secrets ที่เหมาะสม เช่น External Secrets หรือ encrypted secrets
- กำหนด RBAC และสิทธิ์ของ Argo CD ตามหลัก Least Privilege
- ใช้ Helm หรือ Kustomize เมื่อต้องจัดการหลาย Environment
- ใช้ immutable image tag หรือ digest สำหรับ workload สำคัญ แทนการพึ่ง
latest - ตรวจสอบทั้ง Git audit trail และ Kubernetes/Argo CD events
- ทดสอบ rollback และ disaster recovery จริง ไม่ใช่เพียงออกแบบไว้
- พิจารณา approval policy สำหรับ Production ก่อนเปิด automation ที่มีผลกระทบสูง
#18. แบบฝึกหัดท้าย Workshop
ทดลองทำโจทย์ต่อไปนี้:
#Exercise 1: Scaling
เปลี่ยน Deployment จาก 2 เป็น 5 replicas ผ่าน Git โดยห้ามใช้ kubectl scale
#Exercise 2: Version Upgrade
เปลี่ยน Nginx image version ใน Git และตรวจสอบ Argo CD synchronization
#Exercise 3: Drift
ใช้ kubectl scale แก้จำนวน replicas โดยตรง แล้วสังเกต Self-Healing
#Exercise 4: Rollback
สร้าง commit ที่เปลี่ยน image version แล้วใช้ git revert เพื่อย้อนกลับ
#Exercise 5: Environment Separation
ปรับ repository ให้รองรับ
dev
staging
production
โดยใช้ Kustomize หรือ Helm
#19. สรุป
GitOps เป็น Operating Model สำหรับ Cloud Native Delivery ที่นำหลักการของ Git มาควบคุมการเปลี่ยนแปลงระบบ โดยมีแนวคิดสำคัญคือ
Declare
   |
Version
   |
Review
   |
Reconcile
   |
Observe
   |
Repeat
เส้นทางของการเปลี่ยนแปลงจึงควรเป็น
Code
 ↓
Test
 ↓
Artifact
 ↓
Git Desired State
 ↓
GitOps Controller
 ↓
Runtime
แทนการพึ่งคำสั่ง deployment แบบ imperative เป็นหลัก
GitOps Philosophy: Declare the desired state in Git, review changes through Git, and let automated reconciliation make runtime converge toward that state.
เมื่อเข้าใจแนวคิดนี้แล้ว ขั้นต่อไปที่เหมาะสมคือ Helm/Kustomize → Argo CD Application → Multi-environment GitOps → Argo Rollouts → Observability → Progressive Delivery
#References
- Argo CD Documentation: https://argo-cd.readthedocs.io/
- Flux Documentation: https://fluxcd.io/
- OpenGitOps: https://opengitops.dev/
- Kubernetes Documentation: https://kubernetes.io/docs/
- kind Documentation: https://kind.sigs.k8s.io/